

Hard disks are not mere add-ons to the motherboard. They are devices that can store sensitive and critical data. Needless to say, such storage can overflow swiftly if you’re not careful. If you are facing such a scenario, it is probably time to explore the methods to free up disk space in Windows 10. With this guide, you’ll learn how one can free disk space in Windows 10 and possible troubleshooting to recover deleted data.
Part 1. Check What Files Are Taking Up Space on Windows 10
As a regular user, it may be overwhelming to realize that your hard disk space is full. Though it can slow down certain procedures, there is nothing you need to worry about. When you receive such notifications, you should act immediately and check which files are taking up space on Windows 10.
Step 1. Go to the Search option in the taskbar and type in ‘storage’ From there on go to the Storage settings.
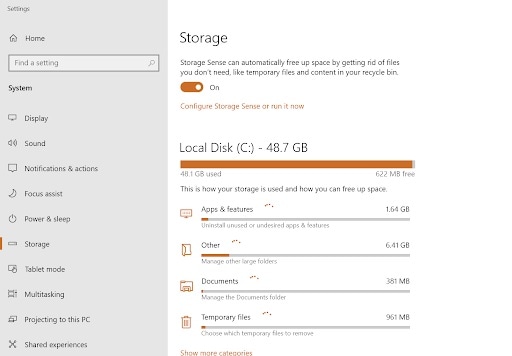
Step 2. Wait for a couple of minutes as it calculates storage spaces for every category. You can then check which type of files is taking up how much space on your computer.
Step 3. Click on a category to get more options. It tells you more about which files are essential to specific programs on your PC.
This way, the system shows you exactly which files you can delete and what is taking up space on your computer. You can then figure out how to free up disk space on Windows 10.
Part 2. How to Free Disk Space on Windows 10
Freeing up disk space on windows 10 is a collective process of more than one step. You often see technicians free up space on your computer without actually deleting anything noticeable. You can do this too, following our easy guide.
Video Tutorial on How to Delete Memory Dumps to Free Up Space? [4 Solutions]
For Windows XP/Vista/7/8/10/11
For macOS X 10.10 or later
1. Free Up Recycle Bin
You can simply free up disk space by emptying the recycle bin. All you need is right-click the recycle bin icon and click the ‘Empty Recycle Bin’ option.

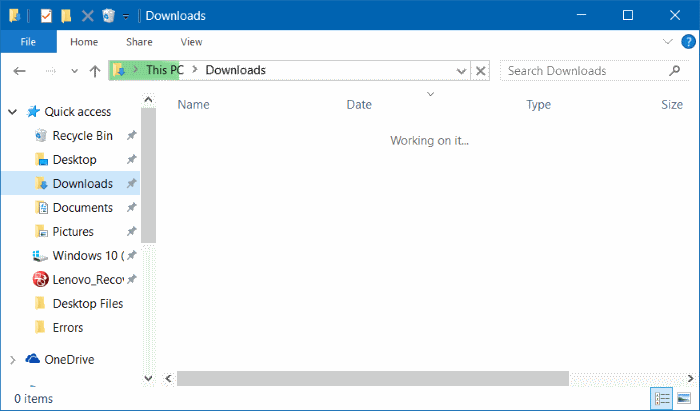
2. Clear The Downloads Folder
It's quite interesting to realize how quickly your download folder can pile up. Clear things up by finding the download folder and deleting things you don’t need. You can also cut and paste the downloaded files to other storage devices.
3. Delete Unwanted Apps
You can delete unwanted apps from the Control Panel using the following method:
Step 1. Go to Start > Control Panel > Programs. For Windows 11, you can go to the Apps tab under Settings.
Step 2. Under ‘Uninstall or change a program’ tab, right-click the undesired program.
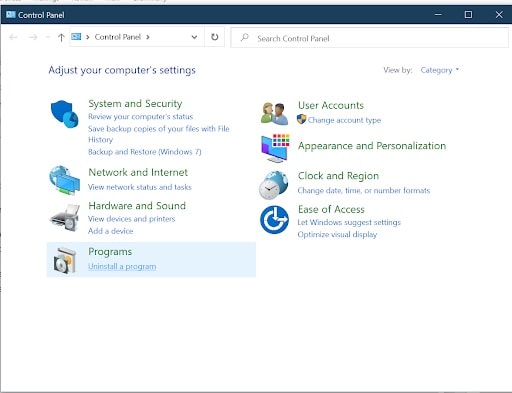
Step 3. Click on the Uninstall and follow the on-screen prompts.
4. Use Files On-Demand In One Drive
OneDrive allows you to use files that you need at that moment. It saves you space by moving any unrequired files to the cloud. To utilize files on-demand:
Step 1. Select the OneDrive icon and go to Settings.
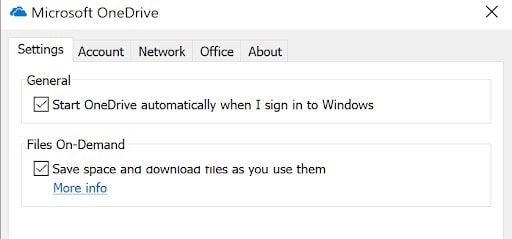
Step 2. Turn on the Files On-Demand option and save your settings.
Now, you can download and use the files you desire at the moment.
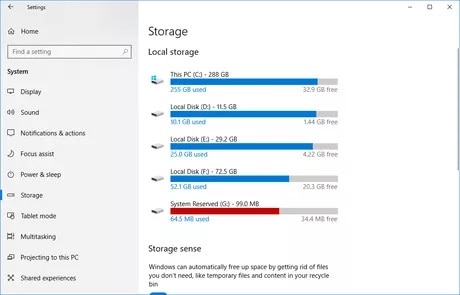
5. Use Storage Pane in Settings
Another option to free up disk space is to use the storage pane in Settings. It helps you check which files you need and which ones to delete to free up space.
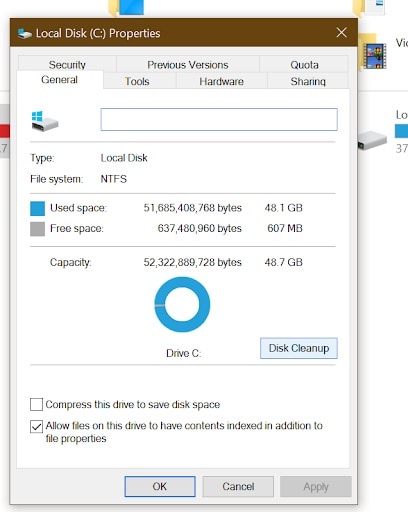
6. Use Disk Cleanup
Disk Cleanup is a popular utility that helps you free up disk space in Windows 10. To run it, follow these steps:
Step 1. Right-click on the drive with excessive storage.
Step 2. Chose the last option ‘Properties’.

Step 3. In the pop window that appears, click on the disk clean-up option as shown in the image.
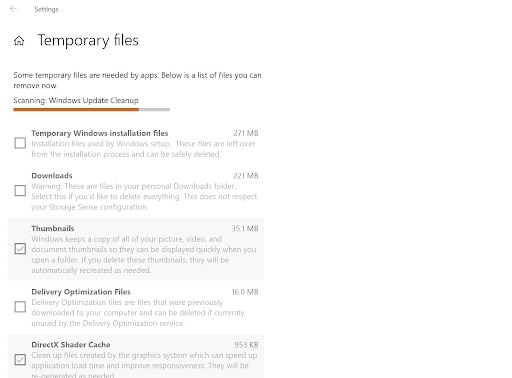
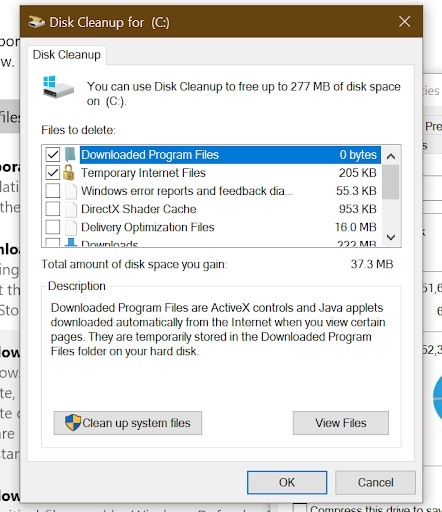
7. Delete More Temporary Files
You can use Disk Cleanup to find and delete temporary files as well. Simply tick the ‘Temporary Files’ option when you’re using the program to clear up hard drive space.
8. Clear Browser Cache
Your browser stores specific website and cookie data that you can delete to free up disk space on Windows 10.
Step 1. Open your browser.
Step 2. Go to the Settings menu.
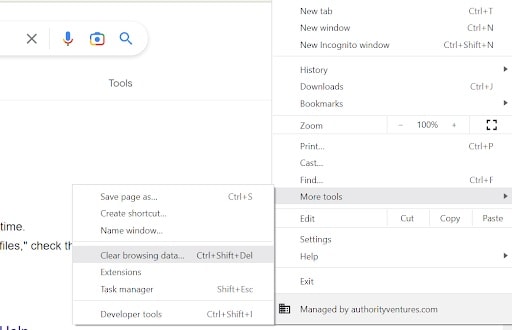
Step 3. Click on ‘Clear browsing data’ or the relevant option.
Browsers like Chrome also have a shortcut “ctrl+shift+delete” to delete browsing data in one go.
9. Find Large Files With WinDirstat
WinDirStat is a Windows file space analyzer and viewer tool. You can install WinDirStat and analyze the computer to find the location for the largest files.
Step 1. Once you’ve installed WinDirstat, launch it and select the Individual Drives option.
Step 2. Choose the drive that’s taking up the most space.

Step 3. Click the OK button to scan the drive.
Step 4. Right-click the files or programs you wish to delete and select the appropriate option from the drop-down menu.
10. Delete Hibernation Files
You can save some space by using Windows Explorer to delete hibernation files. Locate the file named hiberfil.sys in your system drive as shown in the screenshot below.
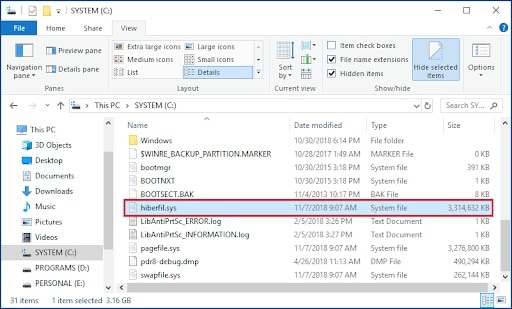
Note: Sometimes, the computer might behave abnormally as hibernation files are core system files. Should you proceed to delete the file, you should have a backup for sure.
11. Delete Old User Accounts
Windows require your user account login that contains a few files per your identification and data usage. If you have old user accounts, you can delete them to free up some space on your hard disk.
Step 1. Open up Settings and go to the Accounts tab.
Step 2. Select the Family & Other Users option from the left pane.
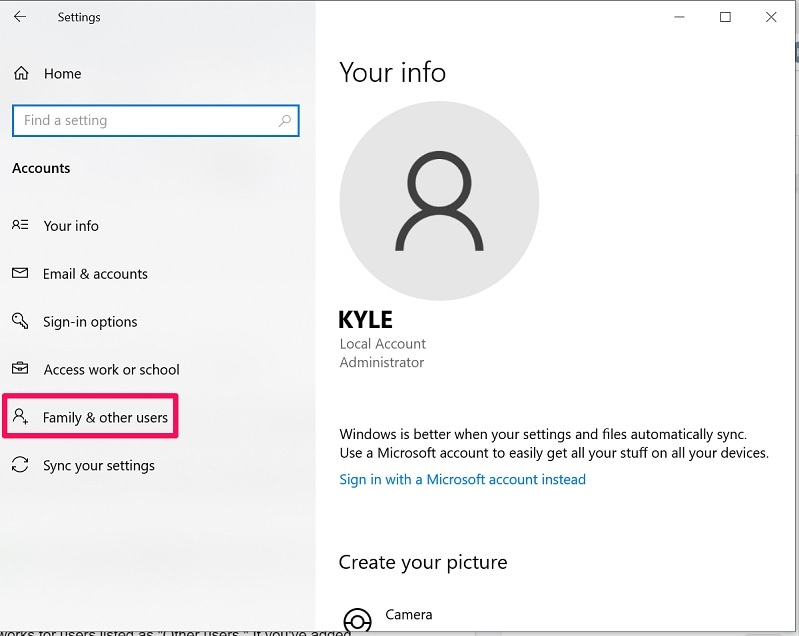
Step 3. In the Others section, click on the account you no longer want on your system.
Step 4. Choose Remove from the drop-down menu.
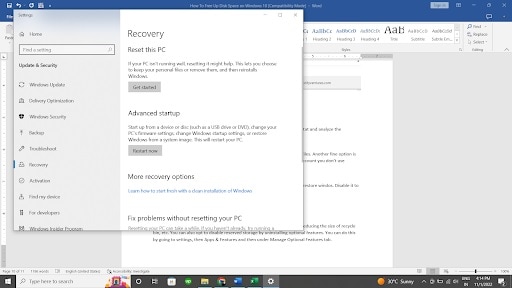
12. Disable System Restore
By going to the Control Panel and then choosing Recovery, you can find System Restore points for Windows. Those help restore your PC to the state should your data get corrupted or affected by malware. You can delete specific restore points to free up a few gigabytes of space on your computer.
13. Run or Activate Storage Sense
Windows also grants you the option to back up files that are one month or older. You can use the Storage Sense option to activate it.
Step 1. Go to Start >Systems > Settings > Storage.
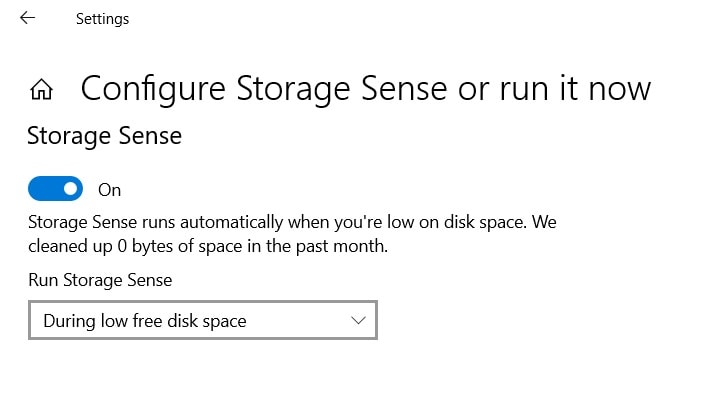
Step 2. Toggle the Storage Sense option ‘on.’
14. Reducing Window Size
The Windows OS has several features that you may not use simultaneously. Thus, to save on space, you can disable a few to save some hard disk space.
Step 1. Open the Settings app and go to Apps and Features.
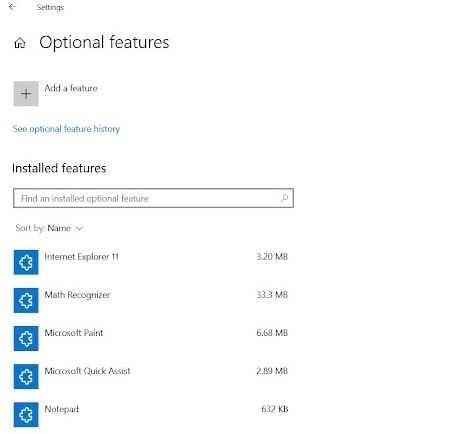
Step 2. Go to Optional Features.
Step 3. Choose from the features you wish to remove or have a third-party app for.
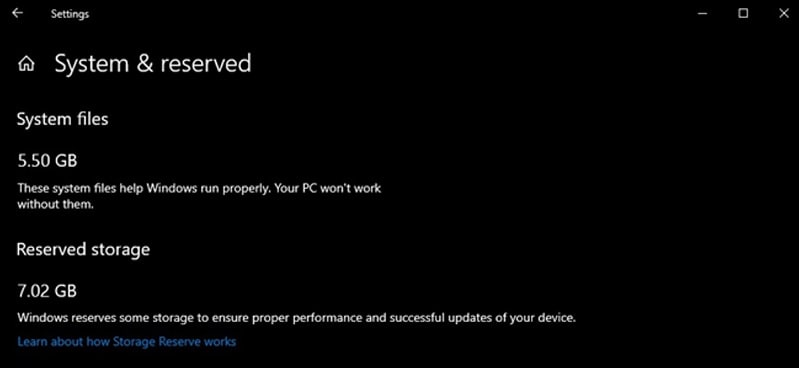
15. Disable Reserved Storage
Windows has a reserved storage to store a few caches and temporary files that are not visible on Window Explorer. When you’ve been using your PC for a few months, it can sum up to several gigabytes. You can remove it from the optional features as mentioned in the previous method.
Part 3. How to Recover Deleted Files in Windows 10
When you dive into the process of freeing up space, it is natural that you might delete some essential files. Worry not, as you can easily recover those deleted files using Wondershare Recoverit. Here are the steps you need to follow:
For Windows XP/Vista/7/8/10/11
For macOS X 10.10 or later
Step 1. Open the Wondershare Recoverit interface and choose the location from where you want to recover the deleted files.

Step 2. Click the Scan button. The software will scan the files before presenting you with the list of files you can recover.
Step 3. Choose the files that you want. You can either search the files you are looking for or use the sorting function.
Step 4. When you have found your file, you may choose to Preview it. This is an added feature that lets you ensure that you have to find the correct file to recover.

Step 5. Choose the location where you want to save the file after recovery. Hit the Recover button and you have your lost files back.

Conclusion
Freeing up space always works in the favor of the user and should be done from time to time. If you want to avoid burden on the system, you should keep a check on your system storage and follow the above steps to free up space for the smooth operation computers are known for.
For Windows XP/Vista/7/8/10/11
For macOS X 10.10 or later
 ChatGPT
 Perplexity
 Google AI Mode
 Grok
Grok


