
Working on one Operating System and then switching to another might not be easy for many people. Something similar is about to happen as Windows 11 is ready to release. You might not be ready yet or want to update your system because you still want to work with Windows 10 interface and features. If this is what you want, then you are absolutely at the right place.
The best thing is that Microsoft will not force anyone to get the system update, and in case your system updates automatically, we can stop it. The article below will focus on ways that will not allow your system to update Windows 10. Using those methods, you will stop the update and enjoy Windows 10 as long as you want to.
Method |
Ease of Use |
Permanence |
Best For |
| Pause Updates | Very Easy | Temporary (1-5 Weeks) | Short-term focus/gaming sessions. |
| Services (msc) | Moderate | Low (System may reset) | Quick temporary block. |
| Group Policy (GPO) | Professional | High (Stable) | Windows Pro/Enterprise users. |
| Registry Editor | Expert | Permanent | Advanced users/Home Edition. |
Part 1. Turn off Windows Update Services in Windows 10
Most of the time, Windows gets updated automatically, but there is a possibility that you don’t want the system to update Windows 10. For that, you have to stop the computerized updating system. We will be sharing with you how that could be done in 4 easy steps:
Step 1: Open the 'Run' window
In the beginning, you are requested to press 'Windows + R.' This will launch the 'Run' window, and this is the first step that will lead you closer to turning off the Windows Update service.
Step 2: Opening Services Window
Once the Run window opens up, the next step is to open 'Services Window.' That would be done by typing "services.msc" and then lastly hitting the ‘Enter’ key.

Step 3: Access Windows Update
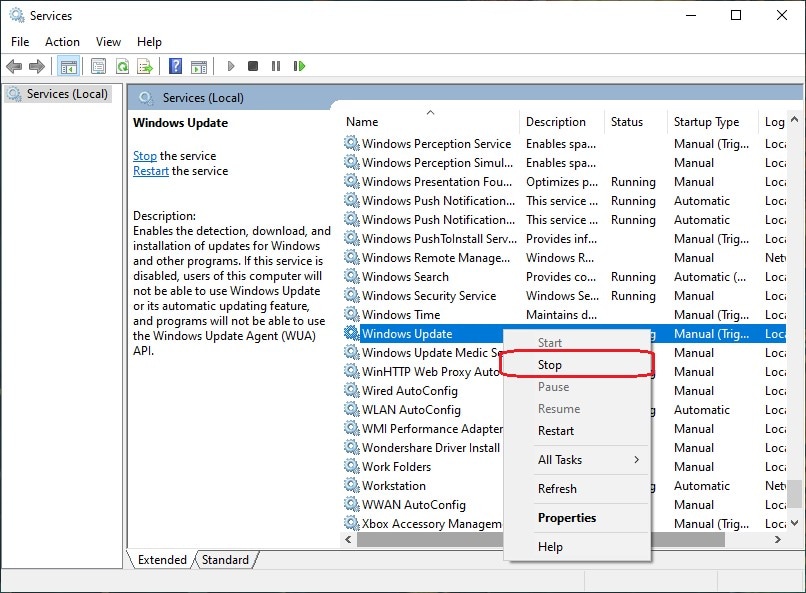
At this point, a new window will appear. That will show you a list of different services. Among those services, find and select 'Windows Update.' Once that is located, don't forget to tap on the ‘Stop’ button by right-clicking on it.
Step 4: Change the Settings
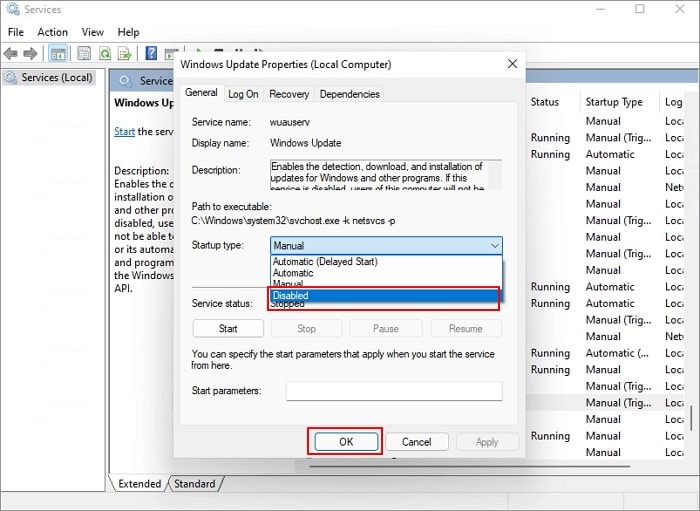
After stopping 'Windows Update,' double-click on it. A new screen of ‘Windows Update Properties’ will open up. From that screen, you now have to change the ‘Startup Type’ in the 'General' tab.
Open the drop-down menu and select the option of 'Disabled.' This will turn off the Windows Update Services.
Part 2. Block Windows 11 Update with Group Policy Editor
You might not want to disable the update services from the Run window, and if this is the scenario, what would be better than introducing this method? To disable the update services, you can also take help from Group Policy Editor. If you don’t know how that’s done, then read the steps given below:
Step 1: Group Policy Editor
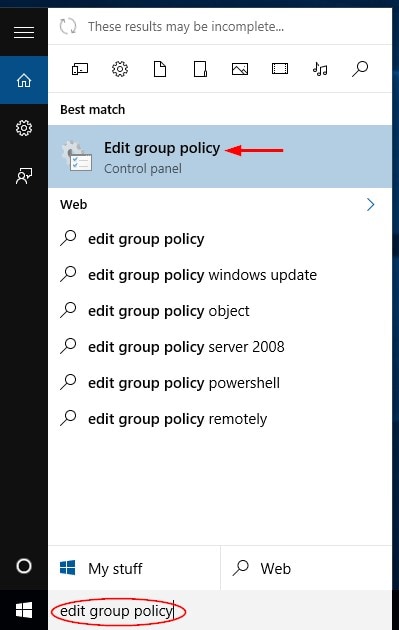
The method starts as soon as you search for the ‘Group Policy Editor’ in the search bar. When the search ends, tap on it.
Step 2: Window Components and Updates
After the editor has opened, move to 'Computer Configuration.' From there, locate 'Administrative Templates' and click on it. Once that opens, head over to ‘Windows Components’ and then lastly, tap on the ‘Windows Update’ option.

Step 3: Configure Automatic Updates
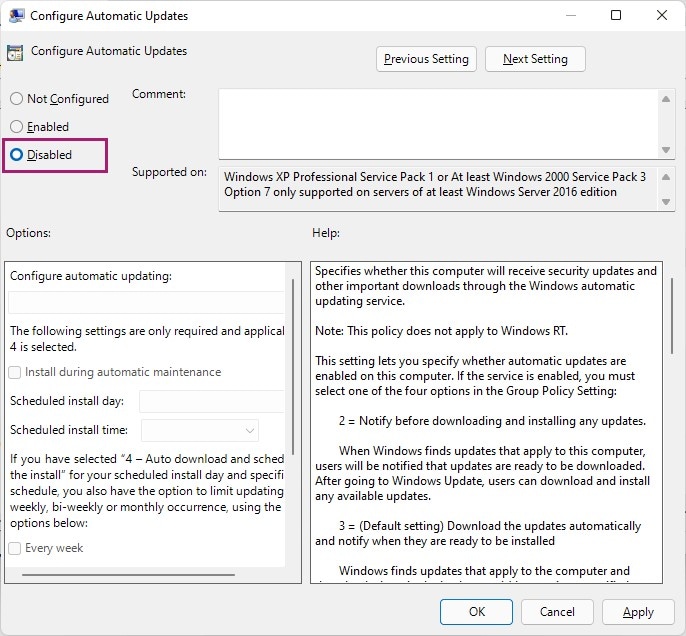
After you have opened the 'Windows Update' page, a list will appear. From that list, search for 'Configure Automatic Updates.' Double click on ‘Configure Automatic Updates,' a new screen shows up. From that screen, you are requested to turn off the toggle and disable the automatic updates.
Step 4: Restart to Apply Changes
After you have disabled the automatic updates, click on the 'Apply' button in the bottom right corner. Once that is all done, restart your PC to apply all the changes you have made.
Part 3. Pause Windows 11 Updates for Every Week
Turning off the automatic updates or disabling the update service is not the only solution to stop your Windows 10 from an update. You can also take help from a temporary solution that can be changed whenever you change your mind regarding Windows updates.
This method is to stop the system from updating spontaneously for 7 days. Right now, it might confuse you, but after reading the steps below, you will understand the method:
Step 1: Go to Settings
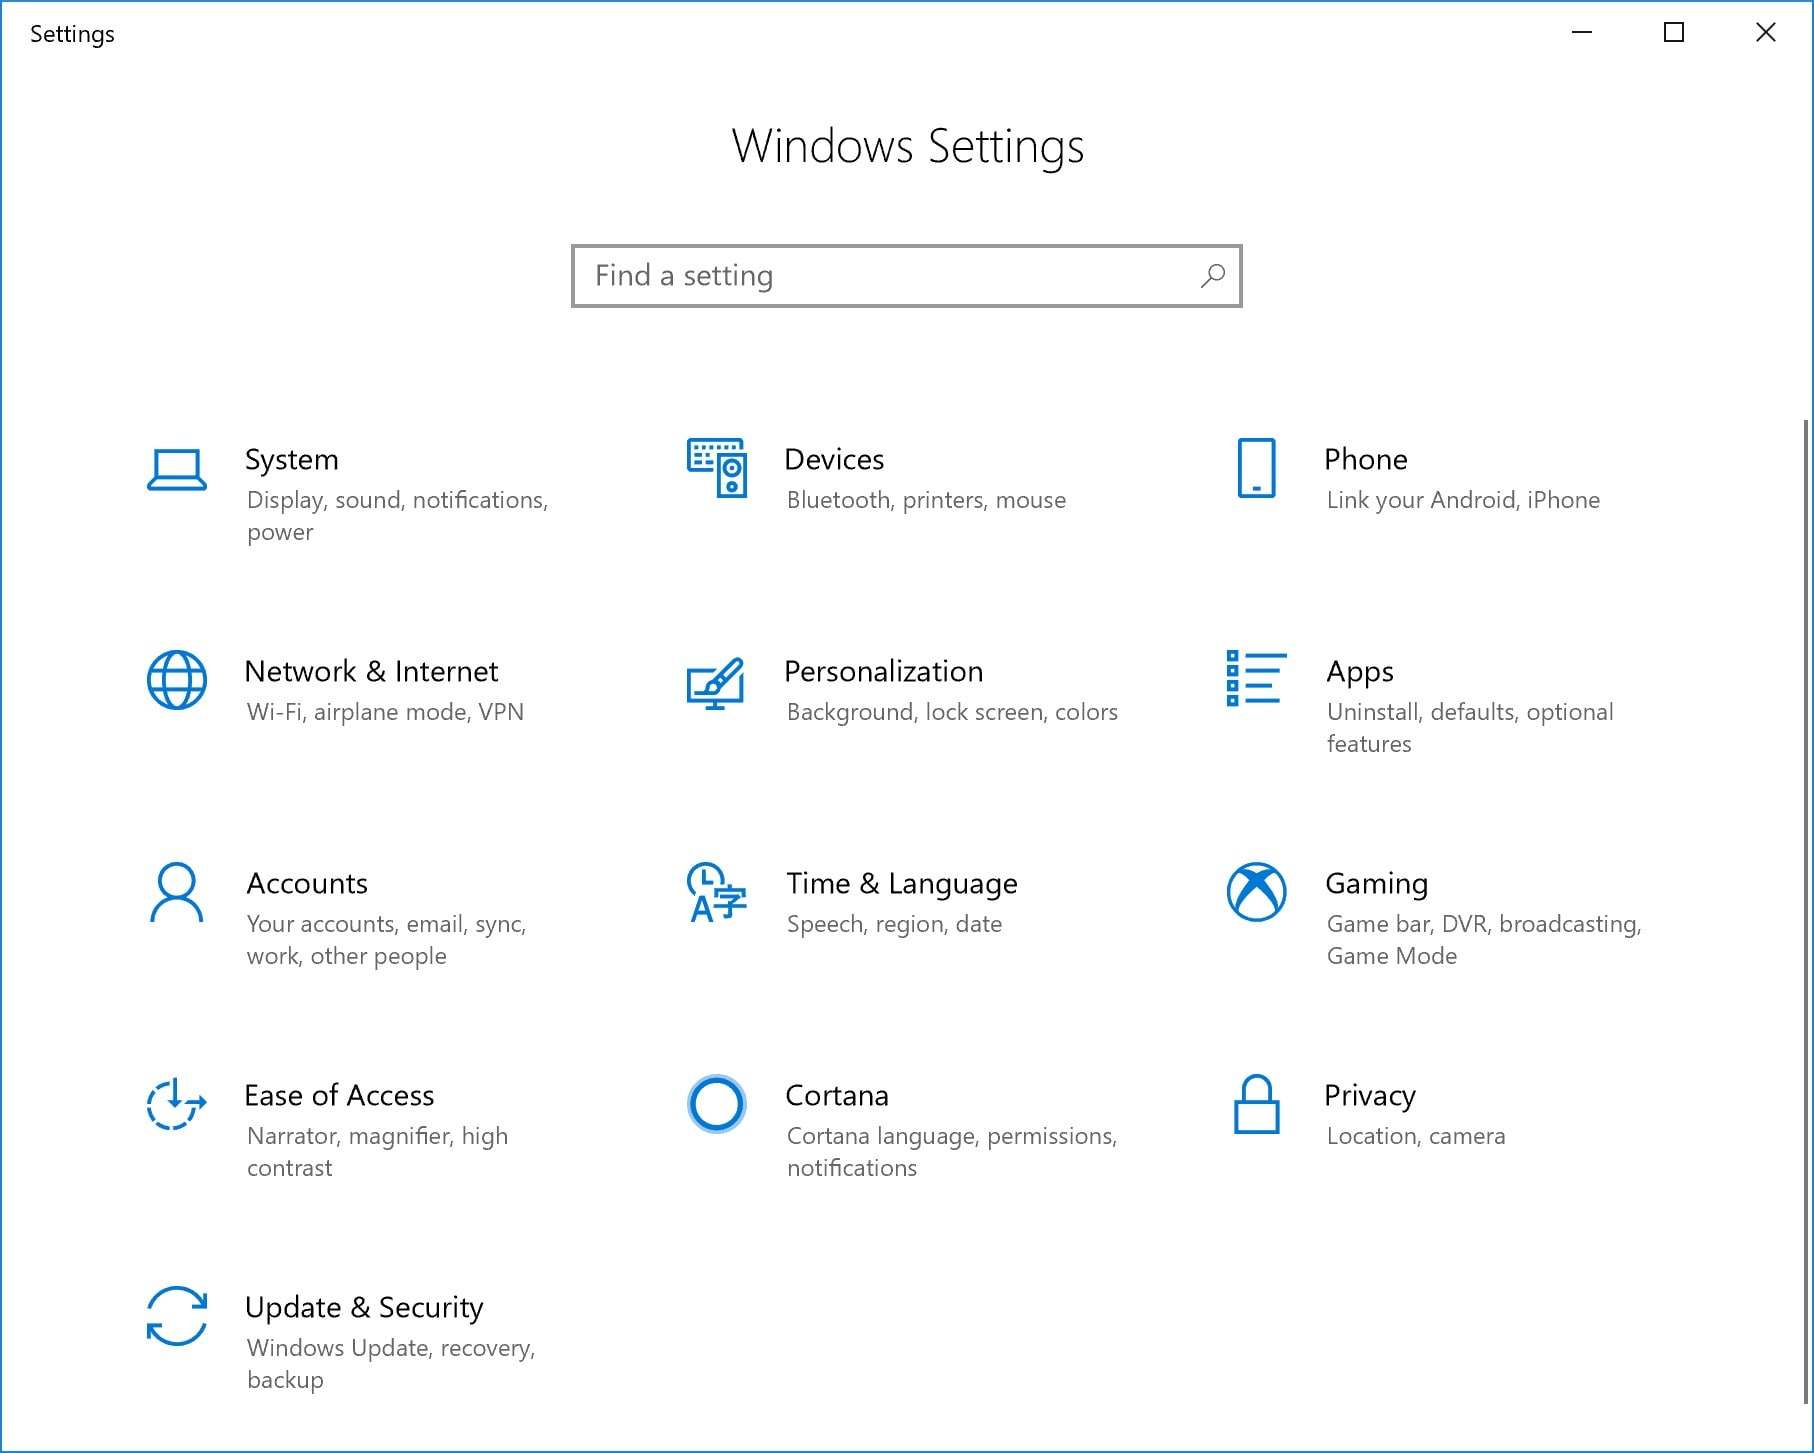
Going to the ‘Settings’ is the initial step to pause the computerized update. You can do that by right-clicking on the Windows icon and go to the 'Settings.' When the settings screen opens up, multiple features will appear from which you have to select 'Update & Security.'
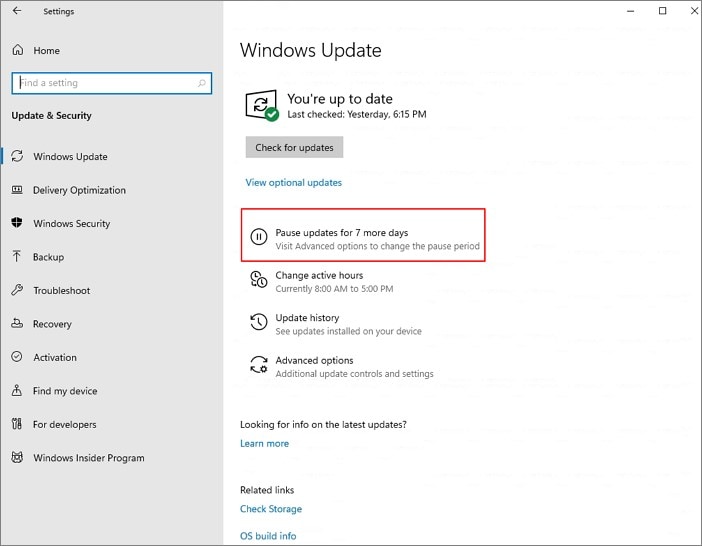
Step 2: Pause the Update
When the ‘Update & Security’ feature opens up, you will be able to see an option of ‘Windows Update.' Move to that option and then tap on 'Pause updates for 7 more days'. This will pause the computerized update, and hence, you will successfully stop Windows 10 from updating.
Pro Tip: Use the "Metered Connection" Fail-Safe Even if you pause updates, Windows may still attempt to download "Critical Security Patches." To block these large data transfers, go to Settings > Network & Internet > Wi-Fi. Select your network and toggle Metered connection to ON. By default, Windows 10/11 will not download major updates over a metered connection to save data, giving you an extra layer of protection against forced background updates.
Part 4. Stop Windows 11 Update with Registry Editor
Another way that could be used to disable the automatic update services is using Registry Editor. Before we take you any further with us, it is important to inform you that this method is very risky to use. Your system can be destroyed from this method, so it is suggested to keep a backup of everything. With that said, let us move towards the steps of this method:
Step 1: Search Registry Editor
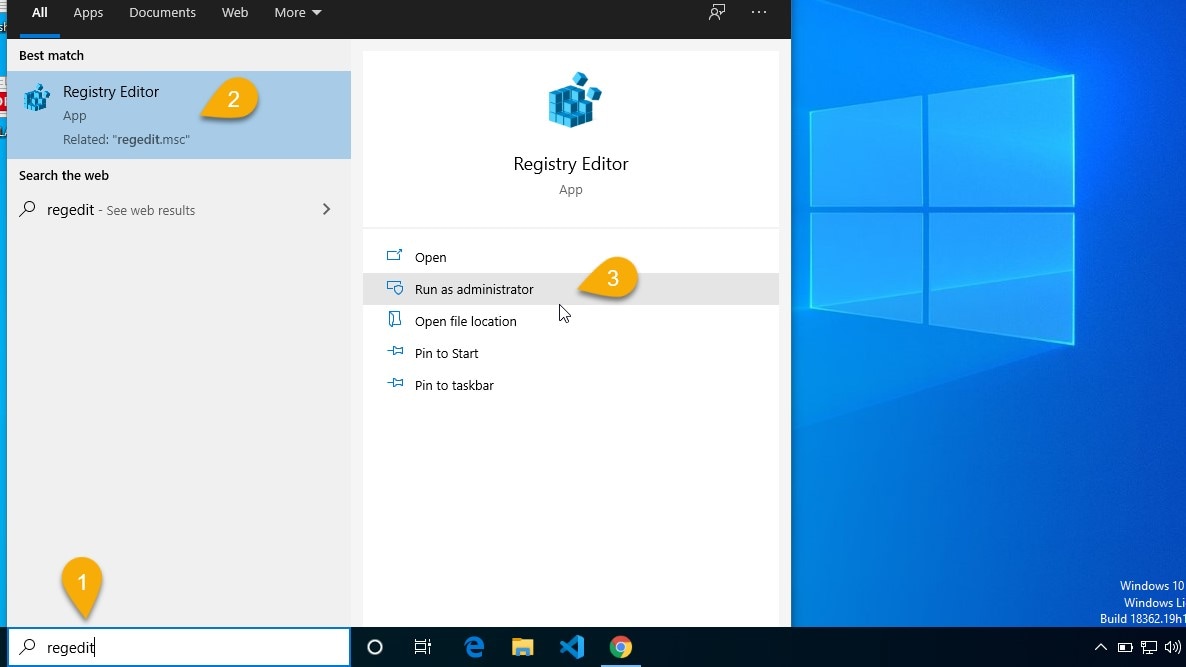
To start the process, first of all, type 'Registry Editor' in the search bar of the start menu and then click on 'Run as Administrator.'
Step 2: Enter the Path
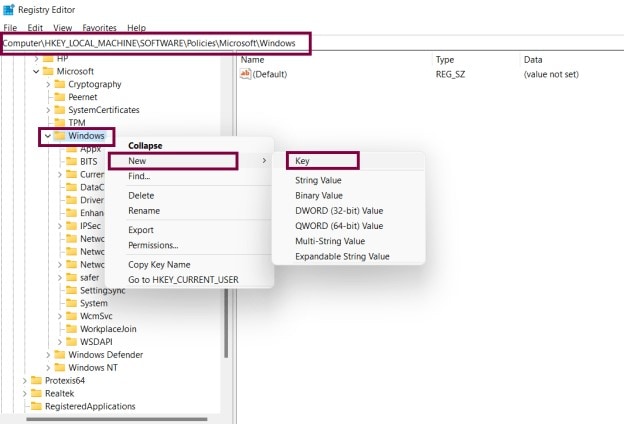
After opening 'Registry Editor,' copy and paste the given path effortlessly in the path after ‘Computers’ or else, you can also type the path.
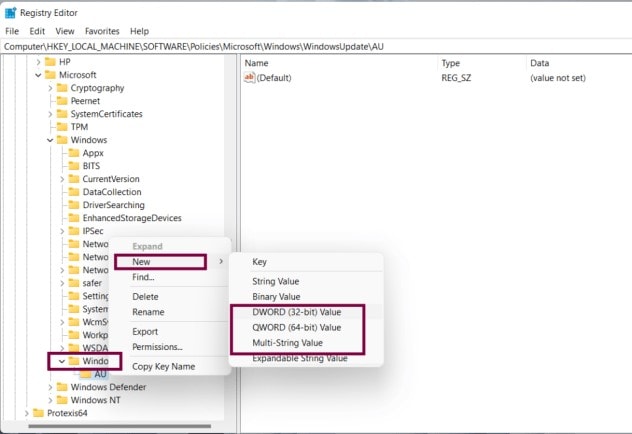
‘HKEY_LOCAL_MACHINE\SOFTWARE\Policies\Microsoft\Windows’
Now, you will look for ‘Windows’ in the sidebar. Once located, right-click on it and then go to 'New.' From there, you have to select the option of 'Key.'
Step 3: Adding New Key
After doing that, you can set the name of the key as 'WindowsUpdate.' Now, for the newly created key, you have to add another key.
Set the key name as ‘AU’ for the ‘WindowsUpdate’ key. Once that is done, you have to right-click on 'AU' and then select 'DWORD (32-bit)’ value and name it as 'NoAutoUpdate.'
Step 4: Reboot to Enable the Mode
The final step for this method is to click right on the 'NoAutoUpdate.' From the menu that will appear, select 'Modify' and then change the ‘Value Data’ to 1 from the default value 0.
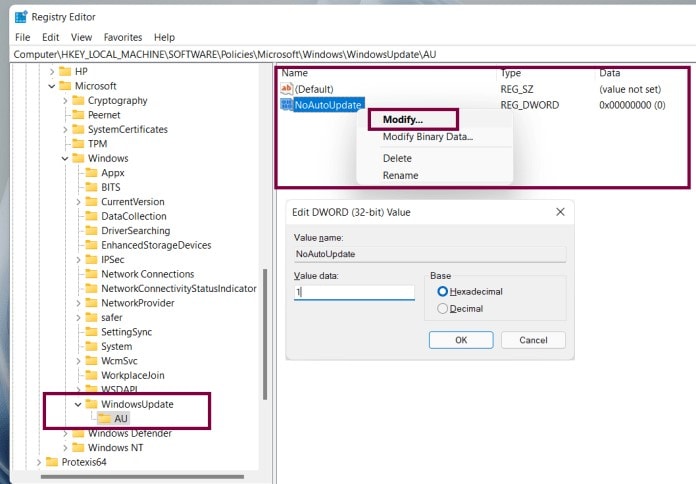
You can also do this by double-clicking on 'NoAutoUpdate' and changing the default value of 0 to 1. After this, you can reboot your system to enable the mode you applied.
Part 5. Disable Windows 11 Update with Third-Party Tool
A third-party tool can also be used to either completely disable or enable the Automatic Updates. It depends upon the user what method they would prefer to disable the computerized updating service. You can skip all the methods discussed earlier if you prefer using a third-party tool. The best one to do this is ‘Windows Update Blocker.'
This is a freeware that helps you manage the Update service on your Windows system. The tool is portable, you only have to carry the programs files on an external device, and you can use it anytime, anywhere. It also saves you from the long installation process. You can fully control the Update process but just clicking on one button. Let us share with you how the tool works:
Step 1: Download ‘Windows Update Blocker’
Firstly, it is important to download 'Windows Update Blocker.' After completely downloading it, you have to extract it. The extraction could be done to your preferred location. Once that’s done, run the tool.
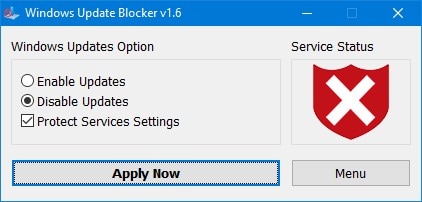
Step 2: Disable the Services
When the tool opens, a service status icon will appear telling you about your device's current update service status. You have to select the option of ‘Disable Updates’ as you want to block the Automatic Update service. Upon doing this, the cross-status icon will show up. In the end, tap on the 'Apply Now' button to apply the changes to your system.
Action Type |
Status After Fix |
Reversal Method |
| Automatic Scans | Disabled | Set Startup to "Automatic" |
| Feature Upgrades | Blocked | Remove "TargetVersion" Policy |
| Security Patches | Manual Only | Resume Updates in Settings |
| Upgrade Popups | Suppressed | Delete "NoAutoUpdate" Registry Key |
Part 6: Lock Your OS Version to Windows 10
If you are on Windows 10 Pro, the most reliable way to prevent the Windows 11 upgrade is to define a "Target Release Version." This tells Windows to only look for updates within your current OS version.
- Open Group Policy Editor (gpedit.msc).
- Navigate to: Computer Configuration > Administrative Templates > Windows Components > Windows Update > Windows Update for Business.
- Double-click Select the target Feature Update version.
- Set it to Enabled.
- Type Windows 10 in the first box and your current version (e.g., 22H2) in the second box.
- Apply and Restart. This ensures Windows remains on your chosen version indefinitely.
More Related: 5 Methods to Backup And Restore Files on Windows 11
Ending Note
In case you are not impressed with Windows 11, then this article is all you need. Multiple methods have been discussed that would help you to stop Windows 10 from updating. The article has covered major areas of knowledge by sharing various methods to block and disable the computerized update services completely.


