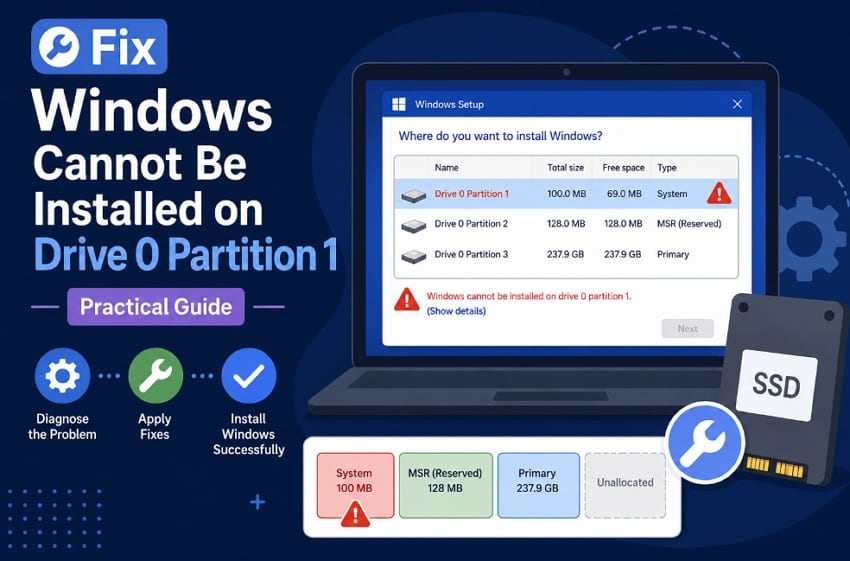


When Windows cannot be installed on Drive 0, Partition 1 appears in the Setup; that line alone does not explain the cause. It stays the same whether the problem involves a partition style mismatch, a reserved partition, or a failing disk.
The actual diagnosis appears after you click Show details. This comprehensive guide explains each version of that message, matches it with the correct fix, and shows how to protect your files before deleting any partition.
In this article
-
- Fix 1. Select the Correct Primary Partition or Unallocated Space
- Fix 2. Boot the Windows Installation USB in UEFI Mode
- Fix 3. Convert an Eligible Windows System Disk From MBR to GPT With MBR2GPT
- Fix 4. Delete Existing Partitions and Install Windows on Unallocated Space
- Fix 5. Clean the Correct Disk and Convert It to GPT With DiskPart
- Fix 6. Recreate the Windows Installation USB With Official Media
- Fix 7. Load the Required Storage Controller Driver
- Fix 8. Check or Replace the Drive if Formatting Reports Hardware Errors
Part 1. What Does "Windows Cannot Be Installed on Drive 0 Partition 1" Mean?
Setup names a specific location in that message, and understanding the numbering is the first step towards choosing the right partition. Some builds word it as Windows cannot be installed to Disk 0 Partition 1, which is the same error.
What Do Drive 0 and Partition 1 Refer To?
Setup labels disks and the sections inside them with numbers, and the 2 counting systems start differently. That single quirk causes most of the confusion.
| Term | What It Identifies | Numbering Starts At | Usually Refers To |
| Drive 0 | An entire physical disk | 0 | Your internal SSD or hard disk |
| Partition 1 | One section inside that disk | 1 | A small system or reserved partition |
How They Differ: Drive 0 is hardware and covers everything on that disk, while Partition 1 is only one slice of it.
Why the First Slice is Not Your Old Windows: Partition numbering starts at 1, but Partition 1 can be boot, recovery, data, or Windows.
Why Setup Uses Numbers at All: Drive letters may exist in Windows PE, but Setup uses disk and partition numbers to identify targets.
That distinction explains most of these errors. Setup is not refusing your disk; it is refusing the specific slice you highlighted.
Why the Detailed Windows Setup Message Matters
Below the partition list, “Show details” reveals the complete message determining the correct solution before changes. The following 5 reasons explain why checking details matters before troubleshooting:

- Reveals the Actual Fault: Several Windows Setup errors share the same summary line, including six or seven detailed messages.
- Points You Toward the Right Fix: Every detailed message guides users toward the appropriate troubleshooting solution without unnecessary guessing.
- Prevents Unnecessary Data Loss: Skipping details often causes users to erase healthy drives requiring only partition changes instead.
- Separates Hardware From Software Problems: Drive failure warnings indicate degrading hardware, not partition problems requiring software fixes alone.
- Shortens the Diagnosis: One click identifies the problem immediately, avoiding lengthy troubleshooting through repeated trial and error.
Setup sometimes shows a code beside the text, most often 0x80300001 or 0x80300024. Both mean the installer could not use the target you selected, rather than a fault with Windows itself.
Which Partition Should Windows Be Installed On?
On a disk you intend to reuse entirely, the answer is unallocated space rather than any existing partition. Setup then creates everything it needs in the correct order and sizes.
Where you are keeping other partitions, select the large primary partition that previously held Windows, not the small ones surrounding it. Partitions under 1 GB are often system, recovery, or reserved areas, but size alone does not confirm their purpose.
Part 2. Why Does Windows Setup Reject Drive 0 Partition 1?
“Windows cannot be installed on Drive 0 Partition 1” is a heading, not a diagnosis, and each detailed message behind it points to a different cause. The table below maps what you see to why it happens and which fix applies.
| What Setup Reports | Why It Happens | Go To |
| Partition is EFI, MSR, Recovery, or Reserved | The slice you picked exists for booting, not for Windows | Fix 1 |
| Disk Has an MBR Partition Table | The installer booted in UEFI mode against an MBR disk | Fix 3 or Fix 5 |
| Disk is of the GPT Partition Style | The installer booted in legacy mode against a GPT disk | Fix 2 |
| No Detail, But the USB Booted Oddly | The media was started in the wrong firmware mode | Fix 2 or Fix 6 |
| Partition Too Small or Unsupported Layout | Insufficient space, or a dynamic rather than basic disk | Fix 4 |
| Partition Table Damaged or Incomplete | A failed clone, resize, or interrupted earlier install | Fix 5 |
| Disk Connected Through USB | Setup will not install to external or 1394 storage | Connect internally |
| Hardware May Not Support Booting to This Disk | Setup cannot address the storage controller | Fix 7 |
| The Disk May Fail Soon | SMART is reporting the drive as degrading | Fix 8 |
One reported issue involves Windows 11 25H2 upgrades failing when the EFI System Partition lacks enough free space, including certain older 100 MB layouts. Insufficient free space, not the partition size alone, can block servicing.
Part 3. What to Check Before Changing the Disk
Before fixing the Windows can't be installed on Drive 0 error, check the disk carefully. Several solutions below delete partitions, so these quick checks help prevent accidental data loss:
| Check | How to Confirm It | Why It Matters |
| Which Disk is Which | Match the size shown in Setup to your drive | Drive 0 is not always the internal disk |
| Firmware Mode of the Installer | Look for UEFI in the one-time boot menu entry | Decides whether GPT or MBR is required |
| Partition Style of the Disk | Press Shift+F10, run diskpart, and list disk | An asterisk under GPT marks a GPT disk |
| Whether Files Still Matter | Check if the old volume holds anything unique | Deleting partitions is not reversible |
| Free Space Available | Confirm at least 64 GB for a clean install | Undersized targets are rejected outright |
| Disk Health | Note any SMART warning shown in the details | A failing drive needs replacing, not repartitioning |
The partition style check is the single most useful of these. Press “Shift + F10” from within Setup to open a command prompt, run “diskpart,” then “list disk,” and read the GPT column before deciding anything.
Part 4. Recover Important Files Before Deleting or Cleaning the Disk
When Windows can't be installed on Drive 0, many fixes involve deleting partitions or cleaning the disk. Setup does not show which files each partition contains, so profiles, project folders, photos, backups, installers, and downloads may disappear without warning.
Recoverit helps protect those files before any destructive repair begins. It scans the disk below the file-system level and reconstructs data without requiring Windows to start. Connect the drive to another computer, or use bootable media, then recover everything important first.
Key Features
- Bootable Recovery Media: Creates a bootable USB so you can recover files even when Windows won't start.
- Deleted and Lost Partition Recovery: Recovers files from deleted, lost, or inaccessible partitions before repartitioning or reinstalling Windows.
- Deep Disk Scanning: Performs a thorough scan to find recoverable files even when the partition structure is damaged.
Important Note: This tool copies data and changes nothing about partition style or firmware mode. It will not resolve the Setup error, and anything already overwritten by a clean command cannot be retrieved.
How to Copy Your Files Before Repartitioning
To copy your files before repartitioning, use the steps below with Recoverit:
Step 1. Access The Drive From a Working System
Once you open Recoverit > Select “Other Tools” > Find “System Crashed Computer” > Press “Start.”

Step 2. Create a Bootable Drive
Insert a USB drive into your PC > Select “Drive” to create a bootable media > Click “Create.” Afterward, connect the drive to the affected PC > Set USB as the first boot device in the BIOS.

Step 3. Scan the Drive and Save Targeted Files
After the PC starts, select “Data Recovery” or “Hard Disk Copy” > Scan the target drive > Choose files > Save them to an external location.

Part 5. How to Fix “Windows Cannot Be Installed on Drive 0 Partition 1”
“Windows cannot be installed to Disk 0 Partition 1” issue requires matching the detailed message first. Apply the corresponding fix below instead of trying all 8 solutions unnecessarily.
Fix 1. Select the Correct Primary Partition or Unallocated Space
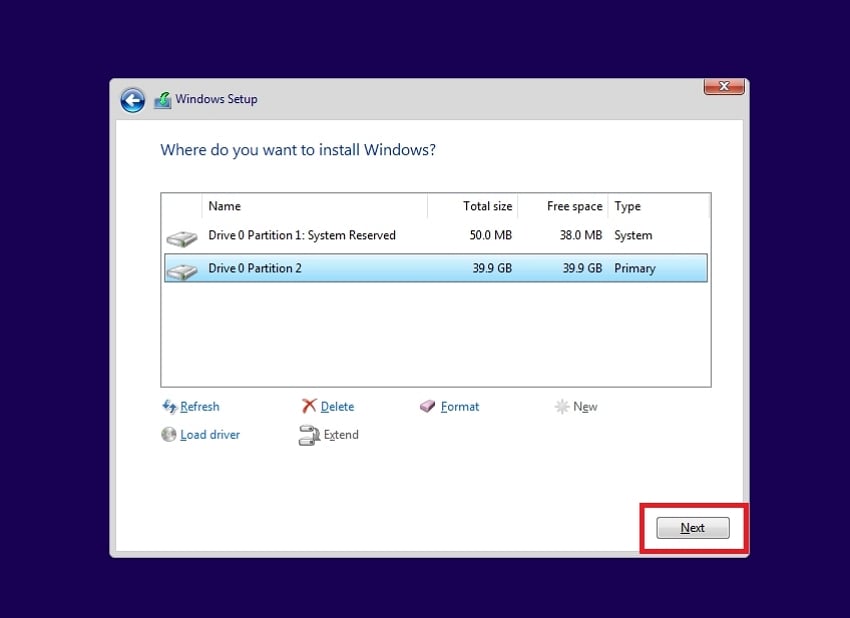
Where Setup rejected a small system or recovery partition, the fix to Windows can't be installed on Drive 0 is simply choosing a different target. Look for the largest partition on the correct disk or delete the old ones to leave a single block of unallocated space.
Instructions. Highlight the large primary partition on Drive 0 and select “Next.” If none is suitable, remove the existing partitions and pick the unallocated space that results.
Fix 2. Boot the Windows Installation USB in UEFI Mode
Windows 11 requires UEFI and GPT, while older Windows versions may install to GPT only when the installer boots in UEFI mode.
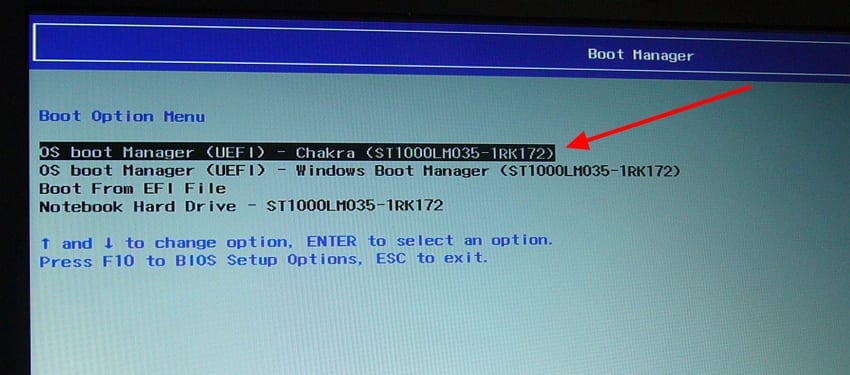
Instructions. Restart and open the one-time boot menu, commonly “F12,” “F11,” or “Esc” depending on the manufacturer. Look for two entries naming your USB drive, one prefixed with “UEFI” and one without. Pick the “UEFI” entry > Start Setup again > Reselect the partition.
Fix 3. Convert an Eligible Windows System Disk From MBR to GPT With MBR2GPT
MBR2GPT converts a disk without destroying its contents. That makes it the right choice when the drive still holds a working Windows installation you want to keep.
The tool has firm requirements worth checking first. The disk must have at most three primary partitions, contain a supported Windows system, and suspend BitLocker protection when encrypted. Firmware must then be switched to UEFI, or the machine will not start afterward.
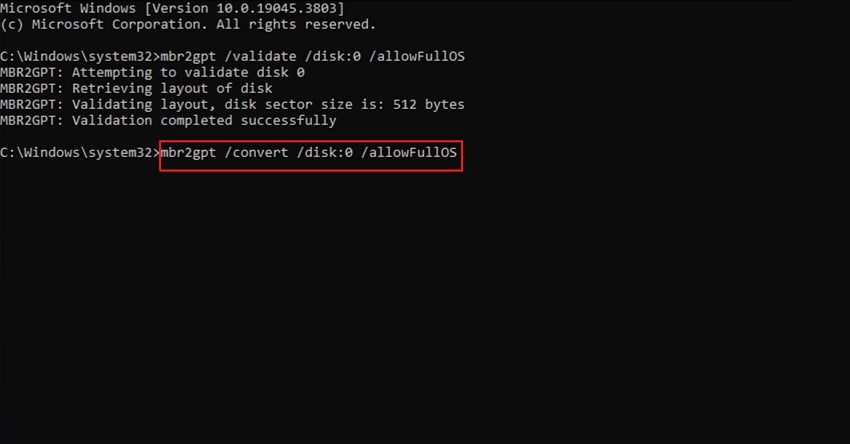
Step 1. Access CMD as Administrator > Run “mbr2gpt /validate /disk:0 /allowFullOS.” (Replace 0 with the correct Windows system disk number if necessary.)

Step 2. Only if validation passes, run “mbr2gpt /convert /disk:0 /allowFullOS,” > Change the firmware to UEFI before restarting.
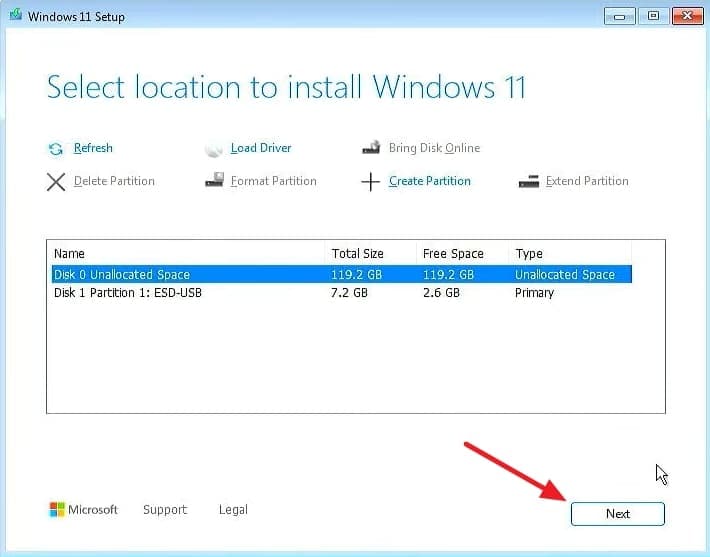
Fix 4. Delete Existing Partitions and Install Windows on Unallocated Space
Delete only the partitions belonging to the Windows installation on the intended installation disk, which resolves undersized partitions and unusual structures alike.
Step 1. In the Setup partition screen, select each partition belonging to Drive 0 > Choose “Delete” > Continue until it shows as a single unallocated block.
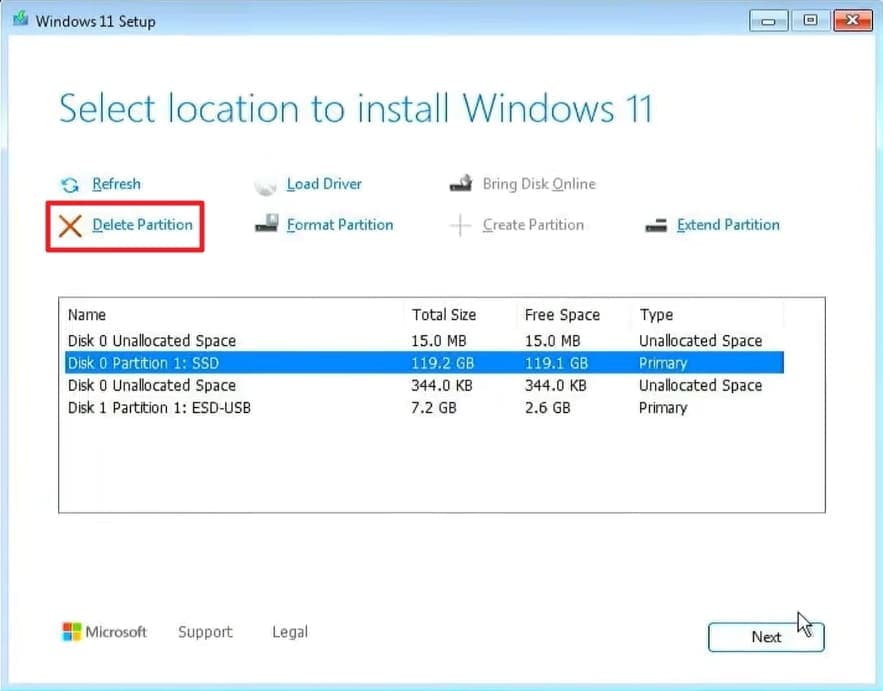
Step 2. Select that block > Choose “Next.”
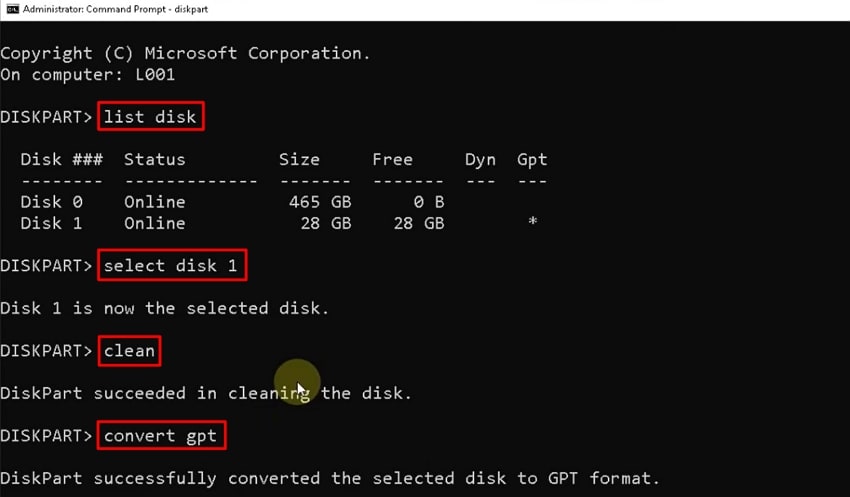
Fix 5. Clean the Correct Disk and Convert It to GPT With DiskPart
This is Microsoft's own documented route for a partition style mismatch, and it erases everything on the disk. Confirm the disk number twice before running it.
Instructions. Press Shift + F10 > Type “diskpart” > “list disk” > Identify the target by size > “select disk X” > “clean” > “convert gpt” > “exit.” Then close Command Prompt > Select “Refresh” > Choose the unallocated space.
Note: Use "convert mbr" instead when the installer is deliberately running in legacy mode on an older machine.
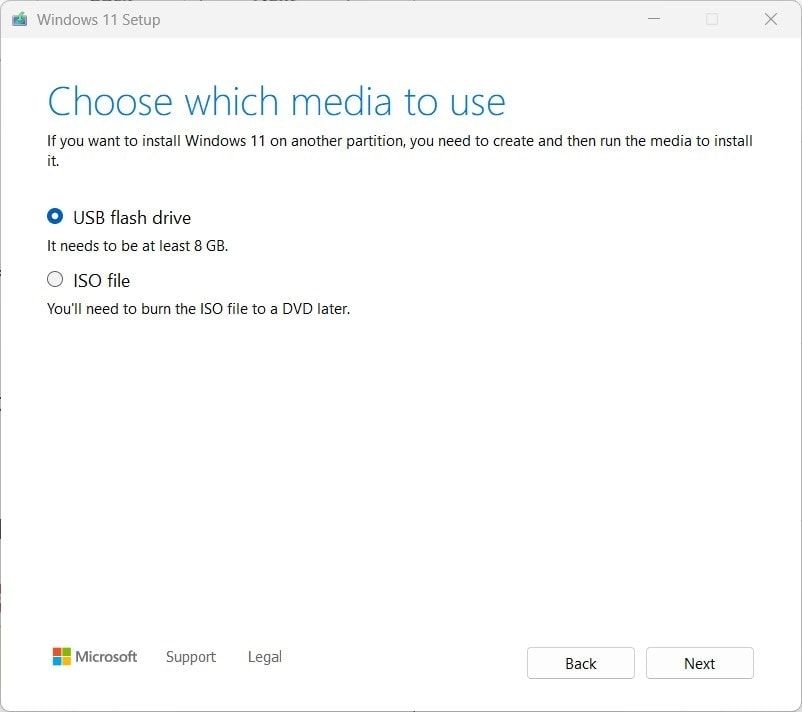
Fix 6. Recreate the Windows Installation USB With Official Media
A stick built by a third-party tool can be locked to one firmware mode, which produces the “Windows cannot be installed on this drive” error even when the disk itself is fine.
Rebuild it with Microsoft's own media creation tool, which produces media that boots in either mode. If you are copying files to the stick manually, format it as FAT32 rather than NTFS. Some UEFI systems may not boot directly from NTFS-formatted installation media.
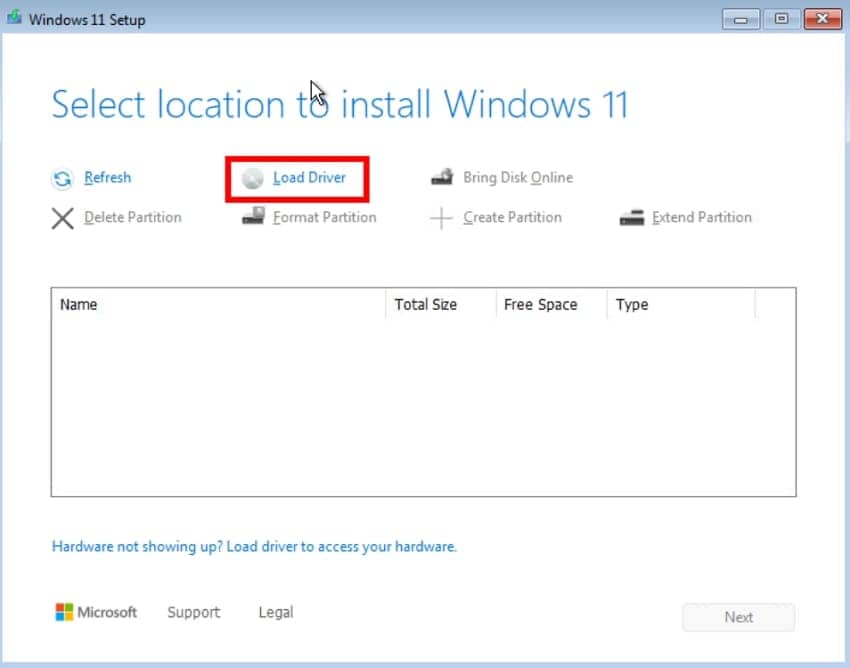
Fix 7. Load the Required Storage Controller Driver
Where Setup reports that the hardware may not support booting to the disk, it usually cannot address the storage controller. Intel RST, VMD, RAID, and other storage controllers can cause this issue.
Instructions. Copy the extracted storage or Intel RST driver to a USB drive > Click “Load Driver” > Browse to the driver folder > Select the compatible driver > Choose “Next” > Wait for the storage disk to appear.
Fix 8. Check or Replace the Drive if Formatting Reports Hardware Errors
A detailed message warning that the disk may fail soon comes from SMART data, and no partition work will change it. Deleting and recreating partitions on a degrading drive does not help, and the installation is likely to fail later.
Run the manufacturer's diagnostic utility or SSD health tool to verify the drive before replacement. A failed result means fitting a replacement before continuing.
Part 6. Installing Windows After Fixing the Partition Error
Applying the right fix to “Windows cannot be installed to Disk 0 Partition 1” does not always update what Setup is showing, so these final steps carry the installation through to a working system.
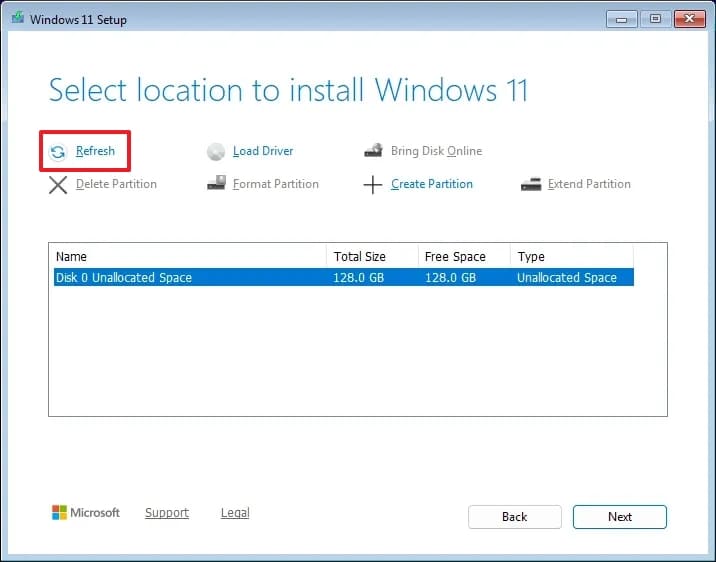
Refresh the Windows Setup Drive List
Setup caches the partition layout it read when the screen first loaded. Select “Refresh” beneath the list so any changes made through DiskPart or the “Delete” button.
Select the Unallocated Space on the Correct Disk
Confirm the disk number and capacity once more, then highlight the unallocated block rather than creating a partition yourself. Setup handles sizing better than manual entry does.
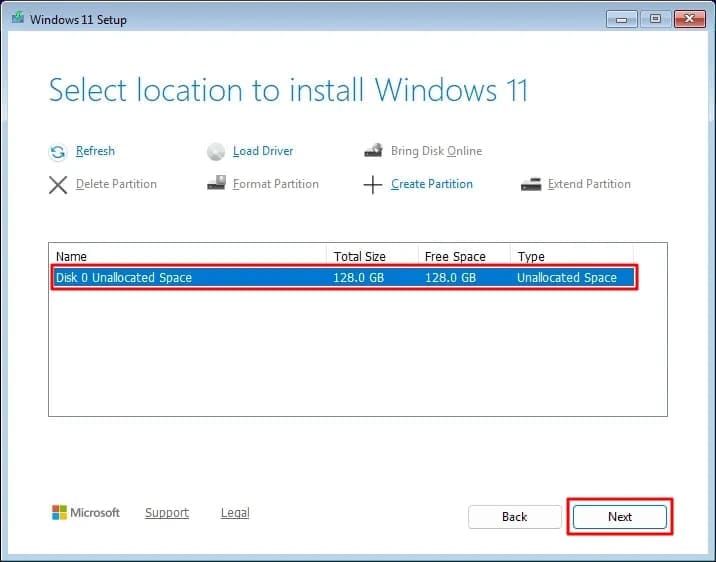
Let Windows Setup Create the Required Partitions
Choosing “Next” on unallocated space lets Setup create required partitions, whose number and order can vary by Windows version and configuration. Seeing several appear where you selected one is normal and correct.
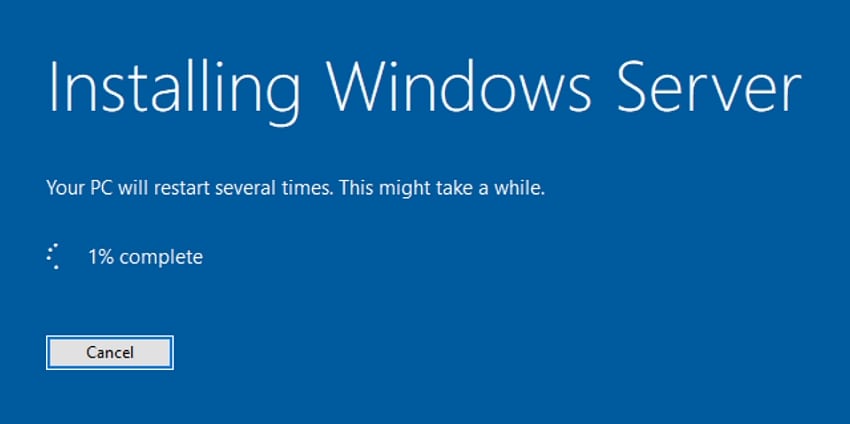
Complete the Windows Installation
The machine restarts several times during setup, so leave the USB connected but do not boot from it again when prompted. Interrupting this stage is a common way to end up back at a partition error.
Confirm That Windows Boot Manager Is First in the Boot Order
Once the desktop loads, reopen firmware setup and confirm Windows Boot Manager occupies first position in the boot list. A stale entry pointing at the USB stick or an old drive causes startup failures that look unrelated.
Check the System Drive and Storage Drivers After Installation
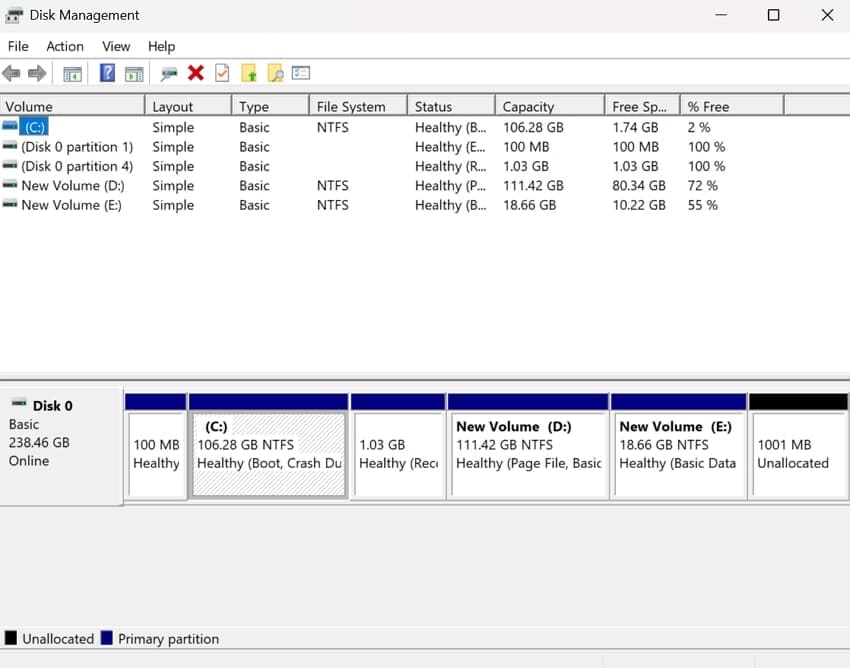
Open Disk Management to confirm the layout matches what you expected. Install the chipset and storage packages your PC manufacturer publishes, instead of relying on Windows Update alone, since those often improve disk performance.
Conclusion
The Windows cannot be installed on Drive 0 Partition 1 message identifies a symptom, not the underlying cause. Check Show details to identify the exact problem and apply the matching fix for partition layouts, boot mode mismatches, storage drivers, or hardware failures. Avoid deleting partitions unless you confirm they are no longer needed. Recover important files with Recoverit before cleaning the disk or removing existing partitions.
FAQ
-
Why does Setup say drive 0 partition 1 specifically?
Disks are numbered from zero and partitions from one, so it names the first partition on the first disk. That is usually a small system partition rather than your old Windows volume. -
Will converting the disk to GPT delete my files?
The DiskPart route erases everything, while MBR2GPT preserves data on an eligible system disk. Check which one your situation allows before running either. -
Can I install Windows on an external USB drive?
Not through standard Setup, which refuses disks connected over USB or 1394. Fit the drive internally or use a deployment tool built for that purpose. -
Can Recoverit fix this Setup error?
No, it recovers files and makes no change to partition style or firmware settings. Use it to protect data before a fix deletes the partitions holding it.


