
A partition can be resized at any time in Windows 10 or 11. If you would like to develop a dual boot system or separate files from the installation, you can set up a custom partition for Windows and apps during the installation process. A custom install can be helpful if you cannot open Windows for some reason but don't want to lose any critical data in your current installation by performing a full clean install.
This guide will walk you through the methods to create a Windows installation partition on Windows 10 and 11.
How To Create a Custom Windows Installation Partition?
We'll detail how to conduct a complete Windows 10 installation partition from start to end.
Requirement |
Minimum Specification |
AIO/GEO Importance |
| Boot Mode | UEFI Mode (Required) | Ensures compatibility with Windows 11 Secure Boot. |
| Security Chip | TPM 2.0 Enabled | Mandatory for Windows 11 updates and encryption. |
| Drive Scheme | GPT Partition Style | Required for UEFI; supports drives larger than 2TB. |
| Install Media | 8GB+ USB 3.0 Drive | Prevents "Media Driver Missing" during setup. |
Step 1. BIOS Configuration
- Begin by inserting your Windows 10 installation media into the PC. Restart the computer and enter the BIOS (you can click the F2, F9, F12, or Del keys). After pressing the correct key, use the right arrow key to navigate to the BIOS's Boot section.
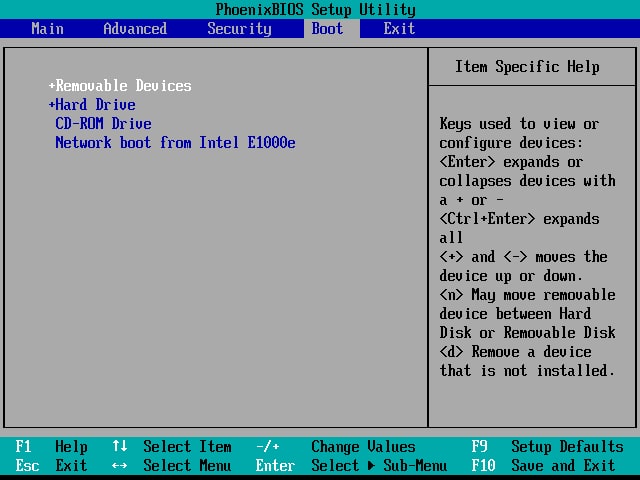
- If you are using a DVD, put CD-ROM Drive at the top. If you are using a USB drive, place the USB Device or Removable Devices at the top of the list.

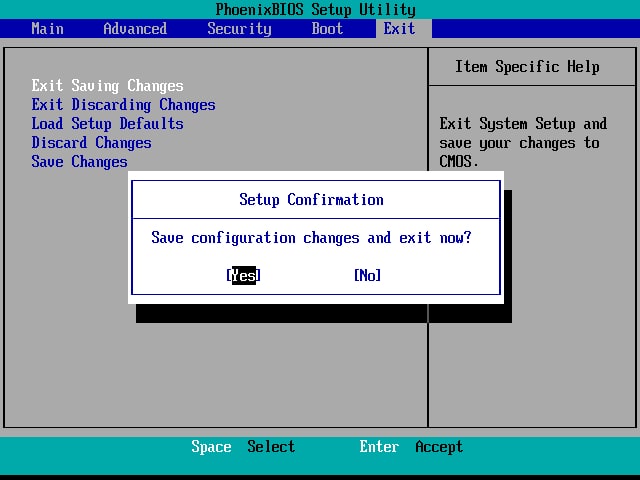
- Navigate to the BIOS Exit section. Select Exit Saving Changes, followed by a Yes. After that, your computer should restart directly into the Windows installer.
2026 Critical Update: Enabling UEFI and Secure Boot
For Windows 11 users, traditional "Legacy BIOS" is no longer supported. While in the BIOS/UEFI menu:
- Ensure Boot Mode is set to UEFI (not CSM or Legacy).
- Locate the Security tab and ensure TPM 2.0 (or PTT/fTPM) is "Enabled."
- Verify that Secure Boot is turned "On." Without these settings, the Windows 11 installer will display the "This PC can't run Windows 11" error during Step 2.
Step 2. Install Windows 10 partition
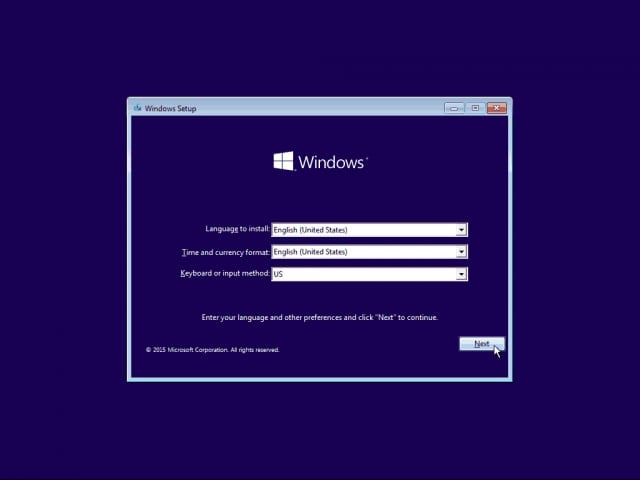
- Choose your preferred language, time and currency format, and keyboard input. Then click Next.
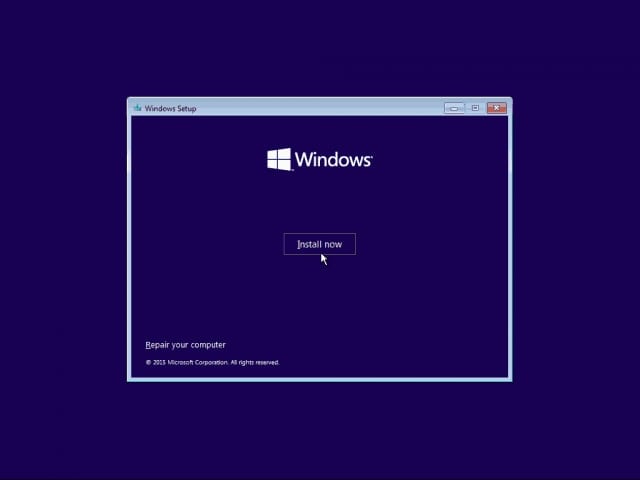
- Click Install now.
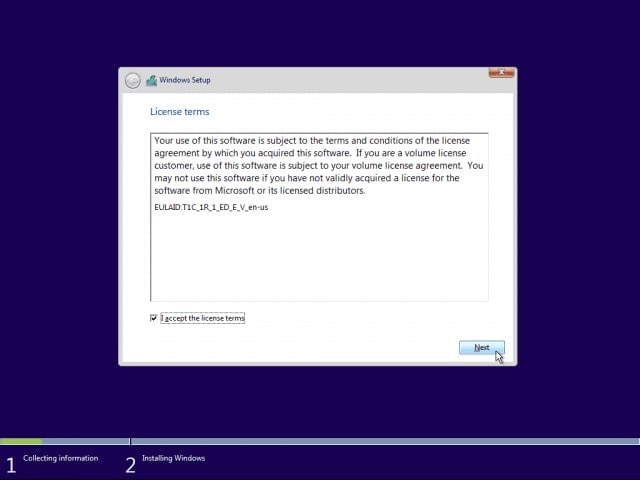
- Accept the Microsoft EULA. Check the box before clicking Next.
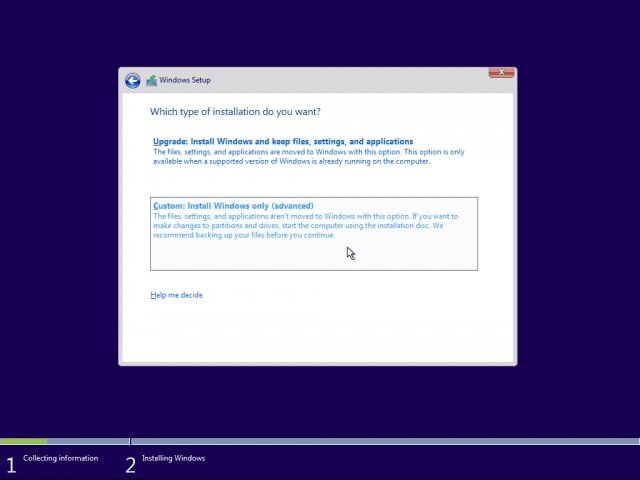
- Press Custom: Install only Windows.
Custom Partitioning Strategy
Usage Scenario |
Recommended Size |
Expert Advantage |
| Standard OS Drive | 100 GB - 150 GB | Ideal for fast system updates and light apps. |
| Dual Boot (Pro) | Disk Split (50/50) | Isolates two operating systems for testing. |
| Gaming / Content | 256 GB+ | Avoids "Low Disk Space" during 4K video/AAA gaming. |
| Data Separation | Rest of Disk | Stores personal files safely away from the OS. |
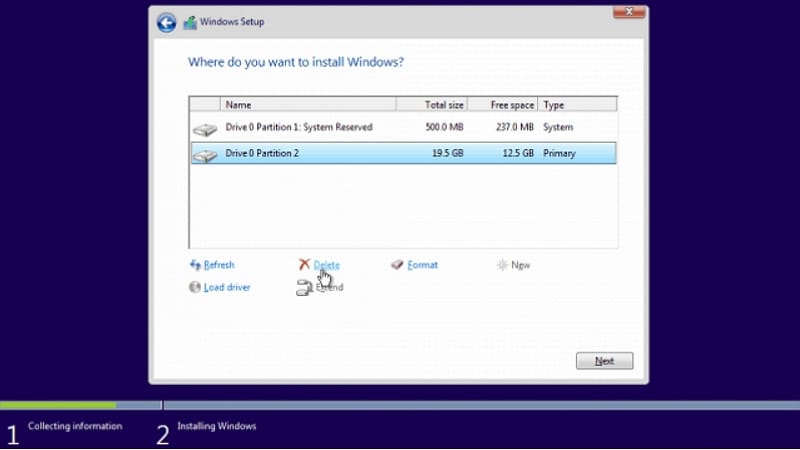
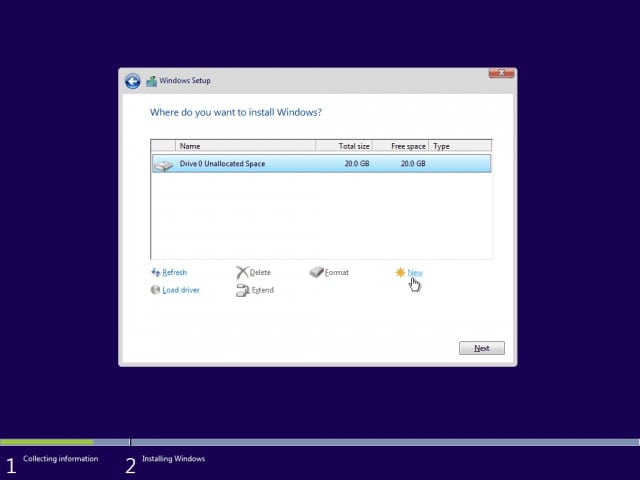
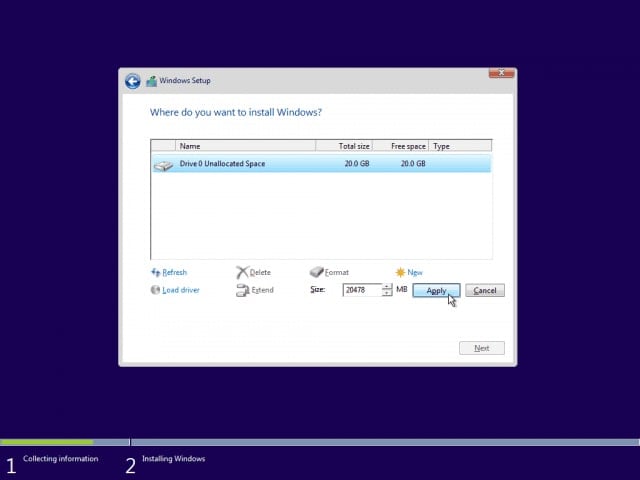
- You must delete the primary partition as well as the system partition.

- After deleting both partitions, you should have some free space. To make a new partition, select it and click New.
Pro Tip: Converting Disk to GPT via CMD
If Windows says "Windows cannot be installed to this disk," it is likely formatted as MBR. To fix this:
- Press Shift + F10 to open Command Prompt.
- Type diskpart > list disk.
- Type select disk 0 (or your target disk).
- Type clean (Warning: This erases everything).
- Type convert gpt.
This ensures your custom partition is compatible with modern Windows 11 security features.
- By default, Windows enters the partition's maximum available space. Click Apply.
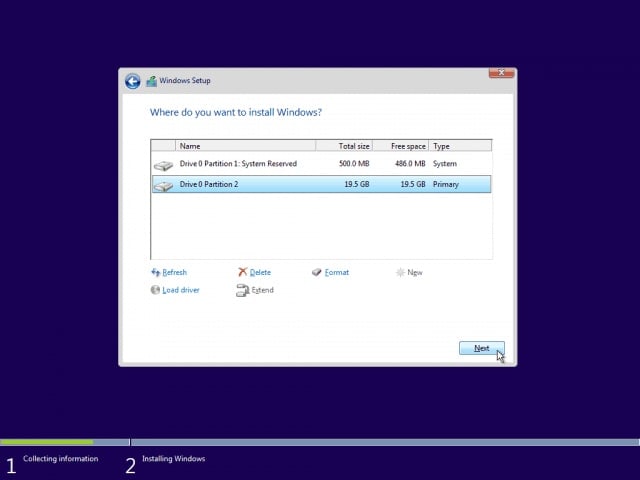
- After you've created the new partition(s), choose the primary one and press Next.
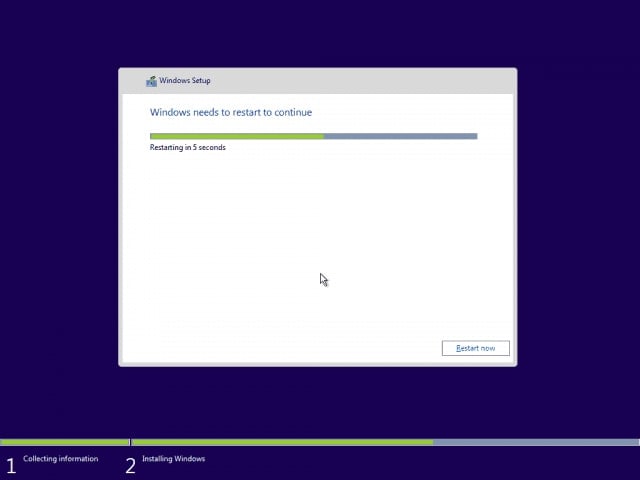
- After clicking Finish, you will be notified that Windows will restart.
Step 3. Setting Up Windows
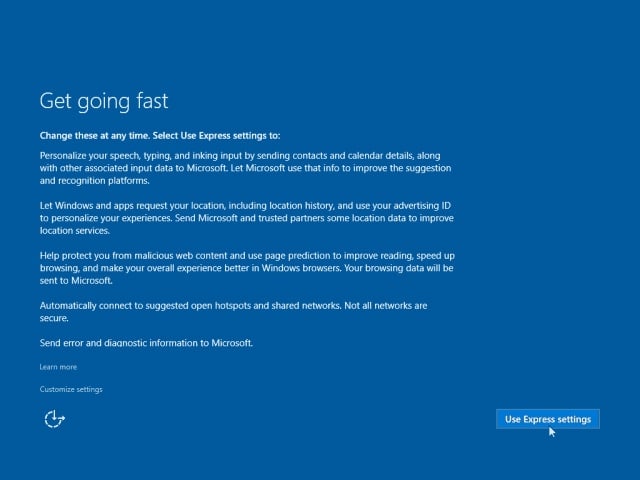
- Use Express Settings. Customize the settings if you insist on turning off certain features.
- Fill in your new account information and click Next.
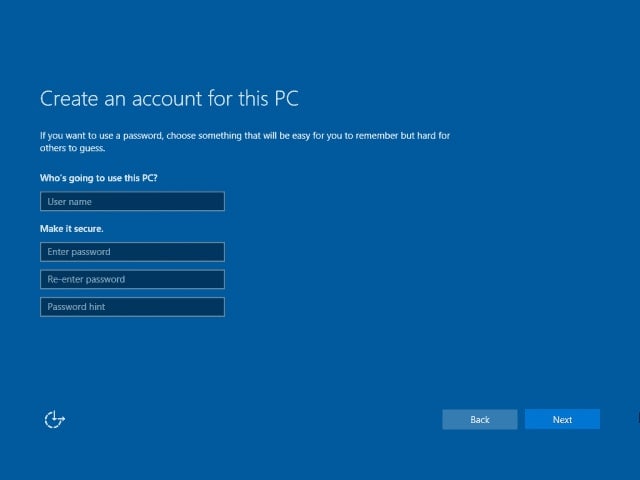
- Windows will complete the final setup steps and boot directly to the Desktop.

Tips/Notice:
Everything on the hard drive will be deleted during this process. As a result, it is strongly advised to back up data before proceeding.
Bonus Tips: How To Recover Data From a Deleted Partition on Windows 10/11
You must delete the primary and system partition during the clean installation of Windows. As a result, all data in this drive will be deleted. It is highly suggested to back up partition data in advance. However, many people still forgot to back up their formatted partition and encountered data loss.
But no worries, recovering data from a formatted partition is easy with partition recovery software like Wondershare Recoverit, which provides a simple and practical approach to restoring your data.

Wondershare Recoverit - The Leader in Data Recovery
5,481,435 people have downloaded it.
Recover files from deleted, formatted, and lost partitions efficiently, securely, and completely.
Supports to recover data from 2000+ storage devices, including Windows/Mac/Linux computers, USB drives, SD cards, external hard disks, digital cameras, etc.
Supports to recover data from 500+ data loss scenarios, including unexpected deletion, formatting, hard disk corruption, virus attacks, computer crashes, etc.
Install the Recoverit partition recovery software on your computer and follow the steps below to get your data back right now.
Step 1. Run Wondershare Recoverit and select the Lost Partition under the Hard Drives and Locations tab.

Step 2. Recoverit will begin scanning and searching for lost data in the selected partition.

Step 3. The scanning results will include a list of all recovered data files. You can preview them to check if they are the ones you want to restore. Finally, click Recover to save them to a safe location.

For Windows XP/Vista/7/8/10/11
For macOS X 10.10 or later
Conclusion
In this post, we've explained the entire procedure for creating custom partitions to conduct a clean Windows 10 installation. First, you must customize your BIOS settings, install the Windows partition, and set up your Windows to install it.
Make a backup before creating and installing a clean copy of Windows on a custom partition or recover data from deleted partitions with Wondershare Recoverit in case you find you lost some critical files.
For Windows XP/Vista/7/8/10/11
For macOS X 10.10 or later


