Installing Windows ARM on a Mac can be very useful. You might need it for specific software. Some users prefer using Windows for its features. Others might need it for work or personal projects.
Windows ARM on Mac works very well. It provides the benefits of Windows along with Mac's hardware. You can install Windows ARM on Mac M1 or install Windows ARM on M2. It might seem complicated, but it is doable.
This guide will walk you through every step. Installing and running Windows on an ARM Mac is doable and not too complicated. By following these instructions, you can set up your Mac to run Windows ARM smoothly.
In this article
Part 1: Can I Install Windows ARM on Mac?
Absolutely, you can install Windows ARM on a Mac, and it has gained considerable popularity, especially among Mac M1 users. The installation process isn't as daunting as it might initially appear, and many users have navigated it successfully.
Running Windows on an ARM Mac opens up the possibility of using Windows-specific applications, which can be a major advantage. For instance, some software is exclusively available on Windows, making this setup particularly useful. Additionally, you still get to enjoy the superior hardware benefits of your Mac, such as its sleek design and robust performance.
So, in essence, you get the best of both worlds: the versatility of Windows applications combined with the elegant and powerful hardware of a Mac.
Exploring the most efficient methods to run Windows on Mac without any hindrance.

Part 2: What You Need: Install Windows ARM on Mac
To install Windows ARM on your Mac, you need to ensure you have the right tools and resources. This includes having a Mac with an ARM processor, a valid Windows ARM license, and a reliable USB drive. Once you have these essentials ready, you'll be well-prepared to set up Windows ARM on your Mac smoothly.
Additionally, you will need to use the Boot Camp Assistant and have a stable internet connection to download the necessary updates and software. Proper preparation with these essentials will make the installation process smooth and hassle-free.
To install Windows ARM on Mac, you will need a few things:
- Mac with an ARM processor (M1, M1 Pro, M1 Max, or M2)
- Windows ARM license
- USB drive (16GB or larger)
- Boot Camp Assistant
- Stable internet connection
Part 3: How to Install Windows ARM on Mac
The installation process for Windows ARM on Mac involves several key steps to ensure everything runs smoothly. You need to check for software updates, prepare your Mac by creating a partition, and then install Windows using a bootable USB drive. Finally, you’ll install necessary drivers and software with Boot Camp to ensure Windows functions correctly on your Mac.
Following these steps carefully will help you successfully run Windows ARM on your Mac.
Step 1: Check for software updates

Before you start, ensure your Mac is updated. Open System Settings. Head to “General”. Check for updates. Install any available ones. This will prepare your Mac for the installation process.
Step 2: Prepare your Mac for Windows

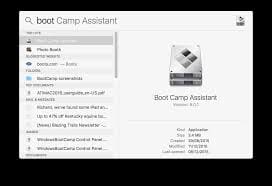
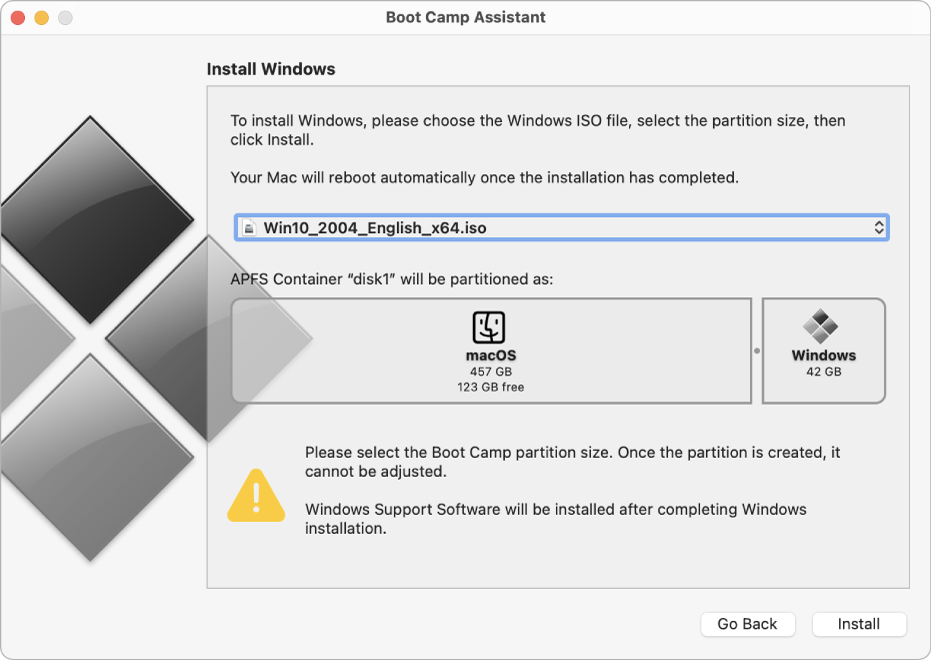
Open "Boot Camp Assistant". This tool helps you create a partition for Windows on your Mac. Follow the prompts to create the partition. Boot Camp Assistant will lead you through the entire process. Make sure you have a USB drive handy.
Step 3: Install Windows

Insert your USB drive with the Windows ARM installer. Follow the on-screen instructions. Install Windows on the partition you created. This process can take a while, so please be patient. Avoid interrupting the installation to ensure it completes smoothly.
Step 4: Install Boot Camp on Windows
Once Windows is installed, the Boot Camp installer will run. Follow the prompts. Install necessary drivers and software. This step ensures that all hardware functions properly. It helps your Mac and Windows work together seamlessly.
Part 4: Accidentally Deleted Files on Mac?
Do important files sometimes get deleted by mistake?
This can be a stressful experience, especially if the files are critical for work or personal projects. Fortunately, there are solutions available to help you recover these lost files. One such solution is Recoverit, a powerful file recovery software that can assist in retrieving deleted data.
Related Video >>: How to Recover Lost Files From Mac?
Recoverit is easy to use and very effective. The software guides you through the recovery process with simple steps, making it accessible even for those who are not tech-savvy. Recoverit makes it simple to recover all kinds of files, including documents, photos, and videos. It swiftly and efficiently restores your lost files, saving you a lot of hassle.
Here are the steps to use Recoverit:
- Go to the Recoverit website. Download the software. Install it on your computer by following the on-screen instructions. Open the Recoverit software on your computer. You will see a home screen with several recovery options. Choose the location. This could be a specific folder or drive. Click on the location to proceed. Click on the "Start" button.

- Wait for the scanning process. This might take some time.

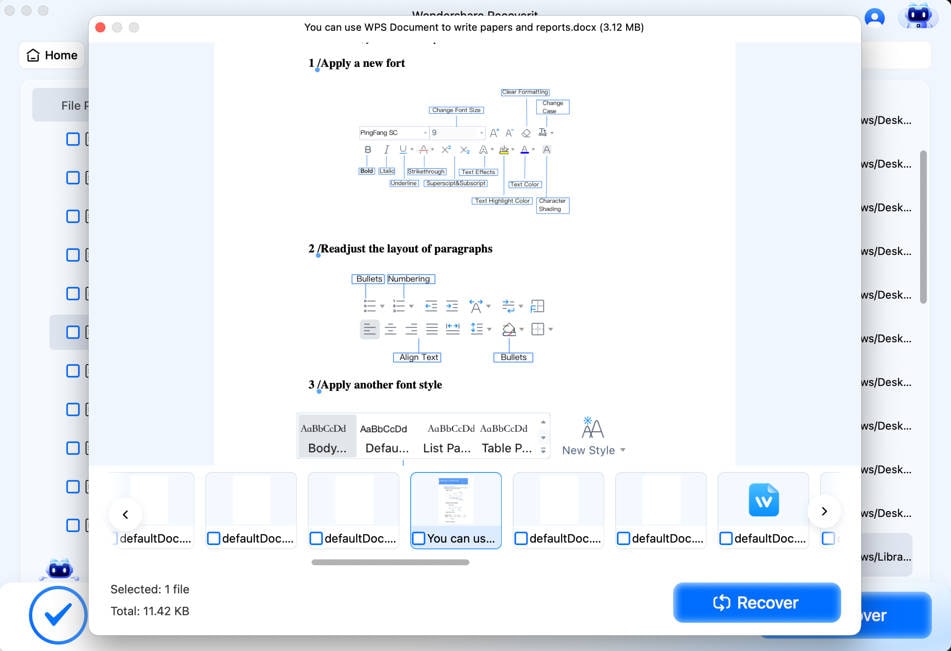
- Aftee the scan, preview these files to ensure they are the ones you need. Select the files you want to recover. Click on the "Recover" button. Avoid saving them in the same location where they were deleted.

By following these steps, you can effectively recover deleted files using Recoverit.
Part 5: Tips to Install Windows ARM on Mac
Successfully installing Windows ARM on a Mac can be smooth with the right tips. Here are some key suggestions to help you through the process:
- Backup Your Data: Always back up your important files before you start the installation. This ensures you won't lose your data if something goes wrong. You can use Time Machine or any other backup method.
- Ensure Your Mac's Battery is Fully Charged: Make sure your Mac is fully charged or plugged in during the installation. A power failure in the middle of the process can cause serious issues and might require you to start over.
- Use a High-Capacity USB Drive: Use a USB drive with at least 16GB of space. The installer files for Windows ARM can be large, and having enough space will ensure a smooth process.
- Check for Software Updates: Ensure your Mac is up to date with the latest software updates. Go to "System Preferences" and check for updates. Updating your Mac ensures it's ready for the installation process.
- Follow On-Screen Instructions Carefully: Pay close attention to the on-screen instructions provided by Boot Camp Assistant and the Windows installer. Skipping or misinterpreting steps can cause issues in the installation process.
- Be Patient: Some steps in the installation process can take a considerable amount of time. Be patient and avoid interrupting the process. Rushing can lead to mistakes and complications.
- Keep a Stable Internet Connection: A stable internet connection is crucial, especially when downloading updates and necessary files. Ensure your connection is reliable to avoid interruptions.
- Create Bootable USB Media: For a clean installation, download the Windows 11 ARM ISO file and use a tool to make the USB drive bootable. This method ensures you install the operating system directly onto your ARM device.
- Check Compatibility: Ensure that your Mac's hardware is compatible with Windows ARM. Only Macs with ARM processors like M1 and M2 models are compatible. Older models will not support this installation.
- Seek Help if Needed: If you encounter any issues, don't hesitate to seek help. There are many online forums and guides that can assist you. Sometimes, a simple search can provide a solution to your problem.
By following these tips, you can ensure a smooth and successful installation of Windows ARM on your Mac.
Conclusion
You can install Windows ARM on a Mac. It's easier than it sounds. Both Windows 10 ARM and Windows 11 ARM work on Mac M1. The installation steps are similar for both.
Running Windows on your Mac has many perks. You get to use Windows-only apps. Plus, you still enjoy the Mac's sleek design and powerful hardware.
You'll find that using Windows ARM on a Mac can greatly expand your productivity. You can run software that’s only available on Windows, making your Mac even more versatile. Many users have found that this combination of systems meets their needs perfectly.
Additionally, you can still benefit from the seamless performance and sleek design of your Mac. This setup allows you to work efficiently, without having to switch between different devices. Just stick to the guide, and you'll be able to enjoy all these advantages quickly and smoothly.
Just follow the guide to set it up. You'll be ready to go in no time!
Try Recoverit to Recover Data
Security Verified. Over 7,302,189 people have downloaded it.
FAQ
-
Can I install Windows ARM on any Mac?
No, you cannot install Windows ARM on just any Mac. It is only compatible with Macs that have ARM processors, such as the M1 and M2 models. Older Macs with Intel processors do not support Windows ARM. The ARM architecture is different from Intel's, and Windows ARM is specifically designed to run on ARM-based hardware. Therefore, you need to ensure your Mac has an ARM processor before attempting to install Windows ARM. -
Do I need a separate license for Windows ARM?
Yes, you need a separate license for Windows ARM. This license is necessary to legally use Windows ARM on your Mac. When you purchase Windows ARM, you are given a product key that activates the operating system. This ensures that you are using a legitimate copy of Windows and have access to updates and support from Microsoft. It is important to obtain this license from an official source to avoid any legal issues or problems with the software. -
Can I switch back to macOS easily?
Yes, switching back to macOS from Windows ARM is quite simple. When you start your Mac, you can choose which operating system to boot into. If you want to return to macOS, you can restart your Mac and hold down the Option key during the boot process. This will bring up the boot menu, allowing you to select macOS. Additionally, if you used Boot Camp to install Windows, the Boot Camp Control Panel in Windows provides an option to restart into macOS. This flexibility makes it easy to switch between the two operating systems as needed.


 ChatGPT
 Perplexity
 Google AI Mode
 Grok
Grok


