
Quick Summary: Android Directory Architecture & Partitioning
The Core Architecture: Android utilizes an isolated Linux-based file system array to split your device's internal storage into independent structural sections called Partitions. This structural separation prevents user apps from corrupting the underlying bootloader or Android Operating System files.
The Critical Operating Blocks: Core internal systems rely on /boot (kernel and flash ramdisk configurations), /system (the core Android OS layout and pre-loaded system applications), and /recovery (the backup maintenance console). If you wipe or corrupt the /boot partition, your device will experience an unbootable hard-brick state.
The User Space: All personal user information, media, third-party apps, app settings, and configuration parameters are isolated inside the /data partition block. Performing a "Factory Reset" simply formats this single /data block while leaving /system intact.
Partition Size Verification: You can read the precise size map of your device partitions without root access by matching your PC terminal to your phone via the Android Debug Bridge (ADB) framework and executing the shell inspection command script: adb shell-> df
Partition Failure Workaround: When an internal directory corrupts or loses structural integrity during manual flashing, standard storage paths break. Utilizing a dedicated partition toolkit like Wondershare Dr.Fone allows you to mount raw storage memory blocks directly to pull files out of degraded unallocated directories.
If you've been using your Android phone for calls, SMS, browsing, and basic apps, you should be aware that Android organizes files and folders on the device using several partitions. Each of these partitions plays a distinct role in the device's functionality. The following 6 partitions are logically present in all Android devices:
The SD Card File System Partitions are also included:
This guide will walk you through all about Android partitions.

Android Partitions Structure
There are a total of 8 partitions, 6 of which are internal and 2 of which are external. Only one of these eight partitions (/sdcard) is found on all devices, whereas others may only be found on specific devices. All of this is explained further below:
Reference Matrix: Android Core Storage Partition Schemes
System Partition Path |
Hardware Memory Allocation |
Standard Access State |
Impact of Executing a Partition Wipe |
Best Practice Flashing Safe Safeguard |
| /boot | Internal Flash Storage | Read-Only (System Runtime) | Hard Brick: The device will fail to turn on or access boot loops. | Flash a matching kernel or complete factory image immediately before restarting. |
| /system | Internal Flash Storage | Read-Only (Normal Use) | OS Removal: Removes the entire Android interface, but keeps recovery active. | Flashing custom ROMs over this block requires an analytical system layout wipe. |
| /recovery | Internal Flash Storage | Isolated Recovery Mode | Diagnostic Loss: Loss of advanced device recovery console control handles. | Deploy custom TWRP or OrangeFox packages directly via fastboot scripts. |
| /data | Internal Flash Storage | Read-Write (Fully Open) | Factory Reset: Clears apps, SMS logs, contacts, and personal settings. | Create a secure local cloud storage backup before running a layout reset. |
| /cache | Internal Flash Storage | Read-Write (Temporary) | Log Clearance: Cleans up active system execution logs without file loss. | Wipe safely post-OTA updates to avoid temporary background system lag loops. |
| /misc | Internal Flash Storage | Read-Write (Hardware Level) | Hardware Error: Destroys carrier tracking tags (CID) and boot modes. | Do Not Wipe: Avoid manual modification; let system scripts handle writes. |
| /sdcard | External Media / Shared Space | Read-Write (User Storage) | Media Loss: Clears local documents, download files, and gallery images. | Safely eject or back up files straight to an external desktop storage array. |
| /sd-ext | External Media Extension | Read-Write (Custom Mod) | Linked App Crash: Corrupts app extensions moved via legacy APP2SD+ links. | Only configure when using vintage devices with severe space limits. |
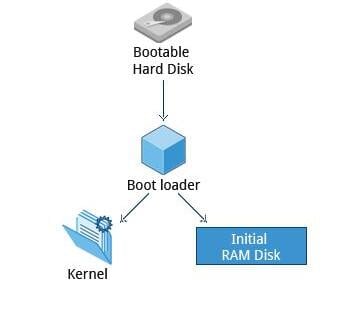
1. /boot
As the term implies, this is the partition that allows the Android device to boot. It consists of the kernel and the ramdisk. A kernel is a layer of code that allows the operating system and applications to communicate with your phone's hardware. The quality of the kernel code determines the extent to which you can access your phone's hardware features. Choosing a custom kernel means selecting the one that works best with your ROM.
The device will not be able to boot without this partition. Therefore, wiping this partition from the recovery should be done only when necessary. Once done, you should NOT reboot the device before installing a new one. You can accomplish it by installing a ROM with a /boot partition.
2. /system
Apart from the kernel and the ramdisk, this partition holds the entire operating system. It involves the Android user interface and all system applications pre-installed on the device. Removing this partition will eliminate Android from the device without rendering it unbootable. You can still install a new ROM by booting the phone into recovery or bootloader mode.
It contains AOSP source code for system applications and libraries. This partition is mounted read-only during normal operating conditions; its components change only during an OTA update or when flashing a new OS.
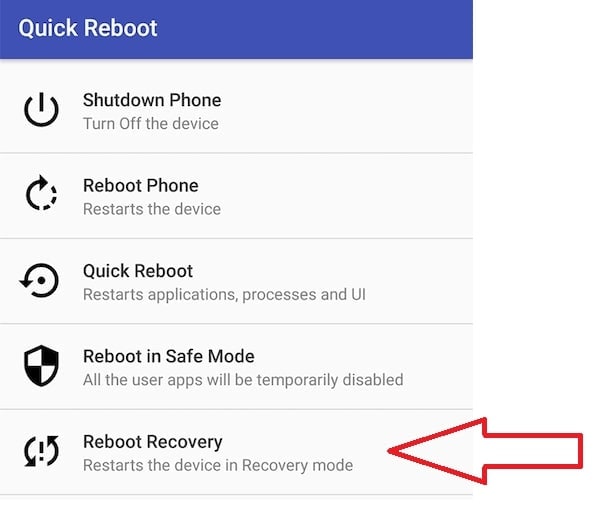
3. /recovery
It is specifically intended for backup. This recovery partition is an alternative boot partition that allows you to boot your Android device to a recovery console for advanced recovery and maintenance operations. It is also the most common approach for flashing custom ROMs.
4. /data
The data partition, also known as user data, stores the user's data - it's where your contacts, messages, settings, and installed apps are stored. Wiping this partition may perform a factory reset on your device, restoring it to the state it was in when you first booted it or the state it was in after the most recent official or custom ROM installation. You are wiping this partition when you perform a wipe data/factory reset from recovery.

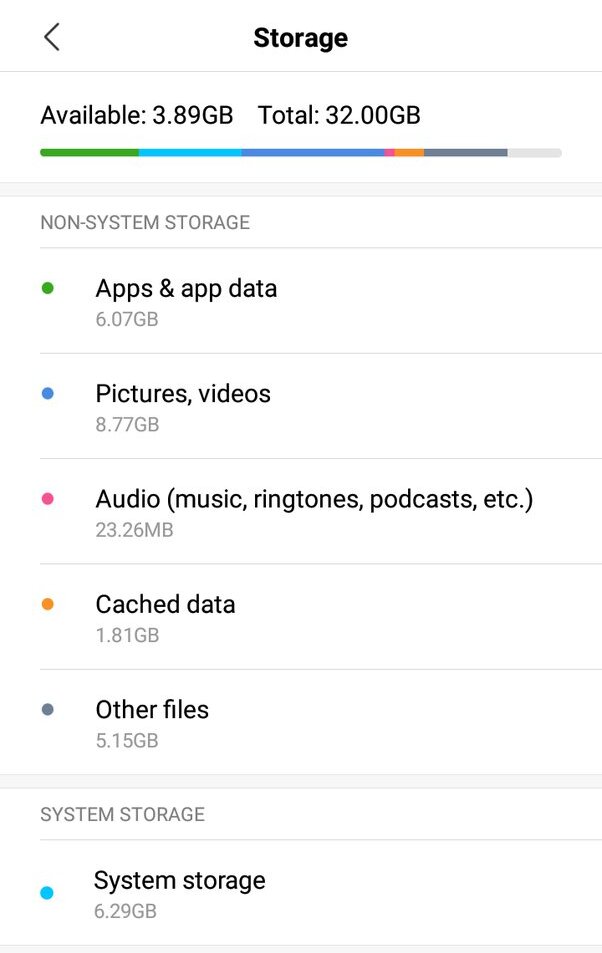
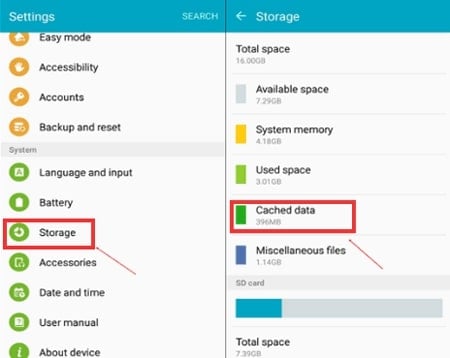
5. /cache
Almost everybody is familiar with the cache. It is where Android keeps frequently accessed data and app components. Wiping the cache does not affect your data; it simply removes any existing data, which is automatically rebuilt as you operate the device. It is a temporary storage area used by a few applications, with the expectation that files will vanish anytime.
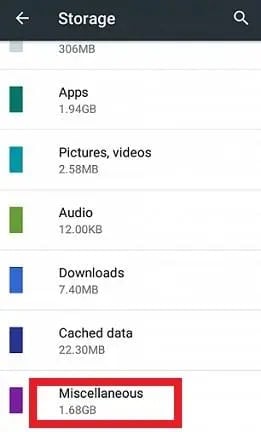
6. /misc
This partition incorporates system settings in the form of on/off switches. CID (Carrier or Region ID), USB configuration, and specific hardware settings are included in the settings. It is a vital partition; if it is corrupted or missing, several device features will not work correctly.
It's a small partition used by recovery to communicate with the bootloader and store information about what it's doing in case the device reboots. At the same time, the OTA package is being applied. It is a boot mode selector that transfers data between stages of the boot chain.
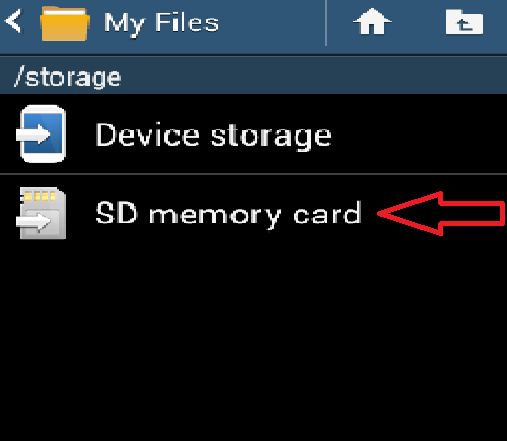
7. /sdcard
It is not a partition on the device's internal memory but rather an SD card on the external. It is your storage space to use as you see fit to store your media, documents, ROMs, and so on. Removing it is completely safe as long as you back up all the data you need from it to your computer. Although many user-installed apps save their data and settings on the SD card, wiping this partition will lose all that data.
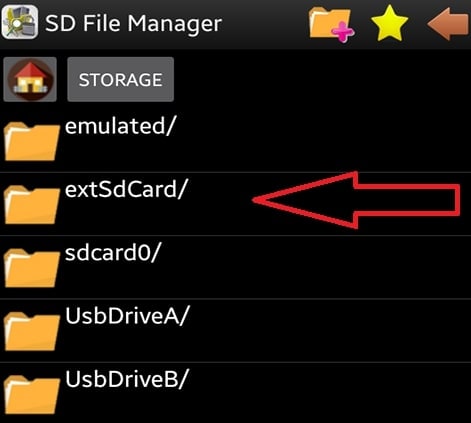
The /sdcard partition is always used to refer to the internal SD card on devices with both internal and external SD cards. If an external SD card is present, an alternative partition is used, which varies by device.
8. /sd-ext
It is not a standard Android partition but has gained popularity in the custom ROM community. It is an additional partition on your SD card that acts as the /data partition when used with certain ROMs that support APP2SD+ or data2ext.
It is particularly useful on devices with limited internal memory for the /data partition. As a result, users who want to install more programs than the internal memory allows can create this partition and use it in conjunction with a custom ROM that supports this feature to gain additional storage for installing their apps.
Wiping this partition is similar to wiping the /data partition in that you lose your contacts, SMS, market apps, and settings.
It brings our tour of Android partitions to a close. Now, whenever you install a ROM or mod that requires you to wipe certain partitions before installation, you should be able to tell what you're losing and what you're not, and thus know what to backup and what not.
Pro Tip for 2026: The Shift to Dynamic Partitions and Seamless A/B Updates
If your smartphone shipped with Android 10 or later, its internal structure uses Dynamic Partitions. Modern Android deployment frameworks no longer map a fixed, immovable size to individual sections like /system or /vendor. Instead, Windows-like sub-allocations are consolidated into a large master directory block called super. The device dynamic routing manager scales these virtual boundaries on the fly during OTA updates.
Furthermore, modern layouts use an A/B Seamless Update mechanism. Devices duplicate vital blocks into two slots: Slot A and Slot B (e.g., /system_a and /system_b). The operating system runs silently on one slot while streaming a new system update to the secondary slot in the background. If an error occurs during an update, the device safely rolls back to the alternate slot to eliminate the risk of boot-failure loops.
How To Know Your Android Device Partition Size
By executing Android Debug Bridge (ADB) commands, you can know your Android device partition size without rooting. Follow the steps below:
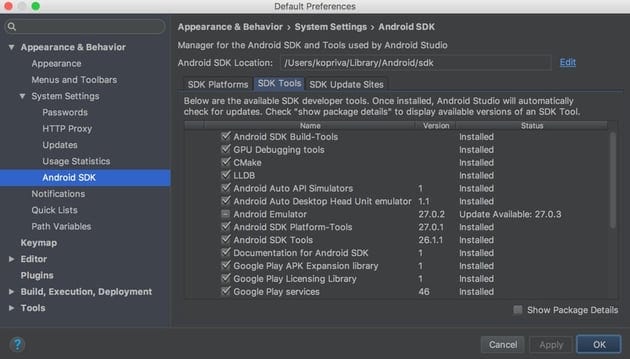
Step 1. Set up the Android SDK
You must first install the Android SDK Platform Tools on your computer. Download the official ADB. Then, extract it to a location on your computer that is convenient for you. It will enable your PC to recognize your device in ADB mode. You will receive the platform-tools folder, which you can use to access your Android device partition size.
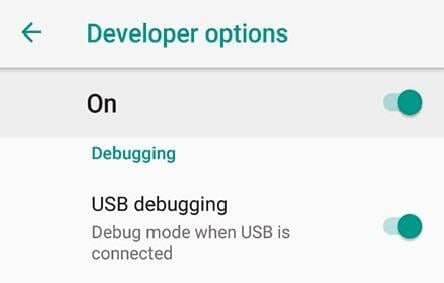
Step 2. Switch on USB debugging
To enable USB Debugging, go to Settings > About Phone > Seven times, tap the Build Number, then return to Settings > System > Advanced > Developer Options.
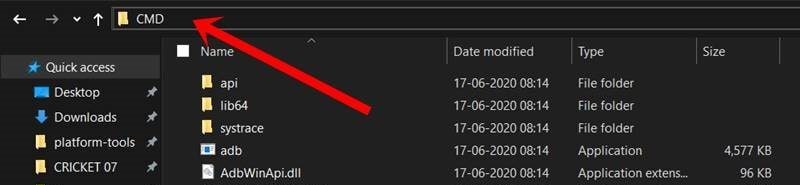
Step 3. Start CMD within ADB
Connect your Android device to the computer. First, make sure USB Debugging is turned on. Then navigate to the platform-tools folder, enter CMD in the address bar, and press Enter. It will open the Command Prompt window.
Step 4. Enter the commands
Type the following commands in the cmd and press Enter.
adb shell
df
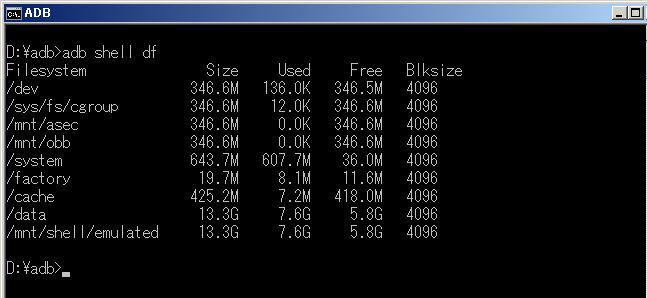
The first value is the size, followed by the used number of blocks, the available blocks, and the block size (blksize).
Bonus Tips: How To Recover Data if You Accidentally Deleted or Lost an Android Partition
What if you lost or deleted an Android partition by mistake? It could be a significant headache. Fortunately, you can recover deleted or lost Android partitions using reliable software. One of the top solutions is Wondershare Dr.Fone. If you’re finding a fast, simple, and feature-rich data recovery software, Wondershare Dr. Fone will satisfy you.
Dr.Fone includes the following features:
Wondershare Dr.Fone: Partition Parsing Engine Architecture
Data Loss Variable |
Compatible Mobile Platforms |
Target Storage Media Fields |
Core Extraction Automation Feature |
| Accidental Custom Flash Wipes | Android 5.0 up to Android 14/15+ | Raw Internal Flash Storage Sectors | Bypasses standard OS file restrictions to extract data directly from unallocated partition blocks. |
| Interrupted Firmware Runs | Leading Samsung, Google, Xiaomi lineups | Corrupted Secondary Drive Layers | Deep Scan Routine: Reassembles fragmented database files (SQLite contacts, message files). |
| Rooting Errors & Boot Loops | Universal Mobile Device chipsets | Broken External MicroSD Card Cards | Bypasses OS software limits to pull target photos and documents from raw blocks. |
| Physical Hardware Drops | Cross-compatible with Windows & macOS | Damaged Storage Controller Interfaces | Rebuilds missing directory headers without modifying structural file extensions. |
- There are numerous ways to lose important data, but Dr.Fone’s toolkit assists you in recovering all of them.
- Fone is a recovery tool with advanced features compatible with Windows, Mac, iOS, and Android devices.
- It connects your Android to your PC and begins a thorough scan. Within minutes, all deleted files will be visible.
Steps To Recover Phone Data Using Dr.Fone
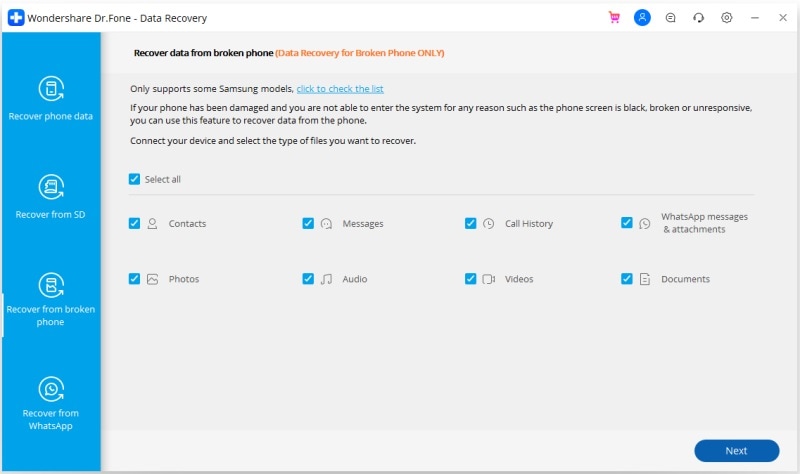
Follow the steps listed below to recover deleted photos from your Android phone's system memory:
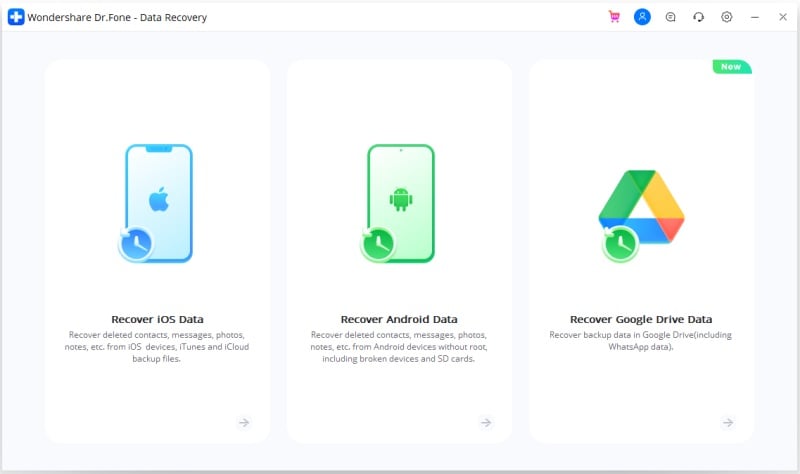
Step 1. Connect Android to PC (insert SD card)
Select Data Recovery from the Dr.Fone menu. Using a USB cable, connect your Android phone to the computer.
Step 2. Dr.Fone will scan for deleted or lost files
Select Scan mode. Dr.Fone will begin scanning the files on the internal memory of the Android phone.
Step 3. Selectively recover files
Preview the recovered photos and successfully recover the deleted photos.

Post-Modification Checklist: Verifying Android File System Health
- Verify Dynamic Mount Status via Terminal: Run the adb shell mount script to confirm that your primary partitions (like /system and /data) are correctly mounted with their intended read/write security permissions.
- Check Storage Free Space Ratios: Execute the df -h command within the ADB shell window to inspect storage allocation blocks using human-readable metrics (MB and GB sizes).
- Confirm Cache Partition Integrity: If your device experiences application crashes or menu performance lag after an update, reboot into your custom recovery tool (TWRP) and select Wipe Cache / Dalvik Cache to flush out stale compiled code chunks.
- Verify SELinux Policy Enforcement Status: Ensure your kernel security profile is intact by executing getenforce in the terminal. The output should read Enforcing to safeguard your partitioned file system trees against unauthorized root modifications.
- Refresh System Backups: After successfully flashing a new ROM or validating partition maps, create a fresh system image backup inside your recovery tool to protect your configuration from future partition corruptions.
Summing Up
We hope that this article assists you in exploring the Android partitions in the simplest way possible. Exploring the Android partition structure is essential for better organizing your device and fixing issues. If you wish to recover data after accidentally deleting or losing an Android partition, visit Wondershare Dr.Fone.


