
 TL;DR:
Booting into a WinPE environment via a USB partition manager enables safe disk resizing, formatting, and conversion without OS interference, using tools like Macrorit, EaseUS, AOMEI, MiniTool, or IM-Magic.
● Free version limitations vary significantly: IM-Magic restricts the bootable media builder to paid tiers, AOMEI and MiniTool require paid upgrades for dynamic disk management, and EaseUS lacks dynamic volume support entirely.
● Operational constraints include Macrorit's incompatibility with dynamic drives and disks larger than 32TB, AOMEI's prerequisite for Windows AIK/ADK installation to build WinPE media, and MiniTool's installer potentially bundling additional software.
● Recovering data from an already unbootable hard drive requires using software like Wondershare Recoverit to generate a bootable USB, followed by modifying the BIOS boot key settings (such as F2, F10, or F12) to bypass the unbootable OS.
Ask AI for a summary
 ChatGPT
 Perplexity
 Gemini
 Claude
 Grok
Grok
Do you want to efficiently create or delete partitions? Or intend to shrink, copy, or expand it? In search of a trusted bootable partition manager? You can’t miss reading this article, as it presents the top 5 bootable partition management tools you can use to manage disk partitions and boot devices in simple yet effective ways. The main points we will be discussing in this guide are:
Part 1. What Is a Bootable Partition Manager?
A partition magic software ISO file is used to burn a USB bootable partition manager. You can use a bootable partition manager to boot your personal computers into a WinPE state from a USB bootable drive. Doing this also assists you in safe and flexible partition management. Now, let’s get into the details of the real potential of bootable partition managers presented in the next section.
You can use partitions managers to manage disk partitions and boot devices in simple yet effective ways, also to handle boot device missing or other problems.
Part 2. Top 5 Bootable Partition Managers
Do you intend to effectively manage disk partitions? Looking for an efficient way of doing so? This section has got you covered, as it presents a list of the 5 best bootable partition managers. Let’s look at how each tool does its job.
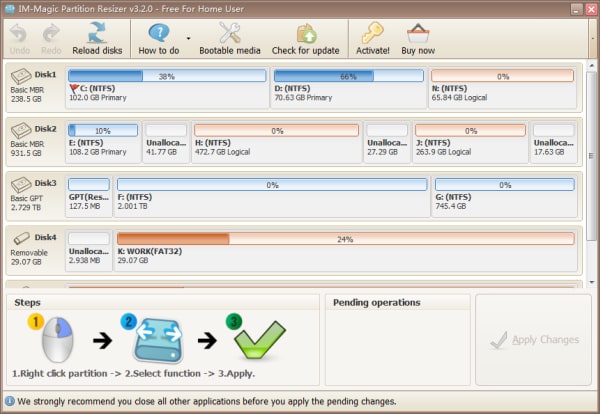
1. IM-Magic Partition Resizer
It is a one-of-its-kind free bootable partition manager that is known for offering a wide range of partition management services, including creating, deleting, resizing, and copying partitions. Apart from that, you can also use this tool for NTFS to FAT32 conversion.
Price: $59 (1 code for 2 PCs), $139 (1 code for 2 servers), $399 (unlimited computer and servers)
How To Use IM-Magic Partition Resizer
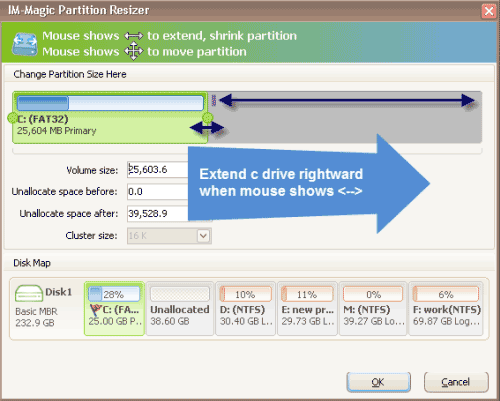
Follow the steps below to extend C Drive with unallocated space with IM-Magic Partition Resizer.
Step 1: Download and install the program.
Step 2: Launch the software and look for the disk with enough free space. As soon as you find one, right-click on it and choose the “Resize/Move” option.
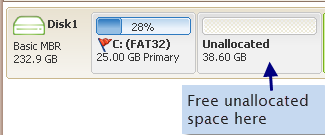
Step 3: To create a free space, move arrows to the right, as shown below.
You will see the free space as an unallocated space.
Step 4: Now, bring unallocated space close to the C Drive. Once done, right-click on the C Drive and tap on “Resize/Move.”
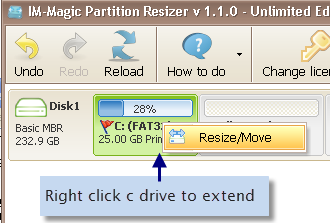
Step 5: Now, add unallocated space to C Drive by moving arrows and tapping on the “Apply” button.
Pros
Super simple to use.
Gets installed quickly.
Lots of partition management options.
Cons
Bootable media program is available in paid version.
2. Macrorit Partition Expert
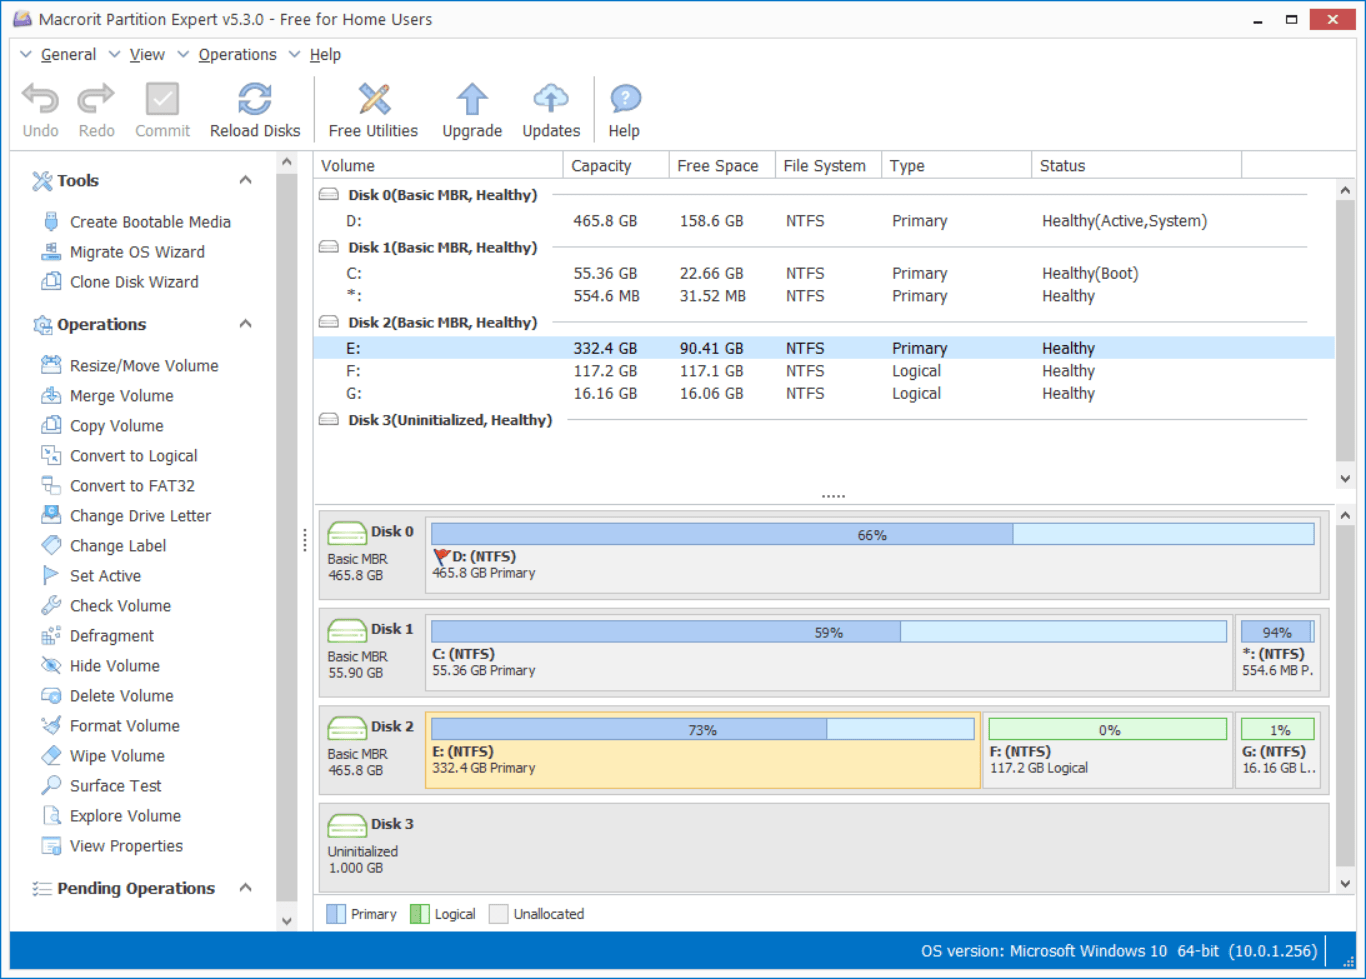
It is another leading free bootable partition manager with the ability to copy, move, resize, delete, and format partitions. In addition, you can use this program to run a surface test and change the label of the volume. It doesn’t make automatic changes to your partition until you allow it to do so.
Price: $39.99 (professional), $129.95 (server), and $399 (unlimited)
How To Use Macrorit Partition Expert?
The steps to use Macrorit Partition Expert for a new disk are as follows.
Step 1: Download, install and launch the program.
Step 2: Connect a new disk. Now, run the tool to load the disk map.
Step 3: Once the disk is loaded to the disk map, you will see it as uninitialized. It is time to right-click on the loaded disk.
Step 4: Now, select GPT or MBR disk in the partition scheme. If the disk size is less than 2TB, you can use MBR, whereas GPT is recommended for disks larger than 2TB in size.
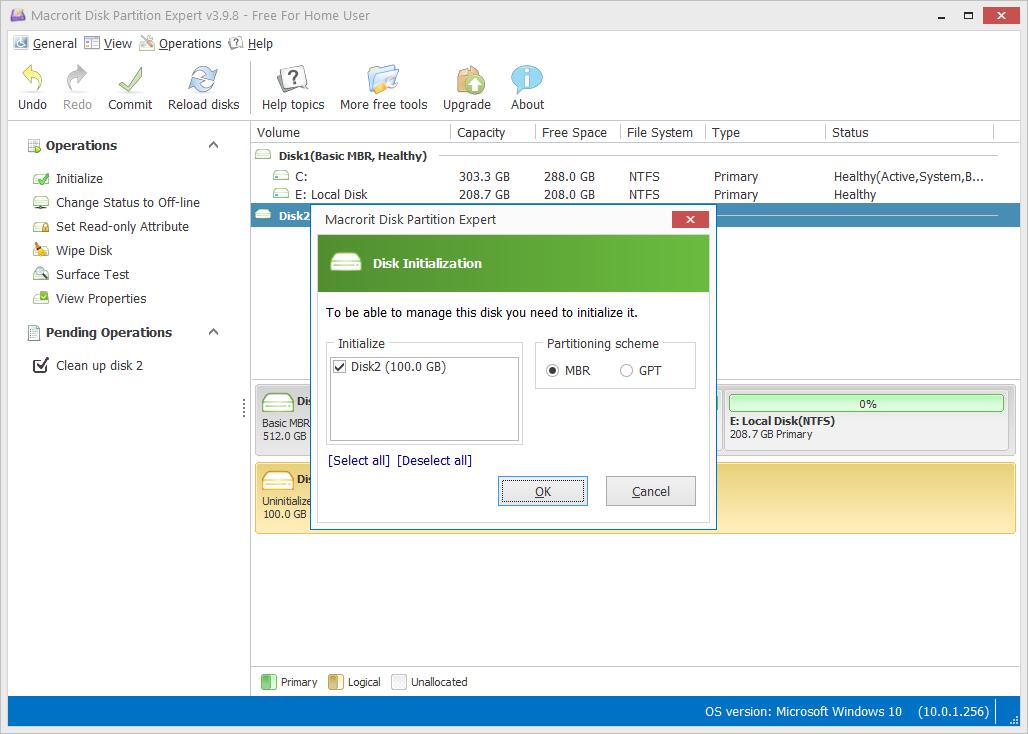
Step 5: The disk is initialized now, which means it has become an unallocated space. Now, you can create partitions on the initialized disk. For this, go to “Operations” and select “Create Volume.”
Step 6: You can now set different parameters from the window shown below. These parameters include; volume label, assign the drive letter, cluster size, and file system. You can now give the desired space to a new partition or split the unallocated volume. Move the handle to the right and tap on the “OK” button.
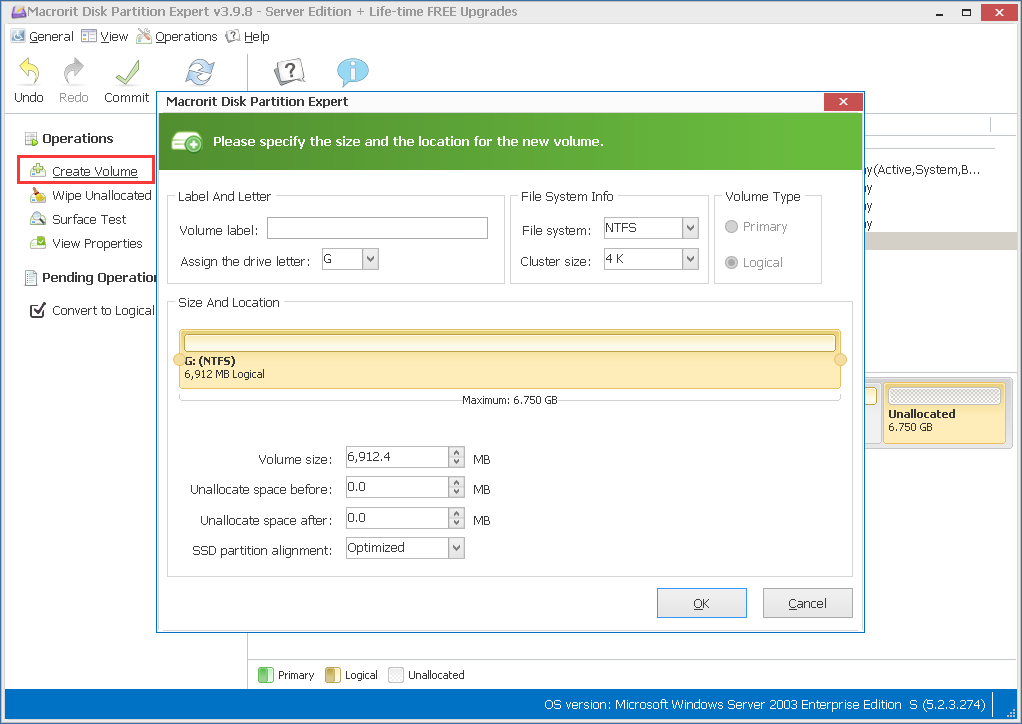
You can repeat this process to create more partitions.
Step 7: Now, apply all operations by pressing the “Commit” button.
Pros
Uncluttered and clean user interface.
No hidden menus.
Supports Windows 10, 11, and previous versions.
Cons
Not compatible with dynamic drives.
Doesn’t offer support for disks larger than 32 TBs.
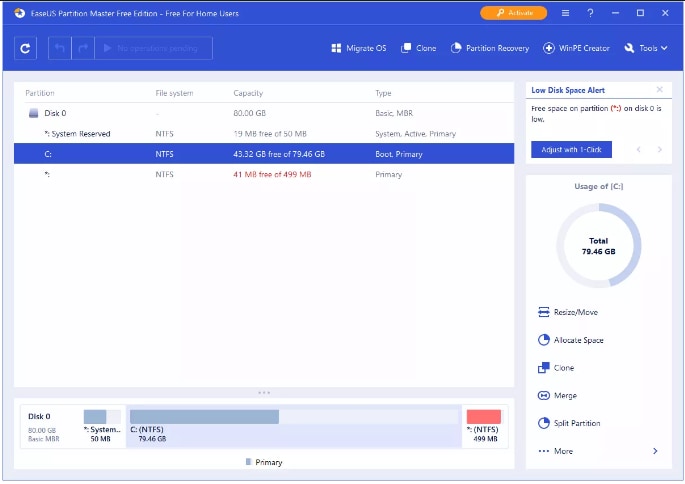
3. EaseUS Partition Master
With this USB bootable partition manager free, you can easily expand or shrink partitions in one swipe just by dragging right or left. Changes you make in the partition don't apply until you hit the “Execute” button. Along with hiding and password-protecting partitions, you can perform a variety of other similar functions with EaseUS Partition Master.
Price: $19.95 (monthly), $49.95 (yearly), and $69.95 (lifetime)
How To Use EaseUS Partition Master?
To create a bootable partition manager to USB, the steps to use EaseUS Partition Master are listed below.
Step 1: Prepare CD/DVD, flash drive, or USB to create a bootable disk. Now, connect the disk to your PC.
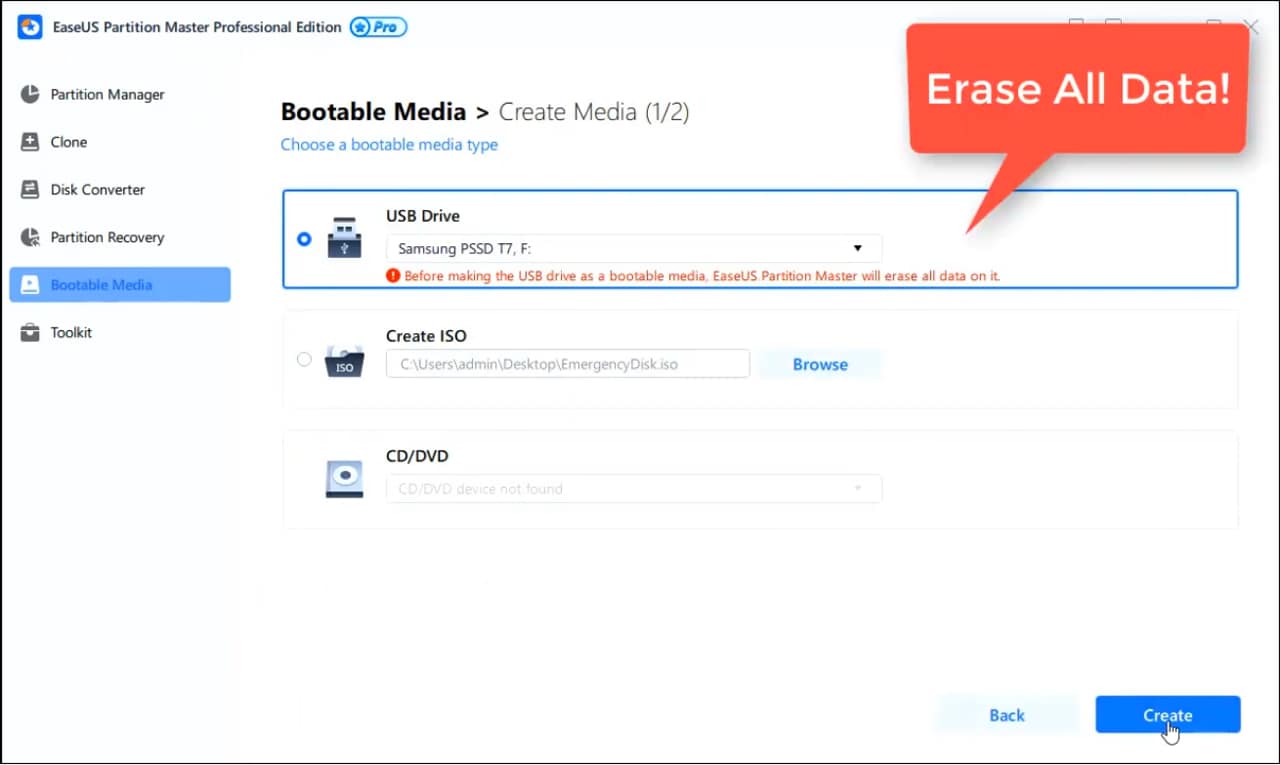
Step 2: Open EaseUS Partition Master, and search for “Bootable Media” from the list of available features. You can see this on the left side of the window. Click on the mentioned feature.
Step 3: When the disk becomes available, you can select CD/DVD or USB. In case you don’t have a storage device, don’t worry but save the ISO file on a local disk. Later, you can easily burn it to some storage media. Once you have decided, press the “Create” button.
Step 4: Read the warning notification and tap on “YES.”
Pros
User-friendly interface makes it easy to use.
Supports easy system drive upgradation to larger HDD.
You can preview the changes before applying.
Cons
Only available for personal use.
Doesn’t help you manage dynamic volume.
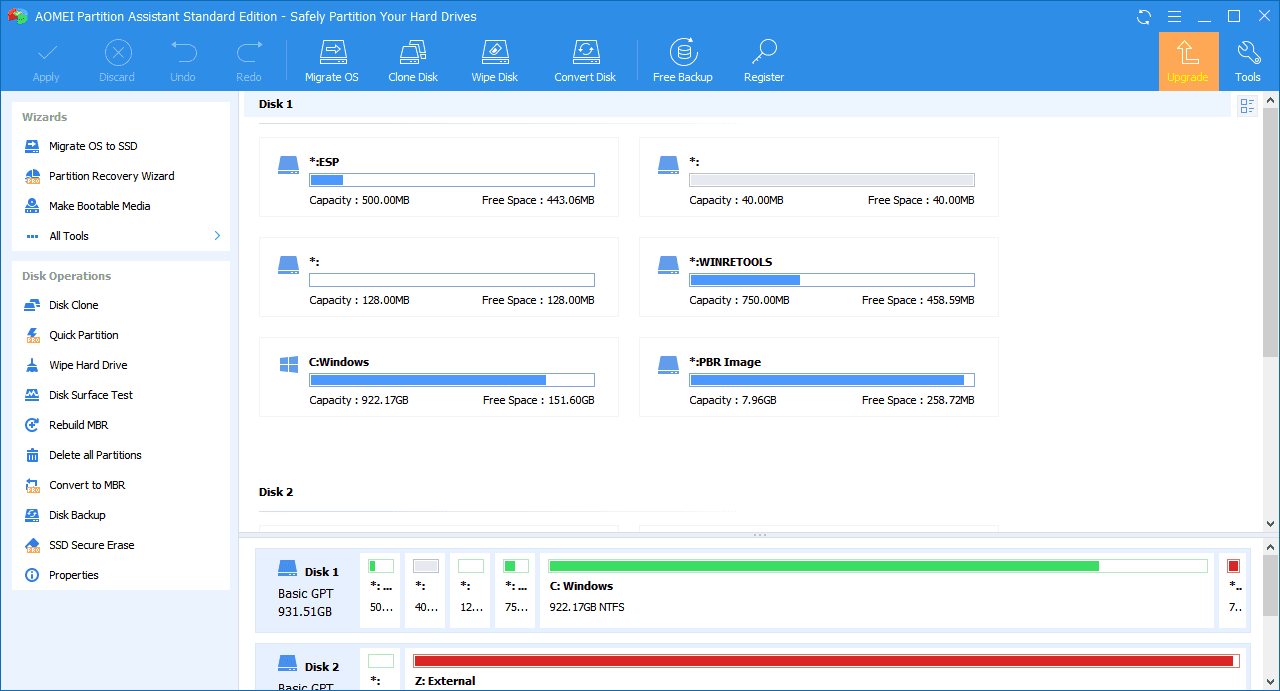
4. AOMEI Partition Assistant
This partition assistant can help you manage partitions in different ways, including creating, formatting, recovering, splitting, and aligning partitions. You can also copy the complete partitions and disks with AOMEI Partition Assistant.
Price: $39.95 (yearly) and $69.95 (lifetime)
How To Use AOMEI Partition Assistant?
The steps to create a bootable WinPE media with AOMEI Partition Assistant are listed below.
Step 1: Open the software and tap on “Make Bootable CD Wizard”. You will find it under the “Wizard” section on the left side of the window. Press “Next.”
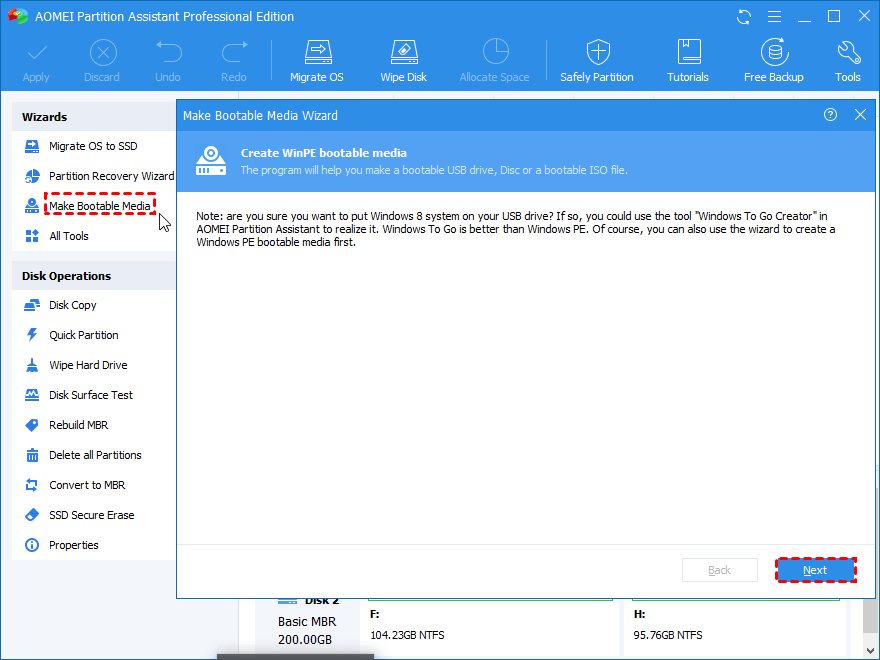
Step 2: The program will detect it automatically whether or not your computer has Windows AIK/ADK installed on it. If it is not there in your system, you have to install it, but if it is already there, move to the next step.
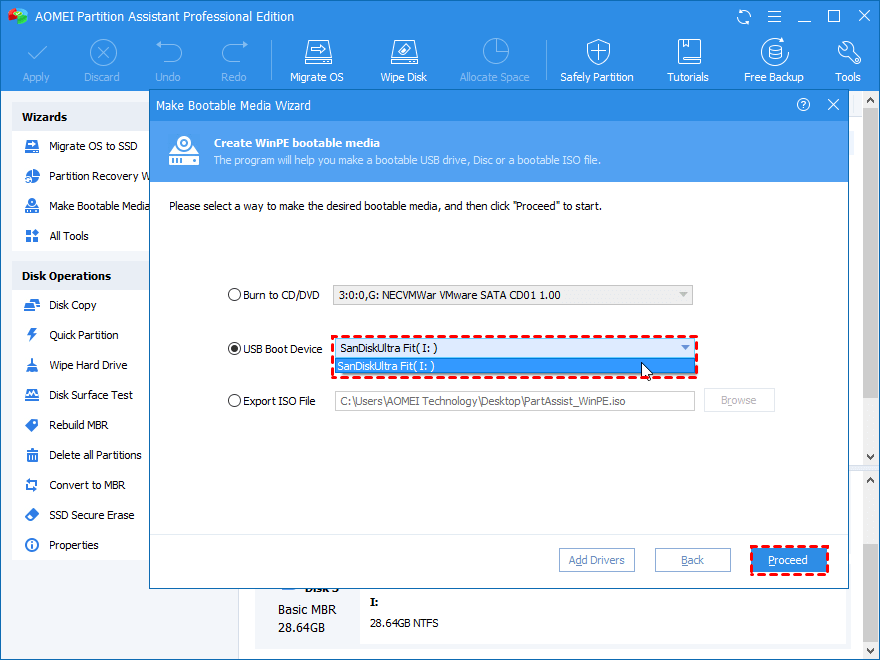
Step 3: Keeping your requirements in mind, select burn to CD/DVD, USB Boot Device, or Export ISO File. Now, tap on the “Proceed” button.
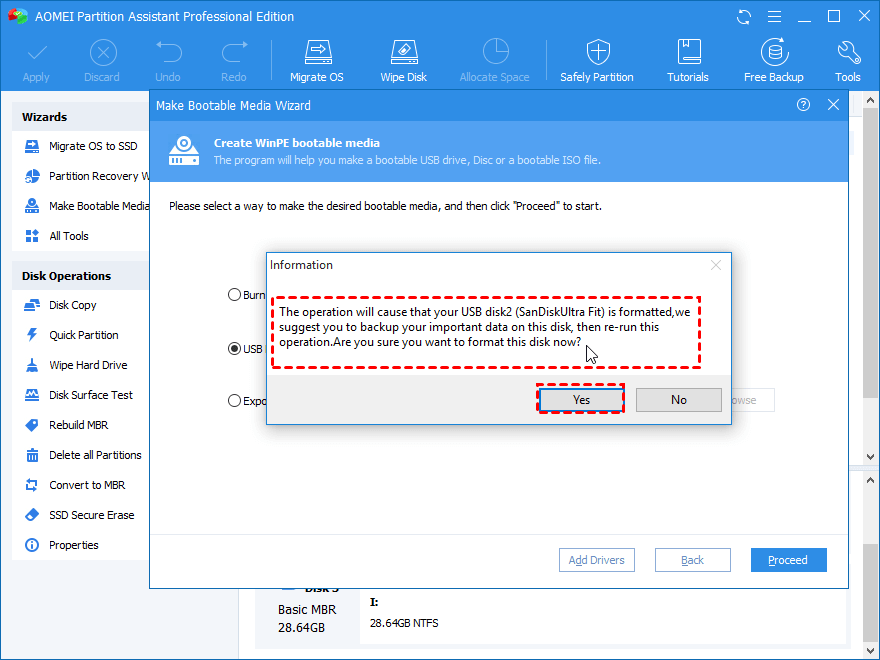
Step 4: Now, format the USB drive. Create a separate backup if it contains important data. Then, redo.
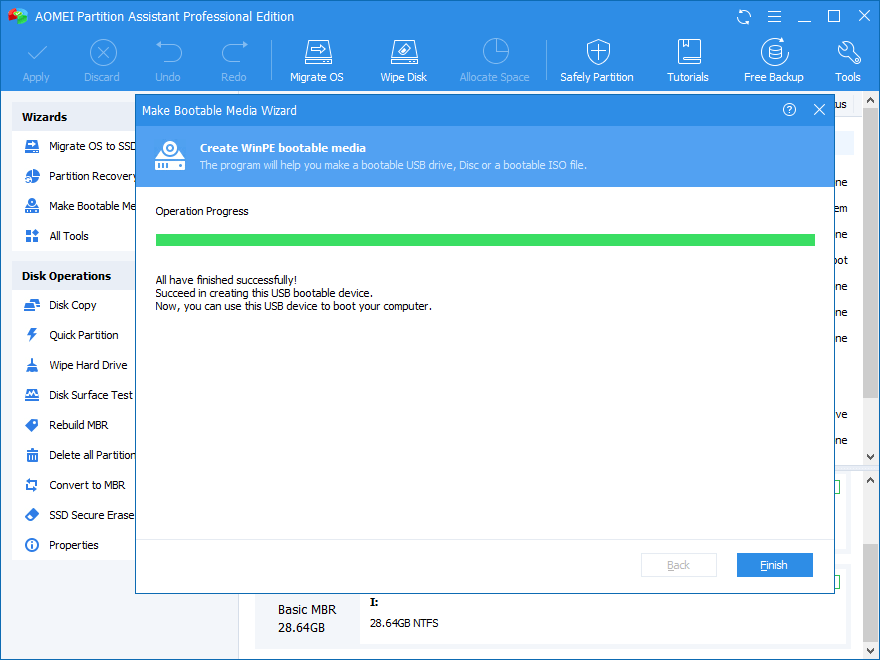
Step 5: Wait until the program creates a bootable WinPE USB drive. It can take a few minutes. Once done, click on “Finish” to close the window.
Pros
A number of features are available to manage your disk partitions.
Perfect tool for creating a bootable Windows USB drive.
Compatible with Windows XP, Vista, 7, 8, 10, and 11.
Cons
Dynamic to basic disk conversion is not supported in free version.
Some useful features are only available in the paid version.
5. MiniTool Partition Wizard
This is the fifth-best free bootable partition manager. MiniTool Partition Wizard is a perfect software to create, delete, format, resize, merge, and split partitions in a matter of minutes. Furthermore, it offers support for wiping partitions, running a surface test, or checking for errors in the file system.
Price: $109 (for 3 PCs for 1 year), $159 (for 5 PCs for a lifetime), $259 (for 1 PC/Server for a lifetime)
How To Use MiniTool Partition Wizard?
Follow these simple steps to create a partition on different Windows OS.
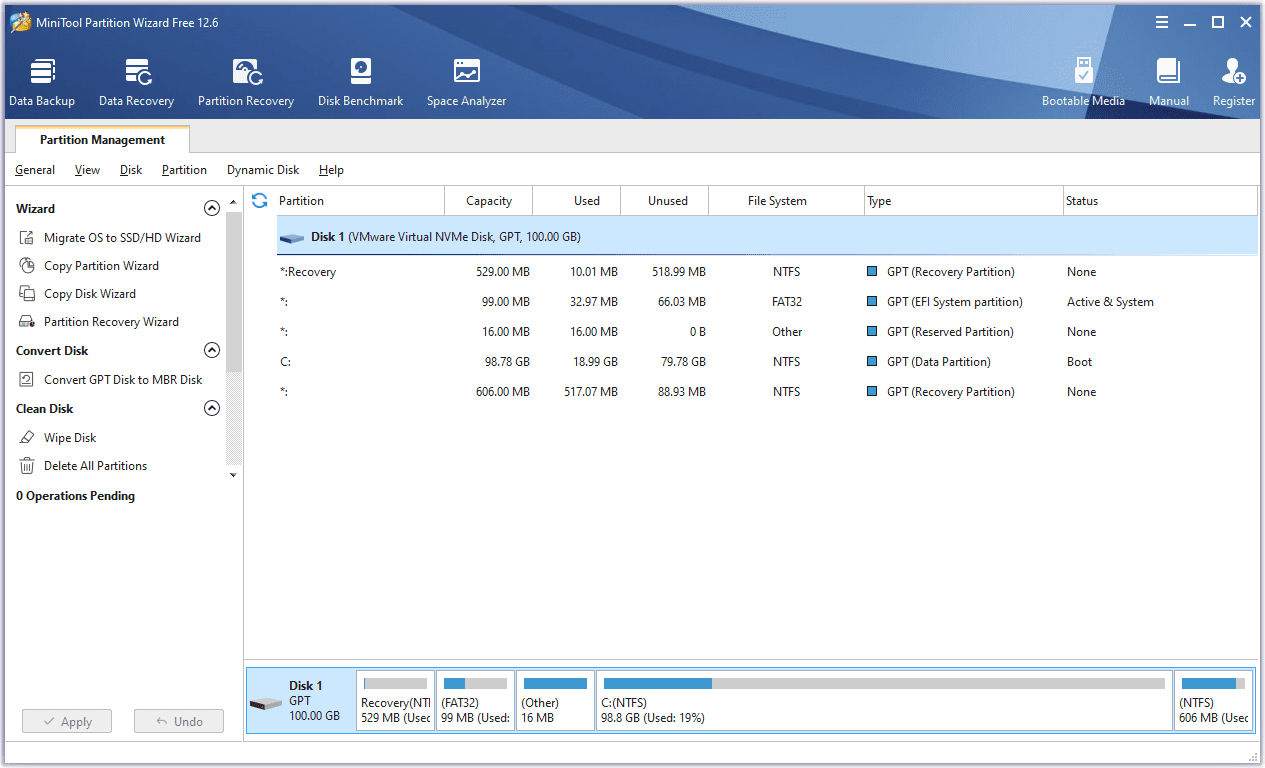
Step 1: Download, install and launch this tool.
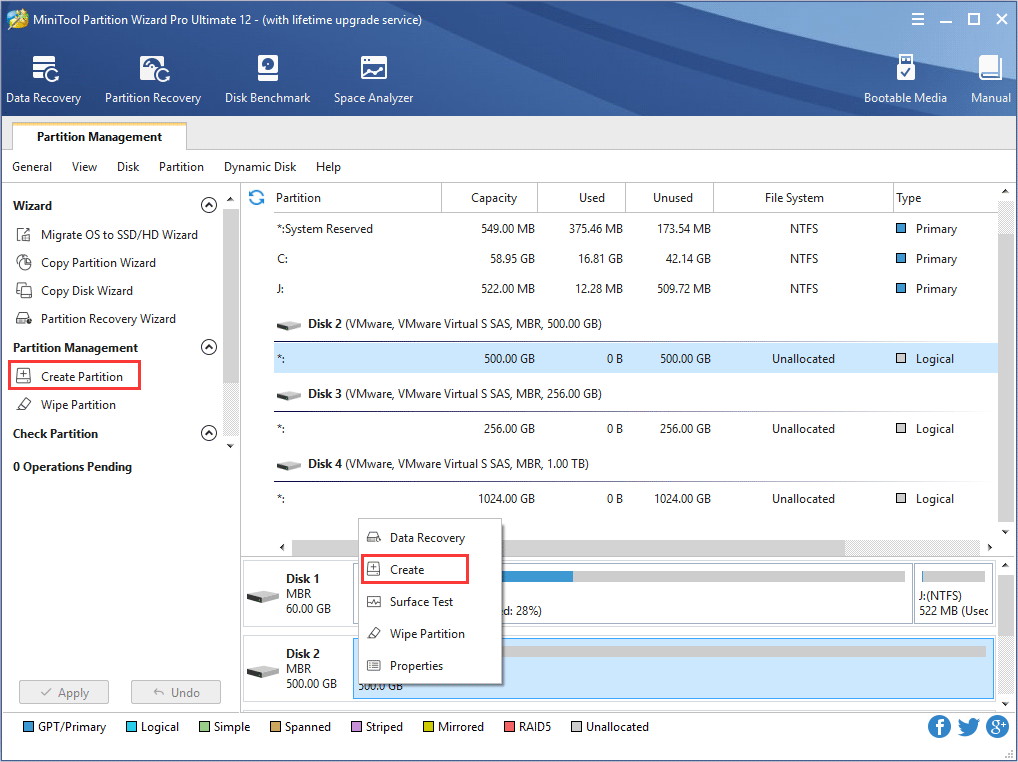
Step 2: Go to the left bar of the software screen and hit the “Create Partitions” option. An alternative way is to click on an unallocated volume and select “Create.”
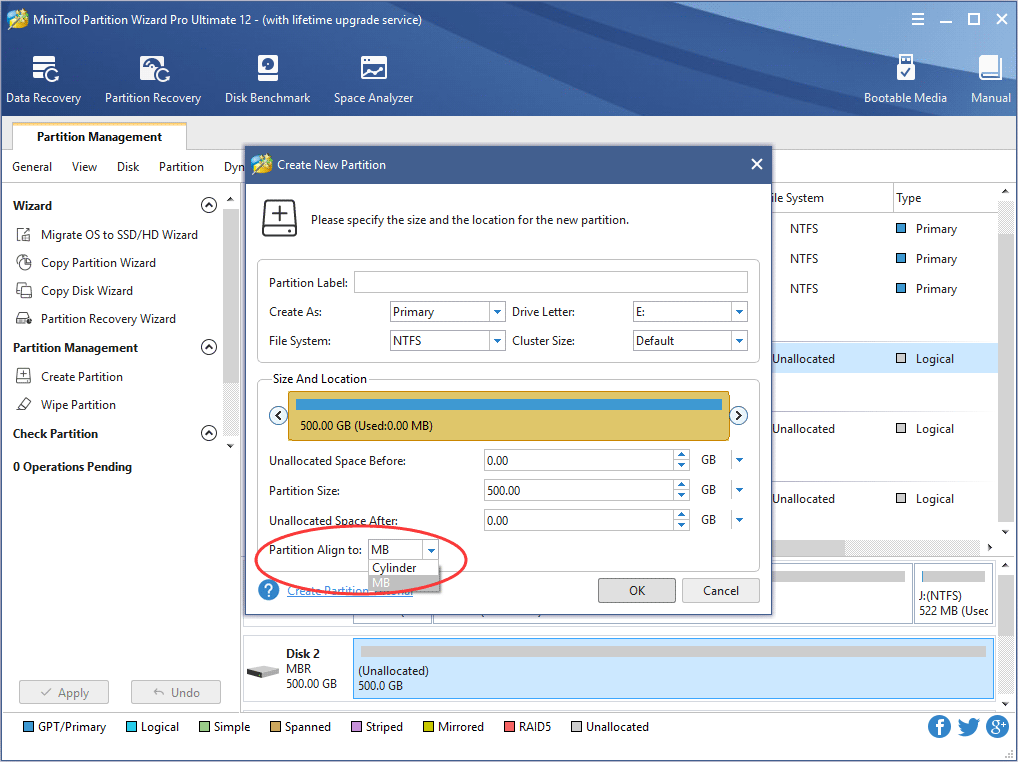
Step 2: Now, it is time to set different parameters, including partition type, partition label, file system, cluster size, drive letter, and partition alignment, as shown below. Once you set all the parameters, hit the “OK” button.
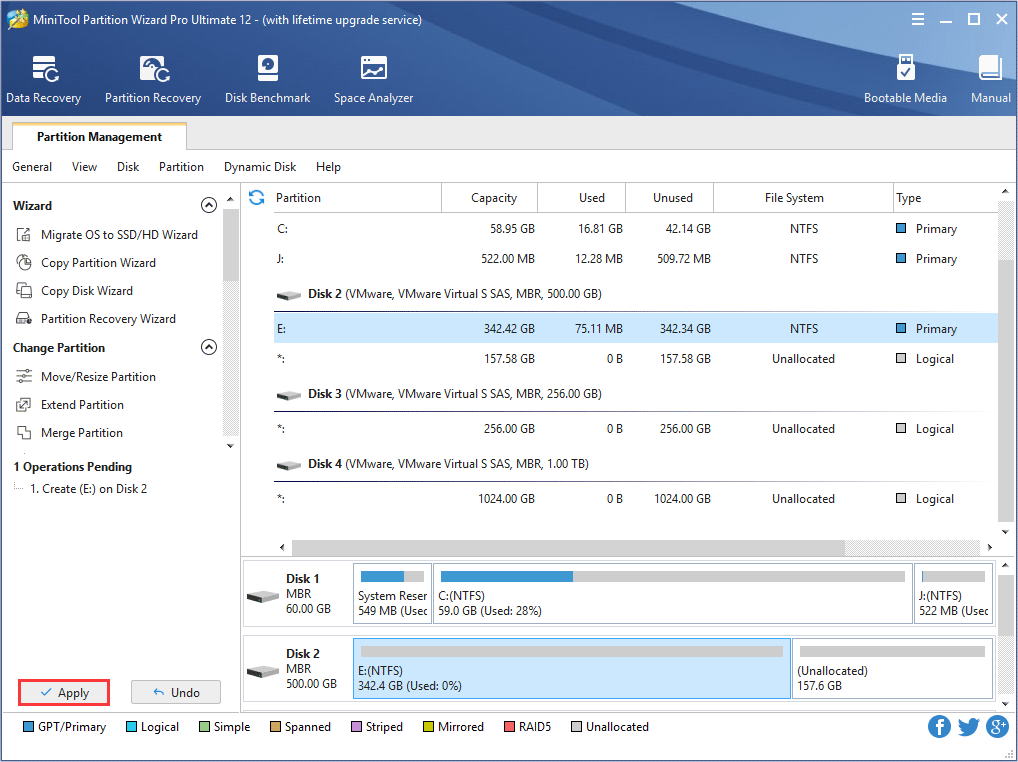
Step 3: As soon as a new partition is created, confirm the changes by tapping on the “Apply” button.
Pros
You don’t have to restart for extending the system partition.
The user interface and all functions are easy to use.
Performs well on all systems with modern Windows versions.
Cons
While setting up, it may add another program to your system.
Dynamic disks dealing is only available in the paid version.
Part 3. How to Recover Files from Unbootable Hard Drive?
Do you want to recover important files from an unbootable disk? Unaware of how to proceed? Searching for a credible program to help you get the job done? Recoverit should be your number-one choice.
The reason why you should trust this third-party software is that it recovers your files 95% of the time. Moreover, virus-free data recovery, free tech support, and a 7-day satisfaction guarantee make you feel confident about it. Apart from that, it supports more than 2000 devices and over 500 data recovery scenarios with 1000+ file formats. Let’s see how you can use Recoverit.
Step-By-Step Guide
Download and install this software and follow the steps below. Before you recover files, you will have to create a bootable media. Then, you can perform efficient data recovery by accessing data from the bootable media.
For Windows XP/Vista/7/8/10/11
For macOS X 10.10 or later
Step 1: Enter BIOS settings by turning on your system and pressing the BIOS key, e.g., F12, F10, or F2. Different systems offer BIOS settings with different keys.
Step 2: Now, turn on your computer after plugging in the bootable media. Select “Deleted Files Recovery”.
Step 3: Now, choose the desired unbootable hard drive. Press the “Start” button.

Step 4: Now, Recoverit will perform auto scanning to find your lost files. If you can’t find a specific file you wish to get back, try proceeding with “All Around Recovery.” The bottom bar shows the scanning progress until it is completed.

Step 5: You can preview the files after scanning the drive. Now, tap on “Recover” and save the restored files on your computer.

Takeaway
It doesn’t matter if you want to create, expand, shrink, format, merge, or delete disk partitions, you can count on the above listed bootable partition managers. If you want to get lost or deleted files back from unbootable hard drives, there is nothing better than benefiting from Wondershare Recoverit. With millions of active users worldwide, this data recovery software is helping us uncover wonders. Try it and you won’t be disappointed.
For Windows XP/Vista/7/8/10/11
For macOS X 10.10 or later


