

Thinking about how to remove Dropbox from your Mac? You're in the right place. Maybe you don’t need it anymore. Or you want to free up space. Perhaps you found a better alternative. Whatever your reason, uninstalling Dropbox from your Mac is simple. But you must follow all steps to avoid leftover files. Let's explore how to delete Dropbox from Mac completely.
Uninstalling Dropbox from your Mac can be necessary for various reasons. Some users might find it redundant or prefer other cloud services. It's also possible that you need to remove Dropbox to solve storage issues.
Removing Dropbox on Mac can also help improve your device's performance. Ensuring a clean uninstallation is crucial to avoid any leftover files or settings. This guide is here to help!
Try Recoverit to Recover Permanently Deleted/Lost Data on Mac
![]() Security Verified. Over 7,302,189 people have downloaded it.
Security Verified. Over 7,302,189 people have downloaded it.
In this article
Part 1: Why Uninstall Dropbox From Mac?
You might wonder why you should remove Dropbox from your Mac. There are several common reasons why users choose to uninstall Dropbox:
- You don’t use it anymore: If Dropbox is no longer serving its purpose for you, it makes sense to remove it and free up some space.
- Need for more storage space: Dropbox can take up a significant amount of storage on your Mac. By uninstalling it, you can reclaim valuable space.
- Performance issues: Sometimes, Dropbox can slow down your Mac, especially if it's running in the background and syncing files.
- Security concerns: If you're worried about the security of your data, removing Dropbox might be a step towards a more secure system.
- Switching to another cloud service: If you have found a better alternative to Dropbox, it makes sense to uninstall Dropbox and switch to the new service.
- Reducing startup time: Having Dropbox running on startup can slow down your Mac’s boot time. Removing it can help speed up your Mac’s startup.
- Avoiding duplicate files: If you have duplicate files on Dropbox and other cloud services, it can be confusing and take up extra space.
- Clearing out old accounts: If you have multiple Dropbox accounts and want to streamline your cloud storage, removing Dropbox from your Mac can help.
These are some of the common reasons why users might want to uninstall Dropbox from their Macs. Each reason is valid and can help improve your overall Mac experience.
Part 2: Is It Possible To Remove Dropbox From Mac Completely?
Yes, it's possible. But you must follow the right steps. Dropbox integrates with your system. So, simply deleting the app won't remove all files. To completely uninstall Dropbox from Mac, follow this guide. We’ll cover all steps needed. This ensures no leftover files.
Uninstalling Dropbox in Mac requires thoroughness. Simply deleting the app won’t suffice. Some files and settings may remain. To delete Dropbox from Mac completely, you must follow specific steps. This guide will detail each step. This will help you remove Dropbox on Mac effectively.
Completing the uninstallation process ensures no residual files. This means Dropbox is entirely removed. This can help prevent any potential issues. Removing Dropbox completely from Mac is possible by following the steps outlined here. Ensuring all files are removed is crucial.
Part 3: How To Uninstall Dropbox In Mac
Removing Dropbox from your Mac can be easy. Just follow these steps to make sure all related files are deleted.
Follow these steps to uninstall Dropbox in Mac.
Step 1: Force Quit Dropbox
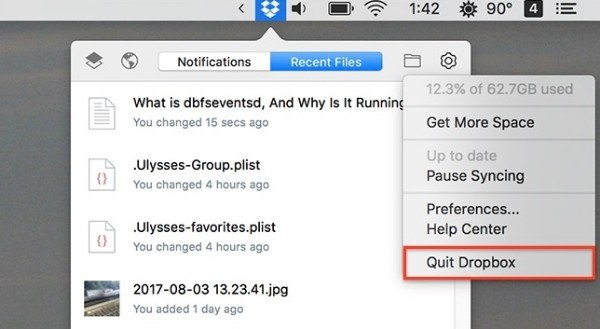
First, make sure Dropbox isn’t running. Click on the Dropbox icon on menu bar. A dropdown menu will appear. Select “Quit Dropbox” from this menu.
This will ensure that Dropbox is not active while you uninstall it. If Dropbox is still running, you may encounter errors while trying to remove it.
Step 2: Remove Dropbox From Applications
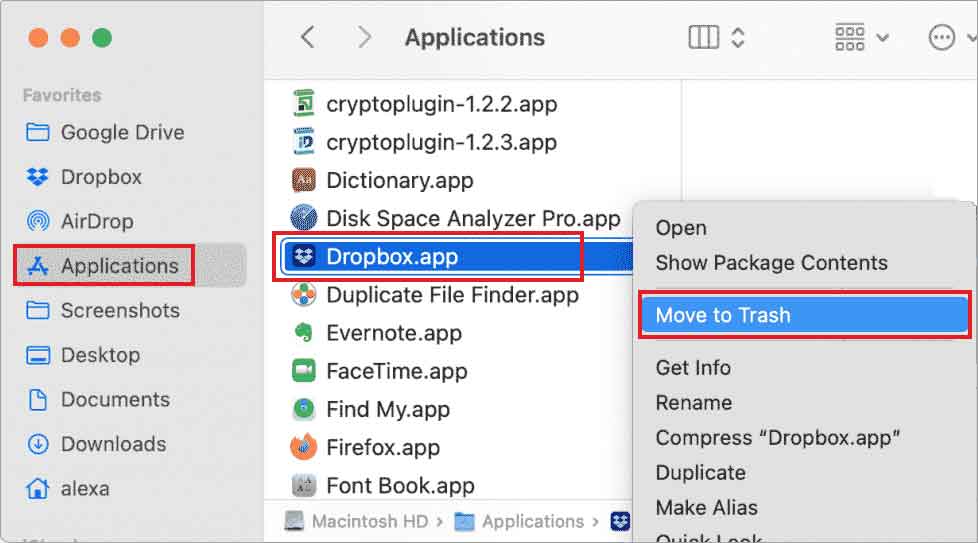
Next, open Finder. Go to the “Applications” folder. Locate the Dropbox app icon. Click and drag the Dropbox icon to the Trash bin in your Dock. This moves the app to the Trash, but it is not yet completely removed from your system.
Step 3: Delete Dropbox Folder (Optional)

To ensure all Dropbox files are removed from your Mac, you can delete the Dropbox folder. Open Finder, navigate to your home folder, and locate the Dropbox folder. Once found, click and drag the Dropbox folder to the Trash bin. This step is optional but recommended for a complete uninstallation, as it will remove all files stored in your Dropbox folder on your Mac.
Step 4: Empty The Trash
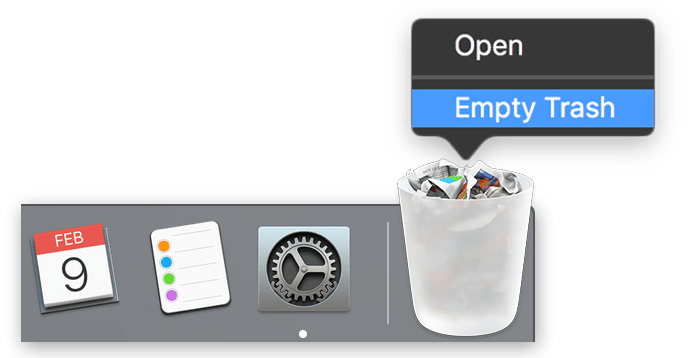
To permanently erase Dropbox from your Mac, you need to empty the Trash. Right-click on the Trash icon. A menu will appear. Select “Empty Trash” from this menu. Confirm the action if prompted. This will permanently delete the Dropbox application and any files you moved to the Trash earlier.
Step 5: Remove Dropbox From Login Items
To prevent Dropbox from automatically starting up when you log in, you need to remove it from the login items.
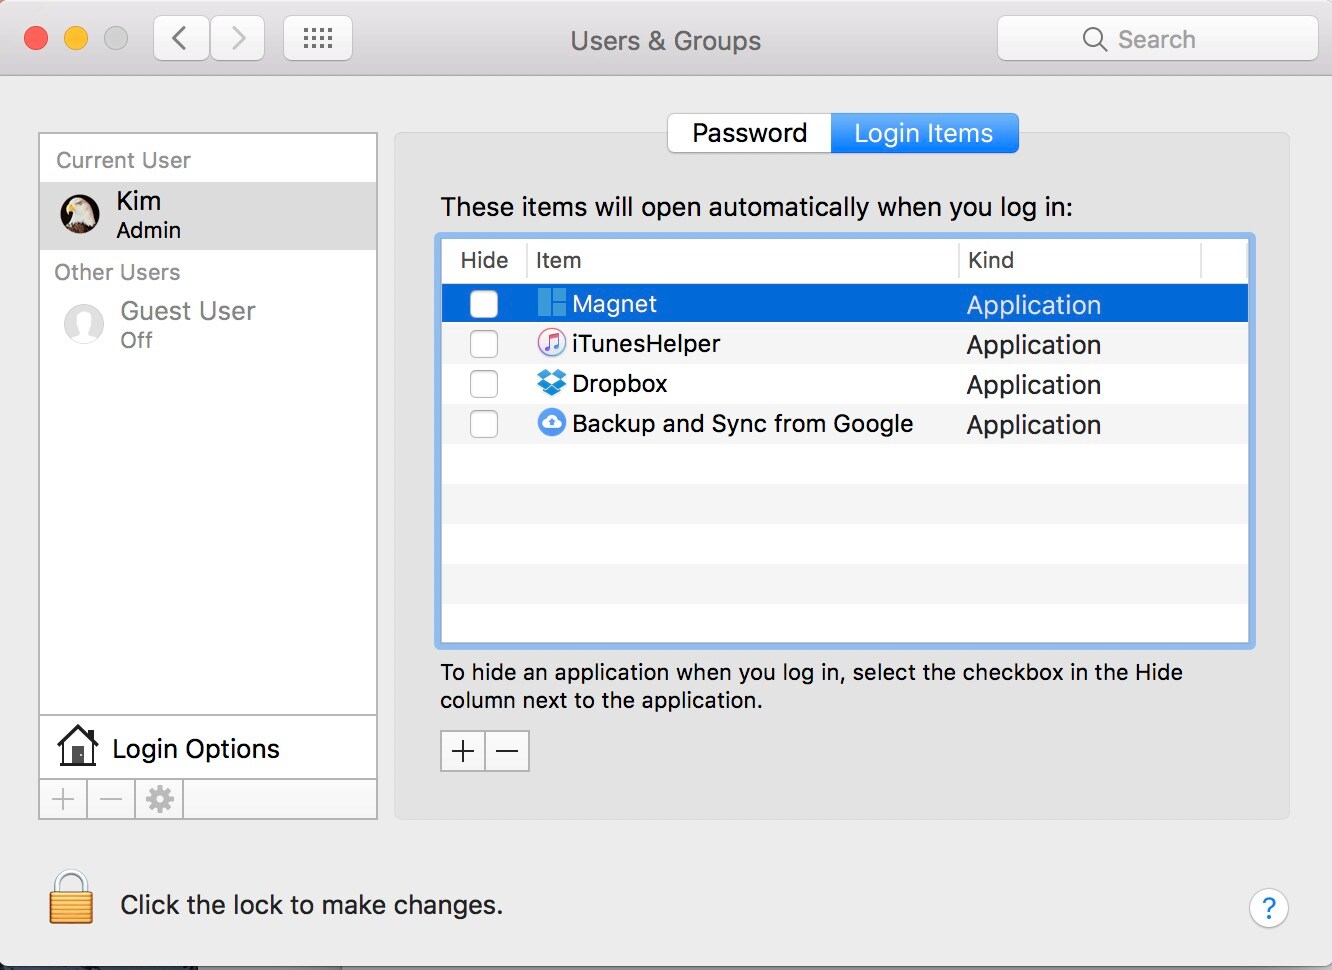
To open “System Preferences,” click the Apple icon in the top-left corner of your screen and select “System Preferences” from the dropdown menu. In System Preferences, navigate to “Users & Groups.” Select your user account from the left sidebar and click on the “Login Items” tab.
Here, you will see a list of items that open automatically when you log in. Locate Dropbox in this list. Select it and click the “-” button below the list to remove it. This ensures that Dropbox won’t start automatically the next time you log in.
Part 4: Lost Important Data On Mac?
Recoverit is a data recovery tool. If you lost data while uninstalling Dropbox, Recoverit can help. It can recover deleted files. This tool is designed to restore files that you may have accidentally deleted or lost during the uninstallation process. It's user-friendly and reliable, making it a valuable tool for anyone concerned about data loss.
Recoverit can recover various types of files, including documents, photos, videos, and more. It works by scanning your Mac for any recoverable data and allows you to preview the files before restoring them. This ensures that you can selectively recover only the files you need, saving time and effort.
With Recoverit, you don't have to worry about losing important data while removing Dropbox from your Mac.
Here are some key features of Recoverit:
- File Recovery: Recoverit can recover various types of files, including documents, photos, videos, and more. This is useful if you accidentally delete important files while uninstalling Dropbox.
- Deep Scan Technology: Recoverit's deep scan feature can find traces of deleted files even in challenging situations. This ensures that no file is left behind.
- System Crash Recovery: If your Mac crashes during the uninstallation process, Recoverit can help recover files from a corrupted or unbootable system.
- Wide Device Compatibility: Recoverit supports recovery from various storage devices like HDDs, SSDs, external drives, SD cards, USB drives, and more.
These features make Recoverit a reliable tool for recovering lost data during the uninstallation of Dropbox from your Mac.
To use Recoverit:
- Download and install Recoverit. Open the app. Select the drive to scan.

- Wait for the scanning process.

- Preview and recover your files. It’s a reliable tool to avoid data loss.

Related Video >>: How to Recover Unsaved/Lost Illustrator Files?
Using Recoverit can help recover lost data. It's especially useful if you accidentally delete important files. Ensuring your data is safe is crucial. Recoverit offers an easy solution.
Part 5: Tips To Erase Dropbox From Mac
Ensuring Dropbox is completely removed from your Mac involves more than just deleting the app. Here are some tips to help you erase Dropbox from Mac thoroughly:
- Clear Browser Cache: If you've used Dropbox via a browser, clearing the cache can help remove any residual files.
- Check for Leftover Files: Sometimes, Dropbox files can linger in unexpected places. Use Finder to search for any remaining Dropbox files and delete them.
- Remove Dropbox Extensions: If you have Dropbox extensions in your browser, make sure to remove them. This will prevent any leftover data from the extensions.
- Restart Your Mac: After uninstalling Dropbox, restart your Mac. This helps ensure all changes take effect.
- Use Third-Party Cleaners: There are third-party cleaning tools that can scan your Mac for any leftover files related to Dropbox. Using these tools can help ensure complete removal.
- Check System Preferences: Make sure there are no Dropbox-related settings left in your System Preferences. This can include things like startup items or syncing settings.
- Delete Temporary Files: Sometimes, temporary files created by Dropbox can remain on your system. Use Finder or a cleaning tool to locate and delete these files.
- Verify Cloud Account Settings: If you linked Dropbox with other cloud services, check those accounts to ensure they no longer have Dropbox integration settings.
Following these tips will help ensure that Dropbox is fully erased from your Mac. This will free up space and improve your device's performance.
Conclusion:
Uninstalling Dropbox from Mac is easy if you follow the steps. Ensure you force quit the app, remove it from Applications, and delete all related files. Use the Recoverit tool if you lose any important data. Remember to remove Dropbox from Login Items. Follow the tips to ensure no files are left behind. Now you know how to remove Dropbox from Mac. Enjoy your clean and organized Mac.
Removing Dropbox on Mac can free up space. It can also improve your device’s performance. Ensuring complete removal is crucial. Follow this guide to uninstall Dropbox in Mac effectively.
After uninstalling Dropbox, you’ll notice improvements. These might include more storage space and better performance. Completing the uninstallation process is essential. This ensures no leftover files or settings.
Try Recoverit to Recover Lost Data on Mac
![]() Security Verified. Over 7,302,189 people have downloaded it.
Security Verified. Over 7,302,189 people have downloaded it.
FAQ
-
1. Can I reinstall Dropbox later?
Yes, you can reinstall Dropbox anytime you want. Just visit the official Dropbox website and download the installer. Follow the on-screen instructions to reinstall the app on your Mac. Make sure you log in with your Dropbox account to access your files and settings. Reinstalling Dropbox is a straightforward process that can be completed in a few minutes. -
2. Does uninstalling Dropbox delete my files?
No, uninstalling Dropbox from your Mac does not delete your files. Your files will remain in your Dropbox account online. You can access them from any device by logging into your Dropbox account. If you have synced files on your Mac, they will still be available online. To ensure you don't lose any data, make sure all your files are synced before uninstalling Dropbox. -
3. How do I unlink Dropbox from my Mac?
To unlink Dropbox from your Mac, open the Dropbox app and go to Preferences. Click on the Account tab and select "Unlink this Dropbox." This will disconnect your Dropbox account from your Mac. Your files will remain in your Dropbox account online, but they will no longer sync with your Mac. Unlinking Dropbox is useful if you want to stop using the app without deleting it. -
4. Is there any other way to delete Dropbox from Mac?
Yes, there are other ways to delete Dropbox from your Mac. You can use third-party uninstaller apps to remove Dropbox and all associated files. These apps can help ensure that no leftover files remain on your Mac. However, following the manual steps provided in this guide is sufficient to remove Dropbox completely. Third-party uninstallers offer an alternative method for users who prefer automated solutions.
 ChatGPT
 Perplexity
 Google AI Mode
 Grok
Grok


