TL;DR:
Wondershare Recoverit is the recommended overall data recovery software due to its intuitive interface and support for over 1,000 file formats, while alternative tools cater to specific technical requirements, operating systems, and budgets.
● Open-source tools like PhotoRec and TestDisk are entirely free and support Windows, Mac, and Linux, but they require technical expertise; notably, TestDisk strictly recovers entire partitions and file systems rather than individual files.
● For complex data loss, R-Studio and Data Rescue provide advanced capabilities such as damaged RAID configuration recovery and bootable drive creation, though Data Rescue comes with a steep $399 annual subscription.
● Windows-exclusive options include Recuva for budget-friendly, simple file retrieval with limited format support, and DiskGenius, which combines partition management with file recovery but features a difficult-to-navigate interface.
Ask AI for a summary
 ChatGPT
 Perplexity
 Gemini
 Claude
 Grok
Grok
No one likes to lose important files, which is why having professional data recovery software is essential. Sometimes, your systems might experience unforeseen events like data loss. This could occur in many ways, like accidental deletion, data corruption, virus attacks, and many more catastrophic situations. Therefore, data recovery software will ensure you have access to your lost files as quickly as possible.
This article will help you pick the best professional data recovery software and handy steps to use each of these favorable file recovery professional software. This article will cover the following:
Top 9 Professional Data Recovery Software
- 1. Wondershare Recoverit Data Recovery (Windows, Mac)

- 2. PhotoRec (Windows, Mac, and Linux)
- 3. R-Studio (Windows, Mac, and Linux)
- 4. Recuva (Windows)
- 5. Data Rescue (Windows & Mac)
- 6. DiskGenius (Windows)
- 7. Stellar Data Recovery (Windows & Mac)
- 8. TestDisk (Windows, Mac, and Linux)
- 9. Remo Recover (Mac)
Below, we’ll review our top 9 choices for professional file recovery. These tools cover many file formats, including documents, images, videos, and many more, to ensure you don’t lose any data. So now that you know what to expect, let’s begin.
1. Wondershare Recoverit (Windows & Mac)

Won the medal of "Best File Recovery Software" from the G2 Crowd Report, Recoverit Data Recovery Free is obviously a top-rated and reliable data recovery tool for Windows 10/11. It also works well on Windows 8/7/Vista and Windows Server 2003/2008/2012/2016.
This is a data recovery specialist within affordable price ranges. It works flawlessly with many storage devices like USB flash drives, camcorders, memory sticks, and hard drives. Recoverit supports over 1000 file formats and systems like FAT, APFS, NTFS, and more.
The steps to recover data from this professional data recovery software is relatively easy, and it offers a preview feature, which isn’t common with most data recovery software. It has a free version that allows users to recover up to 100MB of data. However, you can subscribe to the pro version to recover more files.
Key Features
| Features | Description |
| Universal support | Supports recovery of over 1000 lost or deleted file types from various storage devices. It also handles the recovery of data lost through multiple scenarios like formatting, accidental deletion, and malware attack. |
| Crashed Computer Recovery | Recoverit can rescue your data even when faced with the blue screen of death or during various computer crashes. |
| Advanced video repair and recovery | Offers video repairs through its patented video fragment file recovery technology. It would scan, gather, and match the video fragments allowing you to recover the full video. |
| Filter and recovery during scanning | Users can filter results during the scan to speed up the process. There is also the option of previewing after scanning before recovery. |
Operation Steps
This section will explain how to use Wondershare Recoverit to recover your deleted or lost files. Follow the simple steps outlined below.
- Download and install Recoverit on your PC to get your data back.
- Launch Recoverit and choose a location disk to begin.
- This professional data recovery software will scan the disk to search for lost files.

- You can filter your results or choose to stop the scan midway if you have already recovered the lost file.

- Preview files and select the lost files you want to recover.

- Choose a new location to store your recovered files and then hit the ‘recover’ button to proceed.

Video Tutorial on How to Recover Files from Hard Drive?
Try the Best Professional Data Recovery Software
 Security Verified. Over 7,302,189 people have downloaded it.
2. PhotoRec (Windows, Mac, and Linux)

PhotoRec is another powerful data recovery specialist that offers impressive file recovery capabilities. It supports various operating systems, and as long as it’s a traditional hard drive or digital camera, PhotoRec will recover your lost data in no time.
It gets better! This file recovery professional software can recover more than just images despite its name. It is compatible with over 480 file extensions and uses a non-destructive data recovery method. This prevents the software from writing to the same storage device it is recovering from. As a result, you can use PhotoRec to recover fragmented files on your hard drive in some unique cases.
Key Features:
| Features | Description |
| Price | PhotoRec is free to use as no pro version is needed to access the professional data recovery software. |
| Open Source | This is an open-source application, so that developers can tweak it to their preference. |
| Compatibility | PhotoRec is compatible with every OS. It is compatible with Linux, Windows, and Mac. |
| Supported File Systems | It supports over 400 file extensions and systems like FAT, HFS+, exFAT, and more. |
| Multi-language Support | The support forum offers multi-language support like German, English, and French. |
Operation Steps
PhotoRec is a data recovery specialist you can use to recover lost videos, photos, and documents. Follow the carefully outlined steps below to learn how to use PhotoRec for data recovery.
- Download and launch PhotoRec on your PC.
- Type ‘sudo photorec’ on yourPC and then hit the ‘enter’.
- Choose the media storage device you want to scan and recover lost data.

- Once you select the storage device, identify the type of file structure the storage device uses.

- After identifying the file structure, choose the drive location where you would like to recover the file.

- The lost data scan will begin and save the recovered files to the selected location.
3. R-Studio (Windows, Mac, and Linux)

This comprehensive data recovery specialist is ideal for experienced users who can utilize its extensive and powerful features. It is a professional data recovery software and therefore requires users to have some technical experience. It supports most file systems and partition layout schemes to ensure your file is recovered.
This file recovery professional software also supports damaged or deleted partitions during recovery. Rather than guide users through the data recovery process, this software allows users to begin recovery in different tabs. In addition, you can filter recovered files by their modification time, creation time, extensions, and many more features.
Key Features
| Features | Description |
| Remote data recovery | you can recover files over the network on various OS like Linux, Windows, and Mac. |
| Scanning Process Preview | It displays the different elements detected while scanning for an object, like boot records, FAT records, and files of recognized kinds. |
| Recover data from damaged RAID setups | It can recover data from damaged RAID configurations. It also includes a preview feature to view recovered data and support multiple file systems. |
| SMART data monitoring | It monitors your drive’s SMART data, including eMMC, HDDs, and SSDs. It will notify you of any fault detected, allowing you to create data backups if necessary. |
| Advanced data recovery algorithm | It can recover files not recognized in the file system metadata or files not found in the disk scanning procedure. Users can also search for deleted or lost partitions. |
Operation Steps
- First, download R-Studio and open the install file to proceed.
- Once the file opens, hit the ‘next’ button and follow the simple instructions to proceed with the installation.
- After installation, launch the software and choose the partition or drive with the lost or deleted files. After selecting the drive, click ‘scan.’

- If you’re a technical user, you can customize the scan parameters to determine the part of the drive to be scanned.

- Next, click the ‘show files’ option while the scan is going on.

- You can also use the ‘find/mark’ option to find and mark files for recovery based on the file type.

- After the scan, click ‘recover marked’ to recover the files you want.

- R-Studio will require you to choose an output location, select a new location to save your recovered files, and then hit the ‘ok’ button.

4. Recuva (Windows)

Recuva is a freeware professional data recovery program you can use to recover documents, music, pictures, videos, and other types of files. It supports various storage devices like iPods, memory cards, hard drives, USB sticks, and many more. Most people prefer this data recovery software for its straightforward user interface, ease of use, and low subscription cost.
This data recovery specialist comes with a preview screen that allows you to view the files you would like to recover before completing the recovery process. Unfortunately, the file format support isn’t vast, so users are limited to recovering only formats supported by Recuva.
Key Feature
| Features | Description |
| File Support | It supports various file types for recovery, including rewritable emails, documents, media files, music, images, and videos. |
| Flexible recovery options | Users can recover files from damaged and formatted disks. |
| Deep scan option | Software identifies and recovers deleted and buried files using Recuva’s advanced deep scan mode. |
| Safe file overwriting | It safely overwrites or deletes files no longer in use. |
| Data backup | It prevents data loss through enhanced drive partitioning and detection. |
Operation Steps
- Start by downloading and installing Recuva on your PC.
- Next, launch Recuva and hit the ‘next’ button to proceed.
- Now, choose the type of file you’re looking to recover. If you have no idea, hit the ‘all files’ option.

- After choosing the file type, tap the ‘next’ button to continue.
- Choose the drive with the deleted files, and Recuva will begin to scan and locate deleted files on the drive.

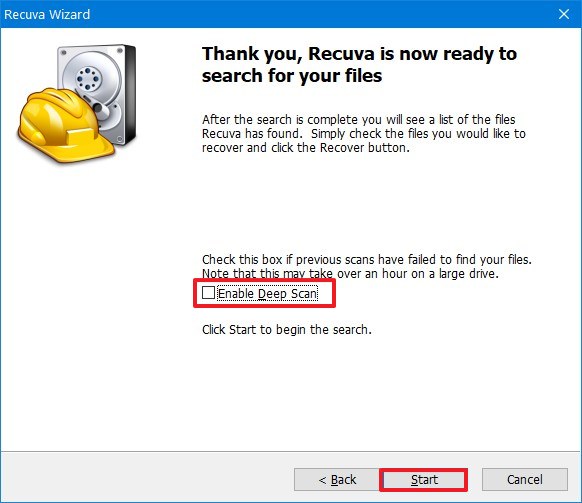
- You could select the ‘deep scan’ option if the first quick scan wasn’t successful.
- After selecting this option, hit the ‘start’ button.
- Once the files are recovered, choose the deleted or lost files you would like to recover and hit the ‘recover’ button.

- Choose a location to recover the file; we suggest an alternate drive to prevent overwriting your file.
- Now, hit the ‘OK’ button, and Recuva will recover your deleted files.

5. Data Rescue (Windows & Mac)

One of the reasons many people love Data Rescue is because of its simple user interface. However, its steep price deters many people from using this professional data recovery software. A single license to utilize this data recovery specialist costs $399 yearly, which is expensive compared to other data recovery software.
Despite its steep price, this file recovery professional software offers users fast scans and recovery speeds. It also provides an improved RAID recovery and several disk tools to ensure secure file deletion and byte-to-byte disk copies.
Key Features
| Features | Description |
| Improved RAID Recovery | It detects and ascertains several RAID configurations |
| Cross Compatibility | It is compatible with Windows and MacOS and can be installed and used with the same license. |
| Fast Scan and Retrieval Speed | It reduces the time spent on a complete scan and retrieves discovered files within seconds. |
| Access Previous Scan Results | If you’ve ended a scan already, it’s quite easy to re-access it. |
| Build a Bootable Recovery Drive | You can build a bootable retrieval drive within Data Rescue in case of system crashes and other issues. |
Operation Steps
- Download Data Rescue; you can find it on the ProSoft Engineering website.
- It comes in a ZIP file; open it and install the professional data recovery software following the steps provided.
- Launch the application and provide your details. The software would then redirect you to the welcome screen. Next, select the ‘start recovering files’.

- Choose the drive you want to scan for lost or deleted data.

- Select a deep or quick scan according to your preference. After choosing the type of scan, hit the ‘start’ button.

- The scan will begin immediately, and you can evaluate the result after the scan is complete. It also offers a ‘search’ function to check particular files amongst your recovered files.

- Choose your preferred files, and then hit the ‘recover’ button, and Data Rescue will get to work to recover the lost data.
6. DiskGenius (Windows)

This is an all-in-one data recovery and partition management solution ideal for professionals and beginners. You can use this professional data recovery software to solve many disk issues. It offers a trial period before users have to subscribe to one of its paid versions. Since partition and data loss problems are usually related, its developers decided to create a data recovery specialist that tackles both issues.
It has many unique features, like recovering data directly from Microsoft Virtual PC Images, Virtual Box, or VMware. It also comes with a hex editor that ensures the analysis of raw disk data.
Key Features
| Features | Description |
| Checks Partition Errors | It can check partition errors to ensure your disk partitions are in good conditions. |
| Recovers deleted partitions | It can recover all deleted and lost partitions in just a few seconds. |
| Rebuild MBR | It can rebuild MBR and partition table and restore lost partitions while also fixing system errors. |
| Disk Management | It can format disks while also creating partitions when you first buy your disk. |
| Clone partition to an image file | DiskGenius can backup your partition and files to an image file and restore them easily whenever you want. |
| Fast scan algorithm | Its advanced and fast scan algorithms are designed to help discover media files and recover them within seconds. |
Operation Steps
- Download and install DiskGenius software on your PC.
- Launch the file recovery professional software and choose the hard drive you would like to recover the file. Select ‘file recovery’ to proceed.
- On the new page, select the ‘Recovery deleted files’ option and tap ‘start’ to scan the hard drive to find deleted and lost data.

- While the scan is going on, you can preview files by double-clicking them. It will show you the file content in its original size.

- Once the scan is complete, select the discovered files and folders you want to recover and then hit the ‘copy to’ option from the context menu.

- Choose a new location to save your recovered files, and DiskGenius will copy the recovered files to the new location.
7. Stellar Data Recovery (Windows & Mac)

Stellar Data Recovery is a professional data recovery software for Mac and Windows. This recovery tool can deal with crashed and unbootable systems that most recovery applications find unrecoverable. It supports common file systems like FAT, NTFS, exFAT, and more. It also allows recovery from USB flash drives, memory cards, SD cards, and more storage devices.
It comes with two paid versions that are identical to use. It ensures recovered files are organized by sorting them according to their type or displaying them in a tree view. This feature can come in handy when looking for a specific folder.
Key Features
| Features | Description |
| Video repair | It will repair and store corrupt videos in popular video formats |
| Mobile data recovery | It helps recover deleted call history, contacts, videos, photos, messages, and calendars from iPhones and iPads. |
| Storage media support | It recovers video and photo files from various storage devices like CF cards, SD cards, and many more. |
| Data and photo recovery tool | It allows users to recover lost data from USB pen drives, SD cards, and hard drives. You can also recover lost and deleted photos from drones, DSLRs, and action cameras. |
Operation Steps
- Start by downloading Stellar Data Recovery on your PC.
- Unzip the downloaded file and install it using the self-instructive wizard.
- Now, launch using its shortcut icon.
- Choose the type of data you would like to recover from the options available and hit the ‘next’ button.

- Select the data loss location and check the ‘deep scan’. Afterward, hit the ‘scan’ button to continue.

- Once the scan is complete, select ‘OK’ to proceed.
- Choose a view tab and expand the structure. Now you can select any file to preview it.

- Select the discovered files you’re looking to recover and tap the ‘recover’ button.
- Choose the drive location where you would like to store your recovered files and click ‘recover’ to proceed.

8. TestDisk (Windows, Mac, and Linux)

This professional data recovery software is designed to recover lost partitions and fix non-booting disks. Therefore, it is the best option for most data-loss situations. However, it comes with a text-only user interface, making it difficult for most users to utilize.
TestDisk doesn’t focus on single files but entire file systems and partition recovery. It will repair boot sectors, fix partition tables, and many more actions to help you access lost files. In addition, it can undelete files from file systems like NFTS, exFAT, and FAT. However, you would have to access the advanced menu, which is difficult for most users.
Key Features
| Features | Description |
| Partition recovery | It quickly scans on-disk structures and compares them to partition tables for entry errors. This tool can recover deleted partitions and rewrite the Master Boot Record (MBR). |
| Fast and easy scans | It is quite easy to use, and the process of recovering lost and deleted partitions is fast. |
| File system repair | It can deal with file system corruptions on FAT12, FAT32, FAT16, NTFS, exFAT, and more file systems. |
Operation Steps
- Start by downloading TestDisk to your PC.
- Now, open TestDisk using the textdisk_win.exe file in the TestDisk folder. Users need administrative privileges to run this professional data recovery software successfully.

- You can choose to create and append a log file on the console window or not create it. Choose the option you prefer and then hit the ‘enter’button.

- The software will ask you to choose a storage media on the next screen. Then, you can use the arrow keys to navigate and select the hard disk drive.
- Now, choose a partition table type and select ‘enter’ to proceed. TestDisk will provide you with a list of partitions on your PC. You can find the partition’s name in square brackets []. Use the arrow keys to choose the partition you want to recover data from.

- Next, navigate to the ‘analyze’ option if you want to recover deleted files and press‘enter.’

- Use the quick search option to begin the scan.

- If this doesn’t work, use the deep scan option.

- TestDisk will ask you to select a folder to save the recovered files. Use the left arrow key to choose a folder and press ‘enter.’
- Once you open the folder, hit the ‘C’ button to recover the lost files to the new location.
9. Remo Recover (Mac)

Because of how dependable Remo Recovery is, it has received many positive user reviews. It has a bright and simple design and is relatively easy to install. In addition, it has many practical features and will help you recover files from various storage devices like memory cards, hard drives, and external drives.
Remo Recover supports over 300 file formats and allows users to preview recoverable files before recovery. It also offers a free version that users can use to evaluate if the software would be a good fit.
Key Features
| Features | Description |
| Powerful drive identifiers | It can thoroughly scan, find, and identify the connected devices. |
| Sector-level scan | It performs a comprehensive scan sector-by-sector to recover your essential data. |
| Dynamic data recovery | Users don’t have to wait till recovery is over to save their files; it will begin to save files while recovery is in process. |
| IDS technology feature | It sorts recovered files using the iDS technology. This is by tags, titles, and hierarchy. This feature makes it easier to search and filter your recovered files. |
Operation Steps
- First, install Remo Recover on your device and launch it to begin recovery.
- On the main screen, select the ‘recover files’ option.
- Choose the location you would like to restore the deleted or lost data from a list of drives and partitions on your PC.

- Afterward, click ‘scan’ to begin scanning the drive.
- Once the recovery scan is complete, you can preview files by simply double-clicking them.

- Remo Recover offers a ‘show deleted’ option that only shows files deleted from the drive.
- Mark the files and folders you want to recover and hit the ‘recover’.

- Choose the location you want to save to and then click ‘OK’ to recover your lost data.

Let’s Check How Can I Choose a Professional Data Recovery Software for You?
How do I know the right data recovery specialist for me? Using professional data recovery software to recover deleted files is a reliable method of addressing unexpected data loss scenarios. However, you might not know the best option for you amongst the 9 best professional data recovery software reviewed above. Below are features you should consider when making your choice.
| Features | Details |
| Price | Users always seek to get what they pay for professional data recovery software. Therefore, although there are many free recovery applications, their features usually pale compared to the paid options. Luckily most paid options like Wondershare Recoverit, Data Rescue, and many more have free or trial versions you can use to evaluate the software. |
| Supported Formats | This is an essential consideration as it determines the type of files you can recover. Therefore, you should look for file recovery professional software that supports thousands of file formats. This ensures you can always recover your lost data irrespective of its file format. |
| Compatibility | The professional data recovery software you choose must support your operating system. Although some data recovery tools support multiple operating systems, you should confirm the file recovery professional software covers your operating system. |
| Features | There are many data recovery tools out there. That’s why checking out their features is essential. Top features include bootable data recovery, an intuitive user interface, fast and easy scan, etc. By choosing a data recovery tool with all the features you need and more, you don’t have to spend on multiple applications. |
| Usability | You shouldn’t find it hard to navigate the professional data recovery tool you choose. It should be intuitive and easy to navigate. If you have to read a lengthy manual to utilize this tool, it might be best to opt for another option. |
| Security | You should also pick a professional data recovery tool that’s virus free and ensures the safety of the files you’re recovering. So many shady websites today distribute malware, it’s essential to avoid them, but that’s not always easy. If you want to avoid these issues, it’s best to stick to the top 9 professional data recovery software featured in this article. |
| Customer Support | The data recovery tool you use to use should provide you with access to technical support. This is important as you might encounter application issues and need help. Whether customer support is available via phone, ticketing, or email, there should be a method to get timely help. |
| Additional Features | The tool you select should be reliable, simple to use, flexible, and scalable while offering features you need for your file recovery needs. In addition, it can have additional features like video repair and recovery, partition management, and more. |
After reviewing these features, we understand why Wondershare Recoverit is your best data recovery specialist. Its intuitive user interface makes data recovery accessible to beginners and professionals alike. Furthermore, this data recovery tool has consistently delivered excellent results, therefore outshining its competition and establishing its position as the best file recovery professional tool for users.
Conclusion
There are many data recovery tools out there. However, most are unreliable, making it difficult to tell the difference. This article reviews the top 9 professional data recovery software; most offer a free version or trial. We also covered the features you should consider to make the right choice for your data recovery needs.