

Having duplicate photos on your Mac is a tricky problem, which will occupy a lot of disk space. The best thing to do is to delete duplicated photos, organize your computer and save valuable disk space. Deleting such photos and recovering important lost photos is a process that you should be familiar with. This article will show you how to delete multiple photos on Mac and how to recover accidentally deleted photos on Mac.
In this article
How to Delete Multiple Photos on Mac?
When you delete a photo from your Mac, it is also deleted from any synced device and cloud storage such as iCloud. You have 30 days in which to recover the photo, otherwise, it will be gone forever.
Where are Photos Stored on Mac?
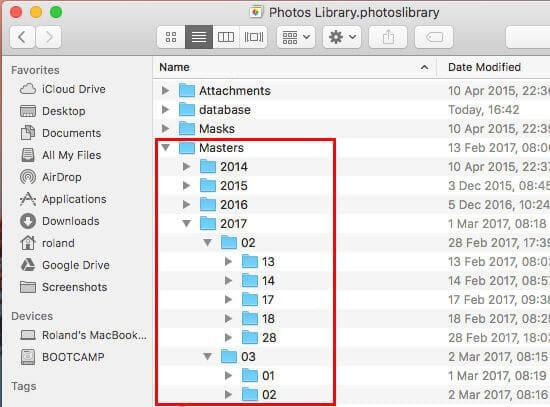
All photos are stored in the "Masters" directory which you can access using the "Go to Folder" command: ~/Pictures/Photos Library.photoslibrary/Masters/
If you want to manually navigate to the folder, follow the steps below:
- Navigate to the "Pictures" folder in the Finder.
- Access the file labeled "Photos Library photos library".
- Right-click on this file and select the "Show Package Contents" option.
- Navigate to the folder named "Masters" and get the image files shown in your Photos app.
How to Delete One Single Photo on Mac?
At times you simply want to delete a single photo and not a full album or collection. Here is how you do about it.
Method 1 – Delete photo using Finder
- Access the Masters folder as shown in the steps above.
- Here you will find the photos arranged by date (day, month, or year). Each folder has images grouped according to the date they were added to the collection.
- Access the folder that you want, and then click on the images to see their previews.
- Select the image that you want to delete and click on "Delete".
Method 2 – Delete Photos using the Photo App
- Launch the "Photos App" and you will be able to see preview thumbnails of all the photos on your Mac.
- Select the picture that you want to delete
- Right-click on the image and click "Delete". You may also hit the "Delete" key on your keyboard or click on "Cmd + Delete" to delete the picture forever.
How to Delete Multiple Photos on Mac at One Time?
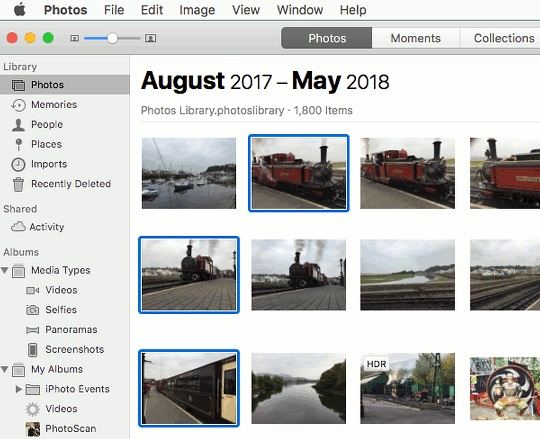
- The best way to delete multiple photos on Mac at one time is to use the "Photos" app.
- Launch the "Photos" app to see all photos that are in your Masters folder.
- Select the photos that you want to delete. You can easily do this by pressing the Command key as you select multiple files.
- Once you are happy with the selection you have made, right-click on any one of them and then click Delete. You may also tap the delete key on your keyboard.
- If you want them deleted without going through the "Trash" folder, simply hit "Shift + Delete".
How to Mass Delete Photos from Album on Mac?
If you want to delete a bunch of pictures from an album on Mac, here is how to do it:
What's an album on Mac?
Mac stores photos on albums that are categorized according to date when the pictures were added. This is so you can easily access the photos using the Photos app. Having pictures in these albums also allows you to easily sync them across multiple devices using iCloud.
How to Delete an Album on Mac?
The best way to delete an album from your Mac is to use the Finder app.
- Click on "Go to Folder" on the Finder, and then type ~/Pictures/Photos Library.photoslibrary/Masters/ Alternatively, you can navigate to the "Pictures" folder, where you will find the file named "Photos Library photos library"
- Now right-click on this file followed by "Show Package Contents".
- Go to the "Masters" folder where you will find all your albums neatly arranged according to date.
- Search for the particular album that you want to delete, select it, and then hit the "Delete" key on your keyboard. You may also right-click on the album and select Delete. Use the "Shift + Delete" combo keys to delete the album without sending it to the "Trash" folder.
You can also delete an album on Mac using the "Photos" app.
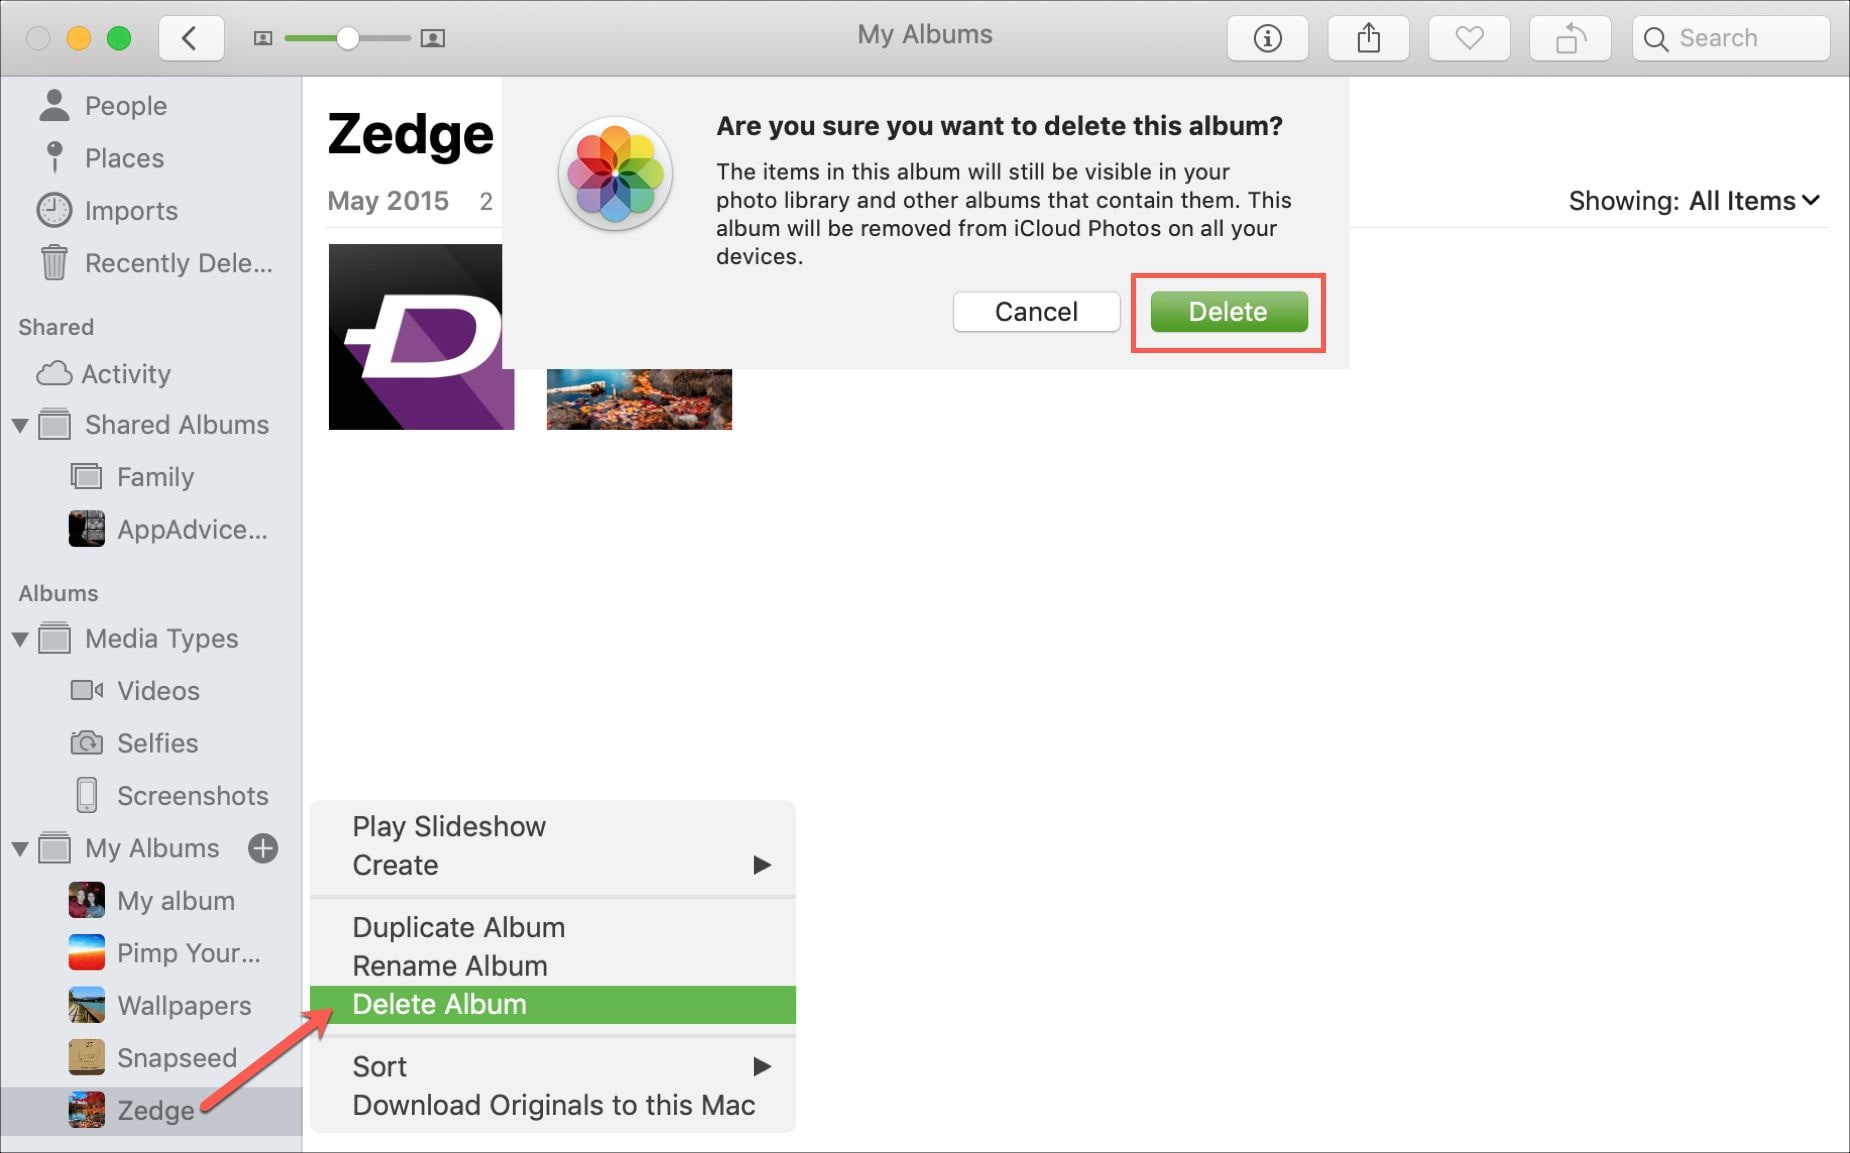
- Launch the "Photos "app and select the album that you want to delete from the left bar on your screen.
- Right-click or Ctrl + Click on the desired album
- From the menu, click on "Delete'.
- The album will instantly be moved to the "Trash".
- You may also use "Shift + Delete" to remove the album without passing the "Trash".
How to Recover Wrongly Deleted Photos on Mac?
How to Recover Recently Deleted Photos on Mac?
What do you do when you accidentally delete important photos from your Mac? Here are the steps to follow when you want to recover recently deleted photos from MacBook Air.
Reasons for important photos loss
- You may have hit the "Shift + Delete" command by mistake.
- Emptied your trash without making a backup.
- Accidentally hit the "Delete" key on your keyboard.
- Power outage.
- Virus corruption.
- Crashed your hard drive.
- Bad partition or poor partitioning of your hard drive.
Recover recently deleted photos on Mac
After deleting photos from your Mac, they are sent to the "Trash" bin, and you can quickly recover them before they are deleted from that folder.
A Mac comes with the feature of accessing recently deleted files, which keeps the files for 30 days before removing them. This built-in feature will assist in finding and recovering the deleted photos.
Step 1: Click on File and navigate down to the "Show Recently Deleted". Click on it to access the "Recently Deleted" album.
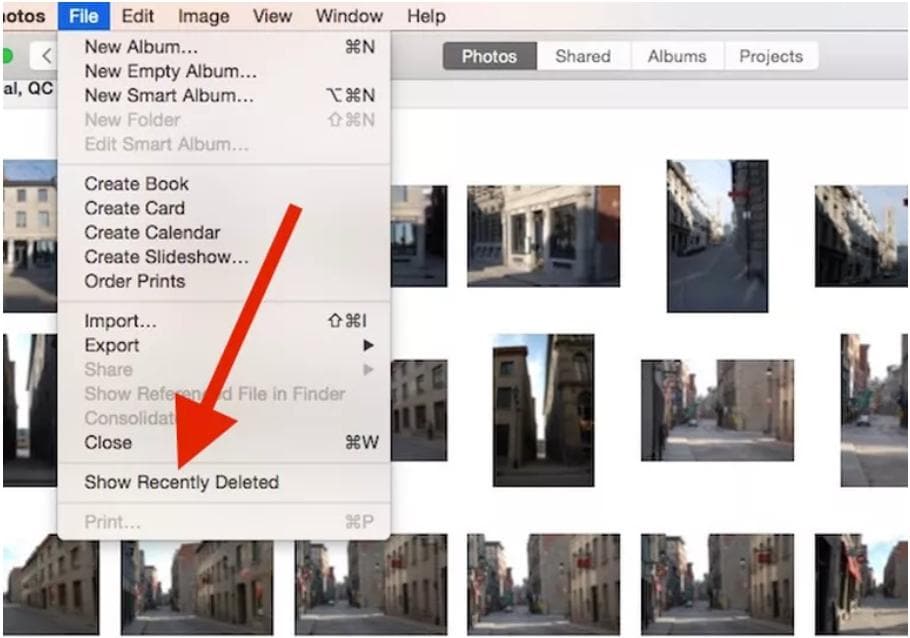
Step 2: Now check for the recently deleted photos, right-click on them and then click on "Restore".
How to Recover Permanently Deleted Pictures on Mac?
When your photos are permanently deleted from your hard drive, you can still recover them if you do not save anything new on your computer after the deletion. The files are still available until they are overwritten by other new files that you may save. Recoverit Mac Data Recovery is a powerful tool that can scan your hard drive for these photo files and help you recover them with ease.
Features of Recoverit Mac Data recovery
Here is a list of some of the powerful features of Recoverit Mac Data recovery:
- Recovers a wide range of files without losing quality
- Works with both Windows and Mac
- Recovers data from Hard disk, external disks, SD Cards, Cameras, and more.
- Can recover files lost through critical errors such as virus infection, an accidental crash of computer, and more.
- It has an easy-to-follow interface that allows you to recover your photos in three simple steps as you will see below.
Step 1: Select the drive to recover photos from
Launch Recoverit Mac Data recovery and then go to the "Recovery" tab. Now select the location where your deleted photos were located.

Step 2: Scan hard drive to find deleted pictures
Click on the "Scan" button and Recoverit Mac Data Recovery will begin scanning the selected location for any deleted photos. You may also select a deep scan to get files hidden deeper in your drive. Wait for the scan to be completed.

Step 3: Preview and recover photos from your Mac
After the completion of the scan, you will be presented with thumbnail previews of the recovered photos. Select the photos that you want and then click on "Recover" and save them on the Mac. Make sure that you save them to a different location to avoid the corruption of the files.

Bonus Tips for Deleting and Recovering Photos
1. Advantages of deleting photos on Mac
You may be having low space on your computer or too many duplicate images. This makes your computer Mac work slower and makes it cumbersome to get an image that you want. Deleting unnecessary images from your Mac streamlines its performance and also helps you organize your images with ease.
2. Tips for deleting multiple pictures on Mac
Always ensure that your images are well placed in albums, even if you store them away from your "Masters" folder. This way you can easily access them and delete multiple images when you no longer need them
3. Tips for recovering important photos
Make sure that you always check your "Trash" bin before your empty it. You should always use the "Recently Deleted" feature in Mac to recover important images within 30 days.
Install and use Recoverit Mac Data Recovery to recover your deleted photos with ease, so you do not lose them forever.
Conclusion
Organizing photos on your Mac requires to delete unnecessary ones and keep important ones. In case you delete important files by mistake, the steps above will help you recover them easily. Always use Recoverit Mac Data Recovery to reclaim permanently deleted photos to your Mac. All services of Recoverit are backed by No Data, No Recovery Fee guarantee


