Having a problem with your Mac can be frustrating, especially when you get an error like "mount:/ failed with 77." This issue usually means your Mac can't access a disk properly. It can happen with both internal and external drives, and it stops you from accessing important data.
Whether it's a Mac disk unmounted issue or a problem with the USB port, we will guide you through the steps to fix it. This article will also help you recover data from an unmounted external hard drive on Mac if needed.
Let's explore how to fix the "mount:/ failed with 77" error and prevent it from happening in the future.
In this article
Part 1: What is the Meaning of Mount Failed with 77?
The "mount:/ failed with 77" error happens when your Mac can't connect to a specific disk. This means your Mac can't read or write data on that disk. This problem can affect both the internal hard drive of your Mac and external drives connected through USB.
This error can be really annoying because it stops you from accessing important files and using your drive normally.
But don't worry, understanding why this error happens is the first step to fixing it. By knowing what causes your Mac to show the "mount:/ failed with 77" error, you can solve the problem faster and get back to using your drive as usual.
Part 2: What Causes the Mac Mount Failed with 72/77 Error Mac?
There are several reasons why you might see the "Mount Failed with 77" or "Mount Failed with 72" error on your Mac:
- Faulty USB Port or Cable: The connection might be bad.
- Disk Errors: The disk itself may have errors or bad sectors.
- Incompatible File System: The disk format might not be supported by macOS.
- Software Issues: Problems with macOS or software updates can cause this error.
- Permissions Problems: Your Mac might not have the correct permissions to access the disk.
- Virus or Malware: Infection can lead to access issues.
- Power Supply Issues: The external drive might not be getting enough power.
Part 3: Fixing the "Mount:/ Failed with 77" Error Mac: Easy Fixes
When you get stuck with the "mount:/ failed with 77" error, it means means your Mac can't access a specific disk. It also stops you from using important files. But don't worry!
In this part, we will go through different methods to resolve the error and get your disk back in working order. Let's dive into the solutions!
Fix 1: Check the USB Port/Cable

Sometimes, the reason your Mac shows the "mount:/ failed with 77" error is simply a bad connection. Start by checking if your USB cable and port are in good condition. Try using a different USB port on your Mac or use another cable. This can often solve the problem if the issue is just a poor connection. Once you've checked and possibly changed the port or cable, re-insert the disk.
If it mounts correctly, then you know the problem was with the connection. This is an easy and quick fix that you can try before moving on to more complicated solutions.
Fix 2: Use the Diskutil Command
If checking the connection doesn't resolve the issue, you can attempt to force mount the disk using Terminal. Terminal is a robust tool included with your Mac that lets you input commands to manage your computer.
- First, open Terminal. Then, type diskutil list. With the help of this command, you will see all the disks connected to your Mac. Find the disk you want to mount and note its number (like /dev/disk2).

- Next, type diskutil mountDisk /dev/diskX (replace "X" with your disk number) and press Enter. This command tells your Mac to mount the disk, and it can help if the disk wasn't mounting automatically.
Using Terminal might sound a bit technical, but it's a useful trick to know.
Fix 3: Erase the Mac Disk
If the above fixes don't work, the issue might be with the disk's format. Sometimes, a disk formatted in a file system that macOS doesn’t support will cause the "mount:/ failed with 77" error. Reformatting the disk can solve this, but be careful because reformatting will erase all data on the disk.
- First, back up any important files if you can access them. Open Disk Utility on your Mac and select the disk you want to reformat.

- Click Erase, choose a macOS-compatible format like APFS or Mac OS Extended (Journaled), and then click Erase again to start the process.
Once the disk is reformatted, it should mount correctly, and you can use it without any issues.
These steps should help you fix the "mount:/ failed with 77" error on your Mac, allowing you to access your drives and files again. If the problem persists, it might be worth seeking professional help to ensure there's no deeper issue.
Part 4: Lost Data Due to Mount Failed with 77 Error? Use Recoverit Today
Losing data because of a "mount:/ failed with 77" error can be very upsetting. It's normal to worry when you can't access your files. But don’t stress—there are solutions to help recover your important data.
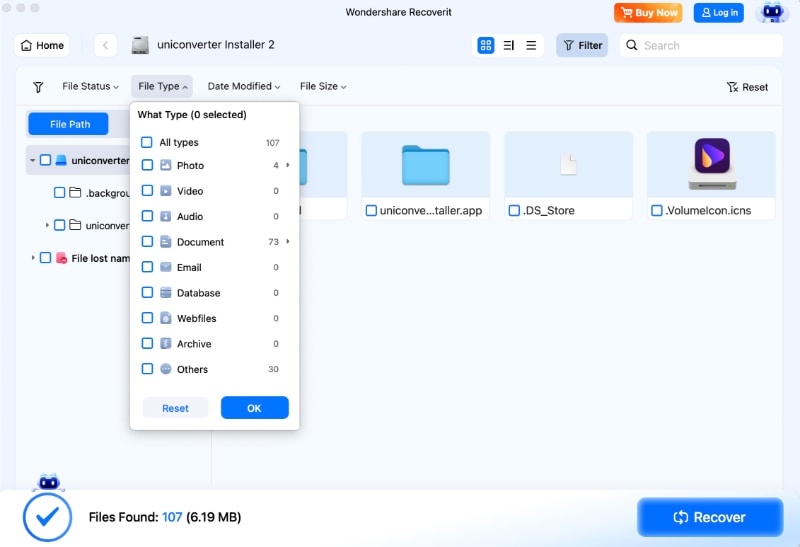
Recoverit is a handy tool that can help you retrieve data from an unmounted external hard drive on your Mac. Whether the files were lost due to an error, accidental deletion, or corruption, Recoverit is designed to find and restore your lost or deleted files with ease.
The great thing about Recoverit is that it’s user-friendly and works quickly. Just follow a few simple steps, and you can recover your important files in no time. With Recoverit, you can feel confident that your valuable data can be brought back, allowing you to breathe a sigh of relief and get back to using your Mac without worrying about lost files.
Key Features of Recoverit:
- High Recovery Rate: Efficiently recovers most lost data.
- User-Friendly Interface: Simple to use, even for beginners.
- Supports Various File Types: Recover photos, videos, documents, and more.
- Compatible with Many Devices: Works with external drives, USBs, and SD cards.
- Quick and Deep Scan: Offers both quick and deep scanning options.
- Safe Recovery Process: Ensures your data is safe during the recovery process.
Steps to Use Recoverit:
- Get Recoverit data recovery software and install it on your Mac. Open Recoverit and choose the drive where the data was lost. Click "Start”.

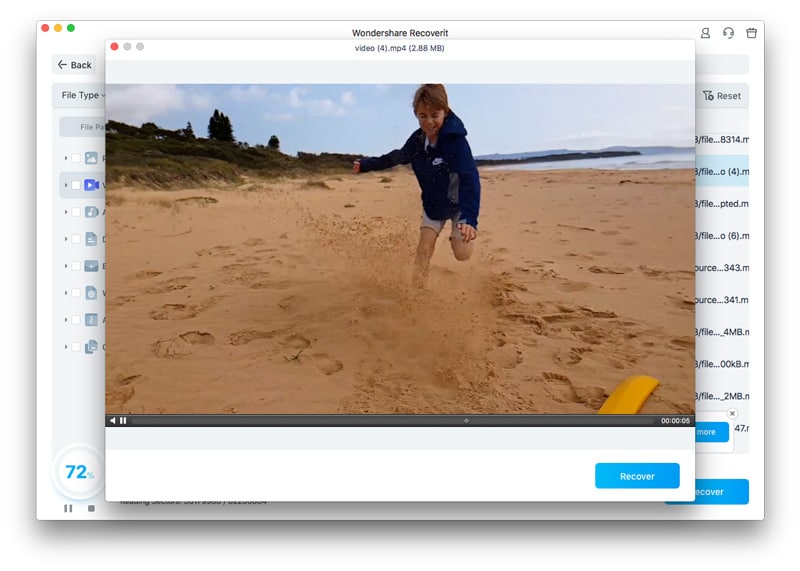
- Wait for the scanning process.

- Preview the found files and select the ones you want to recover. Click "Recover" to save them back to your Mac.

Part 5: Tips To Avoid The Mac Disk Unmounted Issues
Keeping your Mac's disks running smoothly is essential to avoid unexpected issues. Disk unmounted problems can be frustrating, but with a few preventive measures, you can minimize the risks. In this section, we'll share some practical tips to help you maintain your disks and keep them accessible.
By following these suggestions, you can ensure a smoother experience with your Mac and protect your important data.
- Regular Backups: Always keep a backup of your important files. Use Time Machine or another backup service to ensure your data is safe. Regular backups protect your files from unexpected disk errors.
- Use Reliable USB Cables and Ports: Ensure your USB cables and ports are in good condition. Faulty cables or ports can cause connection issues, leading to disk unmounting problems. Always use high-quality, compatible cables for your devices.
- Keep Your Software Updated: Regularly update macOS and other software on your Mac. Software updates often include bug fixes and improvements that can prevent disk unmounted issues.
- Use Proper Power Supply: Ensure external drives receive enough power. Some external drives require more power than others. Using a powered USB hub or connecting directly to your Mac can help avoid power-related issues.
- Run Disk Utility Regularly: Use Disk Utility to check and repair disk errors. Regular maintenance with Disk Utility can prevent and fix minor issues before they become serious problems.
- Be Aware of Virus Protection: Keep antivirus software updated and scan your system regularly. Viruses and malware can cause disk access issues. Regular scans help keep your Mac secure and functioning properly.
By following these tips, you can minimize the risk of encountering disk unmounted issues on your Mac and ensure your drives remain accessible and functional.
Conclusion
Dealing with the "mount:/ failed with 77" error on Mac can be tricky, but understanding the causes and solutions helps. Always check your connections first, and use Terminal or Disk Utility if needed. If you lose data, tools like Recoverit can save the day by helping you recover lost files.
By following the tips mentioned, you can avoid such errors in the future and keep your Mac running smoothly. Regular maintenance and backups are essential to prevent data loss and disk errors.
Remember, if you encounter this error, stay calm and try the solutions step by step. With the right approach, you can fix the issue and get back to using your Mac without any hassle.
FAQ
-
Why does my Mac show the "mount:/ failed with 77" error?
The "mount:/ failed with 77" error happens when your Mac can't connect to a specific disk. This means it can't read or write data on that disk. The issue could be due to a bad USB connection, disk errors, incompatible file systems, or software problems. Fixing the connection or reformatting the disk often helps. -
Can I recover data from a disk with the "mount:/ failed with 77" error?
Yes, you can recover data from a disk with the "mount:/ failed with 77" error. Using a tool like Recoverit can help you find and restore lost or deleted files. Recoverit scans the disk for recoverable data and lets you save the important files back to your Mac. This way, even if the disk can't be mounted, your data isn't lost forever. -
How can I prevent my Mac from having disk unmounted issues?
To prevent disk unmounted issues, always back up your files regularly, use good quality USB cables, keep your macOS and software updated, ensure proper power supply to external drives, and use Disk Utility to check and repair disk errors. Regular virus scans can also help keep your Mac running smoothly and avoid these problems.


 ChatGPT
 Perplexity
 Google AI Mode
 Grok
Grok


