


 TL;DR:
Microsoft Word temporary files allow you to recover unsaved documents from hidden system directories on your Windows or Mac before the operating system automatically deletes them over time.
● On Windows, locate unsaved files at C:\Users\admin\AppData\Roaming\Microsoft\Word or by searching ".temp" in File Explorer, whereas Mac users can find them via ~/Library/Containers/com.microsoft.Word/Data/Library/Preferences/AutoRecovery or by running "Open $TMPDIR" in Terminal.
● You can bypass manual folder searches by clicking "Recover Unsaved Documents" within Word's "Open" tab, and prevent future data loss by configuring custom save intervals using the AutoRecover feature in Word Options.
● Because temporary files are eventually purged by the system, recovering older or permanently deleted documents requires enabling hidden file visibility or using a dedicated data restoration tool like Wondershare Recoverit.
Ask AI for a summary
 ChatGPT
 Perplexity
 Gemini
 Claude
 Grok
Grok
When working on Microsoft Word, users are bound to face a situation where they accidentally close an important and edited document without saving it first. In this scenario, they can try multiple methods to retrieve that file back and recover it.
Lucky for you, MS Word has options that can automatically save and recover files, lost by system failure, accidental closure, or power outage. Thus, go through this article and learn where to find the Word temp file location and several ways to recover them on your Mac and Windows.
Try Recoverit to Perform Data Recovery
 Security Verified. 3,591,664 people have downloaded it.
In this article

Part 1. What is the Purpose of Having a Temp File?
Understanding the purpose of Word temporary file location can help you store essential documents within your device. Learn why knowing the file location can prevent your work from being lost forever in the following:
- Recovery Support: The location can assist users in easily retrieving unsaved documents or the previous versions of their work when they get lost due to unexpected causes.
- Crash Prevention: There are times when your system shuts down due to overheating or failing power supply, so to prevent permanently losing these files, know the file location.
- Further Document Editing: If you still want to make more edits to your Word file, use the temp files to store unsaved changes and make suitable alterations.
- Avoids Data Corruption: Sometimes, losing files abruptly can risk the chances of file corruption, and to avoid that, storing them somewhere else or merging them can help.
Part 2. Where to Find the Word Temp File Location on Windows/Mac?
After learning the purpose of Microsoft Word temp file location, it’s time we look for a way to find them. You can locate your Word files in specific directories on your Windows and Mac with ease. Most times, the main file location is hidden in the File Explorer or Library folder and users can access them without any hassle. So, dive into the following comprehensive instructions on how to find the temp files:
On Windows
Instructions. Open the system’s file folder and follow this direction path or simply copy and paste: C:\Users\admin\AppData\Roaming\Microsoft\Word. When the Word location is opened, access all the unsaved or lost files here.

On Mac
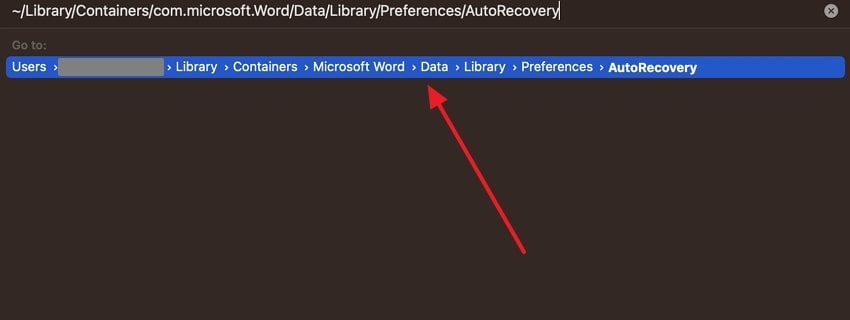
Step 1. Open the Finder app on your Mac and click the “Go” tab from the top menu bar to open a drop-down menu. From here, choose the “Go to Folder…” option to access a small window.

Step 2. Next, paste this direction in the window:
~/Library/Containers/com.microsoft.Word/Data/Library/Preferences/AutoRecovery and press “Enter” to open the “AutoRecovery” folder or the temp folder.
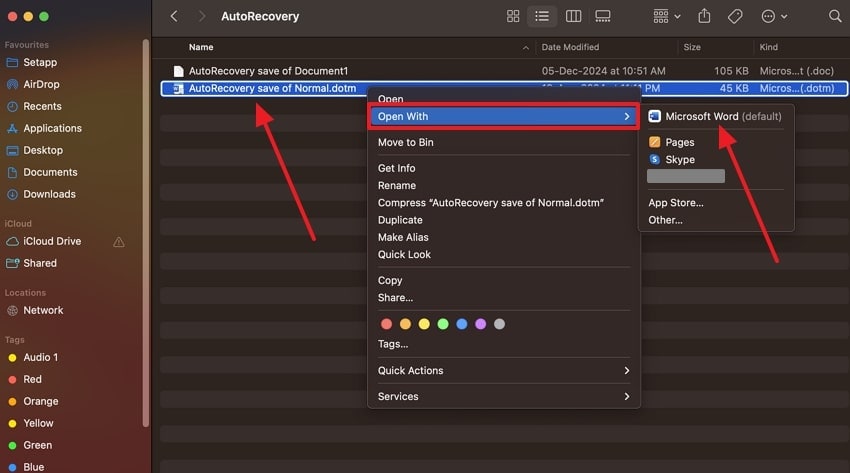
Step 3. Right-click the lost or unsaved Word file and expand the “Open With” option in the opened drop-down menu. After that, select the “Microsoft Word” option, and this time save the file properly on your device.
Part 3. How to Recover Microsoft Word Using Temp Files [All Proven Methods]
Knowing the exact Word temp location can help users find their important documents, but sometimes there might not be any. The following methods will guide you on how to seamlessly recover MS Word documents using the temp files:
Way 1. Manually Recover Word Files from Temp Files
It is surprisingly a straightforward method to manually recover accidentally lost Word files from the temp files. Your Mac and Windows systems have a system to save all the unsaved files for a period of time that users can retrieve within seconds. Moreover, this method is useful in cases when you don’t have the auto-save option enabled.
On Windows
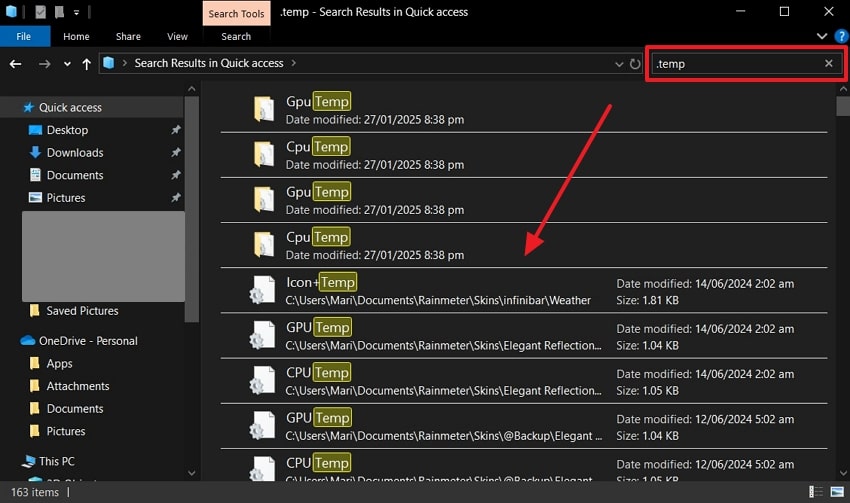
Instructions. Access the File Explorer on Windows and write “.temp” in the “Search” bar at the top right corner. When the results and folders appear, open the temp files and find your lost Word documents.
On Mac
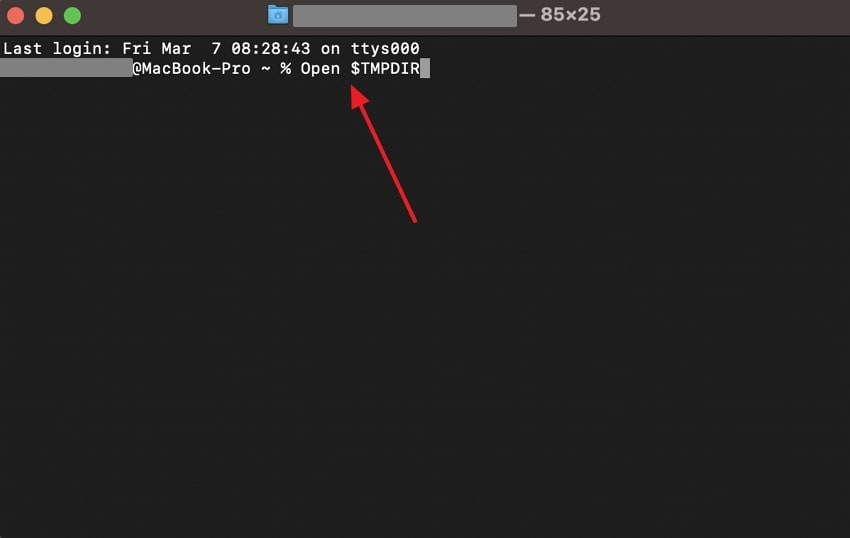
Instructions. Head to the “Terminal” app on Mac and enter the following command, “Open $TMPDIR,” and hit the “Enter” key. It will directly lead you to the temp files, where you can open and save your unsaved files.
Way 2. Recovering Unsaved Documents on Word Directly
MS Word is equipped with built-in functions that help you recover unsaved documents without any manual effort. Knowing Word temp file location is one thing, but being able to recover from the Word itself makes it a useful feature. The software also ensures that every document is saved, even if lost due to system failure. We’ve provided an easy step-by-step guide in the following on how to recover documents from the Word:
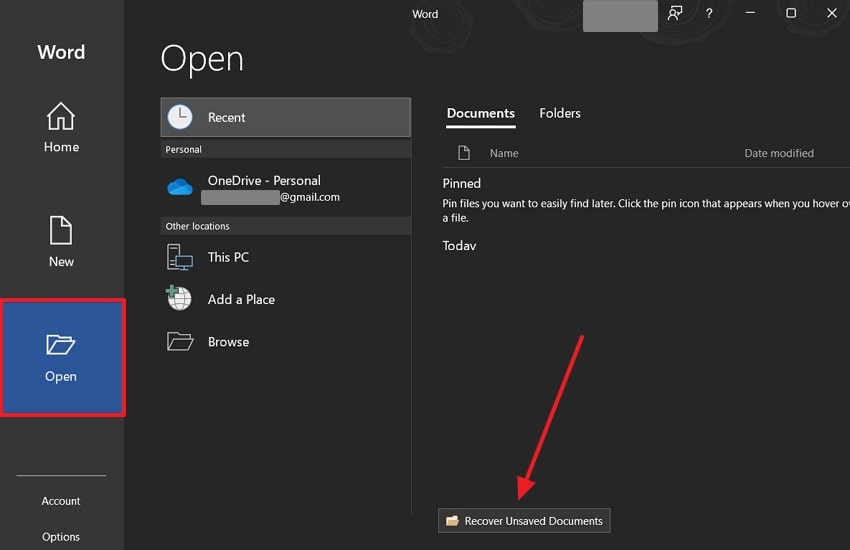
Step 1. First, open MS Word and click the “Open” tab from the left-side panel. Afterward, press the “Recover Unsaved Documents” button to access all the unsaved files.
Step 2. On the “Open” dialogue box, select the Word file and hit the “Open” button to make changes if necessary and save it afterward.

Way 3. Enabling AutoSave and AutoRecover Options on Word
Another way users can find and recover unsaved files is by enabling the built-in AutoRecover option. Despite the Word temp file location, this method is more cloud-based and doesn’t remove files after a period of time. By enabling the option, it automatically saves your work at different intervals. Thus, prevent losing files by learning the following steps on how to turn on the AutoRecover option:
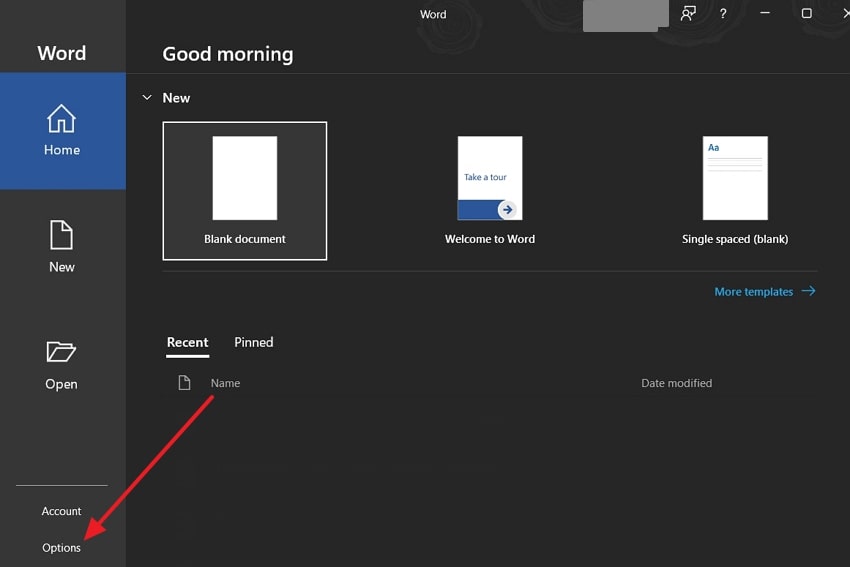
Step 1. In MS Word, click the “Options” choice located at the left-side panel to open the “Word Options” dialogue box.
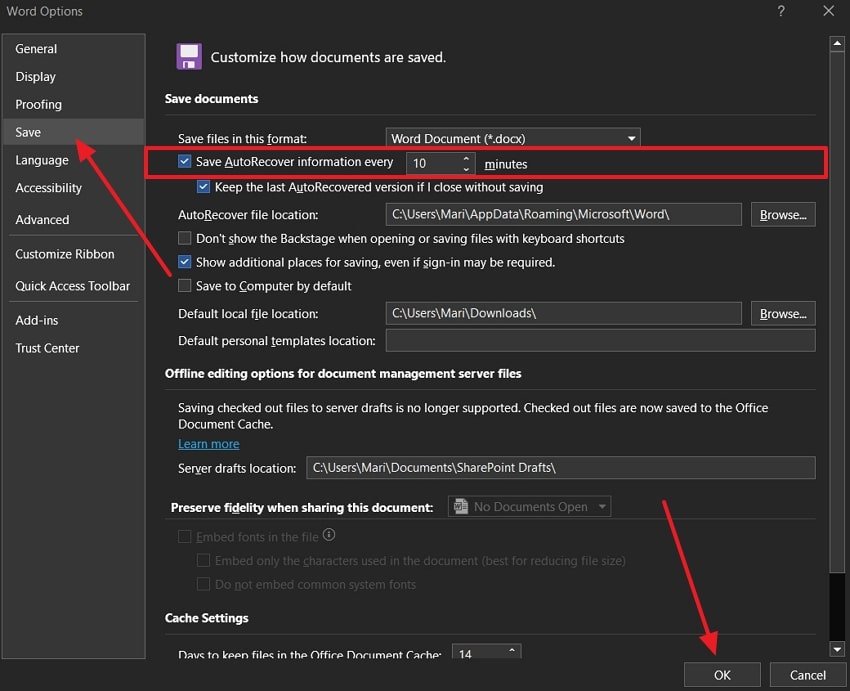
Step 2. Access the “Save” tab on the left side and go to the “Save Document” section. From here, tick the “Save AutoRecover Information Every Minutes,” add the suitable number of minutes, and click “OK.”
Part 4. How to Change Word Temp File Location [A Simple Approach]
The above-discussed methods help you retrieve important Word documents, but sometimes, modifying the file location can help resolve the issue of losing them. Users can change the directory of the saved files from the Word settings and easily access them whenever they need to. Let’s dive into the given steps and learn how to change the Microsoft Word temp file location:
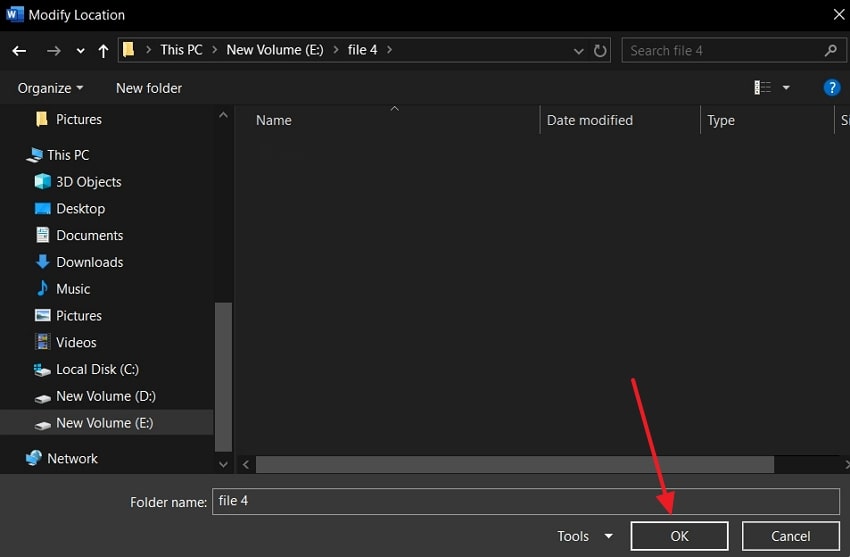
Step 1. From the opened “Word Options” window, access the “Save” tab, and click the “Browse” button in the “AutoRecover File Location” section.
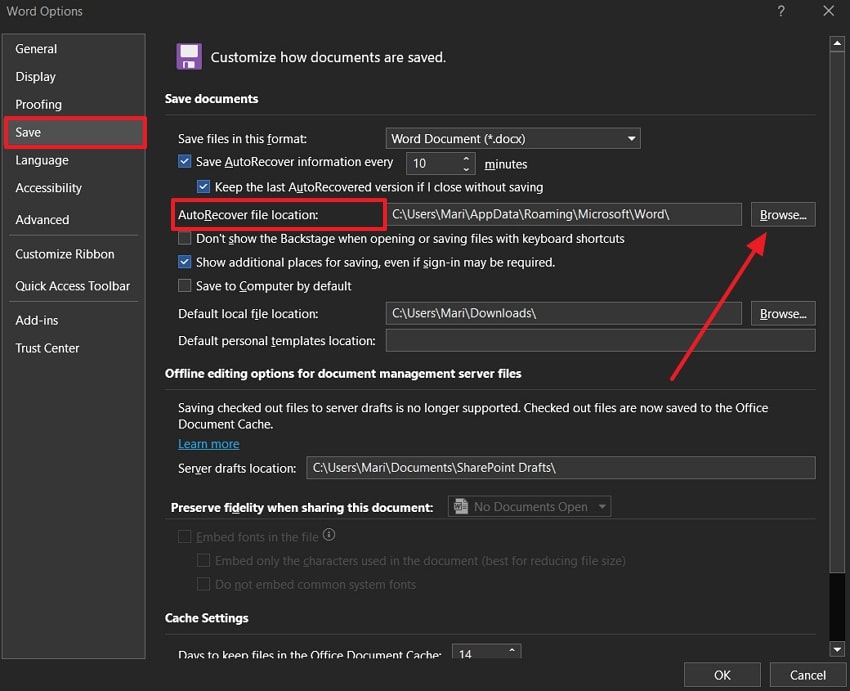
Step 2. After the “Modify Location” dialogue box appears, choose a suitable folder or disk and press the “OK” button to change the Word temp location.
Part 5. Recover Important Word Files Directly with Directed Solution
Did you try everything from Word temp file location change to auto recovering from Word and still cannot access your unsaved files? Fear not, as this part will provide one of the best file recovery software that can recover any lost or deleted Word documents within seconds. Wondershare Recoverit can restore over 1000+ types of files from 2000+ storages.
Moreover, users can retrieve any lost files, videos, images, and more, even if they are permanently deleted. Not only that, this recovery tool has a high successful recovery rate that dives down into your system to find the unsaved Word files with minimal effort.
Key Features
- Advanced Scanning Technology: Recoverit’s advanced scanning scavenges through every disk, hard drive, and USB to find all deleted files. Also, you can stop or pause scanning mid-way if you find the document you’re looking for.
- Filtration Options: It has multiple filter options, such as file type, size, tag, and more, that help speed up the scanning process. Every filter option includes an array of options, such as in the file type, you can choose documents to narrow down the search.
- Preview Screen: After restoration of files, review every component and content of the Word file in the preview window. This tool ensures the recovery of every fragment and piece of the file without compromising its formatting.
Comprehensive Guide on How to Recover Deleted Word Files Using Recoverit
Now, read the following step-by-step guide and learn how this file recovery tool can restore your lost files within seconds:
Step 1. Install the Recovery Tool and Select a Location for Scanning
When the software is downloaded on your Mac or Windows device, open its main interface and head to the “Hard Drives and Locations” tab. Now, choose any external drives, hard drives, or quick access option on the “Select a Location to Start Recovery” window.

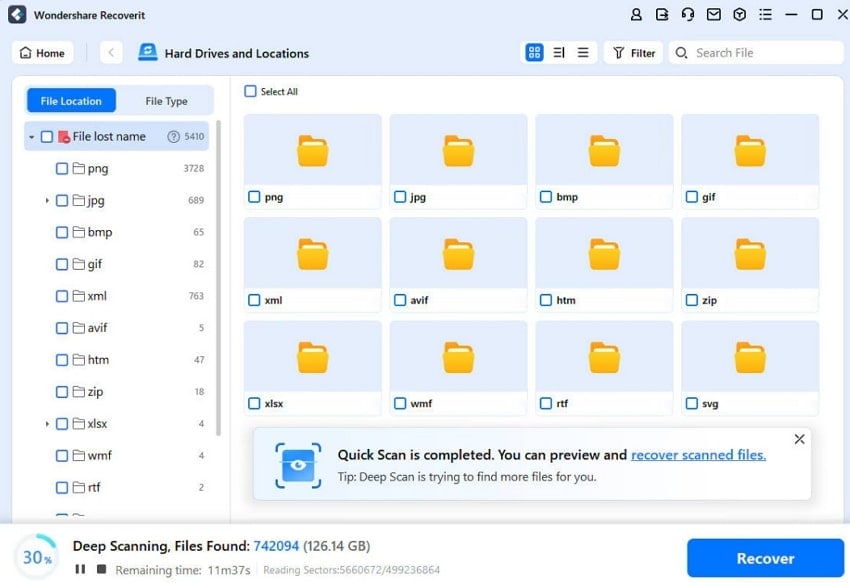
Step 2. Find the Desired Lost Document
As the scanning process initiates, the lost files will be displayed on the left-side panel under the “File Location” tab. When the scanning process is completed, find the lost Word files and open them in the preview window.
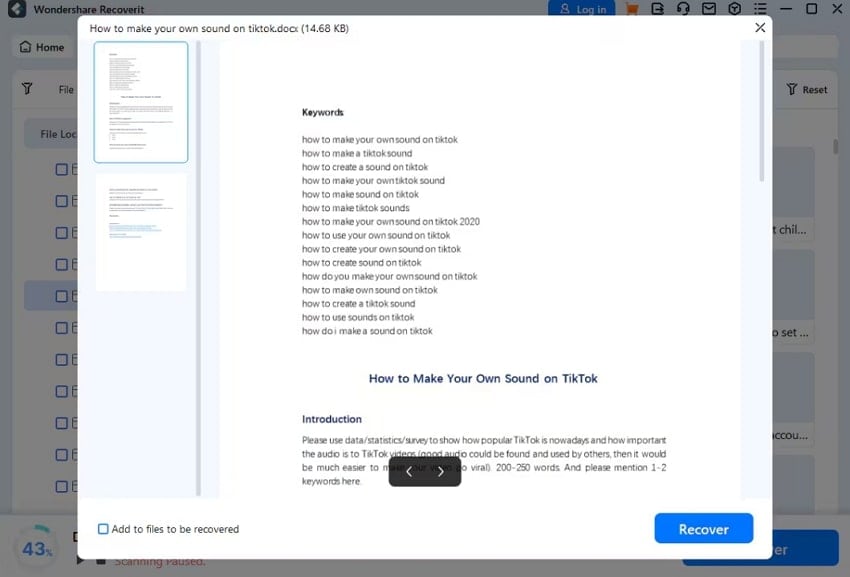
Step 3. Preview the Contents and Recover
On the “Preview” dialogue box, go through every content and formatting of the file to ensure everything is intact and accounted for before pressing the “Recover” button.
Conclusion
This article sheds light on the purpose of Word temp file location and why users need efficient solutions to retrieve their documents. Users can manually retrieve the files, recover them from Word, or enable the auto-recovery option on their Mac and Windows.
However, despite these top 6 recovery solutions, if you’re unable to find the file, try Recoverit. This advanced file recovery tool is equipped with an outstanding scanning feature that deeply searches for files and provides you preview option before recovering.
FAQ
-
1. How can I prevent losing my Word documents in the future?
One of the best options to prevent future file losing is to enable the Auto-Save and Auto-Recovery options in the Word settings. These options store unsaved files on the Cloud, where you can easily retrieve them in perfect condition. -
2. Are Word temp files automatically deleted?
Yes, both systems automatically delete the temp files after a period of time, which can be troublesome as you have only limited access to unsaved files. Therefore, try the Recoverit software to restore even the permanently deleted files with ease. -
3. Why can’t I find the temp file for my Word document?
If you can’t seem to find the temp folder, it's probably a hidden file that you can access by going to File Explorer. From there, go to the “View” tab and check the “Hidden Items” under the “Show/hide” section. For Mac users, they can unhide the temp folder by pressing the “Command + Shift +.>” keys.


