
 TL;DR:
Veeam Backup & Replication supports Network Attached Storage (NAS) backup starting from version 10, enabling users to back up and restore data using any shared folder or physical device accessible via the Server Message Block (SMB) protocol.
● Veeam utilizes CRC hash trees for modified file tracking to bypass full system scans, supports VMware vSphere and Microsoft Hyper-V, and requires configuring Synology NAS devices to use the SMB3 protocol.
● Wondershare UBackit functions as a direct alternative for users who specifically need to transfer files between NAS servers or to external drives with real-time or scheduled backup options.
● For scenarios involving data loss without an existing backup, Wondershare Recoverit allows remote data recovery without disk extraction and supports NAS devices configured in RAID 0, 1, 5, 6, and 10 arrays.
Ask AI for a summary
 ChatGPT
 Perplexity
 Gemini
 Claude
 Grok
Grok
In this digital era, data is considered the most valuable asset you have. It not only sets you apart from competitors but also allows you to provide the best customer experience. However, with these advantages comes the problem of dealing with a considerable amount of data and the hefty price you must pay for data backup and retrieval. But do not fret, as Veeam NAS backup solves these problems.
Part 1. What Is Veeam Backup & Replication?
Veeam Backup & Replication is a data backup software product developed by Veeam Software in 2008 as a member of the Veeam Availability Suite. The software’s primary function is to back up, restore and replicate data on virtual machines, which is a first since backup applications are initially incapable of differentiating physical vs. virtual machine protection.
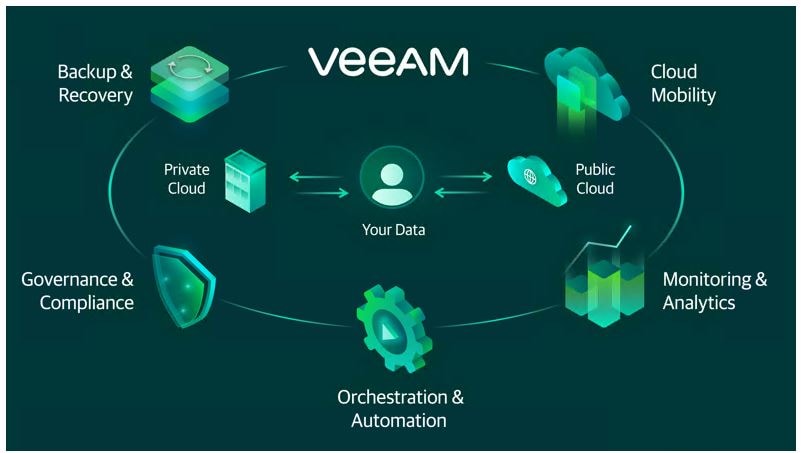
The software offers data backup and recovery for all types of data regardless of the storage used, physical, cloud, or virtual. Moreover, Veeam has an agnostic platform that allows you to work with popular storage vendors and technology partners. Not only that, but Veeam also uses a refined and scalable engine for instant backup and recovery built on Veeam’s patented VM Recovery Capability.
Newly Added NAS Feature and Recent Version Updates
Since Veeam was developed, it is continuously improving as updates and new features have been added to improve the software. In 2022, Veam added support for Network Attached Storage (NAS) backup for Microsoft 365 in Veeam version 10, which allows you to use NAS as backup repositories. Such a NAS can be a shared folder on your computer, or any other physical device that can be accessed using the Server Message Block (SMB) protocol.
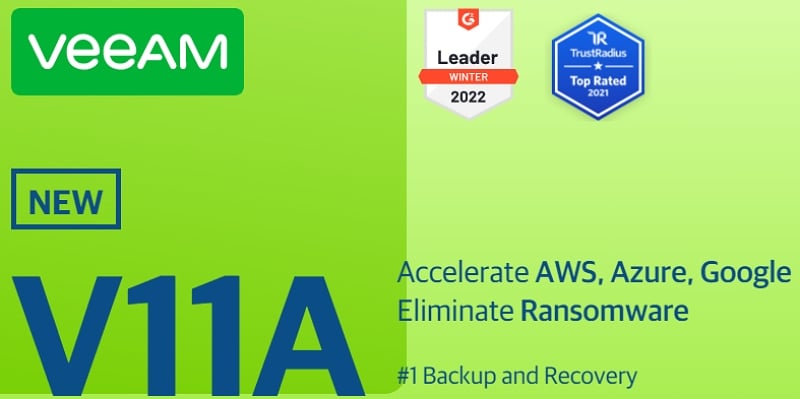
On March 12, 2022, Veniam released the Veeam Backup and Replication 11a, which offers Centralize AWS, Microsoft Azure, and Google Cloud backup, increased cloud security, Red Hat Virtualization (RHV) backup, Kubernetes backup, and lower-cost archive storage.
And, as early as now, the anticipation for Veeam V12 is just around the corner. Although the official release is not yet announced, there are new promising features such as VeeaMover, automatic session logout, scheduled health check operation, simplified Hardened Repository configuration, Glacier Instant Retrieval for Amazon S3, and many more.
Key Features of Veeam Backup & Replication Related to NAS backup
Veeam Availability Suite Version 10 introduced the “Seriously Enhanced NAS backup,” which leverages their platform to introduce key features that set Veeam apart from other storage and backup software. From there, Veeam continuously adds features that support NAS backup. Here are features you should know:
- Modified File Tracking. Veeam utilized the CRC hash tree to determine which files have changed within a file system You do’t need to go through the entire file system when backing up a NAS file system and make a sudden separate backup.
- Increased Scalability and Flexibility. Veeam allows you to protect any data file and protect them. Not only that, Veeam allows you to protect a file system and store it from another system. Also, Veeam leverages multiple proxies to scale out the protection of the NAS file.
- Snapshot Friendly. Leveraging your backup to a snapshot prevents file lock and consistency errors and offloads your NAS storage system to a secondary system.
- Compatibility. Veeam Backup & Replication software is compatible with various backup targets and can be used with VMware vSphere and Microsoft Hyper-V.
Veeam Pricing, Licensing, and Buying Guide
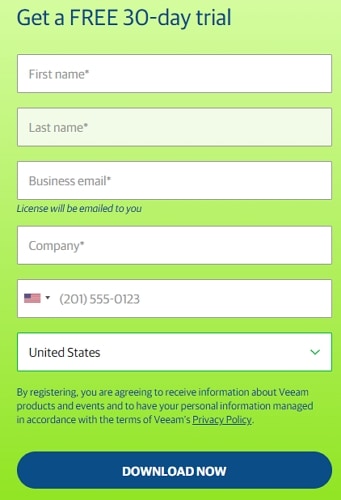
You can download and enjoy Veeam NAS Backup full functionality for 30 days through registration.
After the trial period, if you wish to avail of the Veeam package, you can choose from Veeam Availability Suite and Veeam Backup & Replication.
Both packages are licensed with the Veeam Universal License (VUL), an easy-to-use, per-workload license, available via subscription or perpetual options, for protecting data across on-premises and multi-cloud environments.
Part 2. How To Backup NAS With Veeam NAS Backup and Recovery?
The NAS Backup and Recovery is a feature added to Veeam Backup & Replication version 10. Watch the video tutorial or follow this step-by-step tutorial on how to use the NAS Backup feature to protect your data and files:
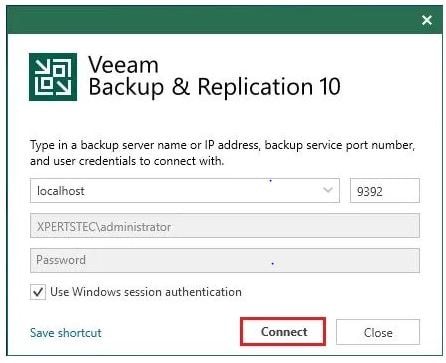
Step 1. Open Veeam and click Connect.
Step 2. Go to Inventory Tab and click File Share > Add File Share.
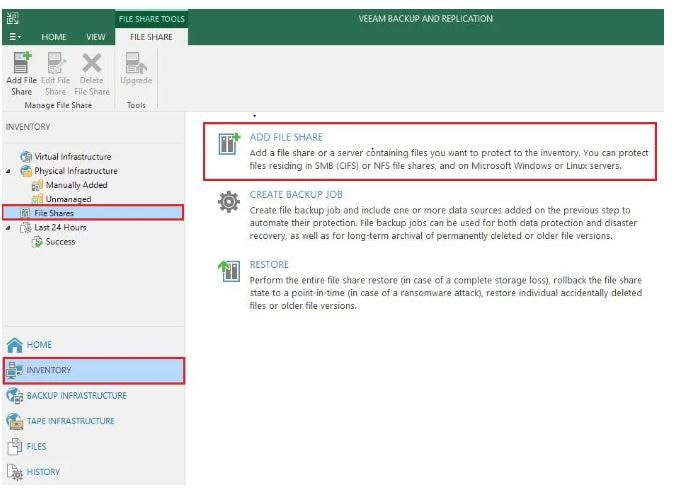
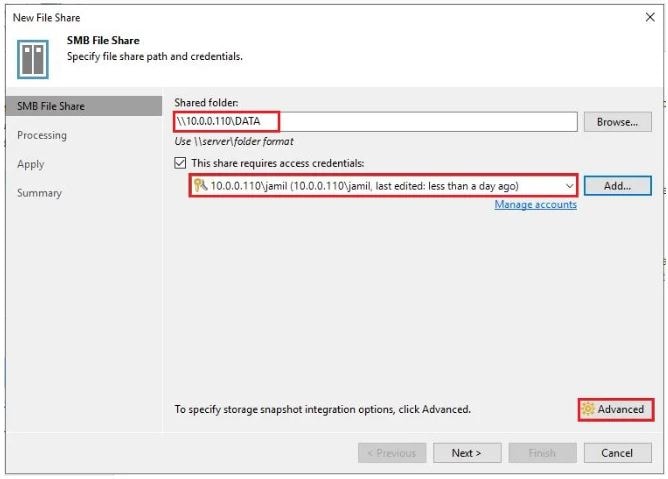
Step 3. Select SMB File share, then specify the shared folder and access credentials. Then click Advanced.
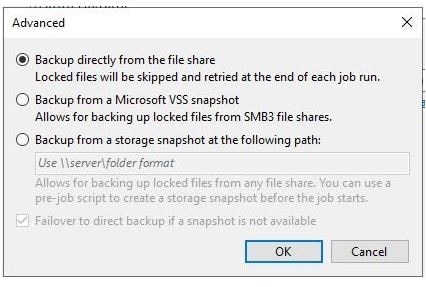
Step 4. Select the backup source and click OK.
Step 5. Go to the Processing Tab and select your proxy server. Then click Apply.
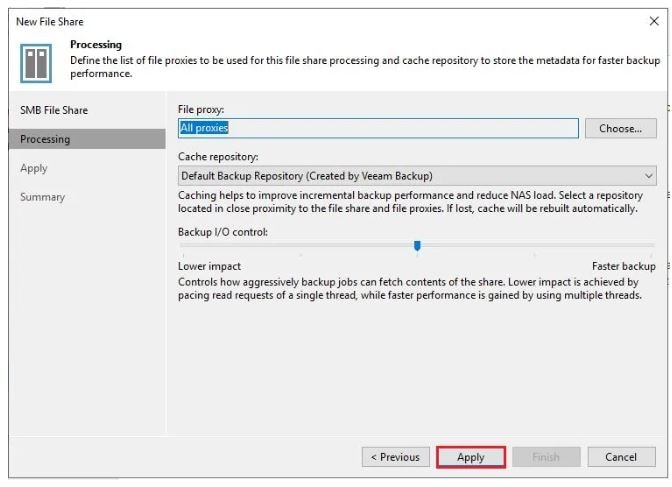
Step 6. Click Apply > Next.
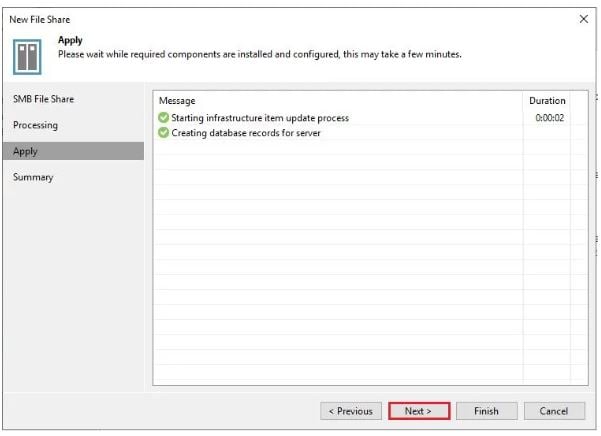
Step 7. View the file summary and click Finish.

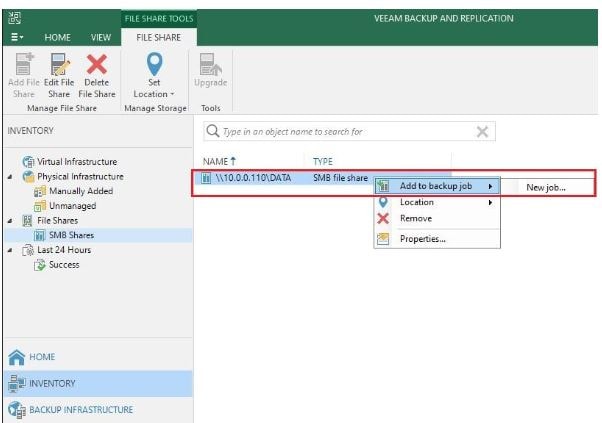
Step 8. Right-click on SMB file share > add to backup job.
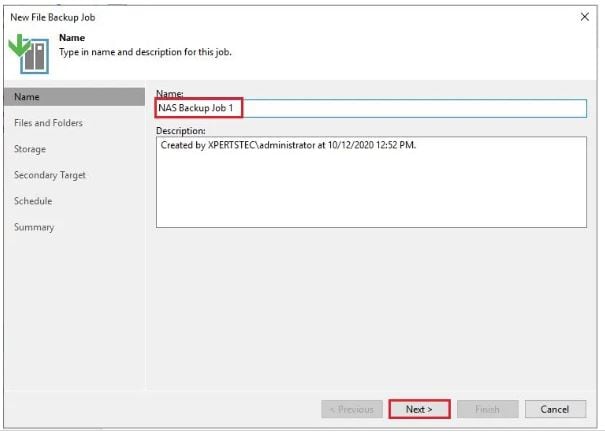
Step 9. Specify a backup job name and description, and then click Next.
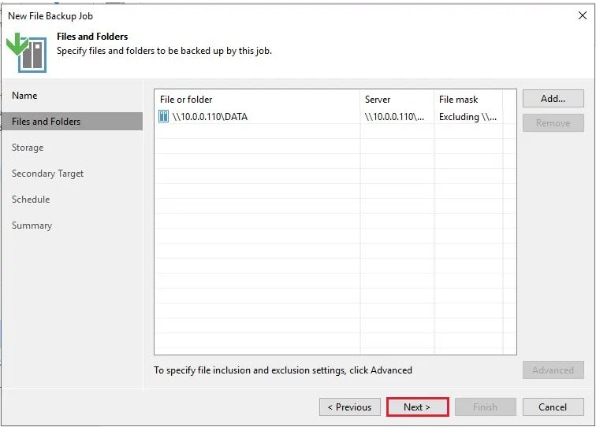
Step 10. Add the file shares you need to backup and click Next.
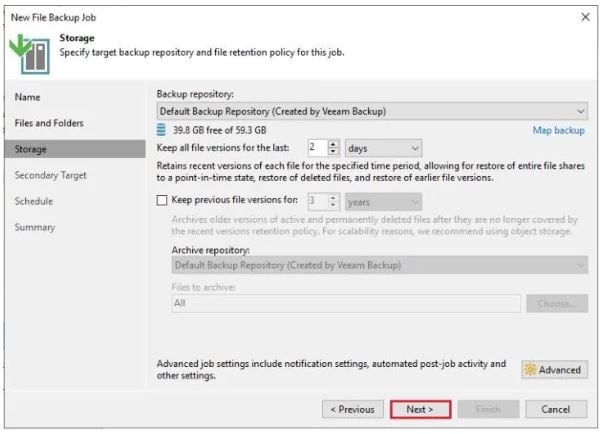
Step 11. Select the backup repository and retention archive settings, and then click Next.
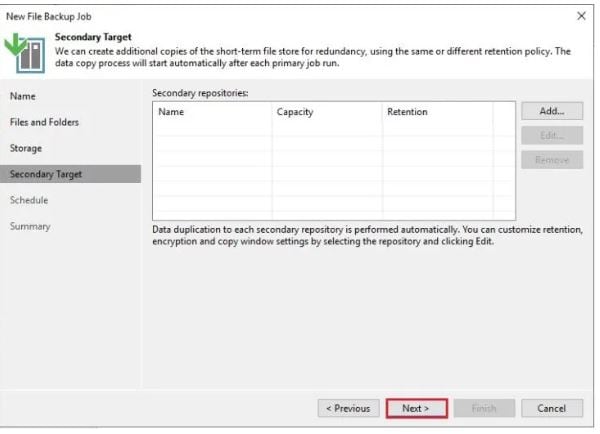
Step 12. You can specify a target for a secondary target and click Next.
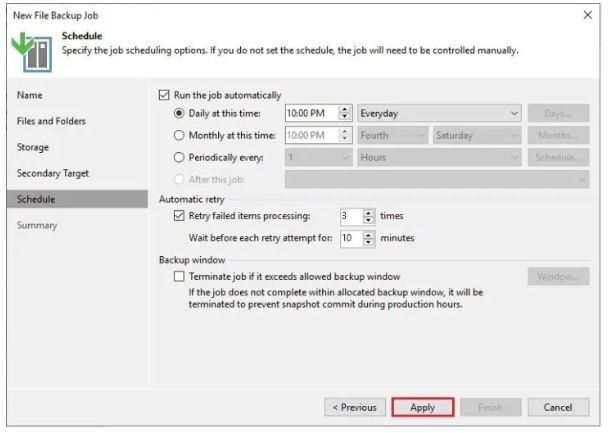
Step 13. Set a backup job schedule, tick automatically retry and click Apply.
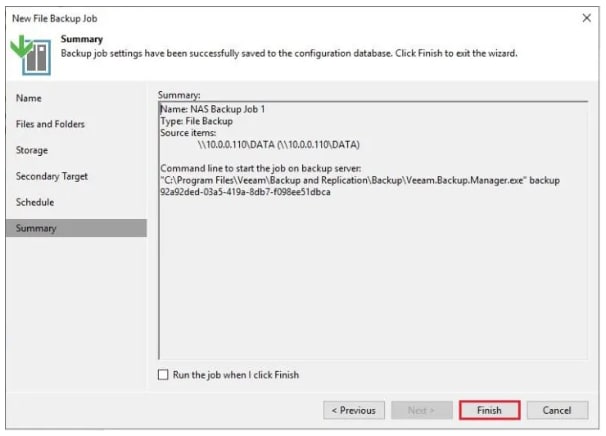
Step 14. Review the job summary and click Finish.
Step 15. Click NAS Backup Job > Start.
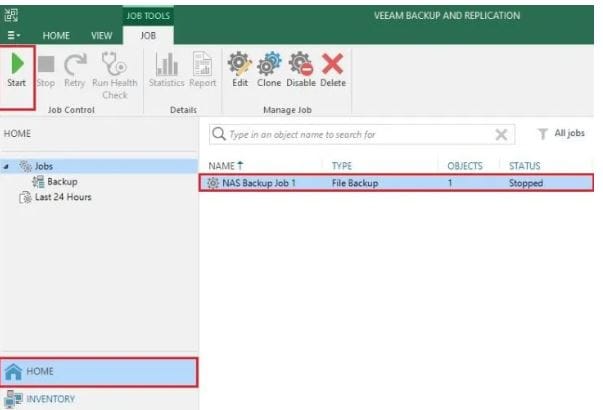
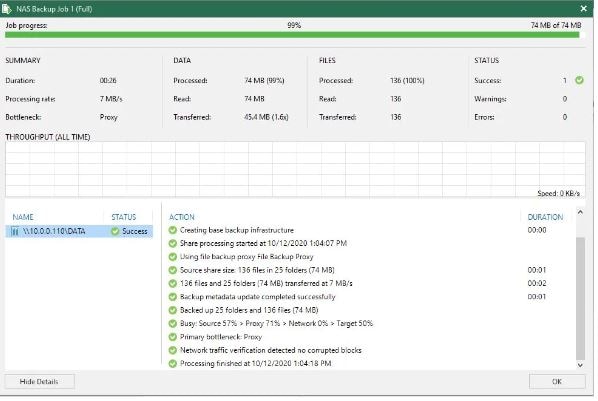
Step 16. Job successfully completed.
Part 3. How To Restore Files From Veeam NAS Backup?
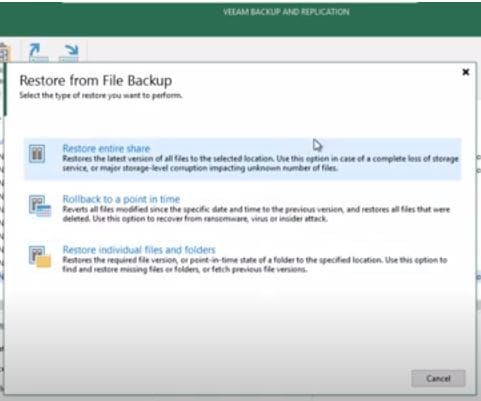
Veeam Backup & Replication offers several recovery options for different recovery scenarios. You can perform instant file share recovery, roll back to a point in time, restore files and folders, restore files from an archive repository or restore the entire file share. We’ll focus on the last option for now.
Restoring the entire file share is best if your device works wrongly and you need to restore the entire file share. Follow these step-by-step guides below or check the full video tutorial:
Step 1. Launch the File Restore Wizard and select Restore the entire share.
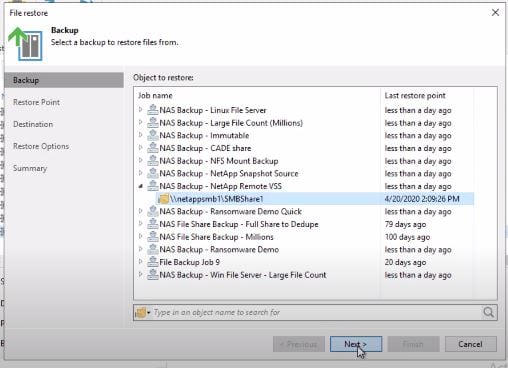
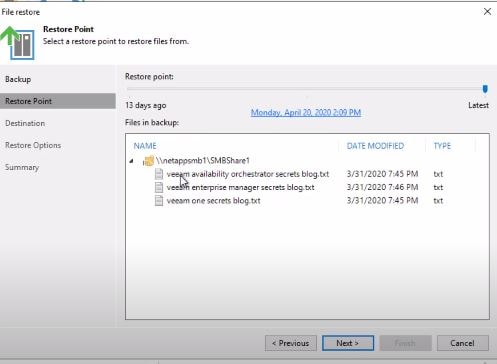
Step 2. Select a backup to restore files from and click Next.
Step 3. Select a restore point and click Next.
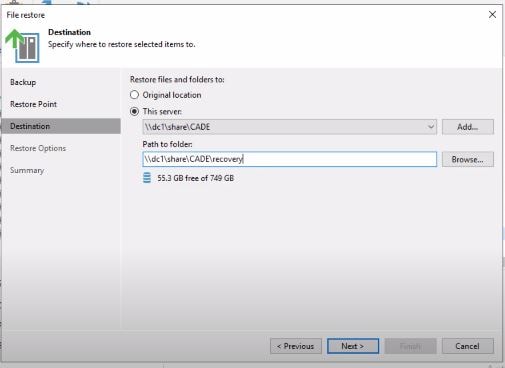
Step 4. Specify the destination where to restore the file. If you want to migrate your NAS to a different place, select This Server and provide a different managed server and file path.
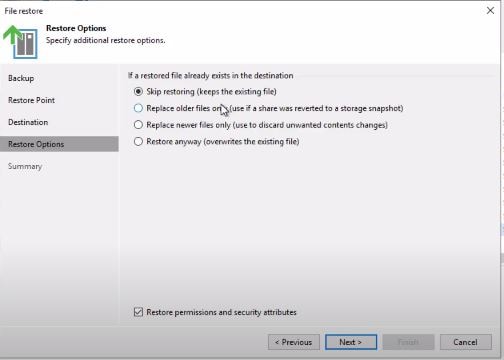
Step 5. Specify additional restore options and click Next.
Step 6. Review the summary and click Finish.

Part 4. Best Alternative to Veeam
Wondershare UBackit is the best choice when you need an alternative to Veeam. This program supports transferring any files, including video, image, email, word, excel, ppt, etc. from one place to another. You can transfer the files from one NAS server to another, or move them to any external drive. It also provides backup schedule that can backup files automatically by day, week, month, or in real-time.
How to Use UBackit to Backup NAS?
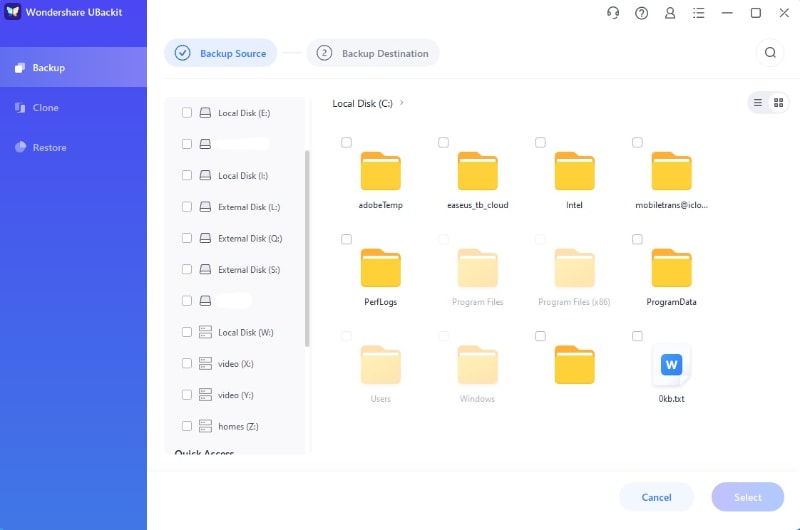
Step 1. Go to the Backup section from the sidebar, and select File Backup from the main interface, which enables you to select the specific files to backup from the NAS server.

Step 2. Find the NAS Server and select the files you want to backup. Then, click Select to the next step.
Step 3. Here you need to select the backup destination where you want to save the NAS files. Please ensure that the destination has enough space to save the backup files.

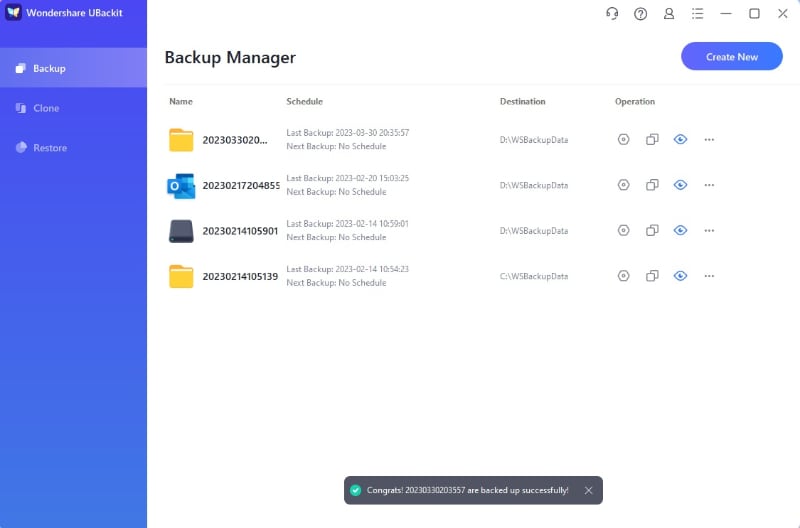
Step 4. It will take a few seconds or minutes to complete the backup process. Once it finishes, you will receive a notification message from the tool. And you can click the Setting icon from the backup folder to set automatic backup plan according to your need.
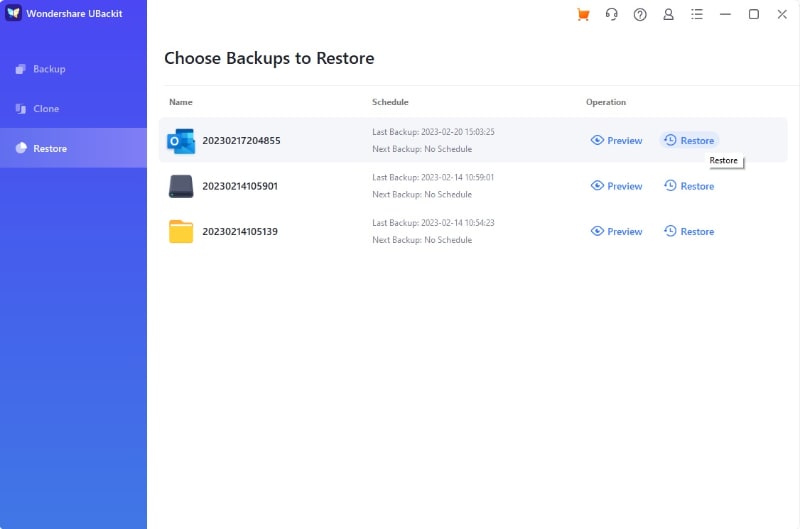
Step 5. To restore the backup files, please go to the Restore section from the sidebar. Select the folder, click Restore, and choose one disk to save the files. Then, the folder will be restored and saved on the destination disk successfully.
Part 5. Bonus Tip: How To Recover Lost NAS Data Without Backup?
Did you accidentally lose your NAS data and forget to perform a backup? Whether the data was lost because of accidental deletion, malware attack, hardware failure, or overheating server, Wondershare Recoverit is a NAS data recovery software you can trust. It allows you to retrieve lost data from various logically corrupted or failed NAS storage devices, including Synology, Western Digital, QNAP, ASUSTOR, WD, Buffalo, Lacie, Seagate, and many more.

Wondershare Recoverit – Almighty NAS Recovery Tool
5,481,435 people have downloaded it.
Support NAS data recovery from all popular NAS vendors such as Synology, QNAP, ASUSTOR, Western Digital, Buffalo, LaCie, etc.
Facilitate 500+ NAS data loss scenarios, such as deleting, formatting, OS crash, RAID failure, defective controller, power failure, virus attack.
Support all RAID types, including RAID 0, 1, 5, 6, and 10.
Recover NAS data through the remote connection without disk pull-out.
Here are the simple steps on how to recover lost NAS data using Wondershare Recoverit NAS Recovery:
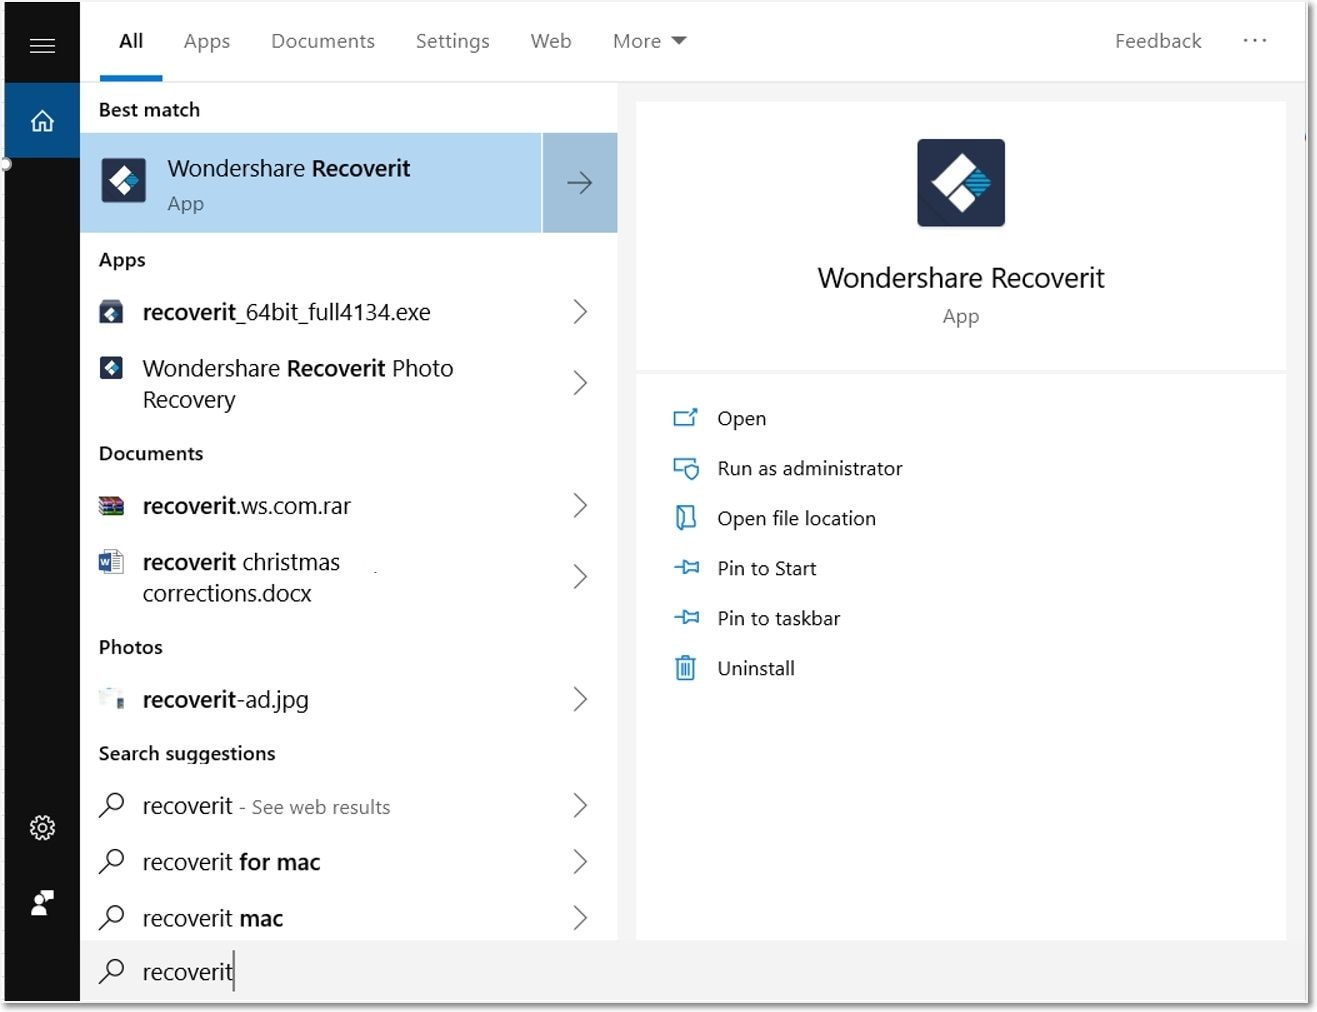
Step 1. Install and launch Wondershare Recoverit on your desktop/PC.
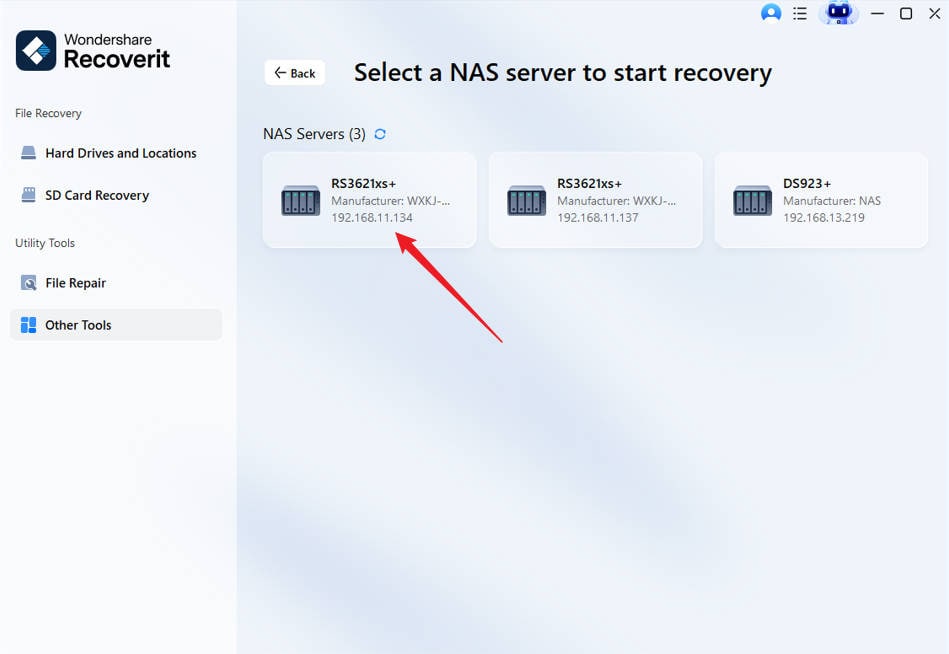
Step 2. Select NAS and Linux and click NAS Recovery.

Step 3. Under the NAS Servers, click on the device where you lost your data.
For Windows Vista/7/8/10/11
For macOS X 10.10 or later
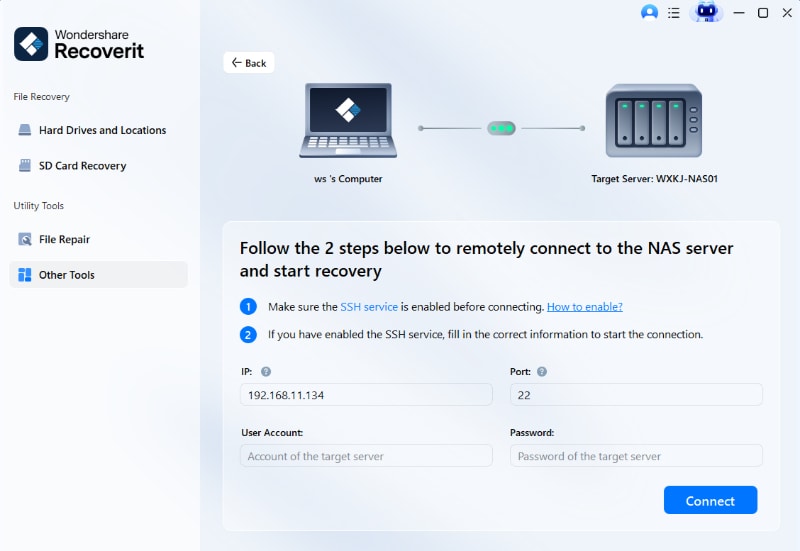
Step 4. Fill in the necessary information and click Connect.
Step 5. After the scanning process, preview your files as you wish. You can also check the scanning progress on the bottom bar and stop it anytime.

Step 6. Preview your file and click Recover.

Step 7. Choose the file path in which you want to save the recovered file.

Video Tutorial on How to Recover Files from NAS Server?
For Windows Vista/7/8/10/11
For macOS X 10.10 or later
FAQS
Can you back up a NAS with Veeam?
Absolutely. Veeam Backup & Replication offers backup and recovery for various NAS file shares. To protect your NAS file shares, you can use your existing Veeam Backup & Replication Infrastructure by configuring your file share, backup proxy, cache repository, and storage reposition.
Does Veeam work with Synology NAS?
You can use Veeam when working with Synology NAS. Remember to ensure that the maximum Server Message Block protocol is set as SMB3. This method will allow you to access stored data in Synology NAS.
Does Veeam work with QNAP NAS?
Of course. Veeam Backup & Replication supports QNAP NAS to provide an effective backup solution for VMware and Hyper-V, which maximizes data reduction and scalability. Veeam allows setting up one or more QNAP NAS units as the backup storage to a remote site for efficient data recovery.
Summary
It is without a doubt that Veeam Backup and Replication provides an impressive NAS file backup and retrieval to meet the demanding needs of various sectors. However, suppose you wish to perform NAS data restoration with little complexity using simple, powerful, and reliable software. In that case, Wondershare Recoverit is the best option for its many promising features.


