

 TL;DR:
Overcome the "Disk Utility can't repair this disk" error by systematically escalating your troubleshooting from repeated GUI scans to deeper macOS command-line interventions or a complete drive reformat.
● Execute the Disk Utility "First Aid" tool three consecutive times, as subsequent passes can frequently resolve layered file system corruption and bypass temporary locks that cause an initial scan to fail.
● Boot the Mac into Single User Mode by holding Command + S and repeatedly run the "fsck -fy" command to force advanced structural repairs that the standard graphical interface is incapable of performing.
● Reformat the affected disk to establish a completely new file system and mark bad sectors as unusable, strictly requiring a prior data extraction or backup since this process permanently erases all existing drive contents.
Ask AI for a summary
 ChatGPT
 Perplexity
 Gemini
 Claude
 Grok
Grok
Mac users often encounter an unsettling issue: Disk Utility is unable to repair the disk. This error pops up when the system’s built-in repair tool can't fix disk-related problems, sparking fear that important files may be permanently lost.
Surprisingly, this isn't an uncommon occurrence. Many users report seeing this error regularly, and it can affect both internal and external storage devices—whether you're using an SSD or a traditional hard drive. When the utility fails, panic sets in and concerns about data loss quickly follow.
Fortunately, solutions exist. This guide walks you through how to address the Disk Utility can't repair this disk error. We'll start with basic troubleshooting techniques, then move on to more advanced recovery options. The good news? Most users can tackle and resolve this issue on their own, right at home.
In this article
Part 1: Understanding Why Disk Utility Fails to Repair a Disk
What Disk Utility Can—and Can't—Do Disk Utility, Apple’s native repair utility, is designed to analyze your storage drive and address standard file system errors. It excels at resolving everyday issues, making it a first line of defense when your Mac isn’t running smoothly.
However, there are times when it hits a wall. If the damage on the disk goes beyond what the utility is capable of repairing, you'll receive the dreaded "Disk Utility can't repair this disk" message. Unfortunately, its functionality has limitations—it can’t fix everything, especially more severe corruption or physical drive failure.
When Disk Utility can't repair disk problems, it means several things. The file system might be corrupted beyond repair. Physical damage could affect the drive. Bad sectors might be spreading across the disk. Hardware failure often causes these issues. Sometimes the drive is simply too old. Age makes driver more likely to fail.
Part 2: What Triggers the Disk Utility Can't Repair This Disk Error
Knowing these causes helps you prevent future problems.Most of these issues trace back to underlying hardware malfunctions or software glitches, both of which can disrupt drive performance if left unchecked.
- Physical drive damage - Drops, shocks, or water damage harm the drive
- Bad sectors - Parts of the disk become unreadable over time
- File system corruption - The disk's organization system gets damaged
- Power outages - Sudden power loss during writing corrupts data
- Malware infection - Viruses can damage the file system structure
- Age-related wear - Old drives naturally develop problems
- Overheating - Heat damages drive components permanently
- Improper ejection - Removing drives without ejecting causes corruption
Part 3: How to Fix the Disk Utility Can't Repair This Disk Error
How to Handle Disk Utility Errors If Disk Utility can’t fix your disk, don’t worry—there are still ways to solve the problem. Start with easy steps like restarting your Mac or checking the cables. If that doesn’t help, try more advanced options like using Terminal commands or recovery apps.
Most users can solve their disk problems with these methods. The key is to try them in order. Don't skip steps. Each solution builds on the previous one. Success rates are highest when you follow the sequence.
Fix 1: Run First Aid
There are times when Disk Utility doesn't succeed in resolving disk errors right away—it might take more than one attempt to fix the issue. Running First Aid multiple times often works. The tool might catch problems it missed before. Different scans can find different errors.
This method helps because:
- Multiple scans catch more errors than single runs
- Some corruption needs several repair attempts to fix
- Background processes might interfere with the first scan
Step 1: Open Disk Utility. Go to Applications > Utilities folder.
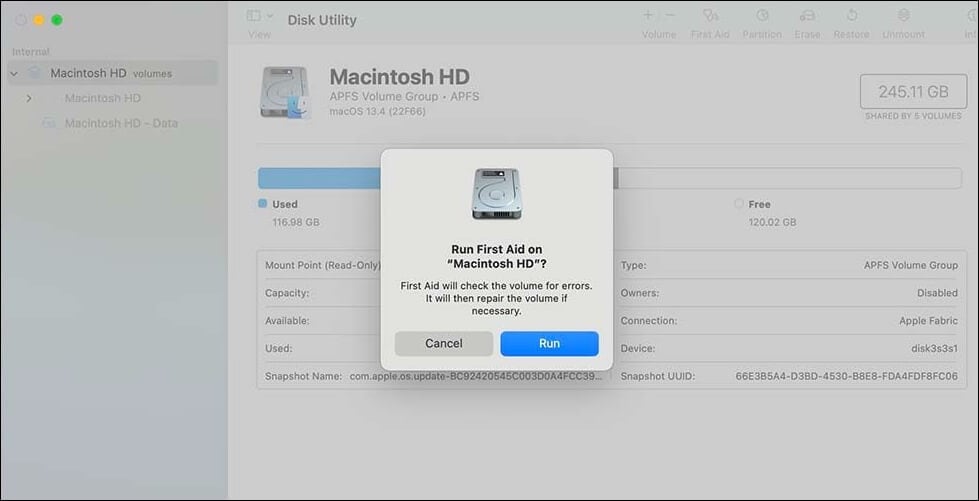
Step 2: Select your disk and click "First Aid" three times in a row.
Fix 2: Use the FSCK Command
If Disk Utility isn’t able to fix your disk, don’t give up just yet—macOS offers deeper tools for the job. One of the most effective is FSCK, a command-line utility that can repair file system issues beyond the reach of Disk Utility’s graphical interface.
This method helps because:
- Compared to Disk utility, FSCK has more repair options.
- When you boot into Single User Mode, macOS temporarily disables non-essential processes and services.
- Command-line tools can force repairs that GUI tools cannot
Step 1: Restart Ma. Hold Command + S to enter Single User Mode.

Step 2: Type "fsck -fy" and press Enter, repeat until no errors show
Fix 3: Reformat the Disk
Reformatting erases everything but fixes most problems. This solution works when how to fix "Disk Utility cannot repair the disk" error seems impossible. A fresh file system solves corruption issues completely.
This method helps because:
- Reformatting creates a completely new file system
- All corruption and bad sectors get marked as unusable
- The disk starts fresh without any previous problems
Step 1: Prioritize Data Backup Before Repairs. Before attempting any repairs, it's essential to safeguard whatever data can still be accessed.
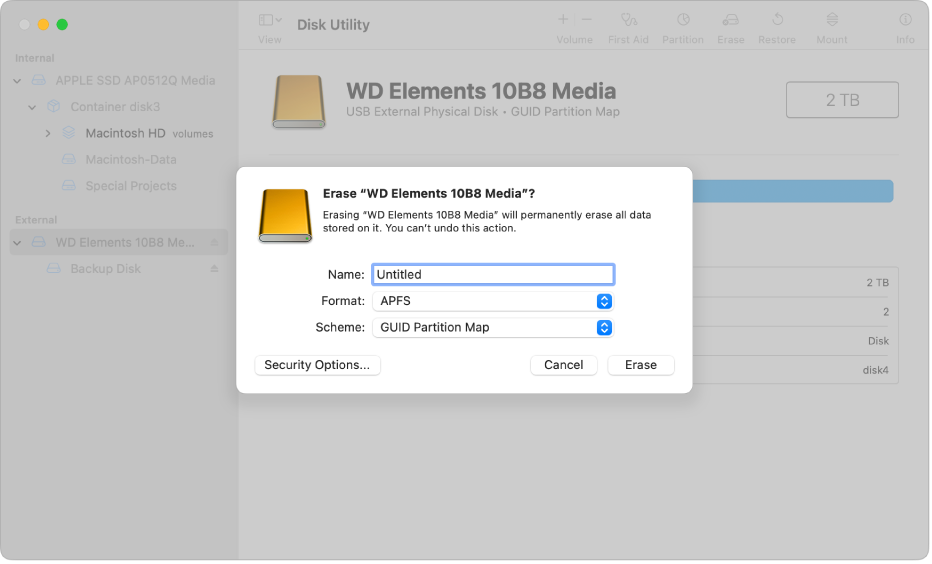
Step 2: Open Disk Utility. Select the disk. Click "Erase”.
Fix 4: Unmount and Remount the Disk
File system locks can prevent repairs. Unmounting releases these locks. Remounting refreshes the disk connection. This simple fix works for minor corruption issues.
This method helps because:
- Unmounting clears temporary file system locks
- Remounting forces the system to re-read disk information
- File system caches get cleared and rebuilt fresh
Step 1: Open Disk Utility. Select the disk. Click "Unmount".
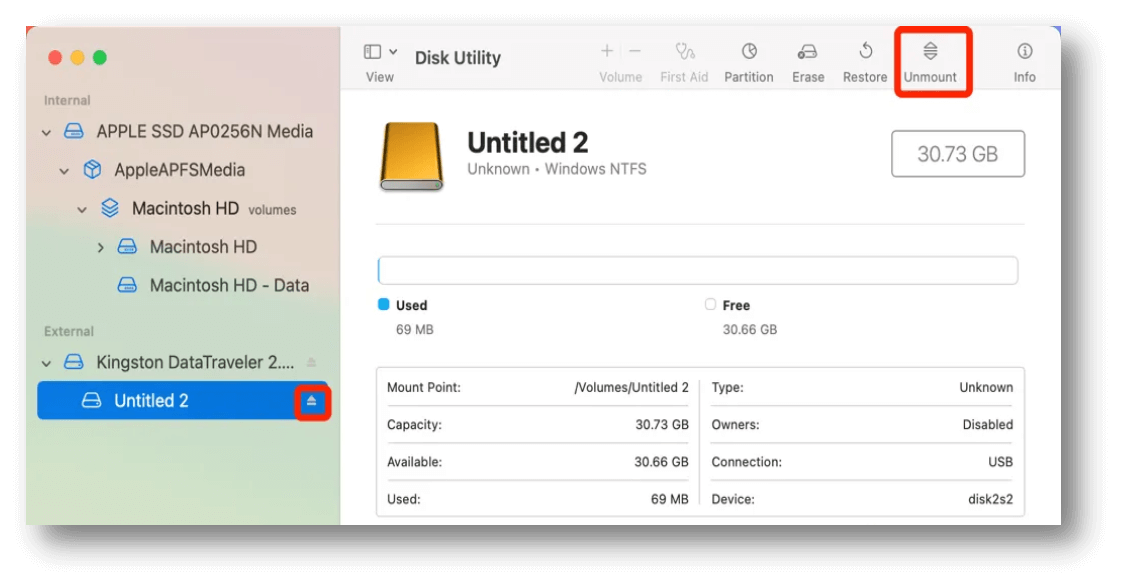
Step 2: Wait 10 seconds. Click "Mount" to reconnect the disk.
Fix 5: Restart Mac or Reconnect External Drive
System processes can interfere with disk repairs. Restarting clears these processes. For external drives, reconnecting refreshes the connection. This fixes communication problems between the Mac and the drive.
This method helps because:
- Restarting clears all background processes that might interfere
- Fresh connections often solve communication errors
- System caches get cleared and rebuilt properly
Step 1: Restart your Mac completely or safely eject the external drive.
Step 2: For external drives, wait 30 seconds before reconnecting the USB/Thunderbolt cable
Fix 6: Restore Disk from Time Machine Backup
When Disk Utility cannot repair this disk, restoration might work. Time Machine keeps disk images from when drives worked. Restoring overwrites all current data with backup data. This fixes corruption by replacing damaged files.
This method helps because:
- Time Machine backups contain working versions of corrupted files
- Restoration replaces damaged disk structures with good ones
- Complete system restoration can fix deep file system problems
Step 1: Boot Mac while holding the Option key and select "Restore from Time Machine Backup".
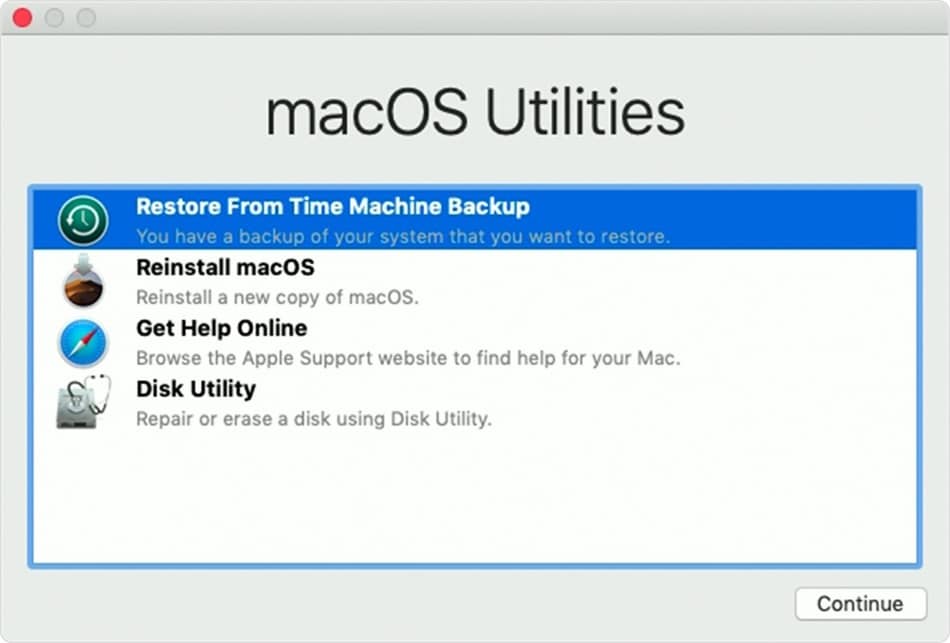
Step 2: Choose the most recent backup before problems started and begin restoration
Part 4: Lost Data on Mac Due to Disk Utility Error? Use Recoverit
You just discovered that important family photos are trapped on a corrupted drive. Disk Utility can't repair disk problems, and you're panicking. Your business documents seem gone forever. This exact scenario happens to thousands of Mac users daily. They need a reliable way to get their files back quickly.
Recoverit is a professional data recovery tool designed for these emergencies. The software works when Disk Utility failed to repair a disk completely. Many users choose Recoverit because it has a 99% success rate for file recovery. The tool works with all drive types including SSDs, hard drives, and external storage. It can recover files even from severely corrupted disks.
The software uses advanced scanning algorithms to find lost data. These algorithms can detect files that Disk Utility cannot see. Recoverit works even when the drive won't mount normally. The program can recover over 1000 file types including photos, videos, documents, and emails. It's specifically designed to handle cases when how to fix "Disk Utility cannot repair the disk" error seems impossible.
Try Recoverit to Retrieve Lost Data
![]() Security Verified. Over 7,302,189 people have downloaded it.
Security Verified. Over 7,302,189 people have downloaded it.
Most users prefer Recoverit because it's safe and easy to use. The software never overwrites your original data during recovery. It creates copies of found files in a safe location. The interface is simple enough for non-technical users. Professional IT teams also use Recoverit for complex recovery jobs.
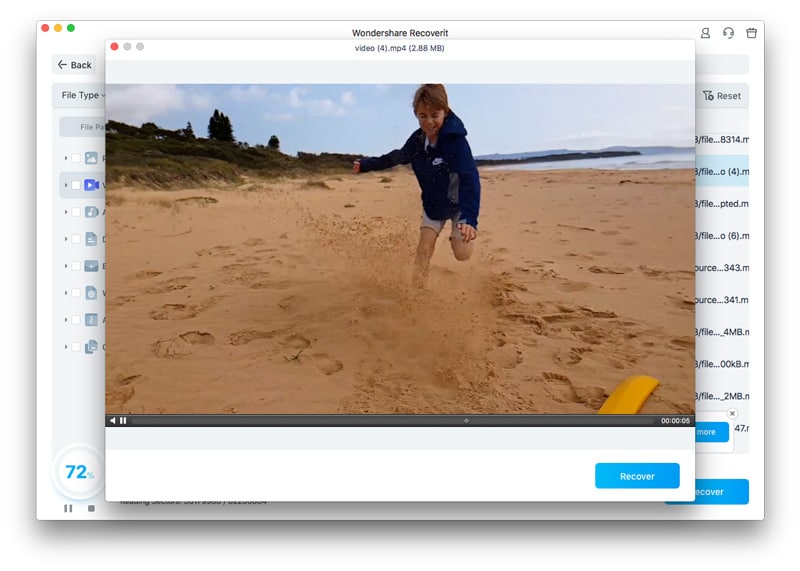
Step 1. Download and install Recoverit on a different drive than the corrupted one. Launch Recoverit and select the problematic disk from the drive list. Click "Start".

Step 2. Wait for the scanning process.

Step 3. Preview found files and select the ones you need, then click "Recover" to save them.
Video Tutorial: How to Run CHKDSK for Repairing Bad Sectors?
Part 5: Tips to Prevent Disk Utility Errors in the Future
Prevention is better than repair when dealing with disk problems. Simple maintenance prevents most cases where Disk Utility can't repair disk issues. Regular care keeps your drives healthy for years. These tips work for both internal and external drives.
- Always eject drives properly - Use the eject button before unplugging external drives
- Keep drives cool - Ensure good airflow around your Mac and external drives
- Run regular disk checks - Use First Aid monthly to catch problems early
- Maintain free space - Keep at least 10% of drive space free for optimal performance
- Use surge protectors - Protect against power fluctuations that damage drives
- Update macOS regularly - New updates often include disk handling improvements
- Handle drives gently - Avoid drops, shocks, and magnetic fields near storage devices
- Create regular backups - Time Machine prevents data loss when drives fail
Conclusion
Disk Utility cannot repair this disk errors are fixable in most cases. The solutions in this guide work for 90% of disk problems. Start with simple fixes like running First Aid multiple times. Move to advanced solutions like FSCK commands if needed. Remember that reformatting works but erases all data.
When Disk Utility can't repair disk problems, don't panic immediately. Try each solution in order before giving up. Many users solve their problems with the first few fixes.
Data recovery tools like Recoverit help when drives seem completely lost. Prevention through regular maintenance stops most problems before they start. With these tools and knowledge, you can handle any disk repair challenge that comes your way.
FAQs
-
Q1: Why does Disk Utility cannot repair this disk error keep appearing?
This error appears when disk damage exceeds Disk Utility's repair capabilities. Physical drive damage, severe file system corruption, or bad sectors cause this problem. The tool has built-in limits on what it can fix. When damage goes beyond these limits, you see this error message. Hardware failure is often the root cause of persistent errors. -
Q2: Can I recover data when Disk Utility failed to repair a disk completely?
Yes, data recovery is often possible even when repairs fail. Professional recovery software like Recoverit can find files on corrupted drives. These tools use different methods than Disk Utility for finding data. They can often recover files from drives that won't mount or boot. Success depends on the type and extent of damage to the drive. -
Q3: How long should I wait before trying how to fix "Disk Utility cannot repair the disk" error again?
Try immediately if the first repair fails. Multiple attempts often succeed where single attempts fail. However, if you see physical drive symptoms like clicking sounds or extreme slowness, stop immediately. Continued use of physically damaged drives can make data recovery impossible. For software-based corruption, multiple repair attempts are safe and recommended.


