MacOS Monterey, updating to the fifth version (version 12.3) within five months, improves Mac computers' stability, performance, and compatibility. But some users may be still not sure what MacOS Monterey is and what's new in it. Thus, here we prepared a tutorial showing you what macOS Monterey is with 24 features you can't miss and how to update macOS Monterey and install it on your Mac. With these tips and tricks, it can be better for you to enjoy it. Let's get started!
Part 1: 24 Features of MacOS Monterey You Can't Miss
New Features in macOS Monterey
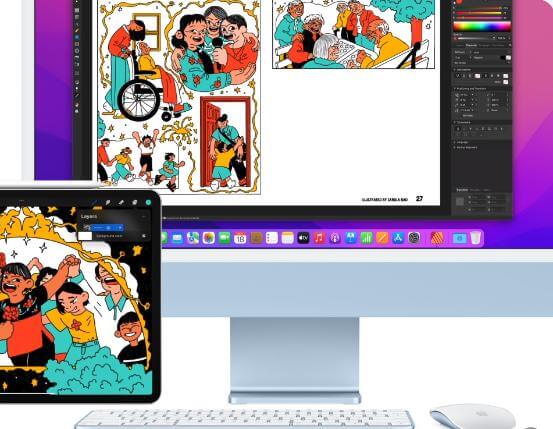
Universal Control
As one of the most attractive MacOS Monterey features, Universal Control can help you use the same cursor and keyboard on any nearby Mac or iPad. However, it's worth noting that you can only use this feature once you install macOS Monterey 12.3 and iPadOS 15.4.
To navigate Universal Control between multiple devices, here's the guide:
- Move the cursor against the side of the Mac's screen
- Push the cursor through the side of the screen to the adjacent device
- Move the cursor between two screens
Want to know more about this basic? Here's the detailed guide on how to use Universal Control, as well as fixing tips for Universal Control not working.
Note: Keyboard input will be automatically linked to whichever device the cursor is currently located. You can use it to type into text field as long as the app supports the text input.
FaceTime & SharePlay
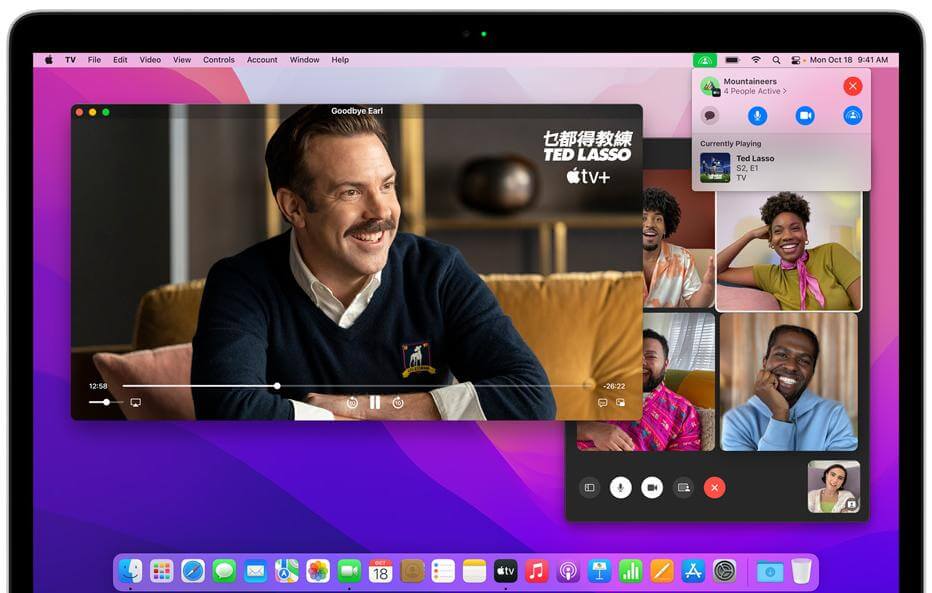
FaceTime has been upgraded in macOS Monterey. A standing feature is that you can share movies, music, and screen with your friends and families during the call. Moreover, FaceTime supports spatial audio, which helps conversations flow more naturally. Under this mode, your friends' voices sound like they're coming from the direction where they are positioned on your Mac's screen.
As for new mic modes, it can minimize your background noise and put your voice front and center, while Wide Spectrum will not filter out ambient when the music or sounds around you are as important as what you have to say.
For a new grid view, you can see people on your FaceTime call in the same-size tiles, which benefits you to have a better conversation with a large group. And it will highlight the person who is speaking, making you know who is talking.
Besides, if you have an M1-powered Mac, you can apply Portrait mode to your FaceTime calls by adding a blur effect to the background to hide messy rooms. However, you should note that the Intel-powered Mac doesn't boast this mode.
Messages-Shared with You
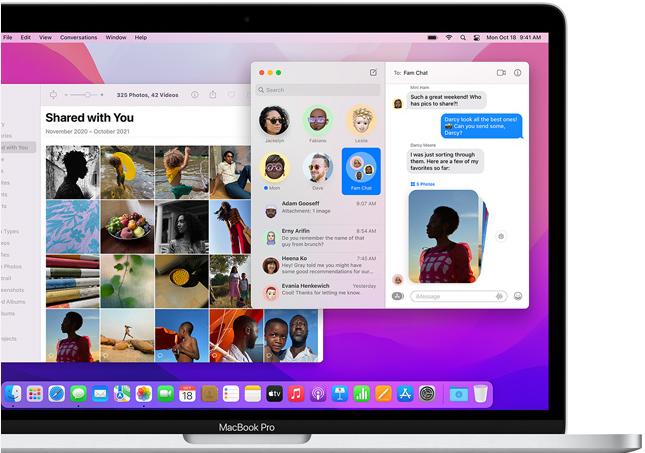
If you need a really simple way to find all contents through the Messages app, such as photos, videos, or articles, the Shared with You section is quite suitable for you. You can use Shared with You in apps like Photos, Safari, Apple Podcasts, Apple News, and Apple TV. This feature not only ensures that you can send or receive shared contents, but help you reply to your friends in apps without going back to Messages.
To turn Shared with You on or off, you need to go to Messages>Preferences>Shared with You. Then, you should choose one of the following:
- Turn on all apps by clicking Turn On.
- Turn off all apps by clicking Turn Off.
- Turn on selected apps by clicking select apps.
- Turn off apps chosen by clicking Deselect apps.
Safari-Tab Groups
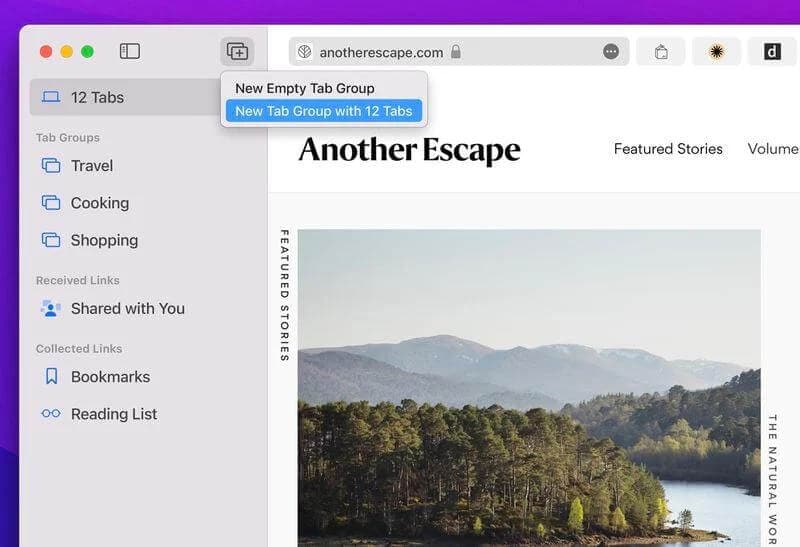
Do you have the demand to group your tabs? If your answer is "Yes," the new Tab Group of Safari couldn't be more suitable for you. Tab Groups are a new feature that aims to make organizing and to preserve your open browser tabs more manageable without having those tabs active and taking up space. Tab Groups are a way to save and manage related tabs for those planning trips or who want to store the daily visited tabs.
For example, if you have a set of websites using frequently, save them in a dedicated Tab Group. And you can customize Tab Groups through multiple Apple devices which run iOS 15 or iPad 15, accessing tabs from anywhere.
Simply, you can create a Tab Group in Safari by going to:
- Click the Show Sidebar icon next to the traffic lights;
- Select New Tab Group;
- Name you Tab Group;
- Press Enter to create.
Is it incredibly simple? So have a try now!
Quick Note
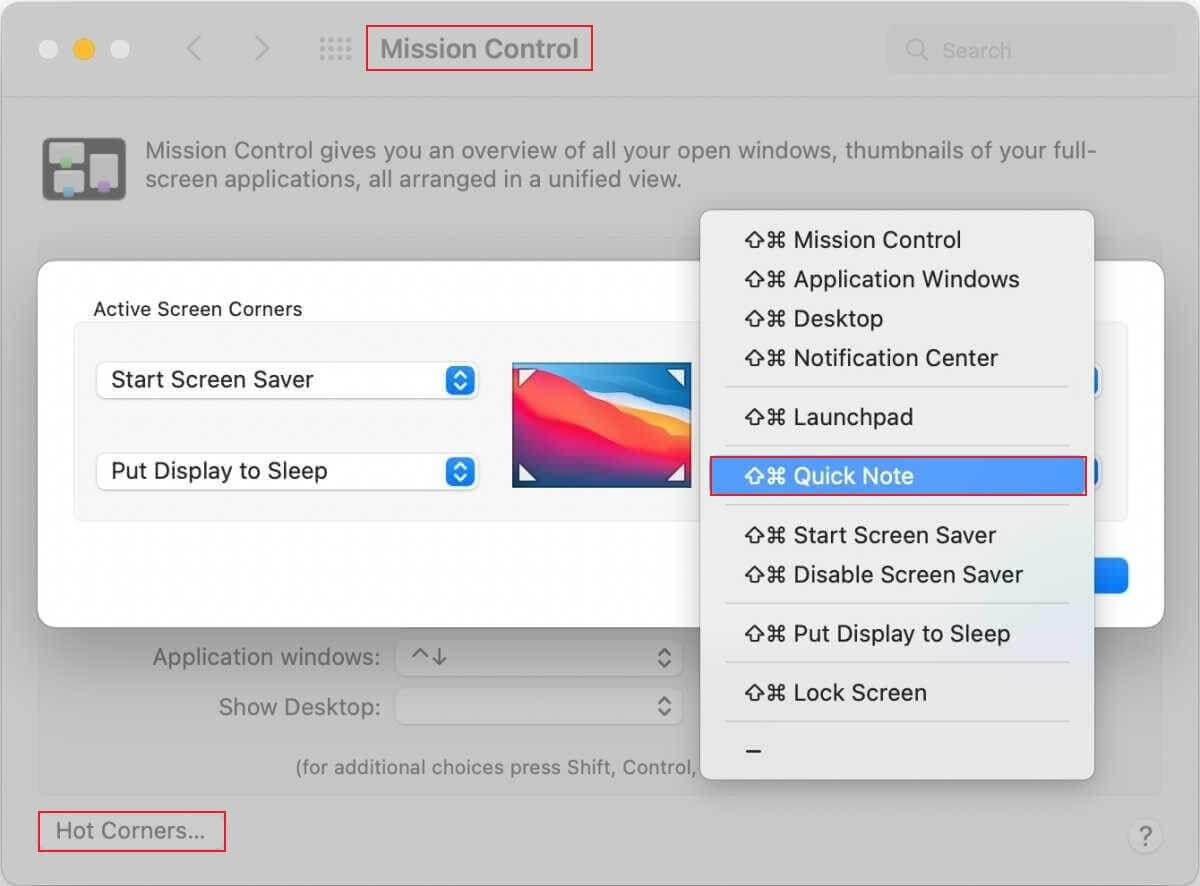
Quick Note is a fast way to create a note file using the notes app. When you trigger it, the Notes app quickly opens to a new file that you can start using immediately. It's quite a helpful feature but might not be so apparent if you don't know it's there. So you must know where to find it. Here are the tips:
- Click System Preferences;
- Click Mission Control;
- Click Hot Corners;
- Pop-up Menu;
- Quick Note;
- Click OK and close System Preferences.
To launch Quick Note on your Mac, you should move your cursor to the corner you picked. A sheet will appear, and the Notes app will launch with a note file open when you click it. Start typing and adding whatever you want into the file. When ordering, you have access to all of the Notes app's features, like changing fonts, implementing a table, setting a checklist, and sharing your note.
Besides, you can also access the note in the Notes app on any device whenever you'd like.
AirPlay to Mac
Have you wanted your Mac to support AirPlay for a long time? Want seamless transfer between your Apple devices? Now, macOS Monterey can make it!
You can AirPlay contents like music and videos from your iPhone, iPad to your Mac. Meanwhile, you will never be bothered by the small screen of an iPhone or iPad if you have to view and edit Keynote presentations, because you have the choice to AirPlay to your Mac's big and beautiful screen. It can work with any Apple device, whether or not these devices share the same Apple ID.
Moreover, your Mac can also be used as an AirPlay speaker. You can stream music or podcasts to your Mac or use it as a secondary speaker for multi-room audio to enjoy the high-fidelity sound. Below are the devices that you can AirPlay to Mac:
- iPhone 7 and later
- iPad Pro (2nd generation and later)
- iPad Air (3rd generation and later)
- iPad (version 6 and later)
- iPad mini (5th generation and later)

Focus Mode
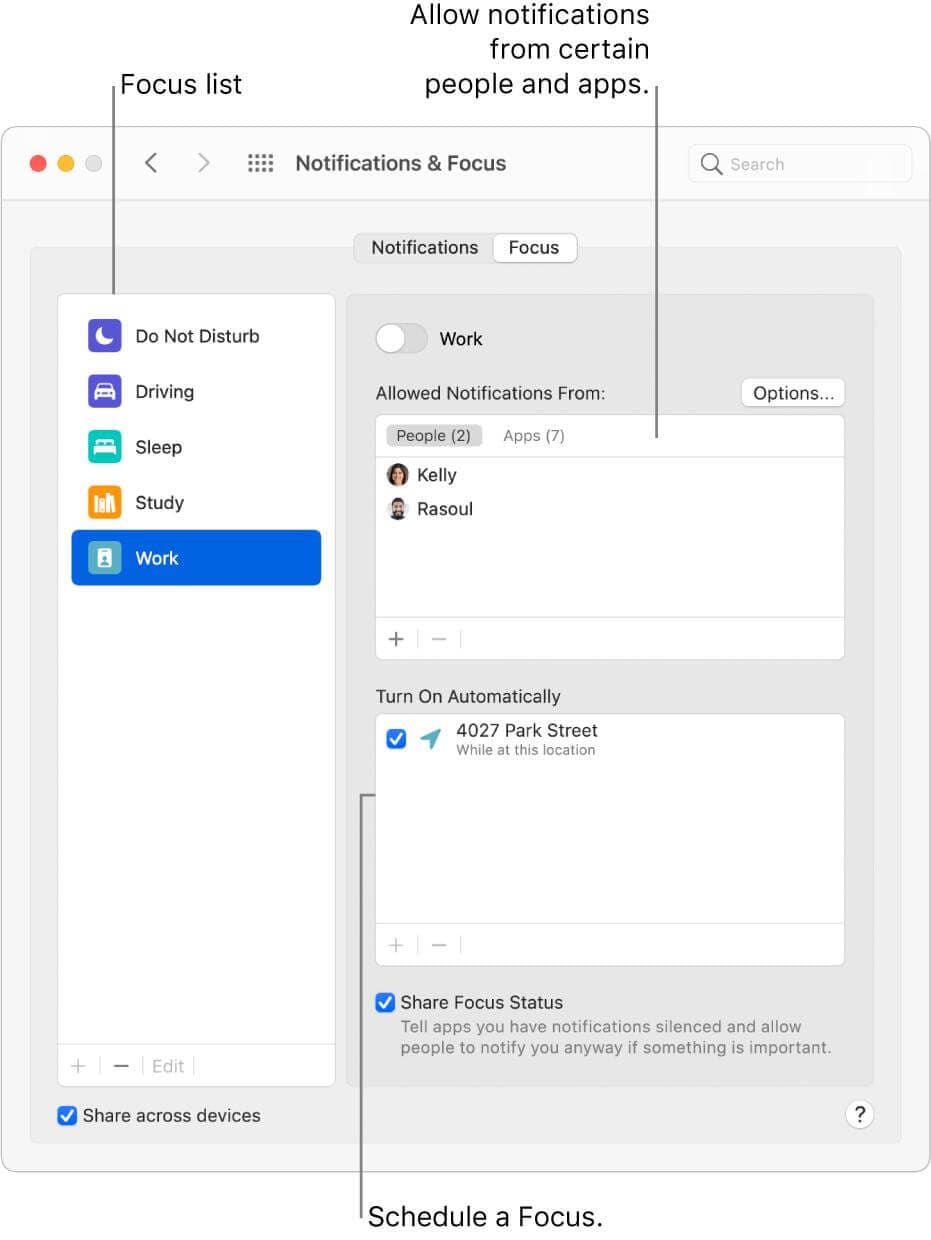
Are you still anxious about being interrupted by information? With Focus Mode, you can set it up so that you aren't interrupted by instant messages, calls, and alerts, allowing you to focus on whatever you're doing on your Mac. The default setting has multiple choices, including Do Not Disturb, Commuting, Driving, Personal, Sleep, and Work.
Besides the default, Focus allows you to set up preferences for different situations. For example, you can have a preference for your gaming time or your fitness-basically any time you don't want to be interrupted. However, to avoid miss urgent messages, you can also set the allowed interference items yourself, and the system will automatically reply your status to the contact.
Note: Once you turn on a Focus, it'll trigger on your iPhone, iPad, and Apple Watch, too (though you can turn this off if you want).
Privacy
Mail Privacy Protection
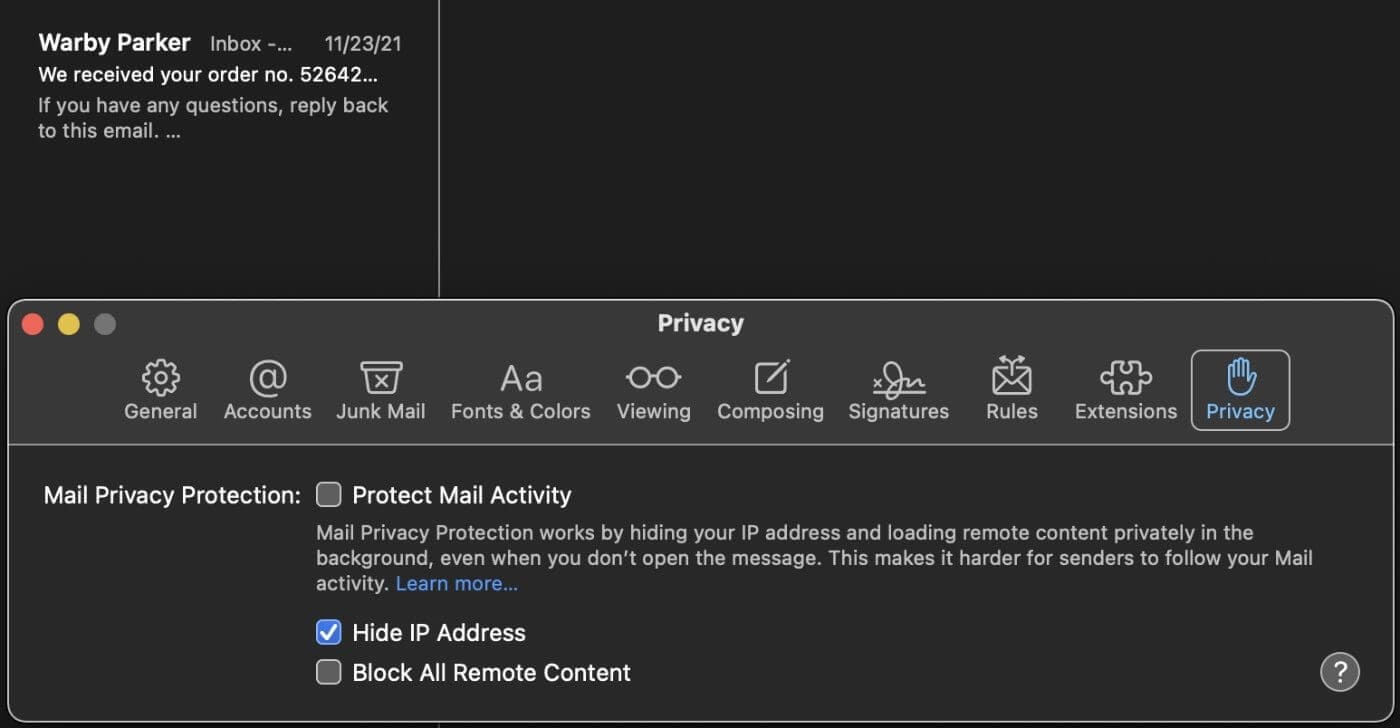
Mail Privacy Protection in macOS Monterey lets you choose whether emails can collect information about your mail privacy. As Apple notes, the Mail app can help protect your privacy.
Before getting to know how it protects your mail privacy, you should understand what tracking pixels and IP address are:
1. Tracking pixels refers to that you automatically download the image included in the mail every time you open the email, and this image request immediately lets the server know that you've opened it.
2. An IP address is a unique address that identifies a device on the internet or a local network, and emails are sent via IP address.
Therefore, email messages you receive may include remote content that allows a sender to collect information when you view the message. Information includes when and how often you view it, whether you forward it, your IP address, and other data. Luckily, you don't have to worry about this risk because Mail Privacy Protection can prevent senders from learning your information. These are achieved by impairing tracking pixels and hiding your address.
To turn on Mail Privacy Protection, you should:
- Open the Mail app;
- Click on Mail in the Menu Bar;
- Click on Preferences;
- Click on the Privacy tab;
- Click on the label that states "Protect Mail Activity."
Recording Indicator
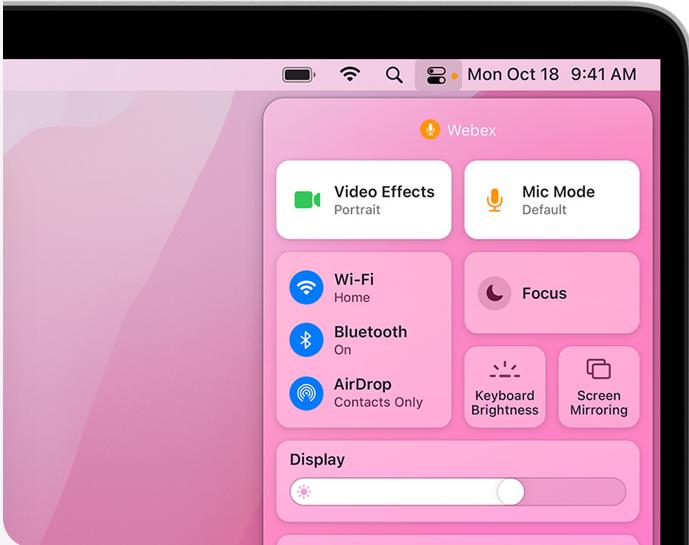
You can check which apps want to call the microphone on your Mac in the Control Center because the indicator light will be on when an app tries to access your microphone. So you can protect your privacy by preventing the app from calling.
iCloud
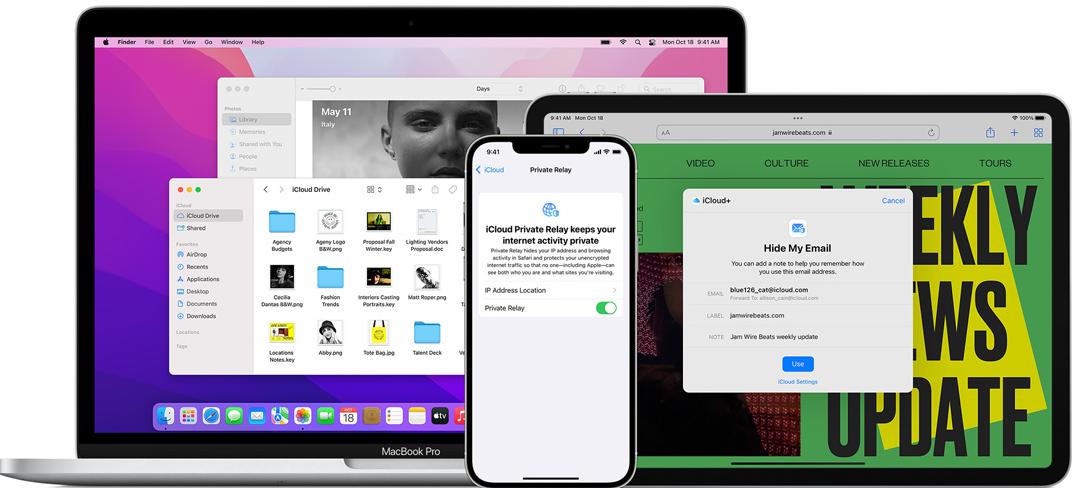
When you install macOS Monterey on your Mac, you'll see a new iCloud shared folder in the left column of Finder. This new section makes it easier to keep track of files and documents shared with you in one place. You can also see who last modified the file, the status of collaboration invitations, and other metadata.
Besides, iCloud can support unlimited cameras through HomeKit Secure Video. It can connect more security cameras than before. Once you turn off the HomeKit Secure Video, you can record, analyze and view your footage in the app. And your whole recording will be stored in an end-to-end encrypted format automatically. Not only can you view the recording, but also the people you choose possess the permission.
Shortcuts
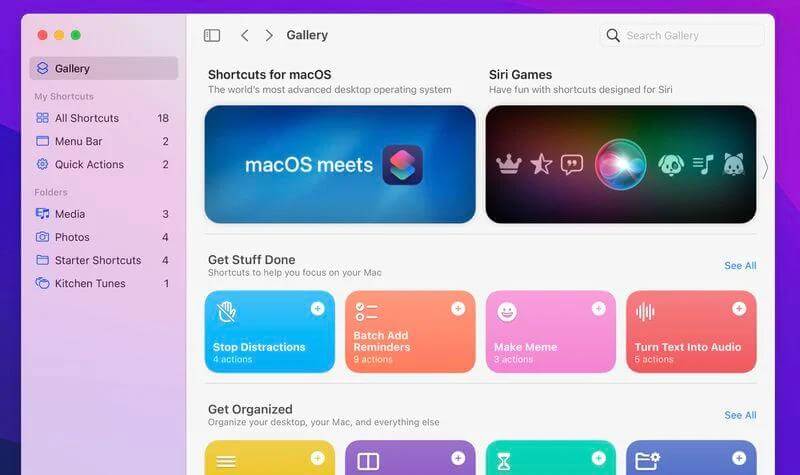
Originally introduced on iOS and iPadOS, Apple makes the Shortcuts available on Mac. So you will no longer feel inconvenient that you can't use it on Mac. Shortcuts can automatically sync across all of your Apple devices, and you can share your shortcuts with others. It is pretty easy for you to access Shortcuts, such as from the Menu Bar, Finder, Spotlight, or Siri. Besides, you can not only quickly access apps from Apple-designed Mac-specific shortcuts but also your customized shortcuts.
Maps
In upgrading macOS Monterey, Apple has added new transit features and interactive globe features to the Maps app.
As for the latest transit features, if you use a certain route frequently, you can choose to pin it to the top of the screen to save your time typing the route again and again. Besides, this feature not only shows nearby stations and transit times, but provides detailed information from a new driving map displaying traffic and road details like turn lanes, crosswalks, buses, and bike lanes.
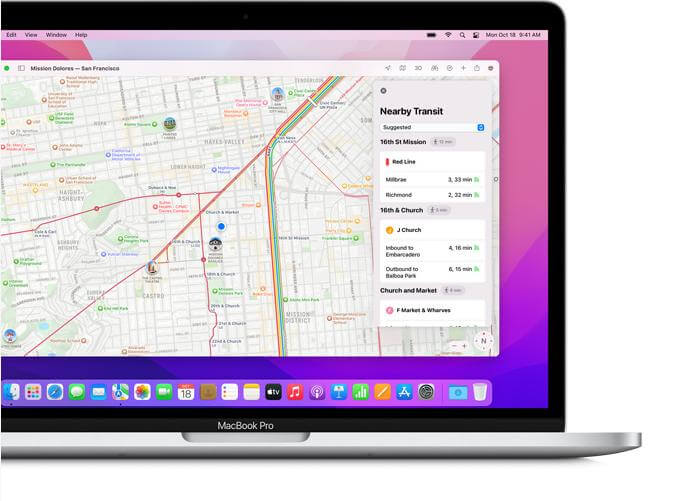
With the aid of interactive globe, you can rotate the world and drill down into different areas worldwide. It is pretty helpful for you to discover the beauty of the earth, such as mountain ranges, deserts, forests, and oceans. This not only helps you appreciate the beautiful scenery but provides a 3D view of some city landmarks. In cities that include San Francisco, Los Angeles, New York, and London, Apple has added tons more detail for elevation, roads, trees, and buildings, with these features rendered in 3D.

Live Text
Are you annoyed that Live Text can be used on iPhone but can't on Mac? You don't have to worry anymore because it is applied to Mac now!
Much like Google Lens, Live Text can digitize any context in an image and make it interactive and searchable. Gone are the days when you manually transcribe text from screenshots, notes, or textbooks. Using Live Text, you can quickly find more content in your image to relive special moments. You can copy text, click a phone number, or search for an address from a photo through Apple Photos or Camera app.
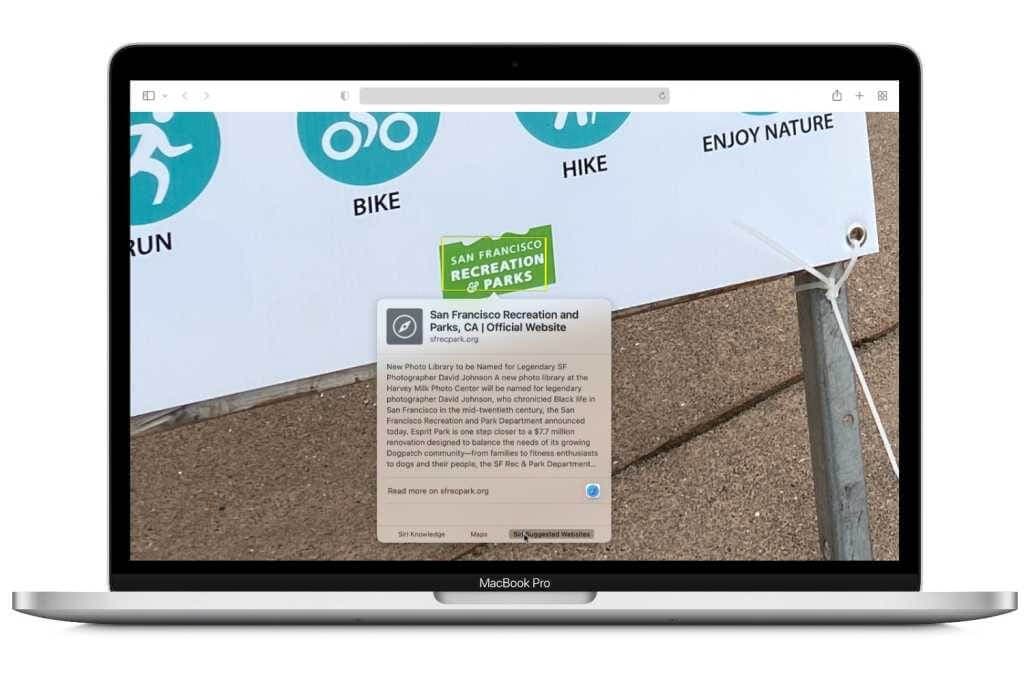
Note: All the text detection for Live Text is done on-device so that you won't leave any personal information on your computer. So don't worry about your privacy!
Translate
Apple has extended system-wide translation from iOS 15 to macOS Monterey. You can translate any text by right-clicking the text and selecting Translate, whatever text is in the image or other forms. Then you can copy the result, change the language or replace the selected text with its translation. Therefore, you will no longer be troubled by language problems because Live Text helps you master multiple languages!
Other Features
Desktop & Screen Saver: Apple has extended the availability of the "Hello" screensaver to all Macs with macOS Monterey. You can set up a new "Hello" screen saver by going to System Preferences > Desktop & Screen Saver > Hello. You can choose 34 languages of hello as you like.
Notification: With contact photos for people, you can set photos for your families or friends. It provides functions of muting notifications of any app or messages. And you can get a suggestion to mute the active thread while you aren't engaging with it.
Memoji: It has added 37 new emojis, including faces, hand gestures, household objects, and plants. And to make Memoji more playable, Apple has provided over 40 choices and three new glasses for you to customize individualized emojis. Particularly, if you are a sports team fan or a college student, you can use some Memoji stickers to represent your identity.
News: The interface of News has been redesigned with more publish times and bylines. So, you can easily find the latest news to read and easily save and share news you like or enjoy.
Photo-Visual Lookup: Visual Lookup can recognize paintings, breeds of pets, landmarks, and some other image content. You can apply this feature by going to clicking Ctrl on the image > Look Up. Then you'll find the basic information about the image. Don't you think it is incredibly simple to recognize the images' content?
Voice Mios: You can use it to playback recording speed, including speeding up or slowing it down. Besides, it can skip silence by analyzing your recording and automatically skipping over gaps with a single click to save a lot of manual processing time. And you will be surprised that you can edit your recording right on Mac, whether you captured it from your Mac, iPhone, iPad, or Apple Watch.
Digital Legacy Program: It allows you to designate five people as Legacy Contacts at most. You can pass sensitive data and personal information stored in your iCloud to them in the event of your pass-away. However, it is worth noting that your data won't be available forever. Because once your Legacy Contacts request access, Apple will give you an expiration date. After that date, Apple will delete your account and data.
Reset without Installing: Are you bothered by restarting your Mac to reset it, for it wastes a lot of time? Now you can say "no" to this because Apple offers a shortcut for resetting your Mac without reinstalling it. You can factory-reset your Mac by going to: System Preferences from the Apple Menu Bar > Erase All Content and Settings > Typing your admin password and clicking OK and Continue > Reading the warnings and click Erase All Content & Settings > Choosing a Wi-Fi to activate your Mac.
Low Power Mode: Now, you can enjoy Low Power Mode like iPhone and iPad on your Mac to reduce system clock speed and display brightness to external battery life. You need to go to System Preferences > Battery Pane > Battery to turn on the mode.
Finder & Windows: Finder allows you to use shortcuts to add apps to the menu bar and quickly go to the folder to find the needed files. As for Window Management, you can switch apps in split view, which is more convenient for users who need to multitask. And if you click the button "Replace Tiled Window" under the green icon in the lower-left corner, the app will be switched to full-screen mode.
Accessibility: The most significant change in accessibility is that you can use the on-screen Accessibility Keyboard. You can use an expanded set of keyboard shortcuts and improvements to Full Keyboard Access to control everything on your Mac with a keyboard rather than a mouse or trackpad. When you type on this keyboard, a wide range of possible words are suggested, reducing the amount of typing you need to do.
Now that you have had end-to-end knowledge of what is macOS Monterey and what is new in MacOS Monterey with the above features, let's get started to upgrade Macs!
Part 2: Compatability & Installation of MacOS Monterey
Is your Mac compatible with the new version of macOS Monterey? Here are the models supporting it:
- iMac (late 2015 and later)
- iMac Pro (2017 and later)
- MacBook Air (early 2015 and later)
- MacBook Pro (early 2015 and later)
- Mac Pro (early 2013 and later)
- Mac Mini (late 2014 and later)
- MacBook (early 2016 and later)
To find out your Mac model, you'll need to tap the Apple icon and the Menu Bar to "About This Mac." Then you should back up your Mac data through Time Machine. Next, to download and install macOS Monterey, here are the steps:
- Click on the Apple Menu
- Click on the System Preferences
- Click on the Software Update
- Click on the Update Now
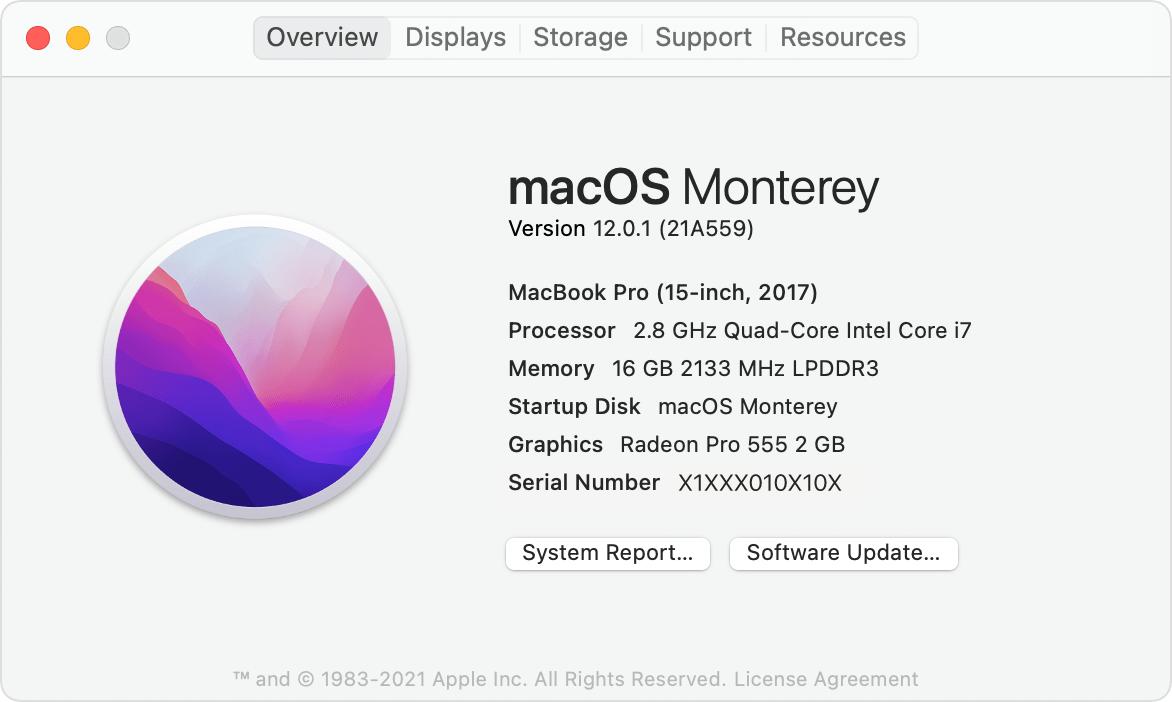
Well, now you just have to wait with a cup of coffee or a piece of cake to finish the download and install. After the installation is completed, you can enjoy the macOS Monterey to the fullest!
Read More: How to Downgrade macOS to the Previous Version?
Part 3: Tips to Fix Upgrading Problems of Mac
During your upgrading, you may face some problems. Here are seven tips to fix the upgrading issues of your Mac.
Ensure That Your Mac Has Enough Space
The very first thing that you do to resolve the macOS Monterey update issues is to check whether or not you have enough space to accommodate the software update:
- Click on the Apple menu;
- Choose About This Mac;
- Click on the Storage tab.
If your Mac is cluttered with space, delete all the redundant files and apps that have clogged up a lot of space. Ample space is needed to download the update files and then for the updates to install. Once installed, the original files are deleted, but you need enough space for both steps of the whole process.
Restart Your Mac
If you can't update your Mac even after cleaning up the storage, restart your Mac. A normal restart may solve random problems. Just give it a try.
Ensure Your Mac a Stable Connection
Software updates often fail due to poor internet connection. So, make sure your Mac is under a stable internet circumstance. First, click on Wi-Fi Menu and turn it off. Then turn it on to check whether your Mac connects to the internet. If the Internt is still unstable, you can try to restart your router once.
Ensure That Apple's Servers Are Not Experiencing Issues
Many things come to a halt when Apple's servers face an outage, including the macOS Monterey update. Hence, make sure Apple's system status for the Mac update is live and running. Go to Apple's system status page and ensure that the circle to the left of the macOS software update is green.
Update Your Mac in Safe Mode
It's worth noting that your Mac should be under Safe Mode during the update. By blocking the problematic apps and software, it allows the Mac to boot up securely, which often fixes miscellaneous issues. Here are the tips:
- Turn off your Mac and immediately press Shift until the login screen appears;
- Let go of the Shift key and log in.
Once your Mac has entered the safe mode, try to update it. After your Mac has successfully updated, restart your Mac normally to exit the safe mode.
Reset the NVRAM
If you want to troubleshoot macOS Monterey freezing, follow these sections:
- Shut down your Mac;
- Find Command, Option, P, and R on your keyboard;
- Turn on your Mac;
- Press and hold the Command-Option-P-R keys immediately before hearing the startup sound;
- Hold these keys until the computer restarts, and you hear the startup sound for a second time;
- Release the keys.
Recover Data Once You Lose After Getting Updated
You may have the trouble of losing your data after your Mac update. Don't worry. You can recover your data with the best data recovery software for Mac, called Wondershare Recoverit. Recoverit can help you recover deleted files on Mac, like critical documents, photos, or videos. Even if your Mac is bootable, Recoverit still plays its role. Just three steps to get back your lost Mac files:
- Select: Launch the Recoverit for Mac and select a specific drive where you lost data.
- Scan: Scan the selected location to search for your lost files on Mac.
- Recover: Preview the files from the resulting menu and click on "Recover" to get deleted files back on Mac.
If you want to know more about Recoverit, here's the guide: How to Find Files on Mac, and How to Recover Videos on Mac.
Part 4: Related Questions Searched for Frequently
Will macOS Monterey slow down my Mac?
Everyone's experience is different. People running the latest M1 Macbooks love the update, but people with older Intel devices feel that macOS Monterey is slower than before. For Apple, the new releases of operating systems are usually faster than the ones that came before.
Is macOS Monterey available now?
Sure, macOS Monterey is available as a free software update on Macs with Apple silicon and Intel-based Macs. Intel-powered Macs don't boast features like FaceTime Portrait Mode, Interactive Globe, Spatial Audio, etc
Should I upgrade my Mac to Monterey?
If you are not supposed to be sure about the stability of the new operating system. It is recommended for you not to upgrade immediately after an operating system update. Instead, you can wait a little while after an operating system drops so all the problems can get worked out
How long does the macOS Monterey installation take?
According to some users, it takes 45 minutes to several hours, depending on how slow your internet connection is
Conclusion
Now that you have an end-to-end understanding of what is macOS Monterey, just learn the above tips, then you can easily handle problems of macOS Monterey, whatever its features and upgrading!


