
 TL;DR:
To completely remove Ubuntu from a Windows 10/11 dual-boot system, you must either run the Wubi uninstaller through the Windows Control Panel or manually delete the dedicated Linux partitions and rebuild the Windows boot loader.
● Identify and delete dedicated Linux partitions using the Windows Disk Management utility by locating the volumes that lack a specific drive letter or recognized file system.
● Deleting the Linux partition inherently removes the GRUB boot loader, making a bootable Windows USB drive a mandatory prerequisite to access the system recovery Command Prompt.
● To repair the Master Boot Record and bypass the Grub Rescue error, execute the bootrec/FixMbr, bootrec/RebuildBCD, and bootrec/FixBoot commands before restarting the computer.
Ask AI for a summary
 ChatGPT
 Perplexity
 Gemini
 Claude
 Grok
Grok
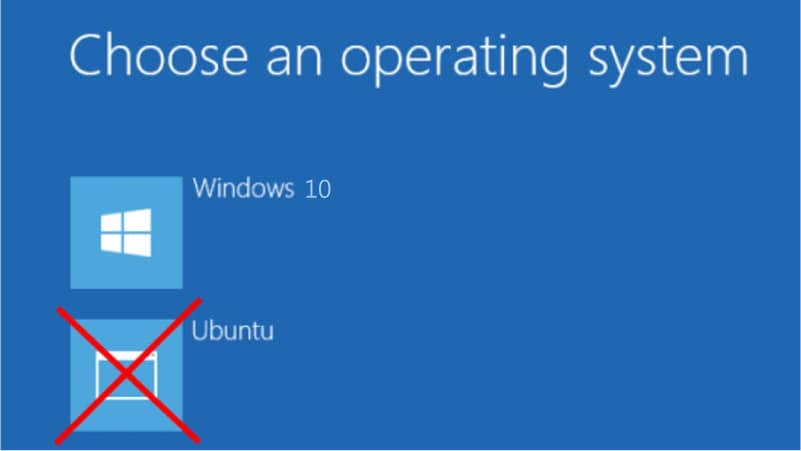
When users want to switch to Linux OS, they can dual boot Linux and Windows on their computer, allowing them to use both simultaneously. However, users may wish to remove Ubuntu from their dual boot for several reasons.
Whatever the reason, removing Ubuntu from dual boot on windows 10/11 is necessary due to the space it takes up on your hard disk. Still, the uninstallation steps can sometimes be clarified for users, making it difficult to remove the dual boot. Good thing this article will lead you through the steps of deleting Ubuntu from dual boot on Windows.
Part 1. Before Removing Ubuntu From Dual Boot
There are two ways how Linux was installed:
- Installed Linux with Wubi
- Installed Linux to its own partition
If you installed Wubi alongside Ubuntu or a similar Linux distribution like Linux Mint, uninstalling it is a simple task. If you installed Linux on its partition, you must delete the Linux partitions from your computer before expanding your Windows partitions to utilize the currently available hard disk space.
It would help if you also recovered the Windows boot loader because Linux overwrites the Windows boot loader with its boot loader, known as GRUB. As a result, the GRUB boot loader will not boot your computer properly after deleting the partitions.
Preparations:
- A bootable USB drive for your Windows version (This will be used to repair the Master Boot Record (MBR) once the Ubuntu has been removed from your PC.)
- Make a backup of any critical files on your Ubuntu system.
Part 2. How To Remove Ubuntu From Dual Boot If You Installed It With Wubi
If you installed Linux as the only operating system, you must reinstall Windows over Linux to restore your Windows system. However, if you install Ubuntu with Wubi, it is simple to remove Ubuntu from dual boot on Windows:
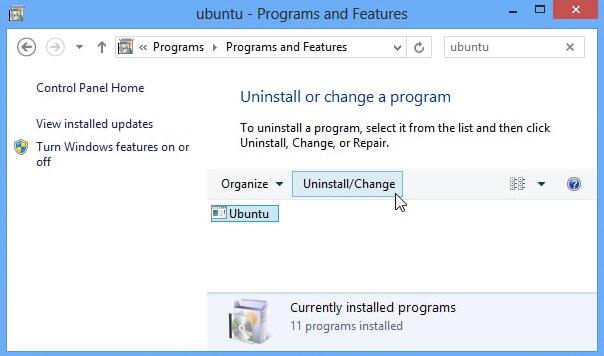
Step 1. Start Windows and navigate to Control Panel > Programs and Features.
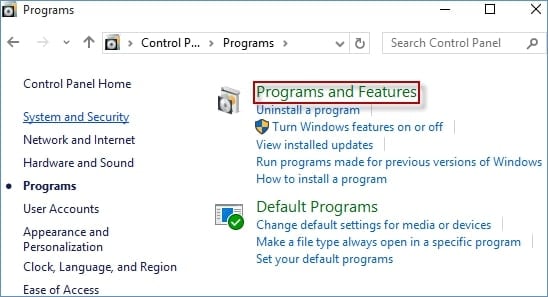
Step 2. Look for Ubuntu in the list of installed programs and remove it as you would any other program. The uninstaller automatically deletes the Ubuntu files and boot loader entry from your PC.
Part 3. How To Remove Ubuntu From Dual Boot If You Installed It to Its Own Partition
In most cases, there isn't a simple uninstaller that will remove Ubuntu from the dual boot if you install it to its partition. Instead, you must manually repair the Windows boot loader and remove its partitions. The steps to remove Ubuntu from dual boot are listed below.
Step 1: Delete the Linux Partition on Windows.
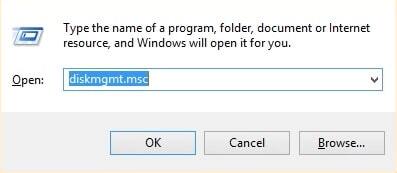
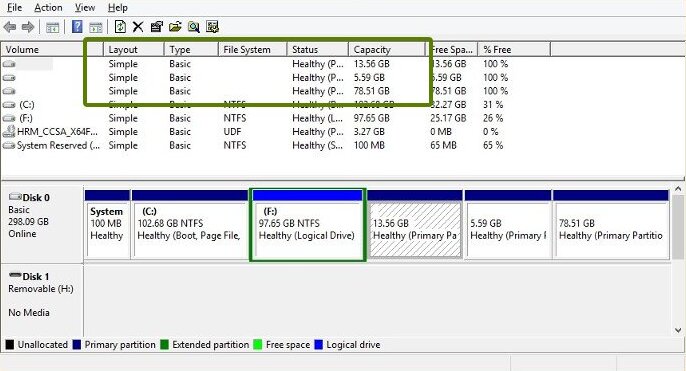
1. Start Windows and enter diskmgmt.msc into the dialog box by pressing Windows+R. It will launch the Windows Disk Management utility.
2. Because you installed Linux, you'll be able to identify the Linux partition by size. Another hint for locating the Linux partition is to look for those that lack a file system and a drive number. Windows partitions are identified by a drive letter, such as C, D, E, etc., and typically use the NTFS or FAT file systems.
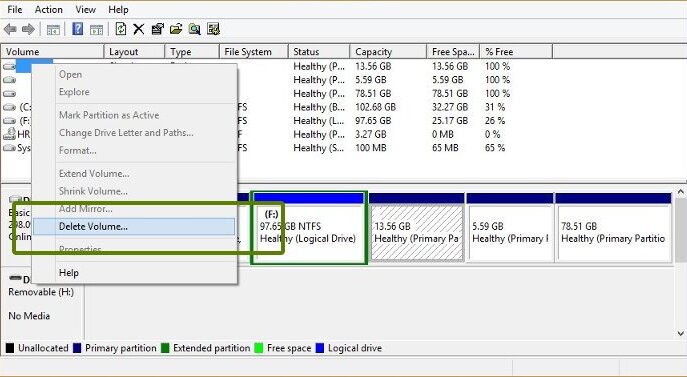
3. Select the Linux partition(s), right-click, and choose Delete Volume.
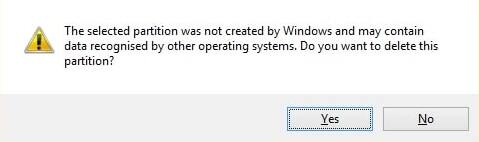
4. It will issue a warning; press Yes to confirm the deletion of the Ubuntu Linux partition on Windows PC.
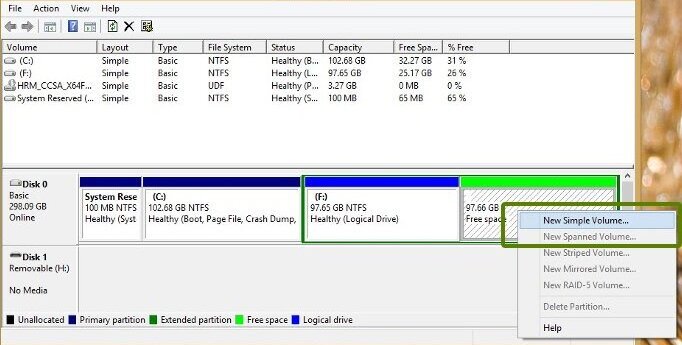
5. The deleted partition(s) will now be available as free space on the disk. You can either extend the existing volume or use it to create a new Windows partition. It is recommended to create a new drive because it will make it easier if you decide to dual-boot Linux and Windows again.
Step 2: Fix the Windows Boot Loader.
This is where the Windows bootable USB drive comes in to help solve the Grub Rescue error. You must boot your computer from this USB drive. The Windows installer will begin after you boot your computer from the USB.
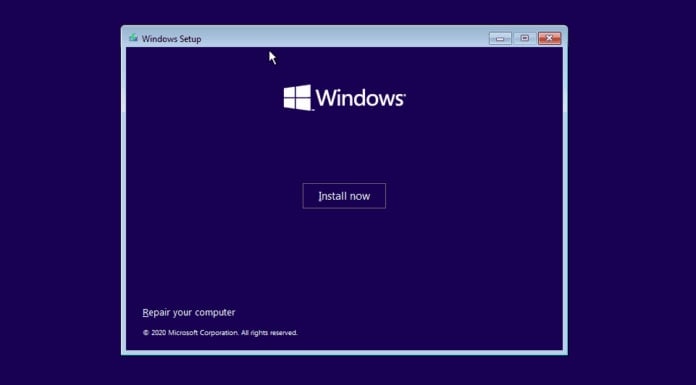
1. After selecting the language to use during the installation process, two options are displayed: Install Now or Repair your computer. Select Repair Your Computer.
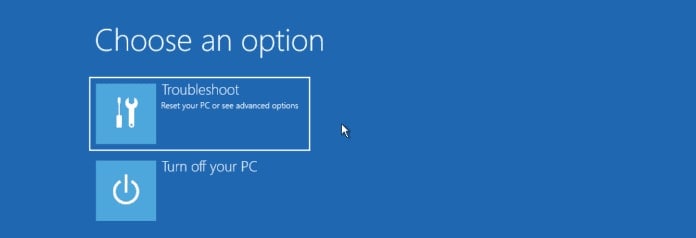
2. To access the Advanced Options screen, click Troubleshoot.
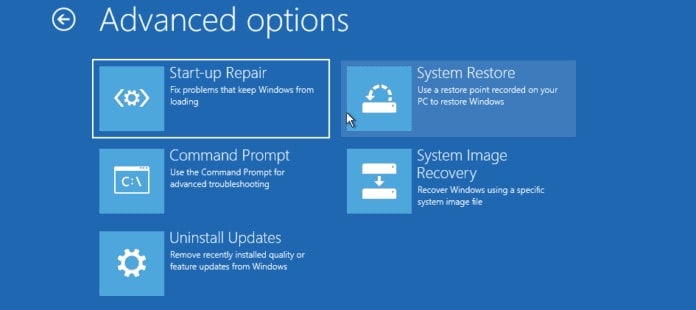
3. 5 troubleshooting options are available: Start-up Repair, Command Prompt, Uninstall Updates, System Restore, and System Image Recovery. Select Command Prompt. It will launch the Windows command prompt, from which you can issue various commands to repair your MBR. For advanced users, you can also access the DiskPart utility from here and partition or format your hard drive.
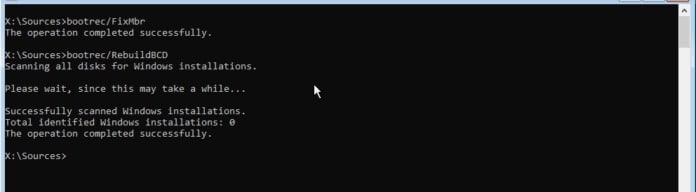
Step 3. To repair the Master Boot Record, enter the following commands:
bootrec/FixMbr
|
After successfully executing the commands, type Exit and restart your computer. Remember to remove the bootable USB drive. Your Windows operating system will boot normally and without the GRUB rescue error.
Part 4. How To Back Up Important Ubuntu Data
How can you make a backup of important Ubuntu data without booting into Linux? Wondershare UBackit came to the rescue. It is a reliable backup software that can help you save important files. This software automatically backup your important files, folders, partitions, and hard drive. It can also monitor the backup process, storage space, and data security competently.
Follow the step-by-step guide below to back up important Ubuntu data using Wondershare Ubackit.
Step 1. Choose a Partition to Backup.
Launch Wondershare UBackit, navigate the Backup & Restore tab, and select Create New Backup. Next, choose any partition you want to back up from the sidebar.
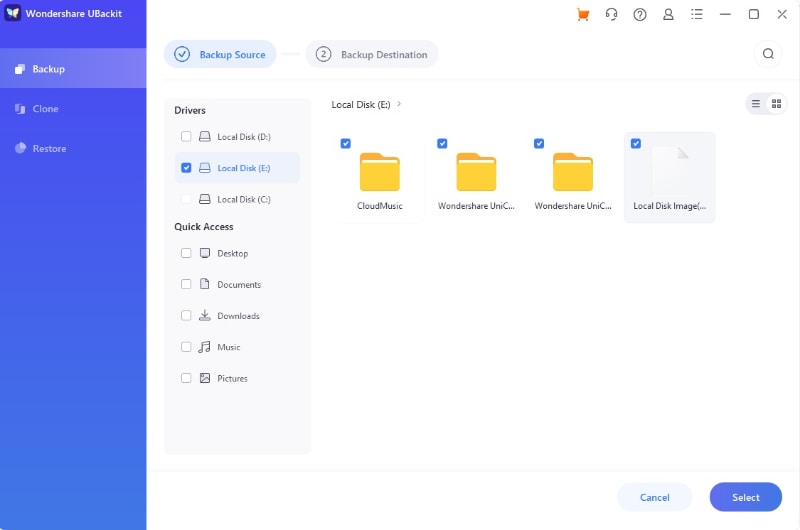
Step 2. Choose a Backup Location.
After selecting a partition can specify where the backup should be saved. It can be an internal drive or any other external source.

Step 3. Finish the Backup Procedure.
Click Backup and wait for UBackit to create a backup of the entire partition on the specified drive. Because it may take a few minutes, you should wait and not close the application in the meantime.
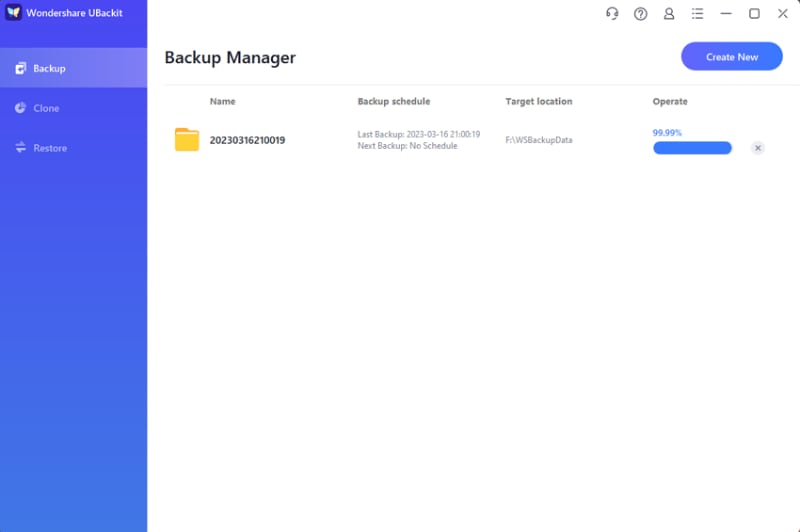
UBackit will notify you when the backup process is complete, allowing you to manage your data efficiently.
Video Tutorial: Removing Ubuntu or Other Linux From Dual Boot
For detailed instructions, you can view the video tutorial below.
Conclusion
That concludes our comprehensive guide to successfully uninstalling Ubuntu from a dual-boot on Windows 10/11, whether installed Linux with Wubi or installed Linux to its partition. It also works with other Linux distributions. If you need to back up your important files, or partition, you can download Wondershare UBackit.


