
 TL;DR:
You can bypass external hard drive limitations and stream your media across a local network by activating the iTunes Server app in the QNAP QTS Control Panel and consolidating your library to the NAS.
● Prior to setup, iTunes must be installed and active on your computer system so you can authenticate into the linked Firefly web client to execute a full scan of your media database.
● To migrate your existing library without data loss, mount the QNAP NAS in Finder, update the iTunes Media folder location in Preferences, and run the Consolidate files command.
● If your shared library vanishes following a QTS or iTunes update, you can scan and restore the missing media via a remote connection using the NAS Recovery feature in Wondershare Recoverit.
Ask AI for a summary
 ChatGPT
 Perplexity
 Gemini
 Claude
 Grok
Grok
Opting for external hard drives to accommodate a large iTunes library doesn’t seem feasible. You might need a more practical approach to eliminating dependence on such external drives. Therefore, setting up the QNAP iTunes server is pretty convenient & hassle-free.
Part 1. What Is an iTunes Server NAS?
iTunes Server NAS indicates the iTunes library stored on NAS that can be accessed over the local network on various devices. You can then easily stream your stored music & videos from NAS. Note that you must choose an appropriate NAS device that fits your needs. Thus, here we have put forward some basic information about QNAP NAS.
| Developer | Teddy Kuo Meiji Chang |
| Initial Release | QuTScloud c4.5.1 (2020-07) |
| Latest Release | QTS 5.0.1 (2022-09-15) |
| Price | US $1.99 per month |
| Target Users | Small to medium-sized businesses, people with specialist knowledge of disks, photographers & other individuals involved in the filming industry |
| Supported OS | QTS, QuRouter |
Part 2. How To Set Up iTunes Server On Your QNAP NAS?
Streaming the iTunes' media files is still possible via NAS if you are away from your Mac device. Given this, you must be familiar with setting up the iTunes server on your QNAP NAS.
Note: Before setting up the iTunes server on your QNAP NAS, make sure iTunes is installed & enabled on your computer system.
Operational Steps:
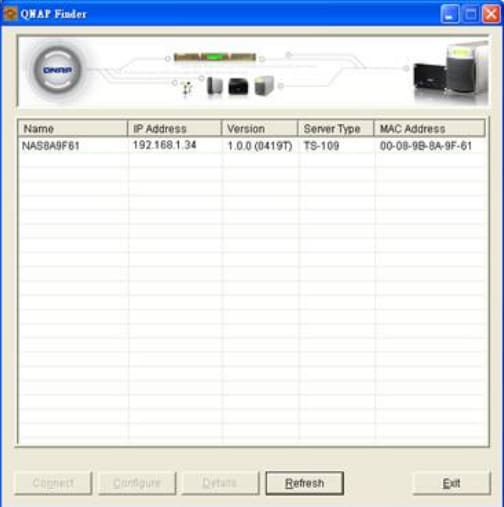
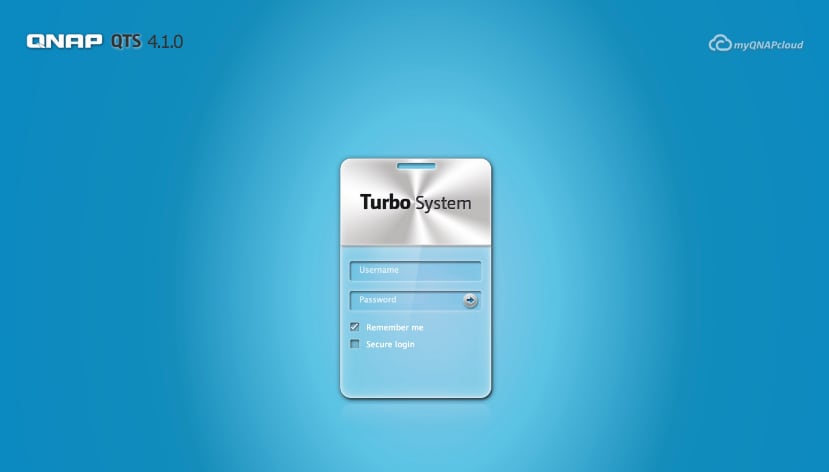
Step 1: To open up the QTS Desktop environment, login to the QNAP using the QFinder Desktop application.
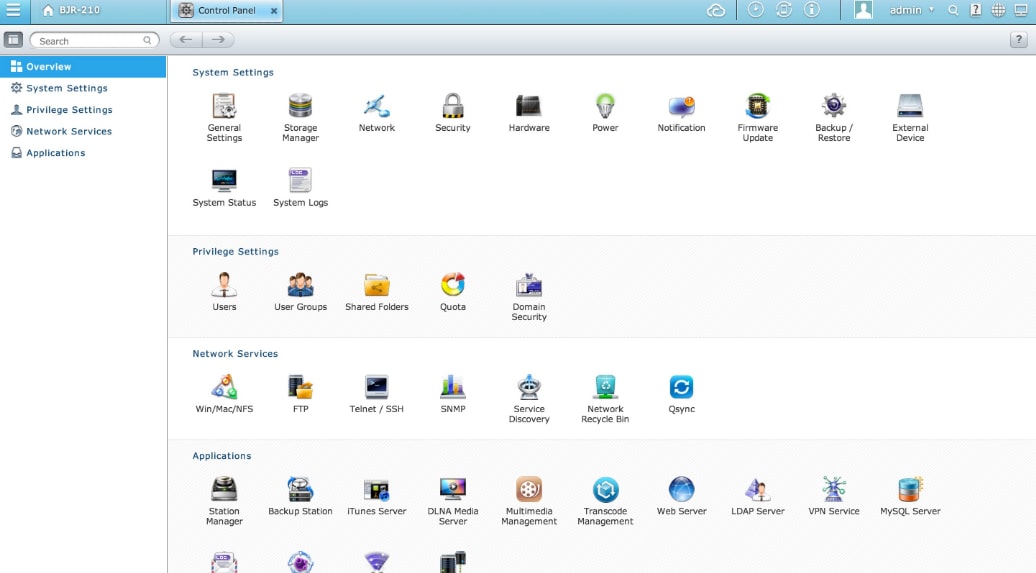
Step 2: Click the Control Panel application from the QTS Desktop environment.

Step 3: Locate the iTunes server app below the Applications tab in the Control Panel menu and launch it.
Step 4: In the next prompted screen, checkmark the options Enable iTunes Server, and After enabling this service, click the following link to enter the iTunes Web server configuration page. Then Enter your credentials and click on the Apply button.
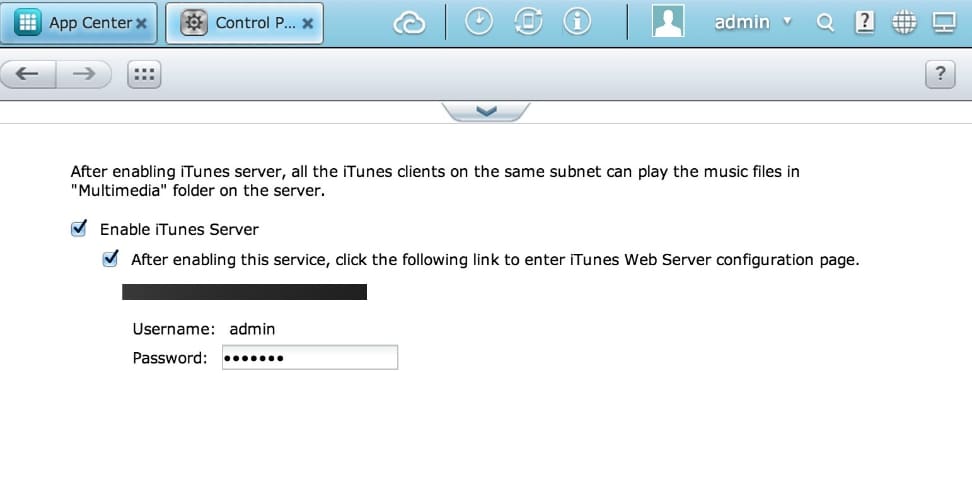
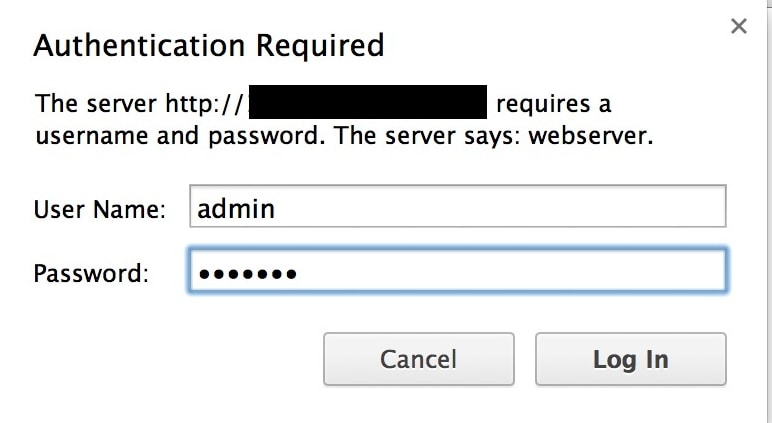
Step 5: Now, the iTunes server is activated. So, to overview other related stuff, click on the web link above the password field. Enter your username & password for authentication and click on the login button.
Step 6: You will be directed to the Firefly web client, where your QNAP iTunes server is located. Here, selects the Server Status tab from the left panel and click the Start Full Scan button.

Step 7: Select the Configuration tab from the left panel to overlook the settings control for the server. Here you can alter the information related to Server, Music Files and Database.

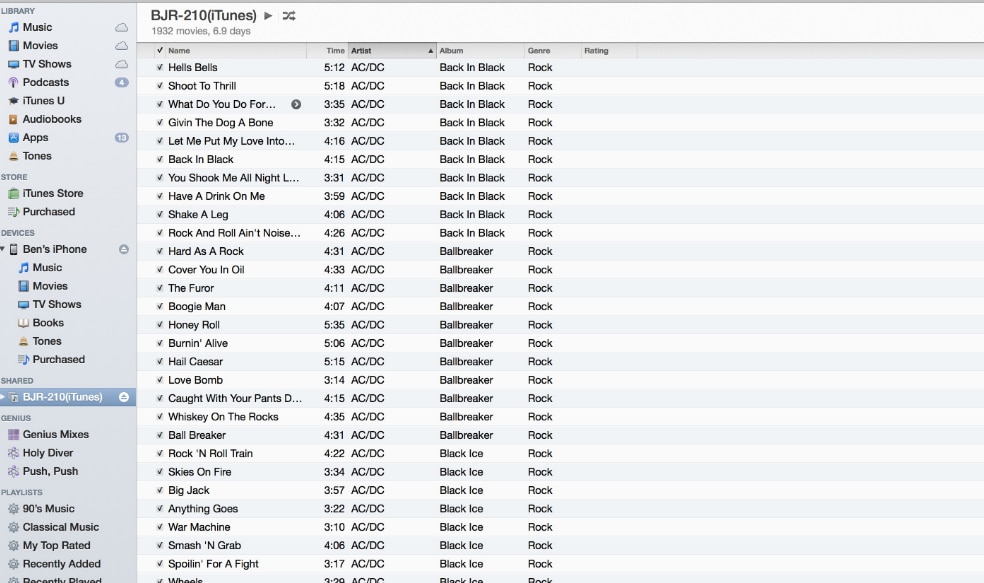
Step 8: Afterward, you can launch iTunes on your system to ensure everything works fine. To do so, you can play the music if you have located a QNAP library in the Shared tab of iTunes.
Part 3. How To Use QNAP NAS as Your iTunes Library?
Once you successfully set up the iTunes server on NAS, you can access all your iTunes files using NAS. Here, we have explained how you can use QNAP NAS as your iTunes Library.
Note: To avoid data loss, you must backup your files before using QNAP NAS as your iTunes library.
Operational Steps:
Step 1: In the first place, make the NAS device mounted and show up in the Finder.
Step 2: Launch the iTunes Preferences and click on the Advanced option.
Step 3: Click the Change button next to the iTunes Media folder location option.
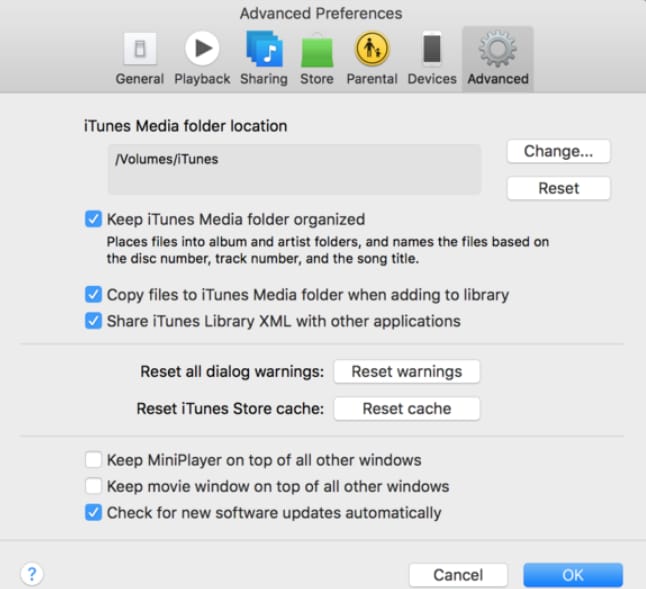
Step 4: Launch the iTunes folder in NAS and click OK.
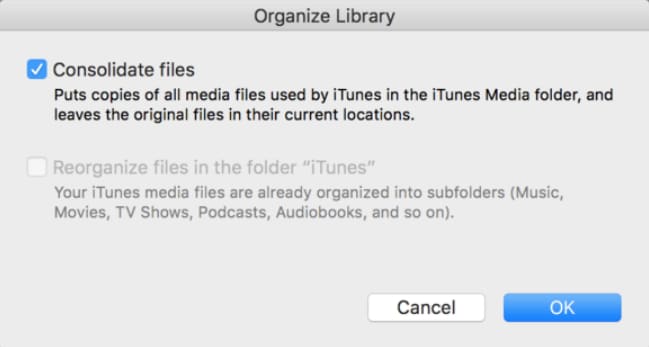
Step 5: Follow this path: Choose File > Library > Organize Library and checkmark the option Consolidate files. Then Click Ok. This will copy all your iTunes files to the iTunes NAS folder (new location).
Step 6: Now, all the iTunes files will be accessible in NAS.
Part 4. How To Recover iTunes Library on Your QNAP NAS Easily?
If you cannot access your iTunes files using NAS that used to appear there previously, you aren't alone. The iTunes shared library often goes missing on QNAP, especially if you've recently updated the QTS or iTunes. Therefore, you might need an effective data recovery tool that retrieves lost files. For such a recovery, you can rely on the Wondershare Recoverit recovery tool, which can recover all sorts of lost data.
Why You Should Choose Recoverit To Recover NAS Data?
The reliability factor matters the most when choosing a recovery tool to recover your important data. So, Wondershare Recoverit is highly reliable and has successfully assisted millions of users in recovering their data. It allows you to recover any sort of data without any limit. Even in its paid version, you'd get a full refund if you can't retrieve your data given any cause.
For Windows Vista/7/8/10/11
For macOS X 10.10 or later
Operational Steps:
Step 1: Launch the Recoverit application on your computer system.
Step 2: Select NAS and Linux option from the left panel and click the NAS Recovery button.

Step 3: You will get prompted to a screen stating Select a NAS server to start recovery.
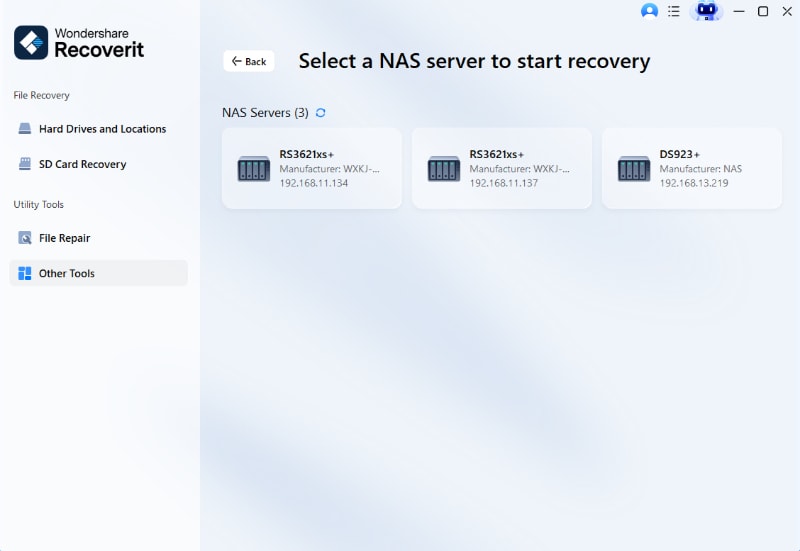
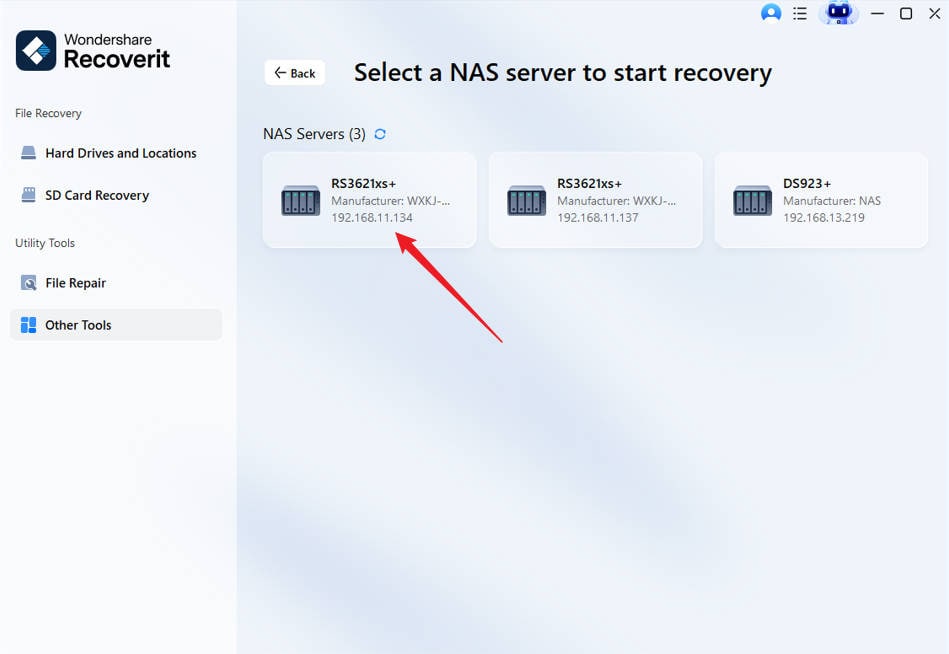
Step 4: Select the respective NAS device where you lost the data.
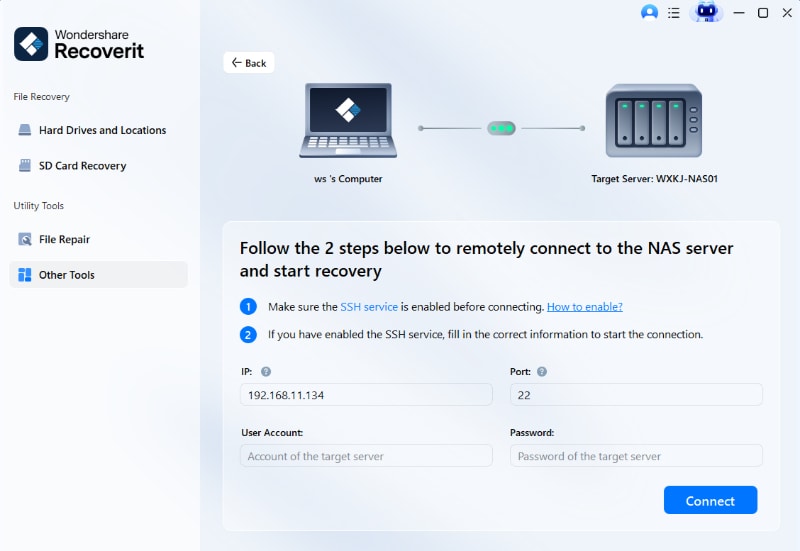
Step 5: Now enter the required information in the fields and click the Connect button to develop a remote connection.
Step 6: The Recoverit will automatically initiate scanning to dig out the lost data in your selected NAS device. (The scanning process may take a few minutes)

Step 7: Once the scanning process gets completed successfully, you can preview the files you intend to recover. Then click on the Recover button to restore your deleted files.

Step 8: You will be asked to select a path to save files. So, choose a specific path to save the recovered files conveniently.

Video Tutorial on How to Recover Files from NAS Server?
For Windows Vista/7/8/10/11
For macOS X 10.10 or later
FAQs
Can iTunes run from a NAS?
Yes! But to run iTunes from NAS, you need to set up your iTunes server to your NAS in the first place.
What is the purpose of QNAP?
QNAP allows you to store & manage your files on NAS; you can even share your stored data with other users connected to the same LAN.
How do I stream from QNAP NAS to Apple TV?
You can conveniently stream from QNAP to Apple TV using the Qmedia application. Qmedia app can be installed to browse and stream your favourite content.
Can I use QNAP without the internet?
Yes, you can use QNAP without any internet connection.
How do I connect QNAP to my Mac?
You can connect QNAP to your Mac using Qfinder Pro. To do so:
Step 1: First, download & install the Qfinder application on your Mac device.
Step 2: Launch the Qfinder Pro application.
Step 3: Select the NAS and click on the Network Drives option.
Step 4: Enter your credentials (username & password) and click "OK".
Conclusion
Suppose you're tired of storing files in your limited Mac storage. In that case, you can set up your iTunes server on QNAP NAS, which doesn't require additional hardware. Therefore, here we have stated the detailed process of how you can use QNAP NAS for iTunes.
For Windows Vista/7/8/10/11
For macOS X 10.10 or later


