We have all been there. You work hard on a Word document. Then, you accidentally click "Don't Save" on Word on your Mac. Panic sets in. Right? Well, you think your work is gone forever. But don’t worry. We have solutions for you.
You might say "I accidentally clicked don't save on Microsoft Word Mac" or "I accidentally clicked don't save Word on Mac". There are ways to recover unsaved Word documents on Mac. This guide will help.
When you lose a document, it can be very stressful. But don’t worry. There are steps you can take. With the right tools, you can get your document back. Let’s explore some effective methods. Here, we will cover steps for unsaved Word document recovery on Mac. We will explore different methods.
Try Recoverit to Recover Unsaved Word Document on Mac
Security Verified. Over 7,302,189 people have downloaded it.
In this article
Part 1: Is It Possible To Retrieve Unsaved Word Documents On Mac?
Yes, it is possible. You can find unsaved Word documents on Mac. Many users have recovered their files.
One common method is to check Word temporary files on Mac. Another is using Time Machine. Both can help recover Word documents not saved on Mac. It is important to act quickly.
When you accidentally click don't save on Word Mac, the document is not deleted immediately. Word often saves temporary versions. These can be used to recover unsaved Word docs on Mac.
Get Back Deleted/Lost/Damaged Word Files Fast!

Part 2: How To Recover Unsaved Word Document In Mac?
When you accidentally click "Don't Save" on Word on your Mac, it can feel like a disaster. But don't worry; there are several methods you can use to recover unsaved Word documents. These techniques can help you retrieve your important files with ease.
Let's explore these methods step-by-step.
Method 1: Use Recoverit For Unsaved Document Recovery On Mac
Recoverit is a third-party tool. It helps in retrieving lost data. It is effective and easy to use. Recoverit supports many file types. It is a good option when you need to recover unsaved Word documents on Mac.
Recoverit helps users recover lost files. Whether it's a deleted file or an unsaved document, Recoverit can assist. It scans your Mac for lost files and helps you get them back.
Here are several key features of Recoverit:
- Enhanced Photo and Video Recovery: This feature thoroughly scans storage devices to find more data remnants and attempts to repair damaged parts, including UHD, 4K, or 8K video clips.
- System Crash Recovery: It specializes in recovering files from a corrupted or unbootable system, which is crucial for businesses and individuals who cannot afford to lose important work.
- Deep Scan Technology: The software's deep scan function searches for traces of data even in the most challenging recovery situations, offering a more thorough retrieval process.
Here’s how to recover Word document not saved on Mac using Recoverit tool:
- Download and install Recoverit on your Mac. Open Recoverit and select the location where the document was saved. Click Start.

- Scan results will show. Look for your Word document.

- Select the document and click Recover.
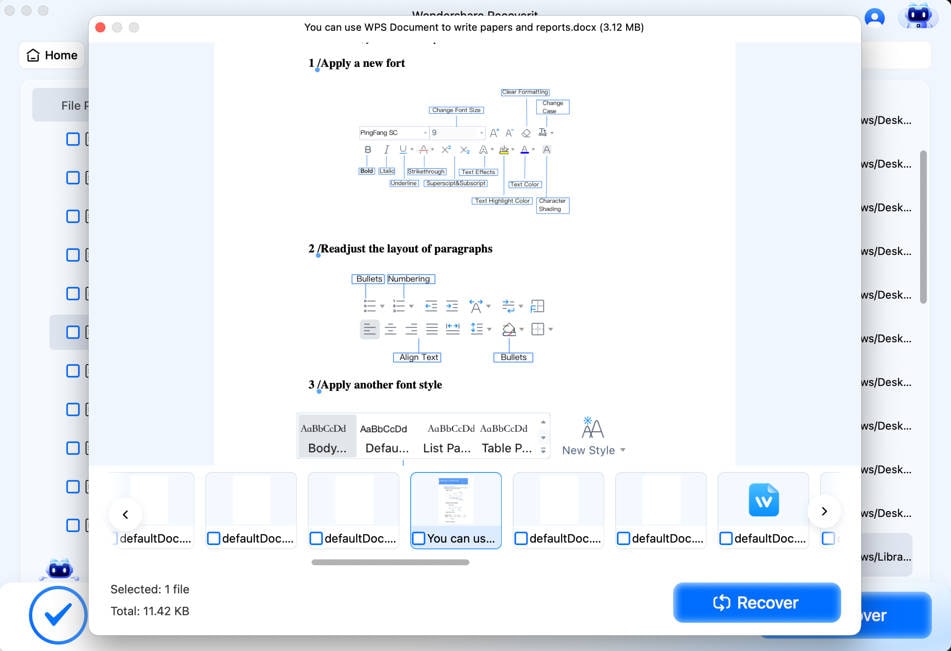
Related Video >>: How to Recover Unsaved/Lost Word Documents on Mac?
Method 2: Use Auto Recovery To Find Unsaved Word Document On Mac
Microsoft Word has a built-in Auto Recovery feature. It saves versions of your document while you work. This is useful for recovering unsaved Word documents on a Mac.
Auto Recovery is a lifesaver. It automatically saves copies of your document. If you accidentally close Word without saving, Auto Recovery helps you get your document back.
You can often find the most recent version of your document. Just reopen Word, and the unsaved document should be available. This minimizes the risk of losing important work.
Steps:
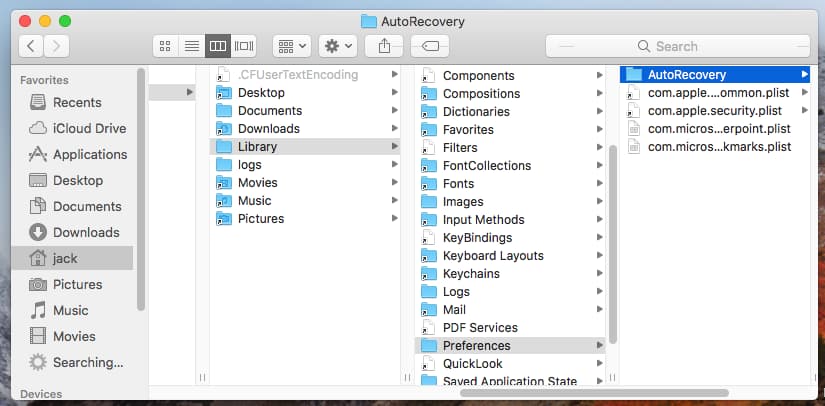
- Open Finder and go to Go menu. Select Go to Folder. Enter ""~/Library/Containers/com.microsoft.Word/Data/Library/Preferences/AutoRecovery.""
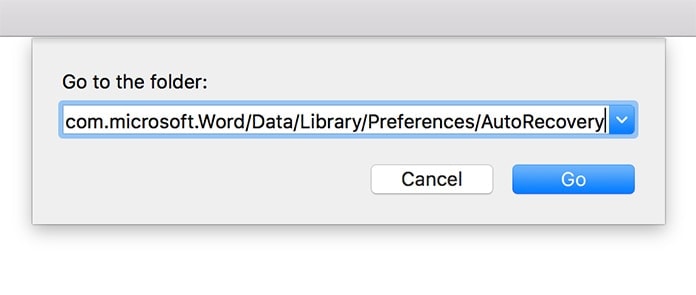
- Look for the Auto Recovery files. Open the relevant file to retrieve your document.

Method 3: Check The Temp Folder To Recover Word Document Not Saved On Mac
Mac computers store temporary files, which can include unsaved Word documents. These temporary files are created by the system while you work and can be a real lifesaver if you accidentally close Word without saving your document. They serve as a safety net, allowing you to recover your progress without starting over from scratch.
To find and recover these temporary files, you can navigate to the location where these files are stored. By locating them, you can retrieve your unsaved work and avoid the frustration of data loss. This can be especially helpful in situations where you might have lost a significant amount of work due to an unexpected shutdown or application crash. The ability to recover these temporary files ensures that your efforts are not wasted and that you can quickly resume your tasks.
Steps:
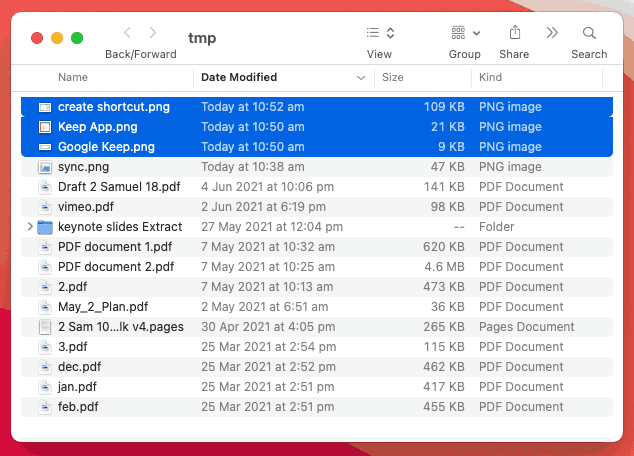
- Open Finder and go to then Go menu. Select Go to Folder. Enter /private/var/folders.
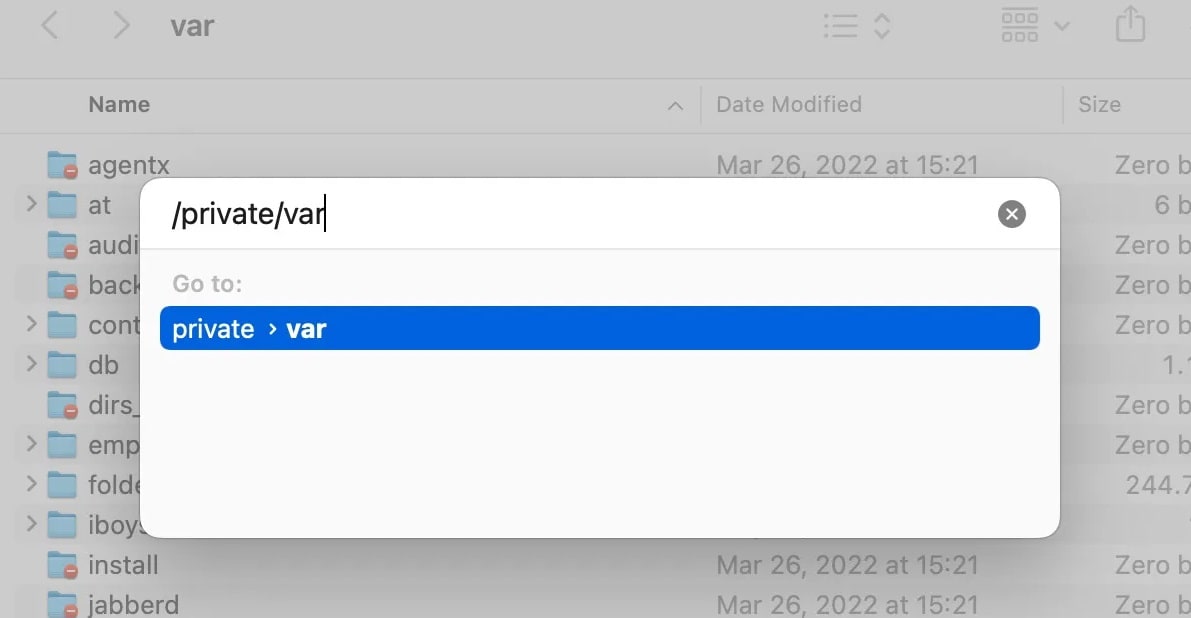
- Search for "Temporary Items" folder. Look for the unsaved Word document and recover it.
Method 4: Recover Unsaved Word Doc On Mac With Time Machine
Time Machine is a backup feature on Mac. It can help recover unsaved Word documents. It is effective and reliable.
Time Machine backs up your files automatically. If you accidentally close Word without saving, Time Machine can help. It can restore your document to a previous version.
Steps:
- Connect the Time Machine backup drive to your Mac. Open the folder where the document was saved. Open Time Machine from the menu bar.

- Browse through the backups and find the document. Select the document and click Restore.
Part 3: Tips To Recover Unsaved Word Docs On Mac
Recovering unsaved Word documents can be stressful, but there are proactive steps you can take to make the process smoother. By following these practical tips, you can increase your chances of successfully retrieving your important files and prevent future data loss.
Here are some effective strategies to help you recover unsaved Word docs on your Mac:
- Act Quickly: The sooner you try to recover your document, the better your chances of success. Temporary files and Auto Recovery versions can be overwritten or deleted if you wait too long.
- Regular Backups: Always keep backups of your important files. Use tools like Time Machine to automatically back up your documents. This ensures you have a recent version of your work in case of accidental deletions.
- Save Regularly: Develop a habit of saving your work frequently. Use the keyboard shortcut Command + S to save your document quickly. This helps prevent data loss if you accidentally close Word without saving.
- Use AutoSave: Enable the AutoSave feature in Microsoft Word. This feature automatically saves your document at regular intervals, reducing the risk of losing your work due to accidental closure or system crashes.
- Keep Software Updated: Ensure that your Microsoft Word and macOS are always up to date. Updates often include important bug fixes and improvements that can help prevent data loss.
By following these tips, you can increase your chances of recovering unsaved Word documents on your Mac and prevent future data loss.
Conclusion
Accidentally clicked "Don't Save" on Word for Mac? Don't panic. There are several ways to recover unsaved Word documents. Options include Recoverit and Auto Recovery, each offering unique benefits. Follow the steps mentioned earlier for the best results in document recovery.
Additionally, remember the importance of always keeping backups. Developing a habit of frequently saving your work ensures that you won't lose important documents. Regularly saving your work adds an extra layer of security and peace of mind.
By utilizing these recovery methods and practicing good saving habits, you can retrieve unsaved Word documents on Mac with ease. This approach minimizes the risk of losing valuable information and ensures a smoother workflow.
Try Recoverit to Retrieve Unsaved Word Document
Security Verified. Over 7,302,189 people have downloaded it.
FAQ
-
Can I recover a Word document not saved on Mac?
Yes, you can recover a Word document not saved on Mac. There are several methods to do this, such as using the Auto Recovery feature in Microsoft Word, checking the Temporary Items folder on your Mac, using a third-party recovery tool like Recoverit, or restoring the document from a Time Machine backup. Each of these methods has been proven to help users retrieve unsaved Word documents effectively. -
Is Recoverit safe to use?
Yes, Recoverit is a trusted and safe data recovery tool. It is designed to help users recover lost or unsaved files from their devices. Recoverit is developed by Wondershare, a reputable company in the software industry. The tool supports various file types and ensures data recovery without causing further damage to your files. However, always download software from official sources to avoid potential risks. -
What if I can't find my unsaved document?
If you cannot find your unsaved document using the methods mentioned, there are a few steps you can take. First, double-check all the locations where the document might be saved, including the Auto Recovery and Temporary Items folders. If you still cannot find it, consider using a third-party recovery tool like Recoverit. If all else fails, consulting a professional data recovery service might be your best option. They have specialized tools and expertise to help recover lost files that are difficult to retrieve using standard methods.


 ChatGPT
 Perplexity
 Google AI Mode
 Grok
Grok


