

⚡ Quick Answer: Recover Emptied Trash on Mac
| Situation | Fastest Method | Difficulty |
| Time Machine backup exists | Restore from Time Machine | Beginner Friendly |
| iCloud Drive enabled | Restore from iCloud.com (within 30 days) | Beginner Friendly |
| File still in another app (Pages/Photos) | Check app version history or Spotlight | Beginner Friendly |
| Copy exists in email/AirDrop/cloud | Download the copy from that service | Beginner Friendly |
| No backup at all | Stop using the Mac, deep scan with Wondershare Recoverit | Beginner Friendly |
| Physical damage or extreme value | Professional data recovery service | Advanced |
Accidentally emptying the Trash on a Mac can make important files seem to disappear without warning. This guide shows you how to recover emptied-Trash files quickly and safely to minimize downtime and data loss.
Below, step-by-step instructions cover built-in tools (Time Machine, iCloud, Terminal), third-party utilities, and professional services — so you can choose the right recovery path for any deletion.
Try Recoverit to Perform Mac Trash Data Recovery
 Security Verified. 3,591,664 people have downloaded it.
Methods to Recover Emptied Trash on Mac
Emptied-Trash recovery is achievable through several routes: restore from Time Machine snapshots, recover from iCloud, use Terminal (only if files are still in the Trash folder), or run an in-depth scan with data recovery software. Regular backups remain the best way to avoid future loss.
Compare Recovery Methods at a Glance
| Method | Best For | Needs Backup? | Difficulty |
| Time Machine | Backups made before deletion | Yes | Beginner Friendly |
| iCloud.com | Files deleted within 30 days | Yes (iCloud Drive) | Beginner Friendly |
Terminal (~/.Trash) |
Files still in the Trash folder | No | Intermediate |
| App Version History | Documents edited in Pages/Photos | No | Beginner Friendly |
| Email / AirDrop / Cloud Copy | Shared copies of the file | No | Beginner Friendly |
| Wondershare Recoverit | No backup, emptied Trash | No | Beginner Friendly |
| Professional Service | Physical damage or extreme value | No | Advanced |
Way 1: Time Machine Backup
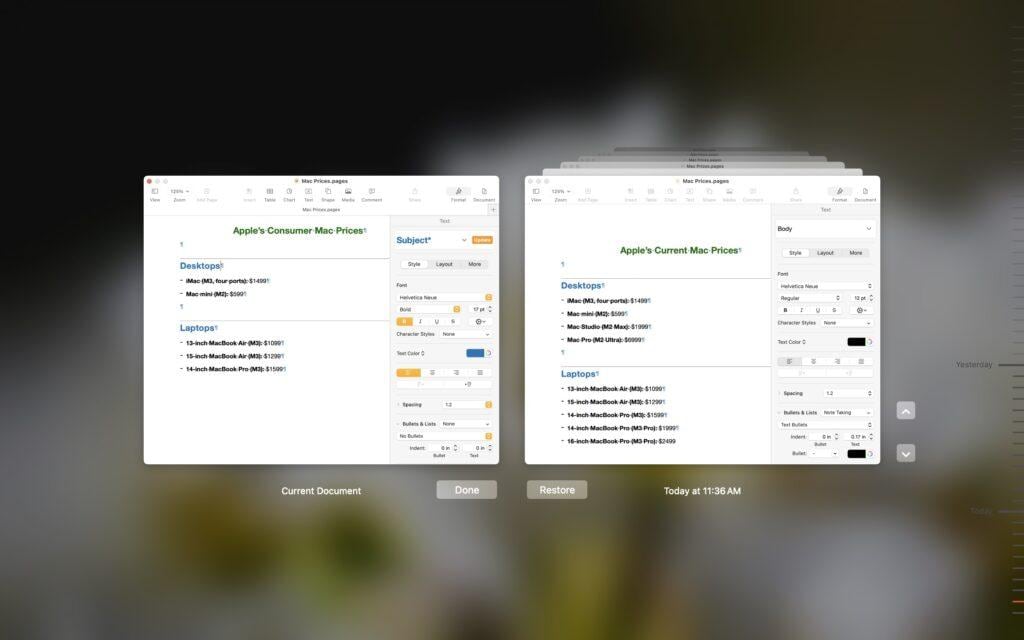
Time Machine lets you learn how to recover emptied trash on Mac without software via backups. It uses hourly and daily backups to secure data. No extra apps or tools are needed to complete the recovery.
Steps:
- Click the clock icon in the menu bar to launch Time Machine.
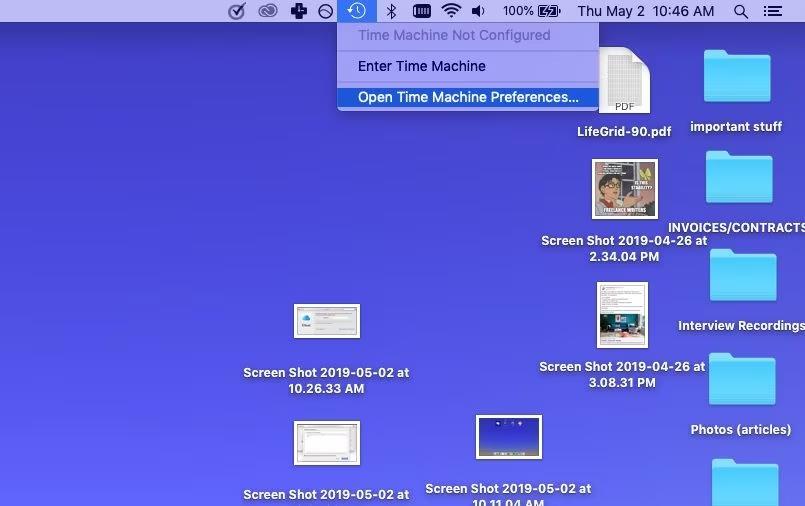
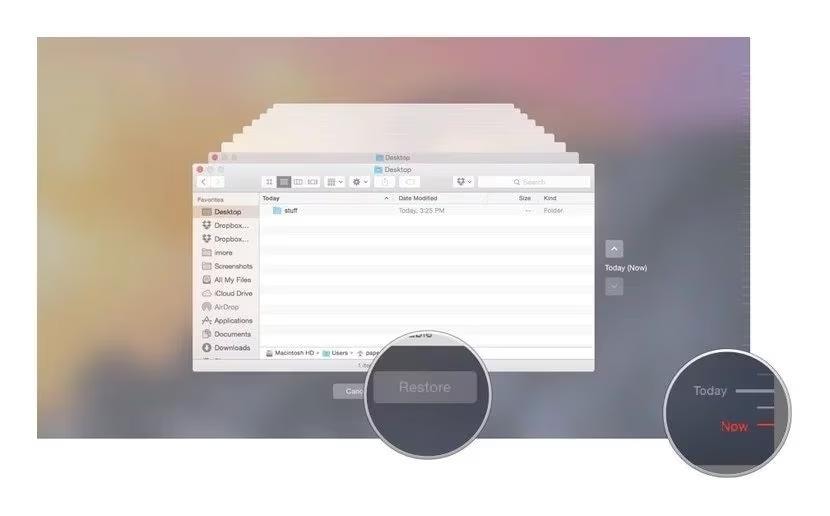
- Browse snapshots to find your Trash folder from before you emptied it.
- Select the files or folders you need. Click the "Restore" button. Time Machine will then automatically restore the files from the trash on your Mac to their original location. This is one of the most reliable ways to restore trash on a Mac if you have backups enabled.
Way 2: Recovering from an Emptied Trash with iCloud Backup
iCloud Backup can effortlessly help you undo trash delete Mac without extra software. You can restore deleted files from your iCloud storage.
Steps:
- Go to iCloud.com in your browser and sign in using your Apple ID credentials.
- Click the account icon in the top right and select iCloud Settings.
- Scroll to Data Recovery and click Restore Files to open recovery options.
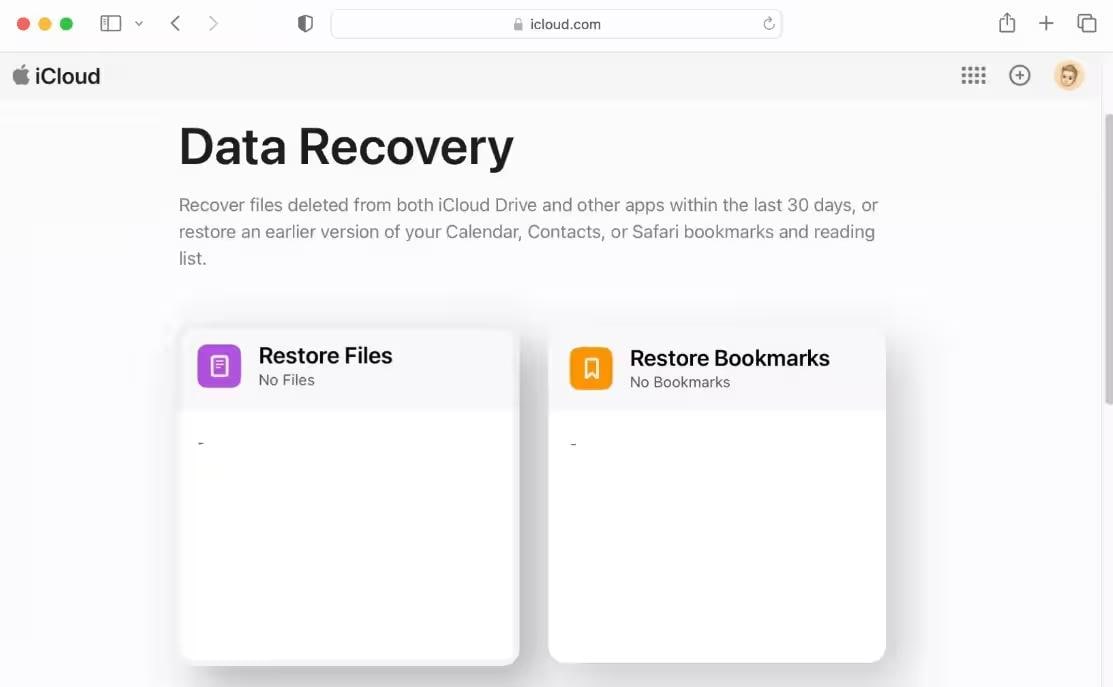
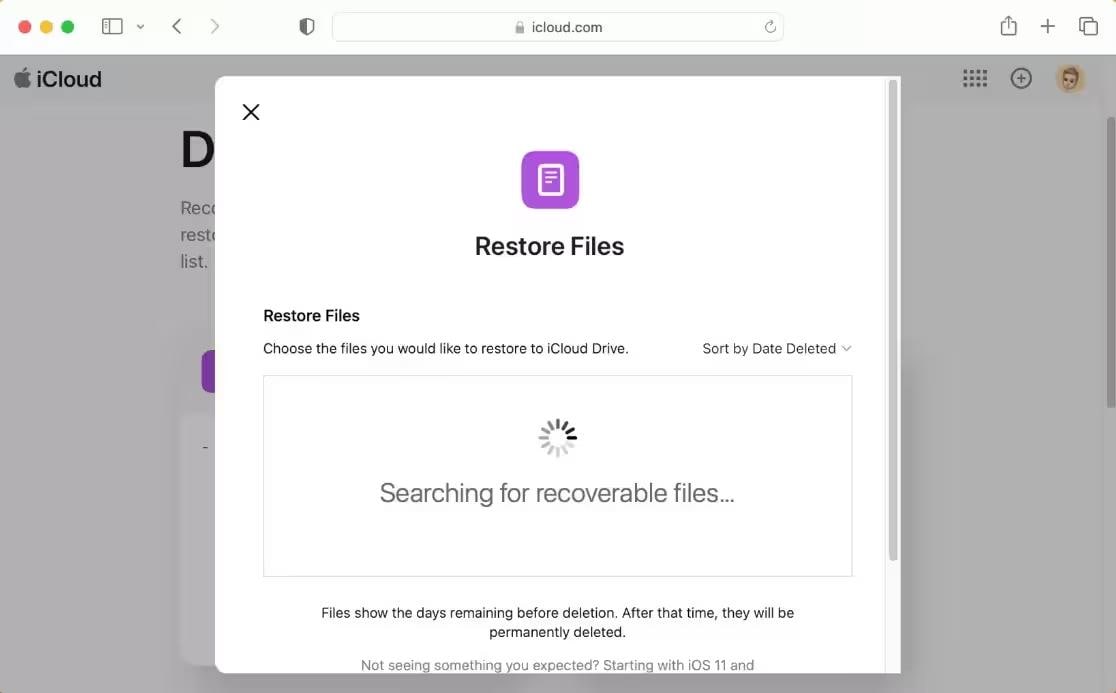
- Checkboxes beside individual files or use Select All to pick every file.
- Press Restore Files to download chosen items back to your Mac automatically.
Way 3: How to Recover Trash on a Mac Using Terminal
Terminal can move files back from the Trash folder, but only if the files are still inside ~/.Trash. Once the Trash is emptied, these commands cannot recover the files — switch to Time Machine, iCloud, or Wondershare Recoverit instead.
Steps:
- Press Cmd + Space, type "Terminal," and press Return to open the Unix shell.
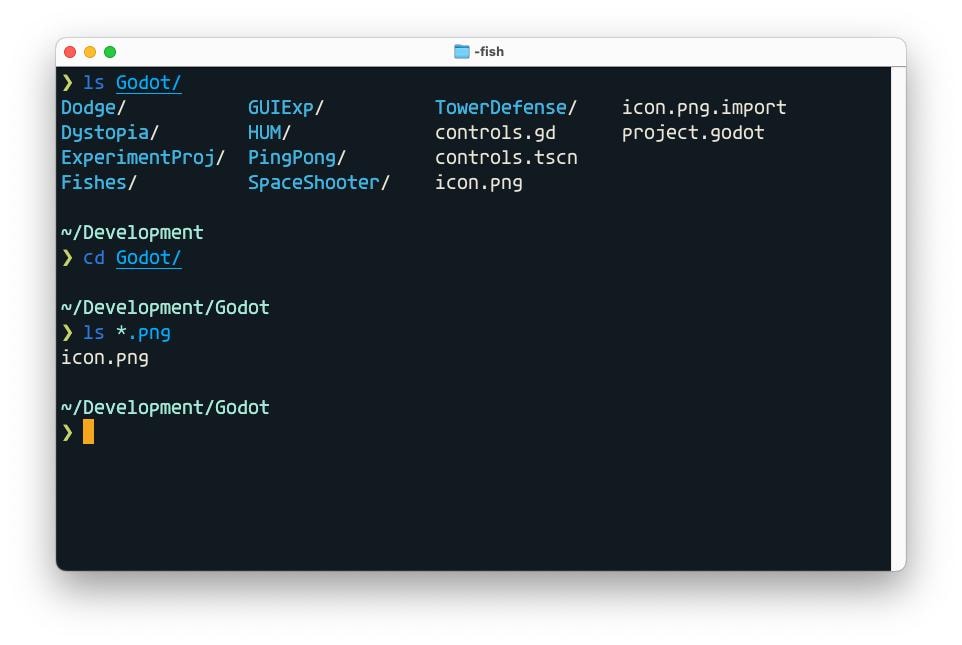
- Enter `cd ~/.Trash` and hit Return to access the Trash folder.
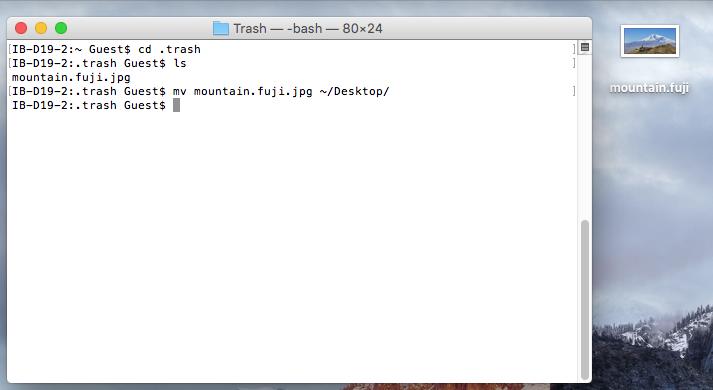
- Type `mv filename ../` and press Return to move your specific file (replace filename with its name).
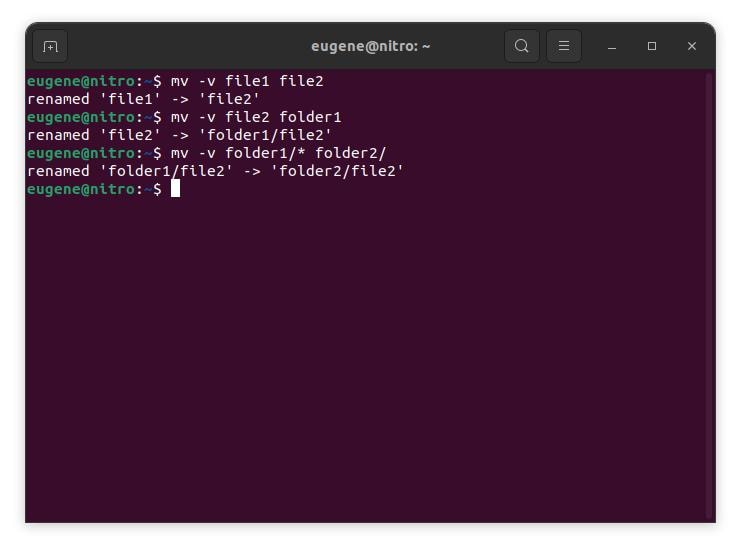
- Quit Terminal by typing `exit` or closing the window, then open a Finder window.
- In Finder's search bar, enter the deleted file name, press Return, and when it appears, drag it to a safe folder.
Way 4: Use Data Recovery Services
Professional data recovery services use specialized equipment and certified technicians to recover emptied-Trash files with a much higher success rate. Follow the steps below to engage one safely.
Steps:
- Research and select a credible data recovery provider who specializes in Mac file restoration. You will want to focus on certified technicians, honest pricing, positive reviews, and turnaround time estimates that indicate the provider's knowledge of performing trash recovery on Macs without software.
- Ship or deliver your Mac's drive securely via an insured courier while following the service's recommendations for packaging and tracking. Include as much information as possible about your system, the file types that were lost, prior recovery attempts, and the desired time frame to help speed up diagnosis.
- Check the data recovery results, costs, and security protocols. After the technician retrieves your files securely, they will produce a restore list. Approve the recovered data for download back to the Mac or for copying to a new drive for safe storage.
Complete MacBook Neo review 2026: release date, price, A18 Pro performance.

Way 5: Check Alternative Recovery Locations
Before spending time on recovery tools, check whether the "deleted" file still exists somewhere else on your Mac.
- Press Command + Space to open Spotlight and search for the file name. It may have been moved, not deleted.
- Open the app that created the file (Pages, Keynote, Photos) and check its version history or Recently Deleted section.
- In Photos, open Recently Deleted and check whether the image is still recoverable there.

Way 6: Recover a Copy From Email, AirDrop, or Cloud Storage
If the file was ever shared, there may be a copy you can re-download without any recovery tool.
- Search your email outbox and sent items for the file attached to a message.
- If you AirDropped the file to another device, check AirDrop history or the Downloads folder on that device.
- Sign in to cloud storage you use (Google Drive, Dropbox, OneDrive) and look for the file in the Trash or version history of that service.
[Easy Tip]: Recover Emptied Trash on Mac with Recoverit Data Recovery
Accidentally or permanently deleted files from the emptied trash on Mac can be recovered using Wondershare Recoverit Data Recovery for Mac. Built-in utilities will fail whenever files disappear from your Trash. Recovering files from Mac with Recoverit is a simple three-step process: select the Trash folder, scan for deleted items, and recover your lost data. To successfully recover documents, pictures, etc., in a matter of minutes, go ahead and free download, install, and start running Recoverit while following the intuitive on-screen setup.
| Key Feature | Highlight |
| File Formats | Retrieves 1000+ file formats, including images, videos, and audio |
| Recovery Rate | 99.5% recovery rate for lost or deleted files |
| Supported Systems | Works on Windows, Mac, NAS, and Linux |
| Free Version | Recover up to 500 MB of Mac data for free |
Video Tutorial on How to Recover Deleted Files That Did Not Go to the Trash Bin
Comprehensive Guideline to Recover Emptied Trash on Mac With Recoverit
- Launch the software and choose the "Trash" location on your Mac. This directs Recoverit to the right folder where deleted items once resided.
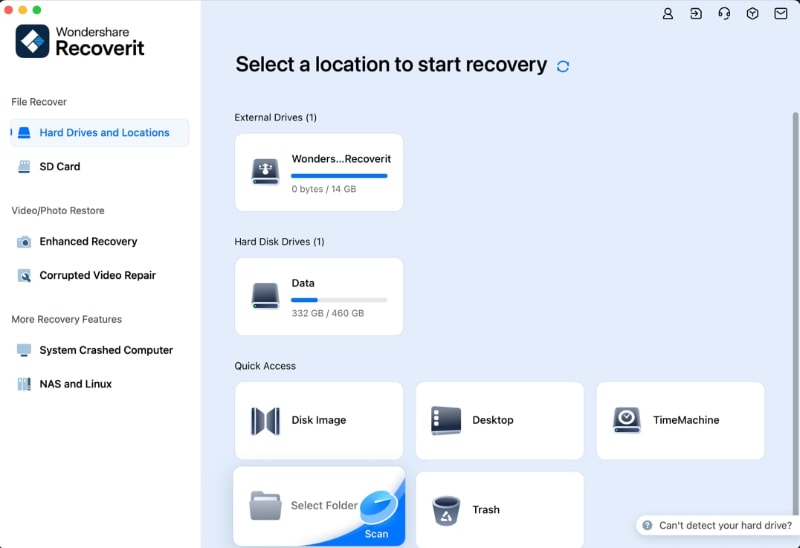
- Click Start to initiate a deep scan of the Trash folder. In just a few minutes, Recoverit will locate lost files, including documents, photos, and videos.

- Review the scan results and preview recovered items to confirm their integrity. Select the files you need and hit "Recover" to restore them. Finally, choose an external drive to safely store your recovered files.

Basic Things To Know About Mac Trash Recovery
Emptying the Trash marks files as deleted, but the data stays on the disk until new data overwrites it. Recovery chances increase if you act quickly — here are five basic facts about Mac Trash recovery you should know.
| Key Point | What It Means | Action |
| Trash Files Are Not Deleted Instantly | Emptied files remain on disk until overwritten | Stop using the Mac and recover quickly |
| Check All User Accounts | Each user has a separate Trash folder | Check every account's Trash for shared files |
| External Drives Have Separate Trash | External drives keep a hidden ".Trashes" folder | Look there for files deleted from USBs/SD cards |
| Time Machine Backup Can Help | Backups made before deletion still contain the file | Restore from a pre-deletion backup |
| iCloud May Store a Copy | iCloud Drive keeps deleted files for 30 days | Restore from iCloud.com within 30 days |

How to Prevent Accidental Data Loss from Trash?
Accidental deletions are much less damaging when you combine preventive measures with reliable recovery mechanisms. Apply the practices below to keep your files safe.
| Habit | Why It Works | How to Do It |
| Activate Versioning and Backups | Historical versions let you revert after accidental deletion | Schedule daily or weekly automated backups to an external drive or cloud |
| System Protection Settings | Built-in safety nets (Time Machine snapshots) restore deleted data | Increase snapshot storage and shorten recovery intervals |
| Archived Recycle Bins & Retention Policies | Keeps deleted items for extended periods as a second safety net | Customize retention policies and storage quotas |
| Recovery Software Readiness | Specialized tools scan for remnants of deleted data | Keep a trusted tool installed offline; act before files are overwritten |
Conclusion
Recovering deleted files might seem complicated, but there are several reliable methods for recovering emptied trash mac. Whether using built-in tools like the Terminal or Time Machine, or external backup sources like iCloud or drive backups, each provides an opportunity to recover files from emptied trash. Knowing how the Mac operates with deleted files aids in the success. Speed is of the essence, with care taken not to overwrite files.
Let's see how to find replaced files on a Mac and return them where they belong.

FAQ
-
Can I recover files after emptying the Trash on Mac?
Yes. Emptied files remain on the disk until new data overwrites them. Use Time Machine or iCloud.com if you have backups, or run Wondershare Recoverit to deep-scan the drive. Stop using the Mac right away to avoid overwriting. -
How can I recover emptied Trash on Mac without software?
Free options: restore from a Time Machine backup, download files from iCloud.com (within 30 days), check the app's own version history (Pages/Photos), or re-download copies from email, AirDrop, or cloud storage. -
Why doesn't the Terminal command recover my emptied Trash files?
Thecd ~/.Trash+mvcommands only work when files are still in the Trash folder. Once you empty the Trash, the folder is cleared and Terminal cannot help — switch to Time Machine, iCloud, or recovery software. -
How long do deleted files stay on a Mac before being overwritten?
There is no fixed time. Deleted file data remains until new data is written to the same disk space. The more you use the Mac after emptying the Trash, the lower the recovery chance — act quickly and write as little as possible. -
Where do emptied Trash files go on Mac?
Emptying the Trash removes the file's directory entry but the data stays in the unallocated disk space until overwritten. External drives keep their own hidden .Trashes folder instead of the main Mac Trash.


