
 TL;DR:
You can safely resize a Bootcamp partition without deleting the Windows OS by using third-party partition managers like MiniTool Partition Wizard or AOMEI Partition Assistant, whereas the native macOS Disk Utility method requires completely wiping your Windows data.
● Native macOS Disk Utility cannot directly expand the NTFS-formatted Bootcamp partition; using it requires entirely deleting and recreating the Windows partition, making full data backups mandatory before proceeding.
● To extend the partition without data loss, you must first shrink a macOS partition in Disk Utility to free up space, boot into Windows, and use tools like MiniTool Partition Wizard Free Edition or AOMEI Partition Assistant to allocate the new space.
● While 64GB is the minimum storage required for a Bootcamp Windows installation, allocating 128GB yields optimal performance; if unexpected formatting or deletion occurs during resizing, Wondershare Recoverit can be used to scan and restore files from the affected partition.
Ask AI for a summary
 ChatGPT
 Perplexity
 Gemini
 Claude
 Grok
Grok
Even though you have installed Bootcamp windows within recommended partition size, it may still run out of storage given a few reasons, and you may need to resize Bootcamp partition to accommodate larger storage needs. Therefore, this article is centered around readily resizing Bootcamp partition.
Part 1. Overview of Bootcamp Partition
A Bootcamp partition indicates a specific partition in macOS that is used to install the Windows operating system on it. If you intend to run both Mac & Windows operating systems on a Mac device, you conveniently install the Windows on Bootcamp Partition using the Boot Camp Assistant utility.
Effectiveness of Bootcamp partition
- Convenient & safe to use
- Best Performance
- Run Windows applications on Mac without reboot
- Constructive Disk Space usage
- Easy backup
- Easy migration to the new Mac
Part 2. When Need To Resize Bootcamp Partition?
Resizing indicates the increase & decrease in partition size, and you may often need to resize your Bootcamp partition. For instance, if you've installed the Windows operating system using Bootcamp for gaming purposes, you may encounter the low storage issue then. Because, for Windows installation, 64GB of storage space is often recommended, but for advanced operations, it might need to be extended to work smoothly.
Likewise, if you allocated larger disk space to your Bootcamp partition, and most of the storage is free given the less usage, then you can even shrink the Bootcamp partition to maximize the space for MacOS.
Part 3. How To Resize Bootcamp Partition?
Given the data loss concern, Bootcamp partition resizing may seem complicated because if you go for recreating the Bootcamp partition in the desired size, this will remove your data too. Therefore, here we will explain the few most effective ways to resize Bootcamp partition without losing the data.
Resize Bootcamp Partition Using Disk Utility
The best way to resize the Bootcamp partition through Disk Utility is to totally delete the Bootcamp partition and recreate it. However, you can also use the Disk Utility tool to shrink a Mac partition to make space for extending the Bootcamp partition. It is because Disk Utility cannot directly expand your Bootcamp partition because Bootcamp partition mostly employs the NTFS file system. The space shrunk via Disk Utility can be then added to the Bootcamp partition using any partition management software.
Note: Resizing the Bootcamp partition can delete all your data from the Windows partition; you must back up the necessary data before resizing the Bootcamp partition.
Operational Steps:
Step 1: Delete the Windows partition from MacOS.
Step 2: Start your system with Mac OS.
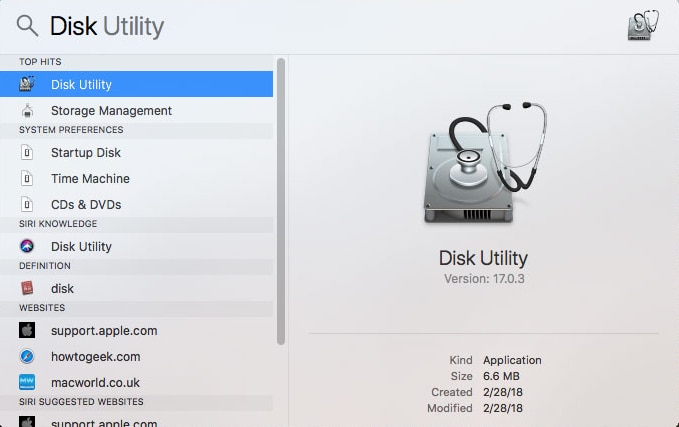
Step 3: Press the Command+Space keys to launch Spotlight Search.
Step 4: Input "Disk Utility" in the Spotlight Search tool and then press Enter.
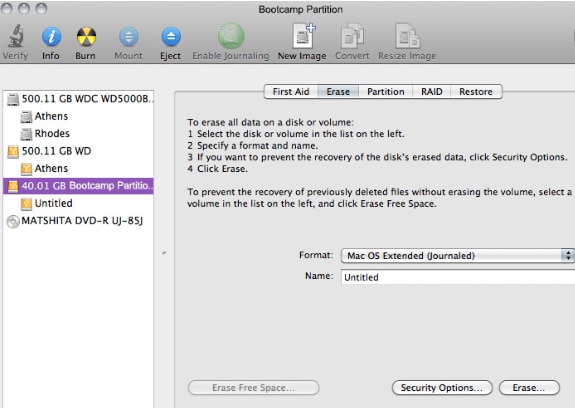
Step 5: Select the Windows partition, click the Erase option.
Step 6: Choose the macOS Extended format, and then click the Erase button.
Step 7: Shrink any macOS partition to evacuate the space for the Bootcamp partition.
Step 8: Create a new large Windows partition by clicking the "Partition" option at the top middle.

Step 9: You can now restore the backed-up information if needed.
Resize Bootcamp Partition Using MiniTool Partition Wizard
If you want to expand the size of your Bootcamp partition without trouble, MiniTool Partition Wizard is a reliable solution. It can extend or reduce the Bootcamp partition without deleting your Windows.
Operational Steps:
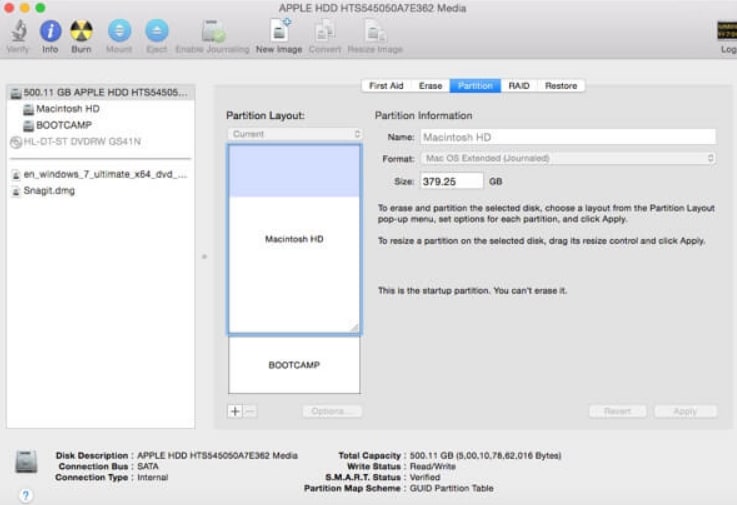
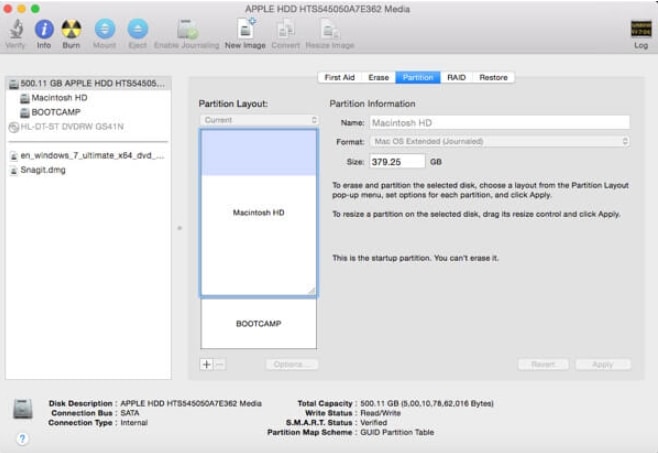
Step 1: Launch the Disk Utility app and select the drive you want to partition from the left side.
Step 2: Drag the separator bar to adjust your partition size; alternatively, enter the partition size value in GB in the Size Box.
Step 3: Click Apply to resize the partition.
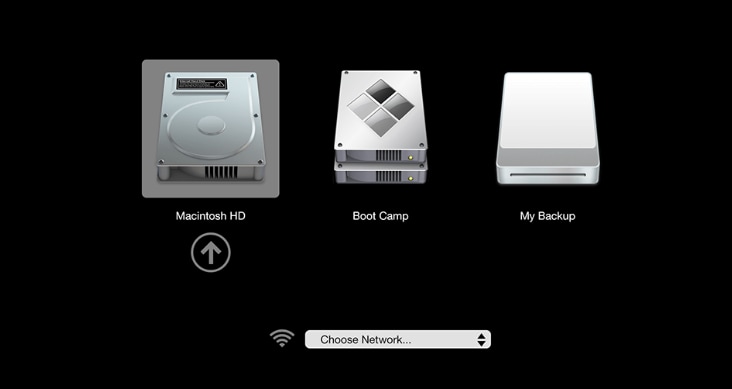
Step 4: Set Bootcamp as Boot Disk, restart the Mac and immediately press the Option key; The StartUp Manager will appear in a few seconds.
Step 5: Use your mouse or arrow keys to select the specified volume you want to use and Double-click the Return option to start your Mac from the volume you chose.
Step 6: Download MiniTool Partition Wizard Free Edition and launch it to access its main interface.
Step 7: Choose the Bootcamp partition from the left panel and click "Extend Partition".
Step 8: Click the Take Free Space fromoption and then drag the slider to determine how much space you need to take for the Bootcamp partition. After getting desired space, click OK to get back to the main interface.
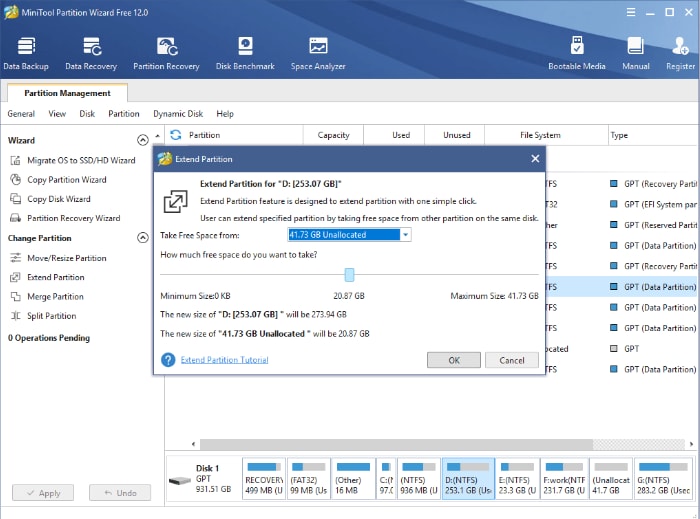
Step 9: Click Apply to save the changes. Afterwards, you would be asked to Restart your computer.
Resize Bootcamp Partition using AOMEI Partition Software
AOMEI Partition Assistant is a free and powerful tool that allows you to resize your Bootcamp partition without losing data or deleting Windows OS.
Operational Steps:
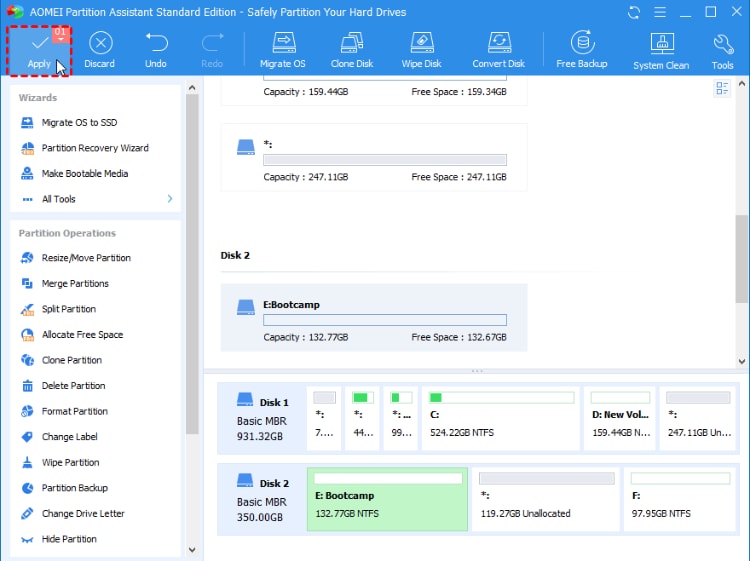
Step 1: Download and launch the AOMEI Partition Assistant.
Step 2: Select Resize Partition on the left column by clicking Bootcamp Partition.
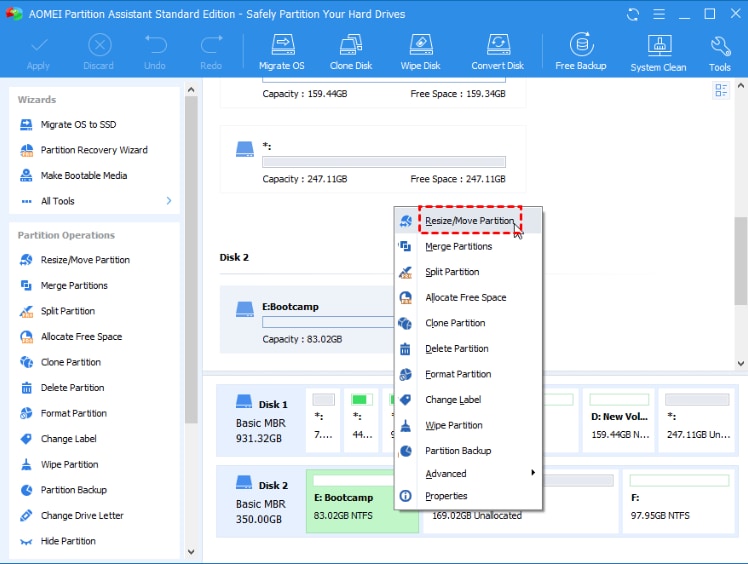
Step 3: Drag the double-arrow to the right to expand the Bootcamp partition to the desired size. To move on, click OK.
Step 4: Click on the Apply option to extend the Bootcamp partition.
Part 4. How To Recover Files From Bootcamp Partition?
Although the process of resizing the Bootcamp partition is quite safe, still, it is suggested to have a backup of your important data beforehand. But if you've lost your data and don't even have any backup, you might need to recover the important files using any reliable data recovery tool. Therefore, Wondershare Recoverit can sort out your encountered problem by providing a fast data recovery service.

Recoverit - The Best Partition Recovery Software For Mac
5,481,435 people have downloaded it.
Recover Lost Data from Mac or Bootcamp Partitions easily, Quickly and Securely.
Recover data after sudden deletion or formatting of Bootcamp partition, Mac partition, etc.
Solve 500+ data loss scenarios and undelete files, no matter what size, from a single Office document to tons of photos, music, and videos stored on your Mac.
Preview files before you recover them. No payment is needed if the files are unrecoverable.
Recoverit is available in both free & paid versions.
Operational Steps:
Step 1: Launch the Recoverit application on Mac.
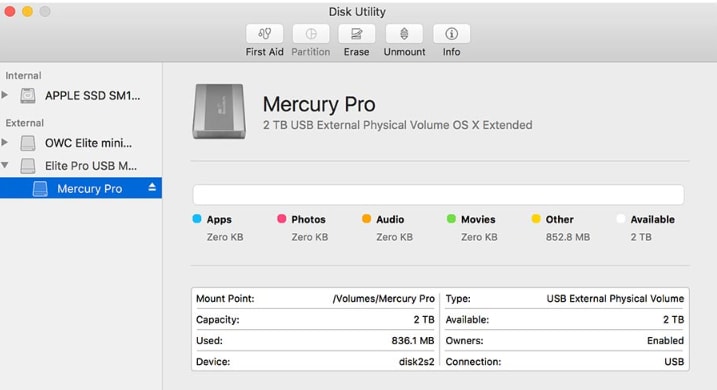
Step 2: Select your respective partition located below the Select Location tab.
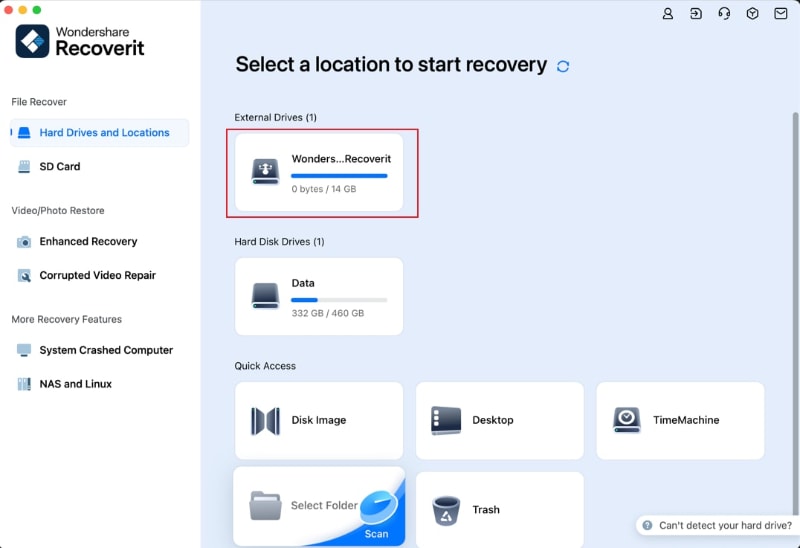
Step 3: Recoverit will scan your selected partition to dig out the lost data.

Step 4: Once the scanning process gets over, Preview the files and then click on the Recover button to restore the selected recoverable files.

FAQs
How much should I partition for Windows Boot Camp?
Although 64GB is considered the minimum storage space required to install a Windows; however, it's better to allocate up to 128 GB for optimum performance.
Can I increase the Bootcamp partition size without deleting Windows?
Yes, you can easily increase the Bootcamp partition size without deleting Windows; in fact, if your Mac is running two different operating systems on separate partitions, you can easily resize any of the partitions.
How do I make my Boot Camp partition bigger?
You can do this conveniently using the Aomei Partition Manager tool. Alternatively, you can recreate the Bootcamp partition with a larger storage space.
Is it safe to resize the Windows partition on Mac?
Yes, resizing the Windows partition on Mac is safe, as you won't need to remove or delete it from your system.
What will happen if I shrink a Bootcamp partition?
It won't affect your system; you can shrink a partition quite conveniently, even without losing data.
Conclusion
Whether you need to extend or shrink your Bootcamp partition, you must learn the proper resizing technique. Therefore, in this article, we explained how you can change the size of the Bootcamp partition without deleting it and illustrated how to recover the lost data, given this scenario.
For Windows XP/Vista/7/8/10/11
For macOS X 10.10 or later


