
 TL;DR:
Formatting a Windows 7 computer completely wipes all local data, errors, and malicious software, which can be achieved using the Control Panel, a System Repair Disc, an installation CD, or a bootable USB drive.
● Restoring factory settings directly via the Control Panel requires a pre-existing manufacturer-saved Windows 7 installation on the system.
● The System Repair Disc and Windows 7 installation CD methods require configuring the BIOS to boot from the CD-ROM and using Command Prompt to manually execute formatting commands.
● Users without a physical CD must use a third-party tool like AOMEI Partition Assistant Standard to create a bootable USB drive to format the active system drive.
Ask AI for a summary
 ChatGPT
 Perplexity
 Gemini
 Claude
 Grok
Grok
It takes much less time to reformat computers when they are heavily contaminated with viruses or other harmful software than it would clean them successfully. Additionally, formatting a system ensures that all harmful software has been eliminated—complete removal is not always possible with manual cleaning. Windows 7 format can be quite helpful if you want to fix issues with the Windows operating system, enhance performance, and permanently delete items.
Part 1. What Will Happen if You Format Windows 7?
When Windows 7 is formatted, all files and errors are deleted, and the computer is left in an empty condition. The operating system is generally installed after it, allowing the user to start with a clean system. Sometimes formatting is your only choice.
Part 2. How To Format Windows 7 Effectively?
The process of returning a disk to a recently formatted condition is known as formatting or reformatting. Therefore, you can format it in a few minutes without needing a disk if your laptop is running slowly or you wish to gift it to someone else without sharing your data. To thoroughly format a laptop, you must follow a set of steps. The procedures for Windows 7 format are listed below.
Method 1: Format Windows 7 to factory settings via Control Panel
Users can use the control panel to return the computer to factory settings if a manufacturer-saved installation of Windows 7 format is present.
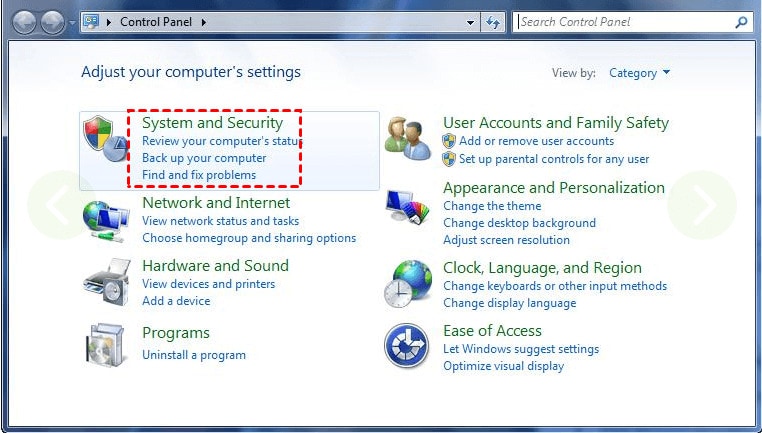
Step 1: After clicking Start, select Control Panel. Please select System and Security.
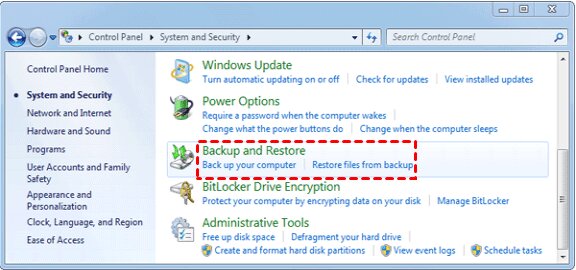
Step 2: Choose Backup and Restore from the new page's display.
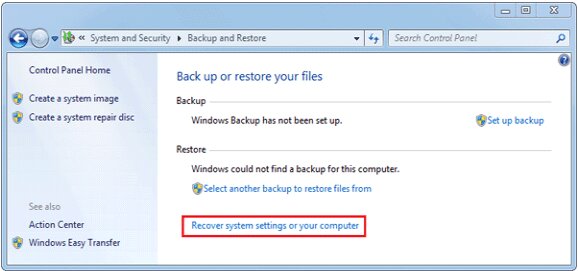
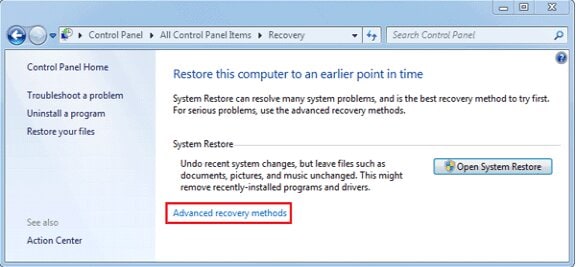
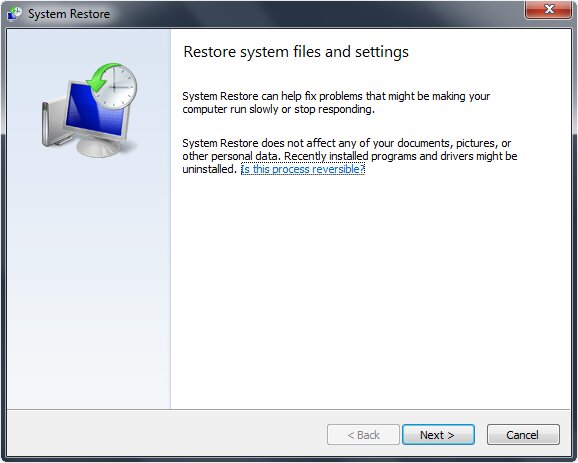
Step 3: Click on Recover system settings or your system in the Backup and Restore window.
Step 4: Select advanced recovery methods next.
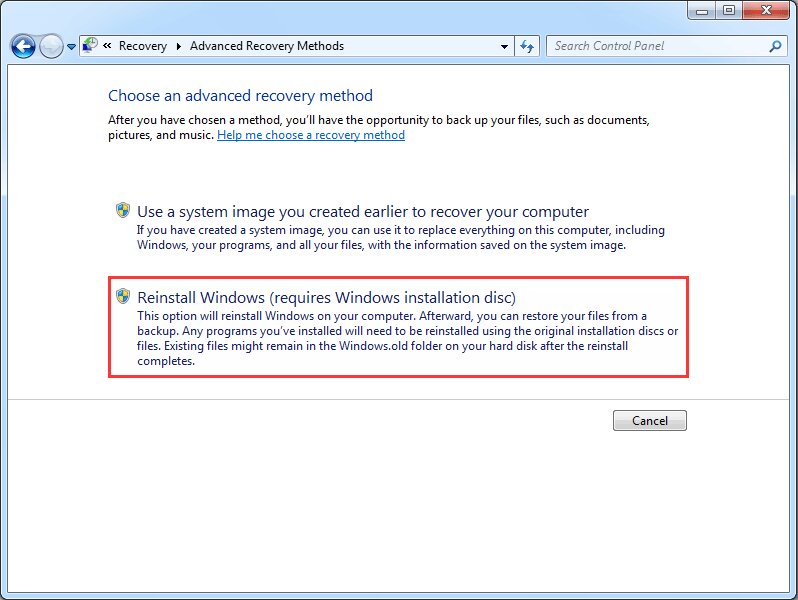
Step 5: Restore files from a system image backup and Return Your Computer to Factory Condition is now available to you. Choose the second possibility.
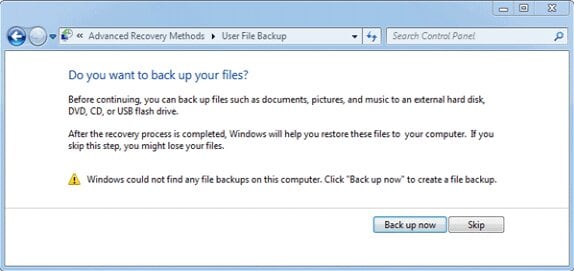
Step 6: Once more, you have two choices: back up your data right now or skip. To create a backup, select the first option. You can also select skip.
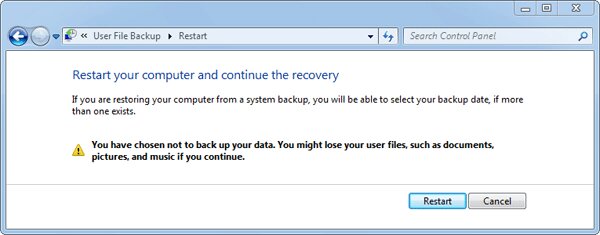
Step 7: Click the Restart button to restart your Windows 7 computer and begin the factory reset. After a while, your computer will shut off and restart.
Step 8: A new notification prompting you to choose a key input method will appear. Select "Next."
Step 9: Restoring the operating system to factory default is required. Next, select Next a second time, and finally, select OK.
Method 2: Format Windows 7 with System Repair Disc
For this technique to work, you must first prepare a disc for a system repair disc.
Step 1: Click Control Panel > Backup and Restore > Create a system repair disc after turning on your laptop.
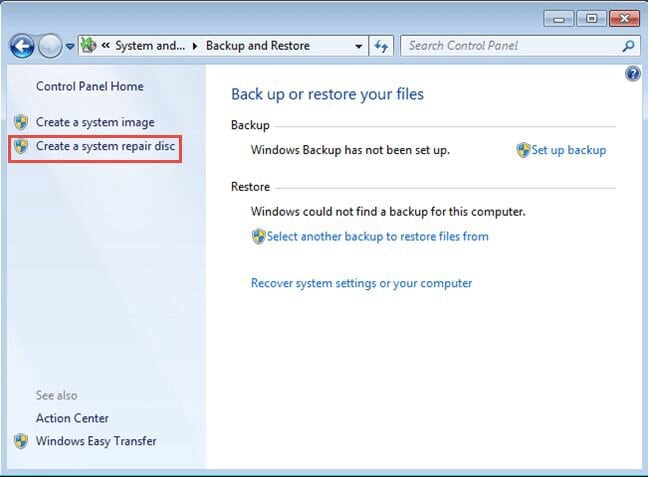
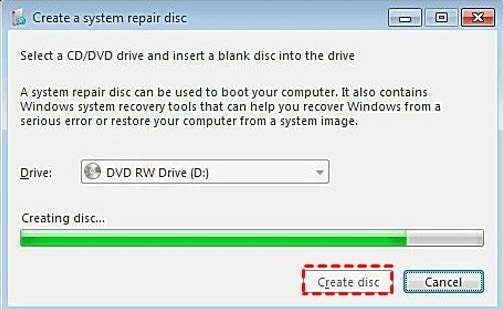
Step 2: Create disc is selected after you plug a blank CD into your laptop. Then click OK and Close.
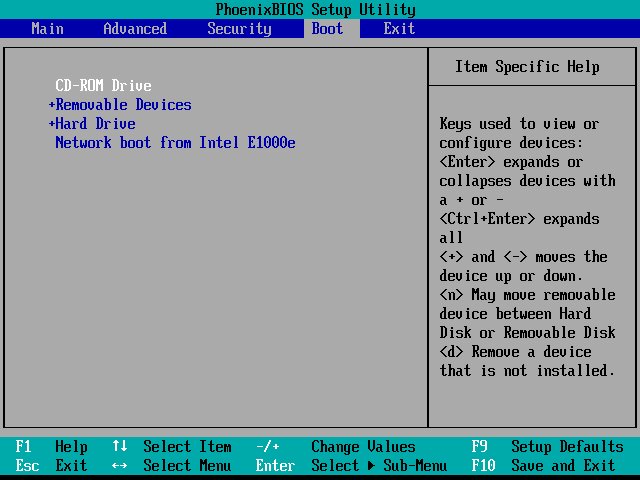
Step 3: Restart your computer and choose the CD as the primary boot device in the boot menu by pressing F10 or F12. Select your Windows operating system after clicking Enter and Next.
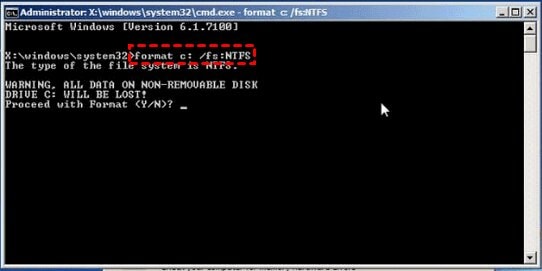
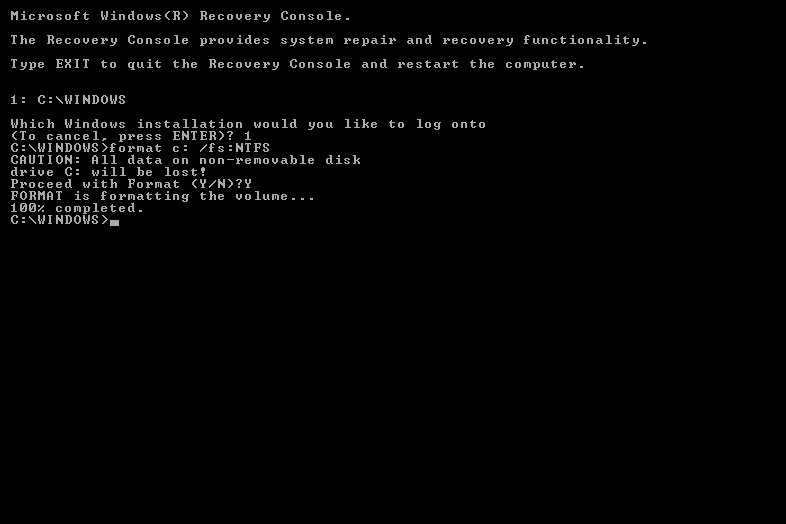
Step 4: Click Command Prompt and Next. To format the C drive, enter the command "format c: /fs: NTFS" and press Enter.
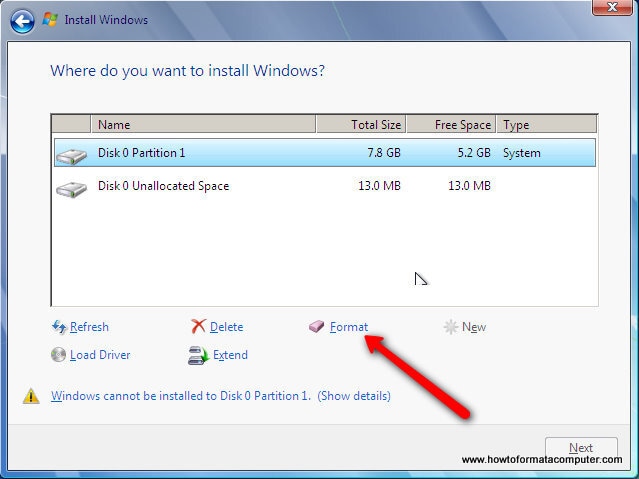
Method 3: Format Windows 7 with installation CD
You can format your Windows 7 format hard drive by following the instructions if you have the Windows 7 installation CD.
Step 1: Restart your laptop after inserting the Windows installation CD.

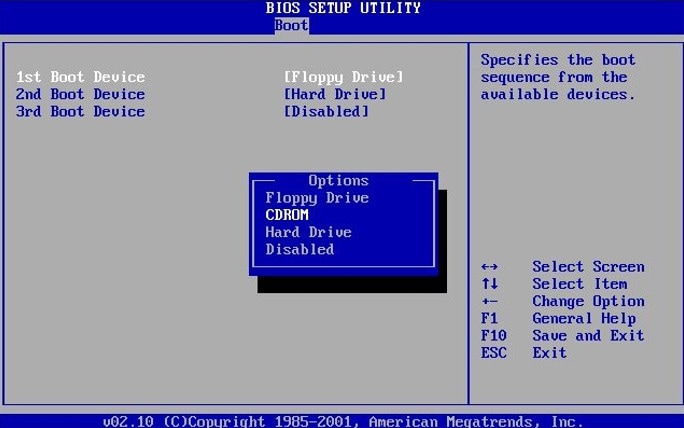
Step 2: Press Delete repeatedly to access BIOS. Choose Advanced BIOS Features and choose CDROM as the first boot device. To save and finish the configuration, click Y.
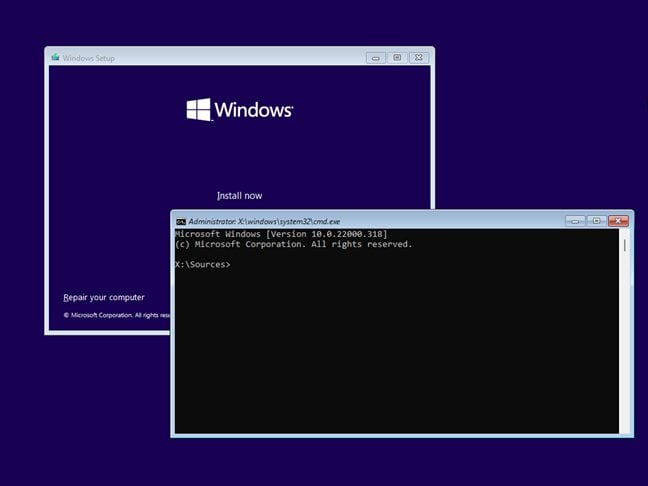
Step 3: Press shift+F10 to bring up the Command Prompt window in the Windows Setup window.
Step 4: To finish formatting, type "format c:/" into the window and press Y.
Method 4: Format Windows 7 with USB
You can create a bootable USB drive and have Windows 7 reformat with a USB if you don't have a Windows installation CD. With the aid of the AOMEI Partition Assistant Standard, this is simple. It is an available disk manager with various capabilities, like clearing up unnecessary files from the computer, expanding the C drive, moving the OS to an SSD, and more. Currently available for free download, you can use it to format a Windows 7 computer without a CD.
Part 1. Create a bootable USB Drive
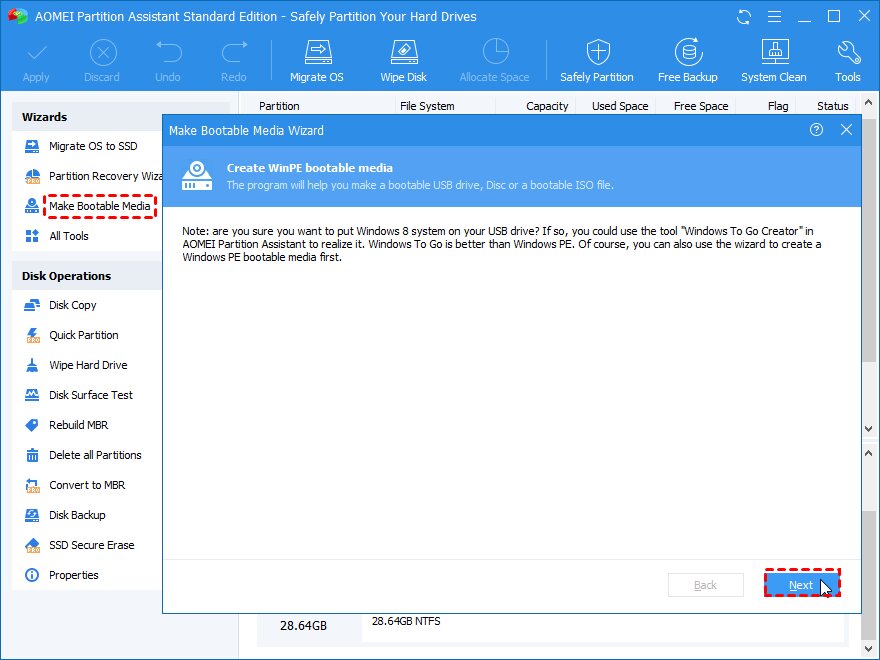
Step 1: Connect your laptop's empty USB drive. Run AOMEI Partition Assistant Standard after installing it. Then select "Make Bootable Media."
Step 2: Select a USB disk, then select "Proceed."

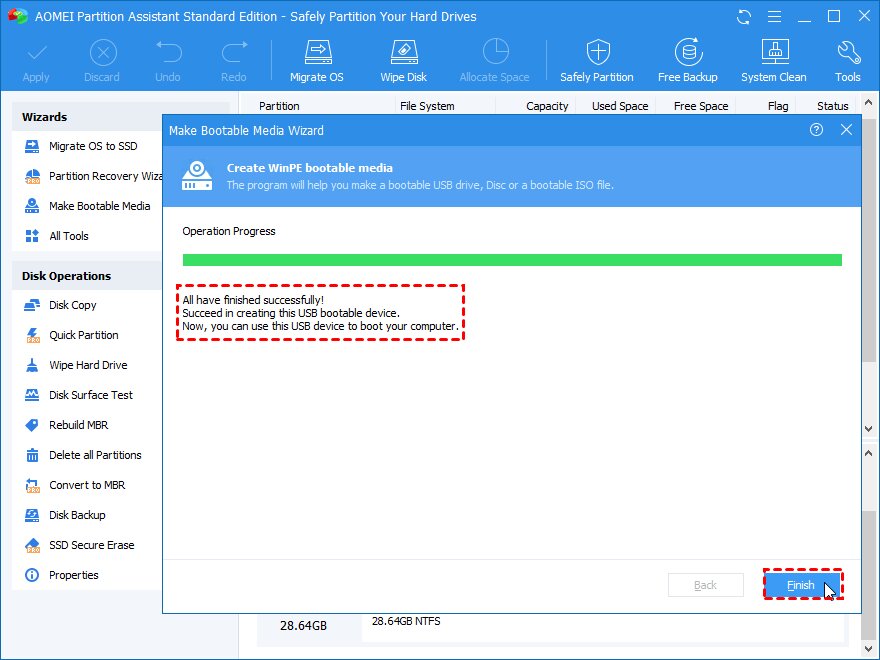
Step 3: Anticipate the procedure's completion.
Part 2. Windows 7 drive formatting with the bootable USB
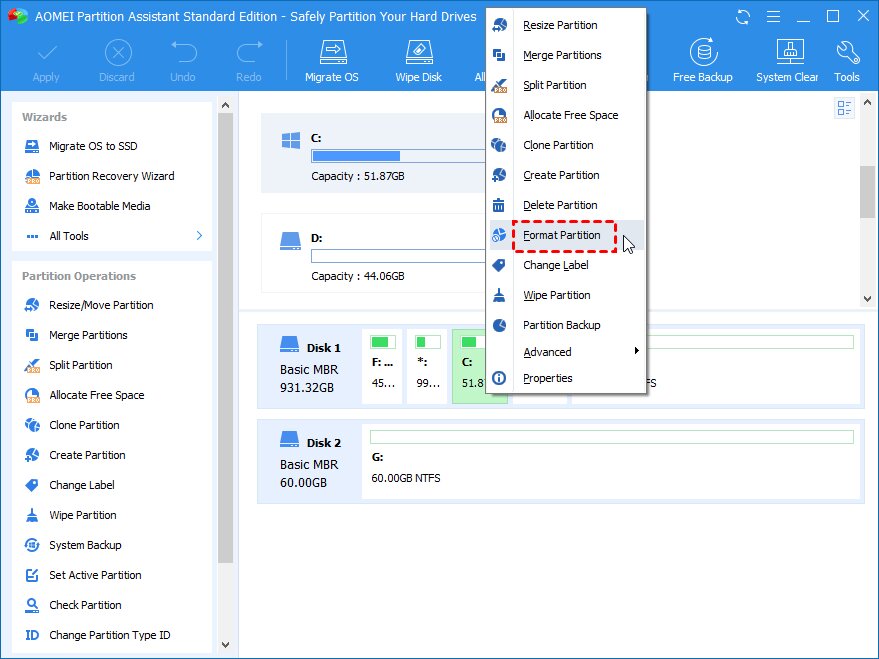
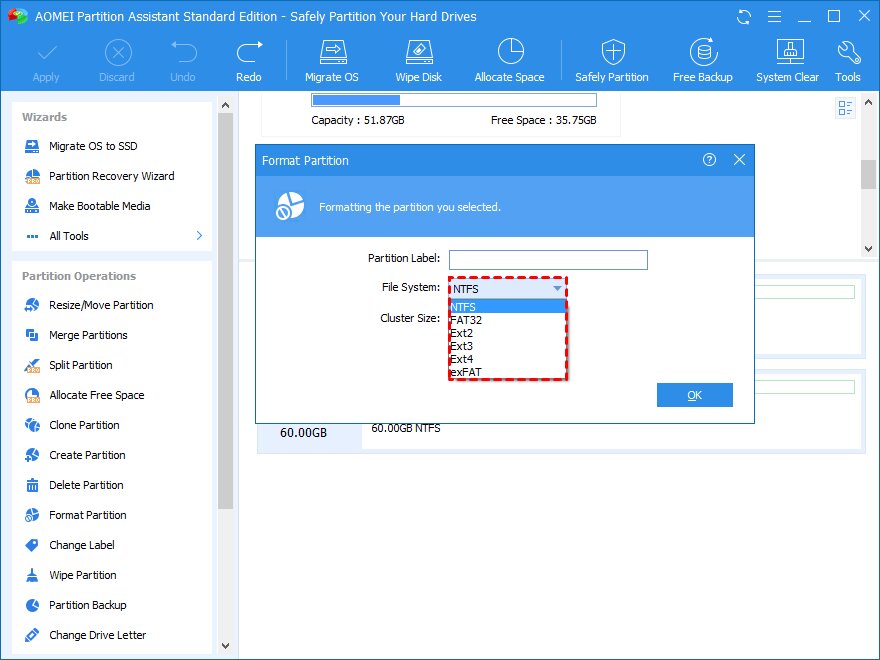
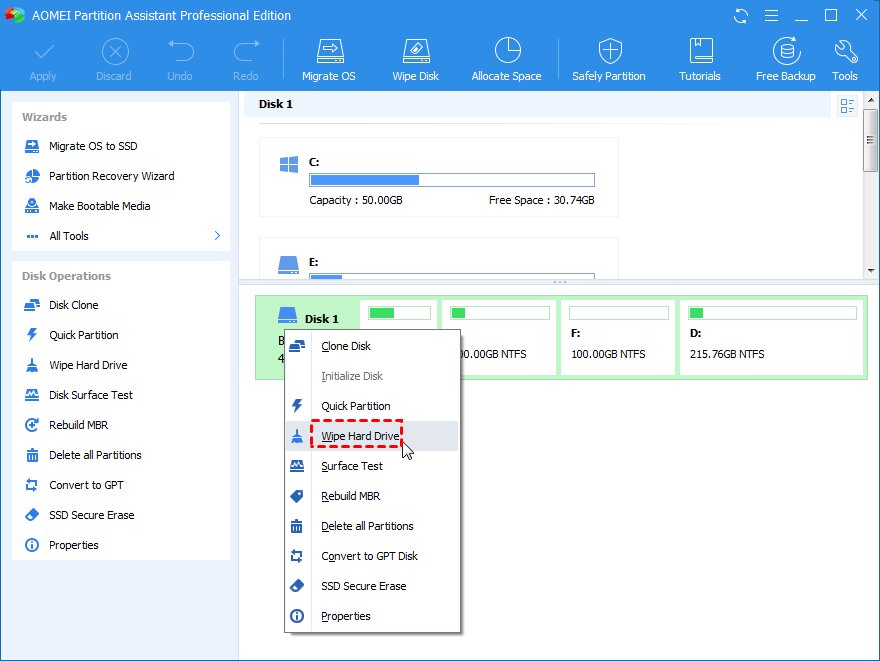
Step 1: Use the bootable USB drive to start a Windows 7 format. Once logged in, you will be on AOMEI Partition Assistant Professional's primary interface. "Format Partition" can be selected by right-clicking the C disk.
Step 2: Select a file system in this window, then click "OK."
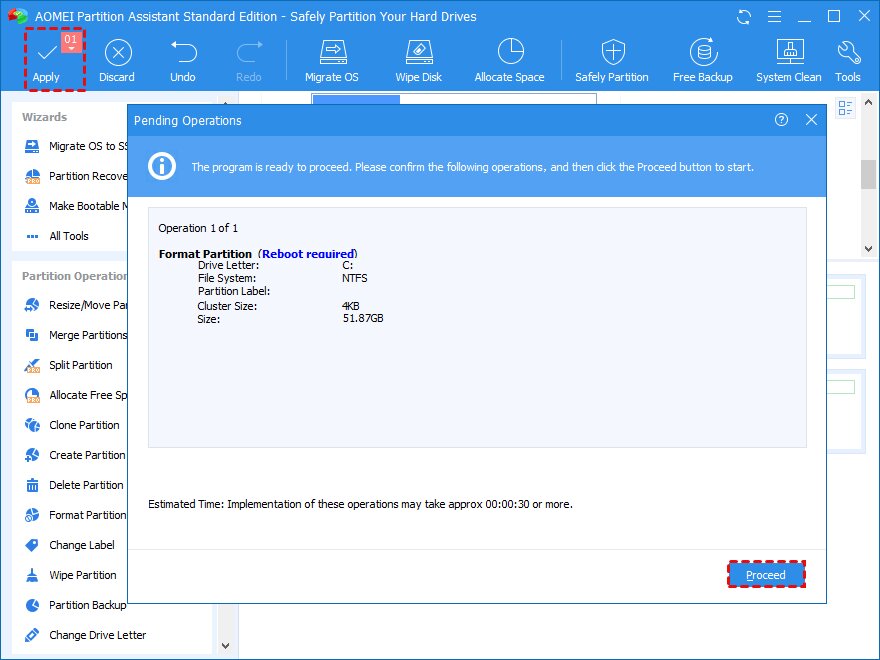
Step 3: To commit the pending operation, click "Apply" and "Proceed."
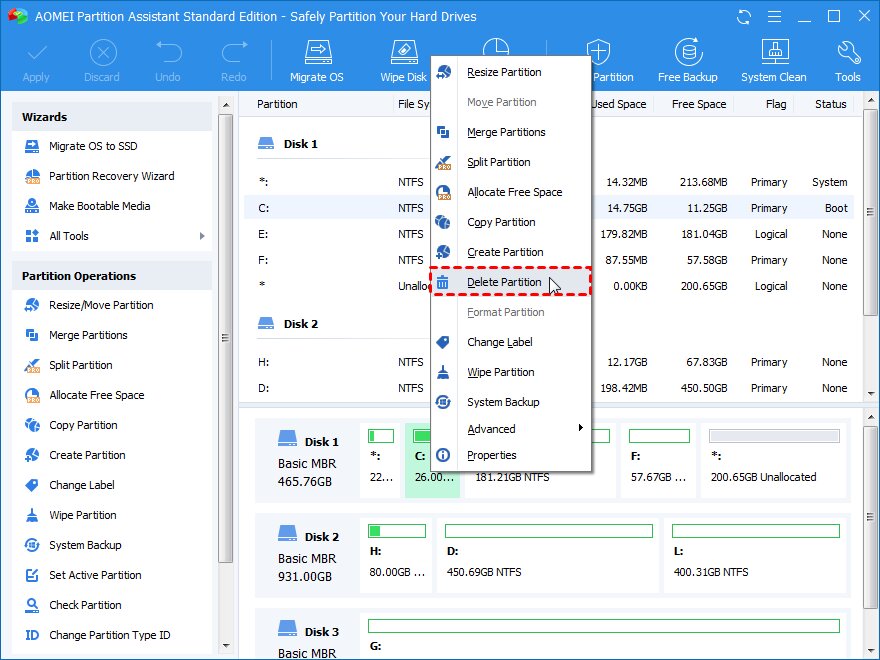
Step 4: Select "Delete Partition" by right-clicking the system drive.
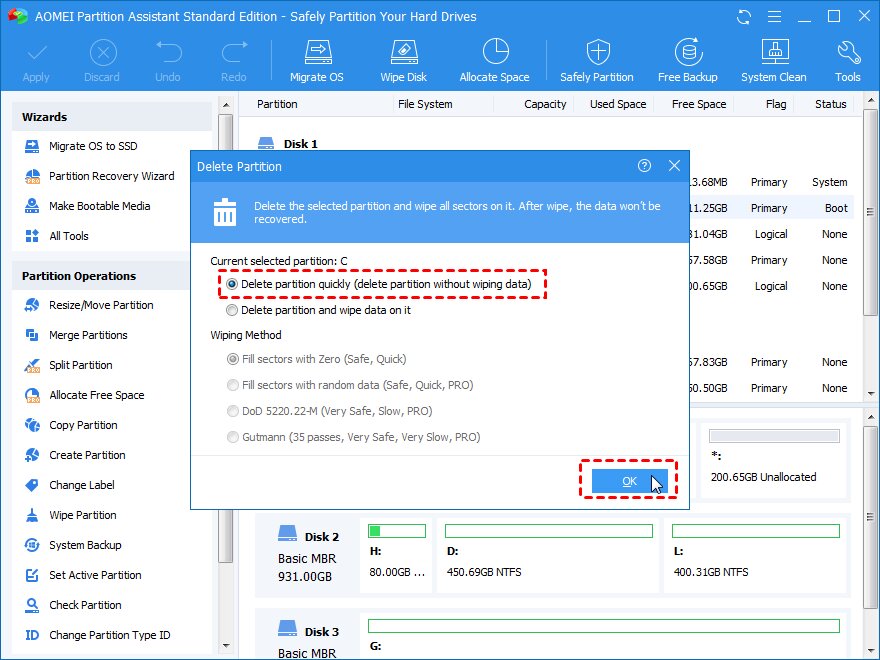
Step 5: You can delete the system drive and replace sectors with zero by selecting "Delete partition and wipe data on it."
Step 6: Its "Wipe Hard Drive" capability may erase the system disk inside of Windows without the need for bootable media.
Part 3. How To Format a Hard Disk Drive in Windows 7 With Disk Management?
You need to be signed in as an administrator, and there needs to be either free disk space or space within an expanded partition on the hard drive to set up a partition or volume on a hard drive. If there isn't any free disk space, you can add some by deleting or decreasing existing partitions or using a third-party partitioning tool.
The disk-based hardware that Windows recognizes can be fully managed with the help of the Disk Management extension to the Microsoft Management Console. It's used to control the installed disks in a computer, including internal and external hard drives, optical discs, and flash drives. Drives can be partitioned, formatted, and assigned drive letters, among many other things. With disk management, you may utilize a windows 7 hard drive format.
Step 1: Press "Enter" to launch Windows 7 Disk Management by typing "diskmgmt. msc" in the search box.

Step 2: Right-click the drive you wish to format and choose Format while Disk Management is active.
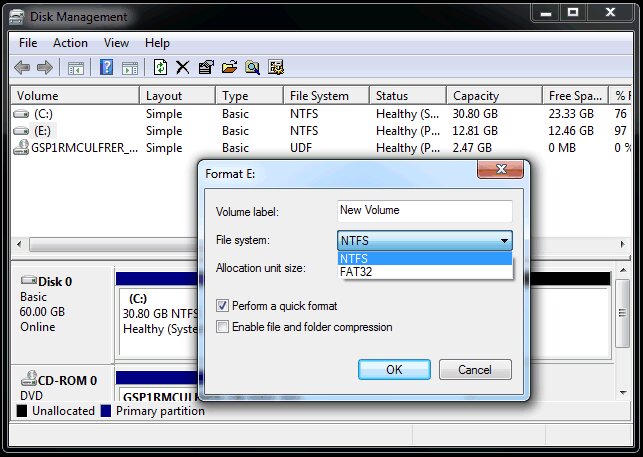
Step 3: The drive's name can be entered or left in the Volume label textbox on the following screen. Then pick the file system of your choice. Leave the rest alone unless you have explicit reasons to change anything, and click OK.
More Related: Backup Computer Before Factory Reset
Part 4. How To Recover Data From Hard Drive Formatted?
Several things might cause data loss, including unintentionally deleting information from your computer or formatting a partition without a backup. Whatever the cause, the final result is that you've lost important data in files, directories, and possibly even an entire sector.
It's likely that your files are still there and accounted for on the drive. To recover deleted or formatted data from a hard disk, use Wondershare Recoverit.
For Windows XP/Vista/7/8/10/11
For macOS X 10.10 or later
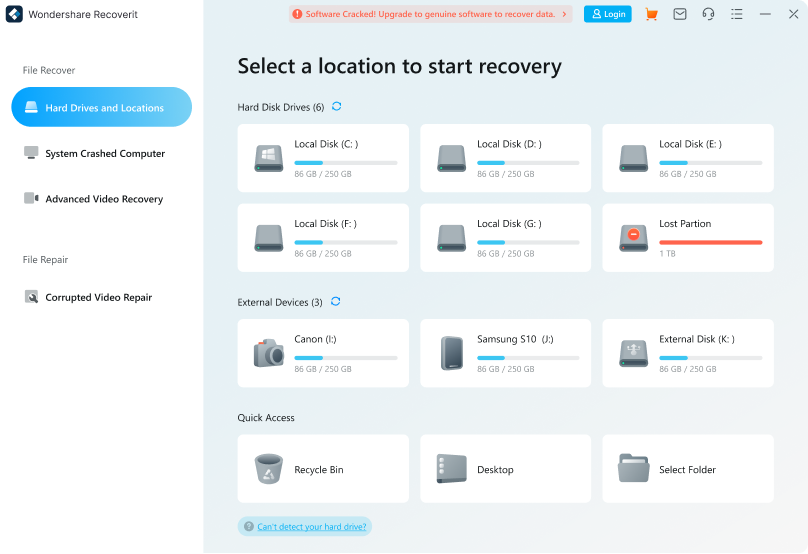
Step 1: Select where to Scan.
Select a location to scan before starting the Recoverit Data Recovery application on your computer. It could be a partition or a whole folder on your device.
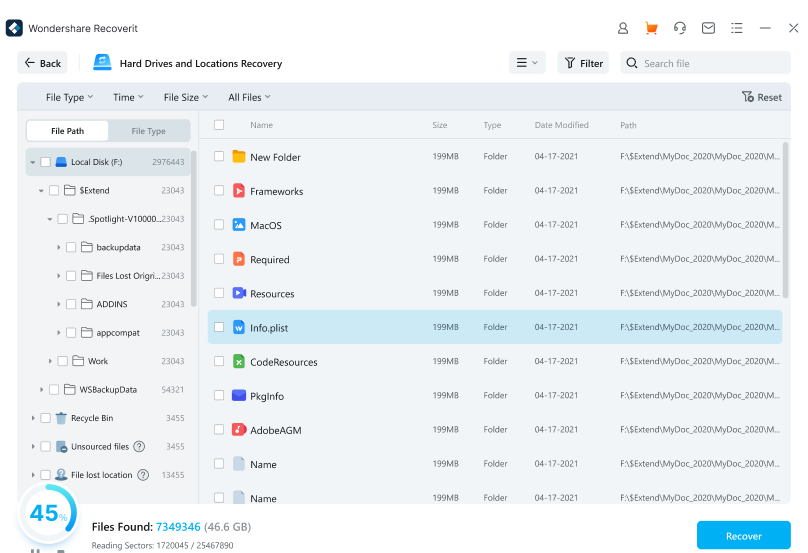
Step 2: Scan the Hard Drive.
The program will begin scanning the chosen drive or partition as soon as you press the "Start" button. Just be patient while you wait for the procedure to finish smoothly.
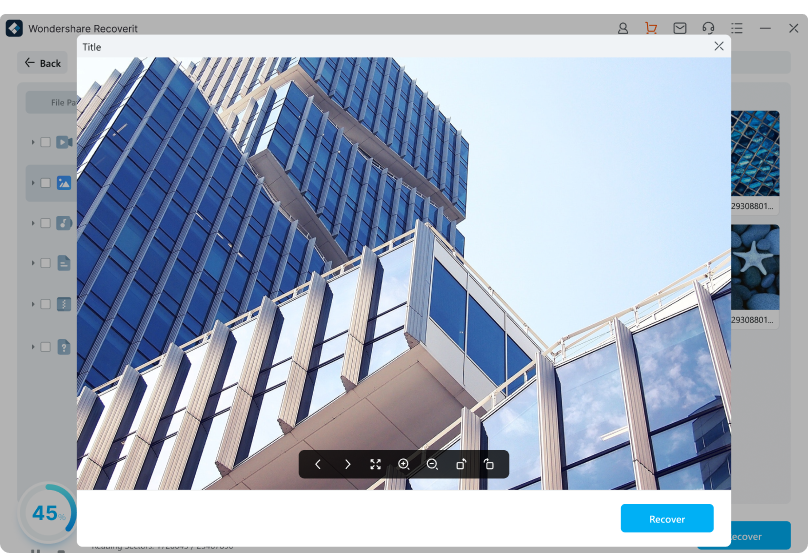
Step 3: Restore your Data.
The program will allow you to preview the documents extracted throughout the operation. You can choose the date of your preference and save it by clicking the "Recover" button. Ensure that you save it in a reliable location.
More Related: How To Fix Windows Could Not Format a Partition on Disk 0?
Conclusion
Anyone with an operating system disc and a basic command set can format a computer's hard drive. In this article, Windows 7 format was introduced using 4 different techniques. You can find a way to completely delete all of your data on Windows 7 whether or not you have the installation CD.
For Windows XP/Vista/7/8/10/11
For macOS X 10.10 or later


