“Why am I getting BitLocker recovery message?”
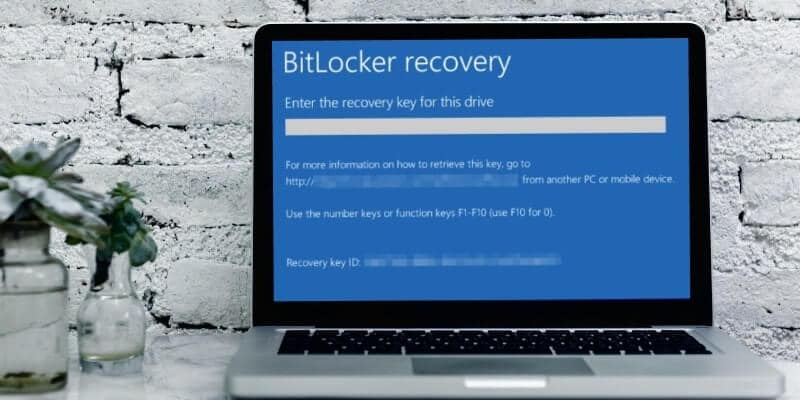
BitLocker recovery key messages can be quite a hassle. Like when you don't seem to have any security issues. However, Windows is sending you bizarre messages about your BitLocker recovery key for unknown reasons. It can happen when you have an update. Or, upon restarting the computer, you are prompted with the option to enter the recovery key. What's more, comes a time when you do everything by the book, yet you encounter errors like "failed to unlock with this recovery key."
In this article, we introduced different types of BitLocker recovery key messages and what's the solution to errors you might encounter.
What Is BitLocker Recovery Mode?
IT professionals use BitLocker on systems with drives to keep unique data restricted or confidential. For example, If you experience a PC showing a BitLocker recovery screen after powering on, it means that the HDD/SDD has been encrypted. Every BitLocker encryption feature comes with an automatically generated recovery key that you can save in different ways and comes in handy when you face troubles.
There are some situations when Windows detects any unauthorized attempt or sense being tampered with. It triggers a recovery mode. If you can't unlock the drive, BitLocker recovery mode is the last resort to restore your access to a BitLocker-protected drive.
There are some options in front of users to gain access again:
- The easiest way is to provide the recovery keys. There are multiple ways of saving a BitLocker recovery password. Some organizations allow keeping a paper-printed version. Or storing that on your Microsoft account online, a document file on the same PC, or a USB. If you render the 48-digit key and type it, it will end the story.
- A data recovery agent (DRA) can use their credentials to unlock the drive. If the drive is an operating system drive, it must be mounted as a data drive on another computer for the data recovery agent to unlock it.
What Causes BitLocker Recovery Key Messages?
Several situations can cause the BitLocker recovery mode to be triggered; let's review them as follows:
1. Failed to Authenticate
- When you forget your PIN, which can force you to enter the incorrect PIN too many times, this could lead to activating an anti-hammering logic of the TPM.
- It also can happen when your keyword has a different layout, your Caps are on, or when you are in a non-Eng language.
- If you lose your BitLocker recovery key in a USB or paper-printed format, you will be locked out of the encrypted data.
2. Boot/BIOS Alterations:
- Updating the BIOS
- When you turn off BIOS while reading a USB in a pre-boot environment using USB-based keys.
- When changing the BIOS boot order to boot another drive ahead of the hard drive
- When upgrading startup components like BIOS upgrades.
- Any master boot record (MBR) alteration or modification on the disk
- Changes to the boot manager (bootmgr) on the disk.
- Failing to boot from a network drive before booting from the hard drive
- Using a BIOS hotkey during the boot process changes the boot order to something other than the hard drive.
3. Any Change in Hardware, Software, and Firmware:
- It could be related to playing CD/DVDs or adding/removing hardware or add-in cards (such as video or network cards). Any firmware upgrade can count too.
- If your computer was undocked when BitLocker was turned on, docking/undocking that PC can cause an alarm.
- NTFS partition table modifications are including: create, deleting, and resizing any of the primary partitions
- TPM changes like turning off, disabling, deactivating, or clearing. TPM firmware upgrade.
4. Other Triggers to Watch
- Modifying the Platform Configuration Registers (PCRs) used by the TPM validation profile.
- If you change the location of the BitLocker-protected drive.
- Motherboard Upgrade with a new TPM, failing TPM self-test, or hiding the TPM from the operating system.
- Disabling the code integrity check or enabling test signing on Windows Bootmgr
Ways to Fix BitLocker Keeps Asking for Recovery Key
Solution 1: Enter The Correct Recovery Key (Self-Recovery)
- This section points toward finding the recovery key to solve the issue at hand. For example, asking if users have a recollection of saving the key in a USB or have printed it.
- On the other hand, a self-recovery policy for any organization beforehand can be a good idea. Such as asking employees to save the key in a USB flash. Plus, they should be informed not to store the UBS next to the PC, especially during travel (if you lose your bag, no one can take advantage of it).
- Another recommended policy is for users to contact the “Helpdesk” before or after performing self-recovery to understand the root cause of the problem.
Solution 2: Suspend Protection of BitLocker Drives
If you are using BitLocker drive encryption on your PC, before applying new updates, hardware alterations, or any triggers we mentioned, suspend the protection of BitLocker drives as follows:
How to suspend BitLocker with Control Panel:
To suspend BitLocker using Control Panel on Windows 10, use these steps:
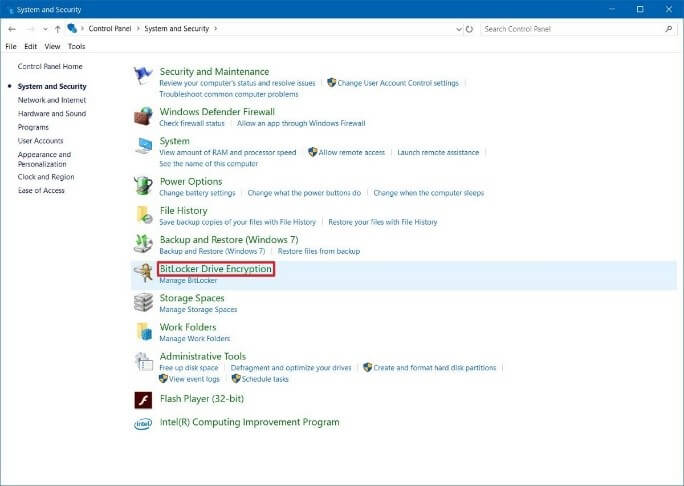
- Open Control Panel. Click on System and Security > BitLocker Drive Encryption.
- Then, choose the Suspend protection option and click Yes to confirm.
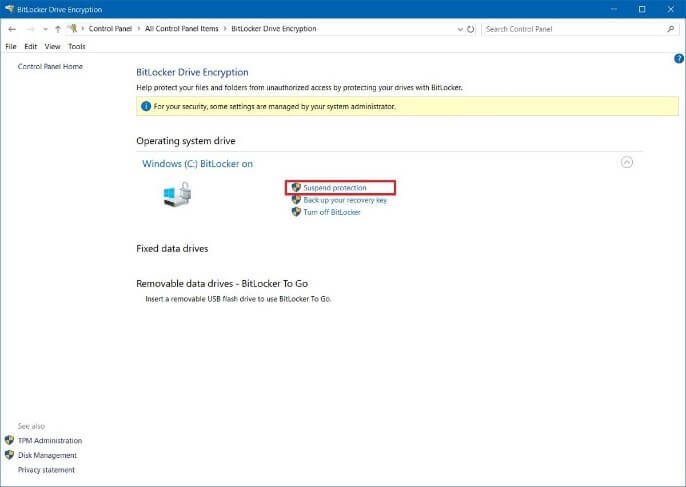
- Once complete the process, you temporarily disable the BitLocker protection without decrypting your data.
After you're done with your system changes, always make sure to resume encryption to keep your files protected. Here's how you can resume BitLocker protection after finishing with your alterations:
- Open Control Panel.
- Select System and Security > BitLocker Drive Encryption > Resume protection.
- Press Yes.
How to suspend BitLocker with Command Prompt
To disable BitLocker Command Prompt on Windows 10 temporarily, follow these steps:
- Open “Start” and search for Command Prompt, right-click the top result, and select Run as administrator
- Type the following command to identify the drive that you want to suspend BitLocker and press Enter:
Manage-bde –Protectors –Disable C: -
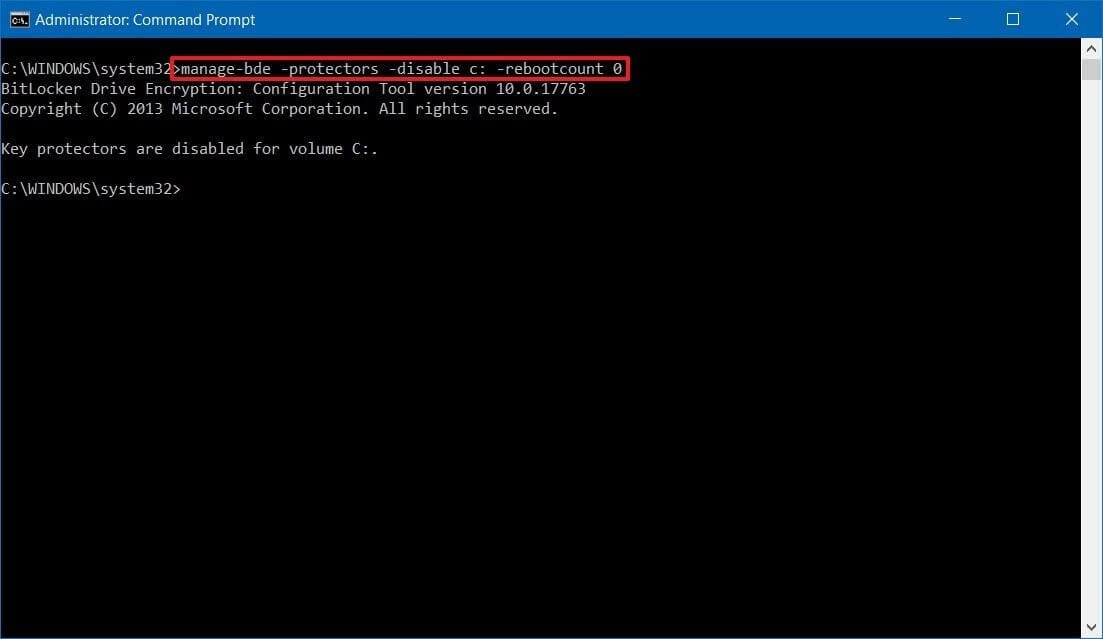
- Once you’re done, your computer will temporarily stay without encryption protection, ready to perform system changes.
Here's how to resume BitLocker protection after applying the system changes:
Open Start, search for Command Prompt, and select the Run as administrator option again.
Type the following command to resume BitLocker and press Enter:
Manage-bde –Protectors -Enable C:
Solution 3: Turn off Auto-lock for BitLocker
To avoid recovery key messages, you can disable auto-lock for BitLocker. Use the following methods:
How to Turn On/Off BitLocker Auto-unlock for Drive in BitLocker Manager
- Open the Control Panel, and click on the BitLocker Drive Encryption icon.
- Open the fixed or removable data drive you want to turn on/off its auto-unlock.
- Click on Turn off auto-unlock
You can turn on BitLocker Auto-unlock again, and it will resume work as before:
- First, open “This PC” in File Explorer (Win+E).
- Then tap on it to open a locked fixed or removable data drive (for example, a USB called "F" drive); you want to turn on its auto-unlock.
- Enter the password to unlock this drive.
- Check the "Automatically unlock on this PC" box, and click and tap on Unlock.
Bonus Tips: Rescue and Backup Crucial Data from a PC with Boot Issues
Professional software is the best way to recover your precious data if your PC is stuck on BIOS Screen.
Recoverit Data Recovery is a recovery program that can recover data in many situations, from crashed PCs, corrupted SD cards, formatted drives, damaged internal hard drives, etc.
Video Tutorial on How to Recover Files from BitLocker Encrypted Drive?
For Windows Vista/7/8/10/11
For macOS X 10.10 or later
Recoverit Data has a user-friendly interface that even the most newbie users can use. To know more about how to recover data from a PC stuck on the BIOS screen, proceed as follows:
- Step 1: Create Bootable Media
As your PC is stuck, you require another computer. With a CD/DVD or USB plugged in to gain access to your drive, Recoverit can help you retrieve your data.
Then, download and install Recoverit Data Recovery. Select the option to "Recover from Crash Computer" under the tab "Advanced Recovery," then select "Start."
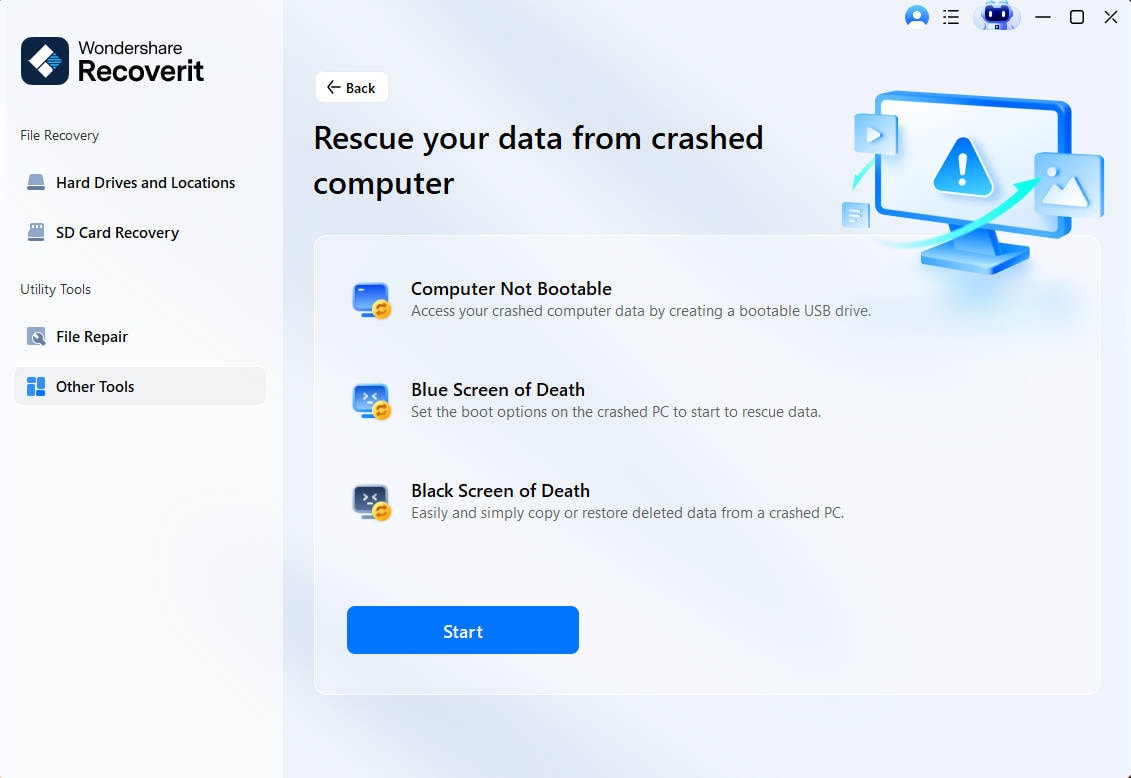
Depending on which device you are using, choose CD/DVD or USB, then click "Create."If you have chosen a USB, you will be prompted to format it. Click "Format" > "Create".

Then, Recoverit will download the needed firmware for creating the bootable media. It will format your drive before making the bootable media. Then it will notify you to eject your DVD/CD or unplug your USB.
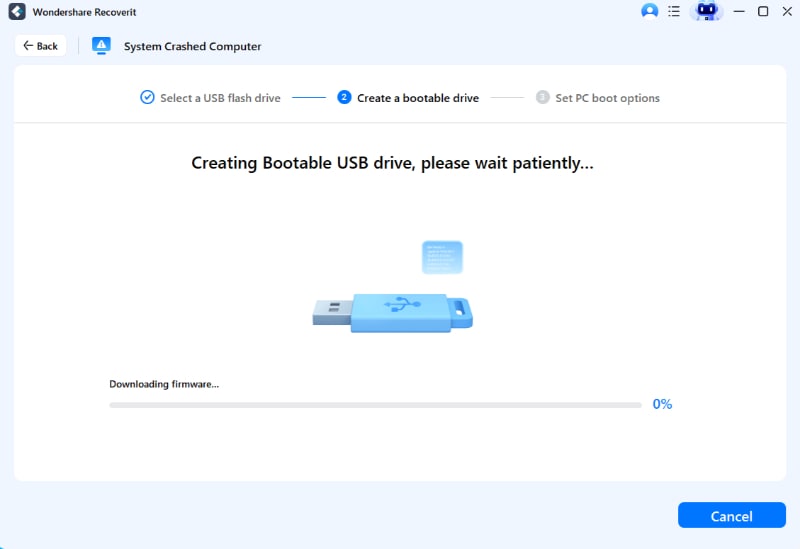
- Step 2: Boot Computer with Bootable media
Go to the BIOS settings of the computer stuck on the BIOS screen. Insert the DVD/CD into the problematic PC or plug the bootable USB into it.
Reboot the PC; Now your access is restored. Also, plug in an external drive that you can use to store the data you are about to recover.
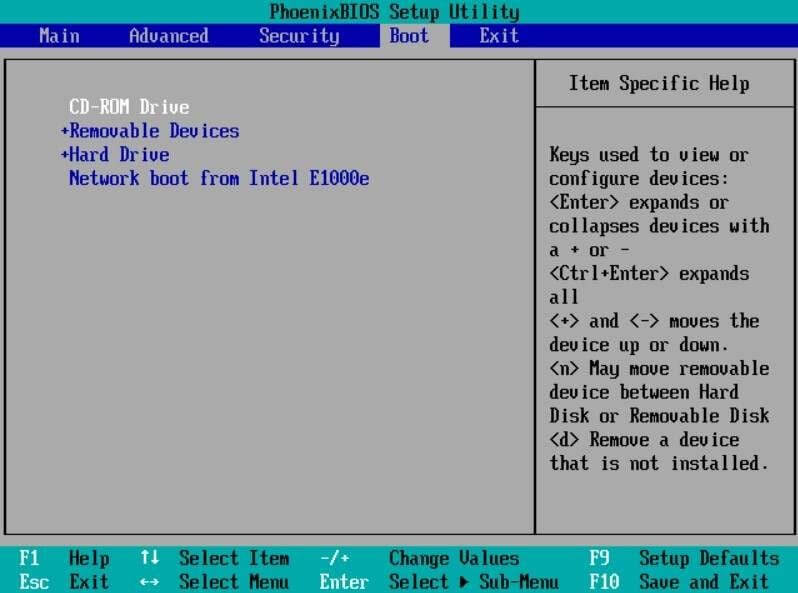
- Step 3: Select Recovery Mode
You will see two recovery options, "Data Recovery” and "Hard Disk Copy. "Select Data Recovery" mode, then go to drive and select your stored files. Recoverit will scan the drive and bring back the lost data when starting the operation.
One of the Recoverit Data Recovery features is a preview of the process. When it retrieves data, you can save them in your plugged external drive. Then press "Recover" to finally have your files back.

 ChatGPT
 Perplexity
 Google AI Mode
 Grok
Grok


