
 TL;DR:
Disabling encryption on Windows 11 requires different approaches based on your operating system edition: Home users must toggle off Device Encryption in Privacy and Security settings while signed in as a device administrator, whereas Pro, Enterprise, and Education users can turn off Standard BitLocker Drive Encryption through Control Panel, Settings, or command-line tools.
● Device Encryption applies automatically to the entire system on all Windows 11 editions supporting Modern Standby, while Standard BitLocker is limited to Pro, Enterprise, and Education editions but allows users to specifically manage and encrypt individual drives using XTS or AES algorithms.
● Disabling Standard BitLocker via Command Prompt requires the exact BitLocker recovery key to unlock the drive first, and the subsequent decryption process through any standard method can take up to several hours depending on the drive size.
● Removing BitLocker by formatting the encrypted drive in Disk Management requires the initial unlock password and will permanently erase all stored data, necessitating a full system backup before proceeding.
Ask AI for a summary
 ChatGPT
 Perplexity
 Gemini
 Claude
 Grok
Grok
Windows 11 brought a lot of changes to the table, including two new forms of encryption: BitLocker and Device Encryption. These options offer heightened security for your device and files, but what happens if you need to disable them? Here we will show you how to disable BitLocker Encryption on Windows 11. Remember that turning off BitLocker on Windows 11 can make your device and data less secure, so use caution when making this decision.
Device Encryption VS. BitLocker Drive Encryption
In today's world, more and more data are being stored electronically, including anything from personal photos to essential business documents. As a result, it's important to have some form of security in place to protect this data. There are a number of different encryption methods available, but two of the most popular are device encryption and standard BitLocker encryption.
Device encryption
Device encryption (aka: BitLocker automatic device encryption) is a Windows security feature conceptualized and developed by Microsoft to help users keep their data safe. It's available on a wide range of Windows devices and compatible with any Windows 11 edition.
Pros
Keeps data safe
Faster and streamlined
Cons
When a user boots up his device, the data gets decrypted automatically.
Standard BitLocker Encryption
BitLocker is an exciting new feature included with Microsoft Windows versions starting from Vista that protects your data by providing encryption for entire volumes.
Pros
No need to pay extra to avail of its benefits
It is safe
You can turn it off in case you don't want to encrypt a particular file
Cons
Data is encrypted only on the BitLocker drive
Lose your encryption key, and all your data is lost
OS compatibility
Differences between Device Encryption and Standard BitLocker Encryption
While both have some similarities, they are different on several grounds.
Device Encryption |
Standard BitLocker Encryption |
| Encrypts the entire system, including the secondary drives | Encrypts a single drive or all (as desired) |
| No security assurance | provides a set of management tools and extreme encryption protocols for data security |
| Uses mathematical techniques to protect data | Uses XTS mode or AES encryption algorithm for data protection. |
| It is easily accessible on all Windows 10 and 11 editions that support Modern Standby | It is available only on supported devices running Windows 10 and 11 (Education, Enterprise, and Pro (it is not available on Windows 10 and 11 Home edition) |
How to Turn off Device Encryption on Windows 11 Home Edition
The steps below will help you disable Device Encryption on Windows 11 Home Edition.
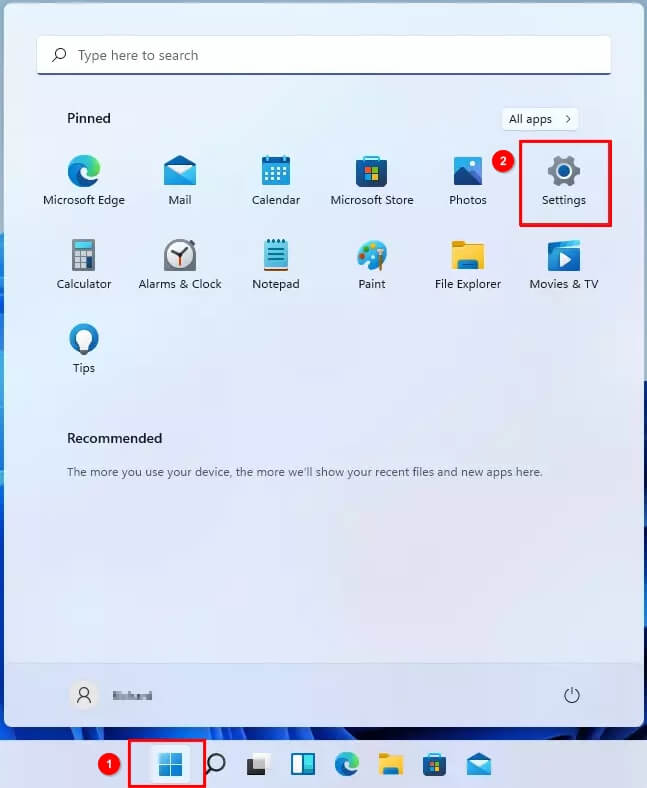
- Open Windows Settings by pressing the shortcut “Win + I” or clicking on Start >
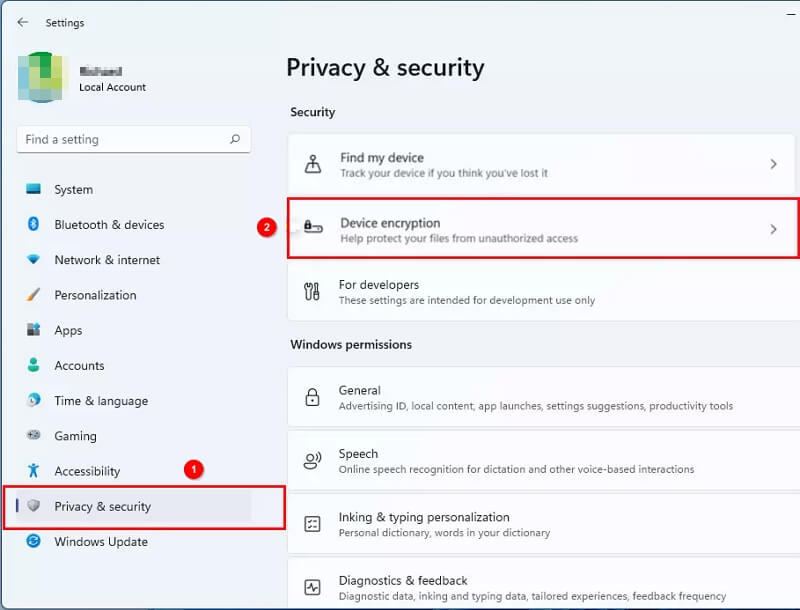
- Go through Privacy and Security > Device Encryption.
- On the Device Encryption setting window, toggle the button to Off to disable Device Encryption on your Windows 11 Home computer.
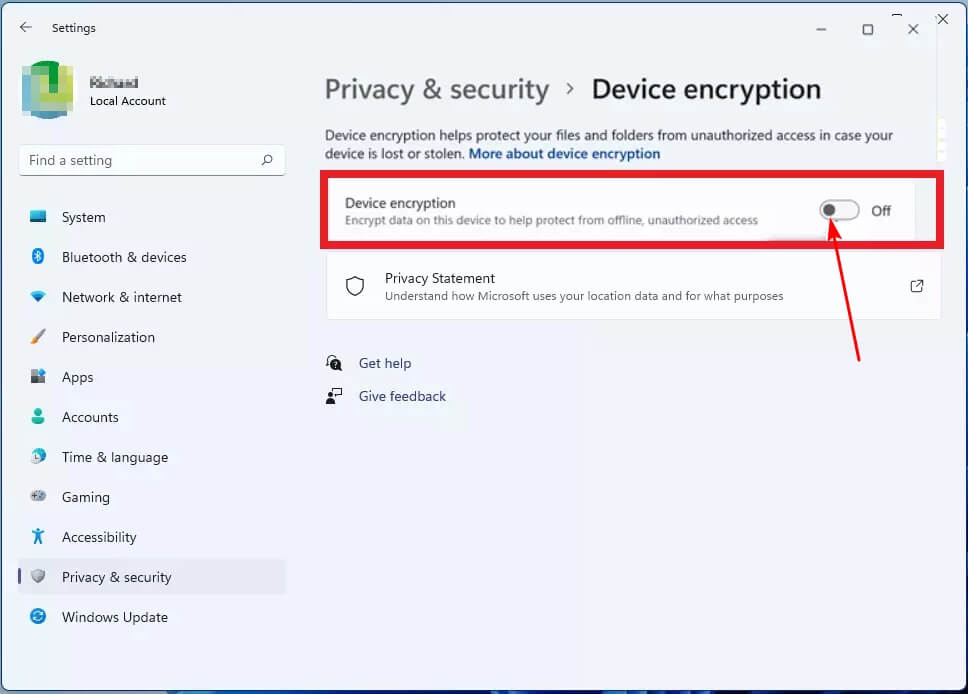
Note: You should sign in as a device administrator to turn off device encryption.
How to Turn off BitLocker Encryption on Windows 11 Pro/Enterprise
If you don't need BitLocker protection, you can disable it to save disk space and improve performance. Here are 8 ways to turn off BitLocker on Windows 11.
8 Methods to Turn off BitLocker on Windows 11
Way 1. Disable BitLocker Encryption on Windows 11 from the File Explorer
- Open File Explorer
- Click on This PC
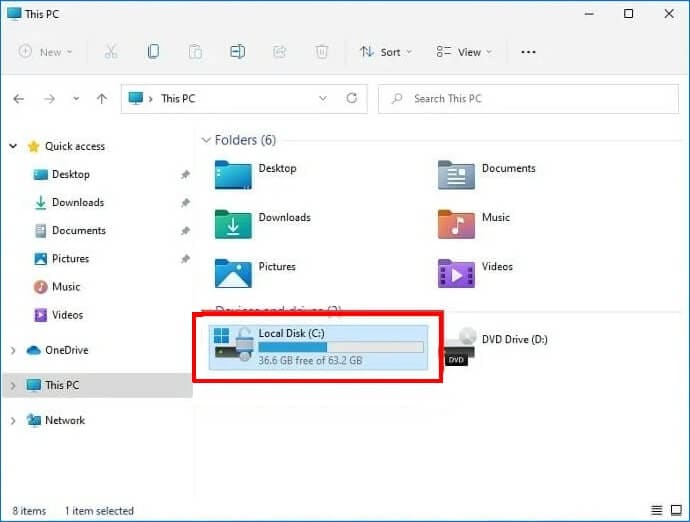
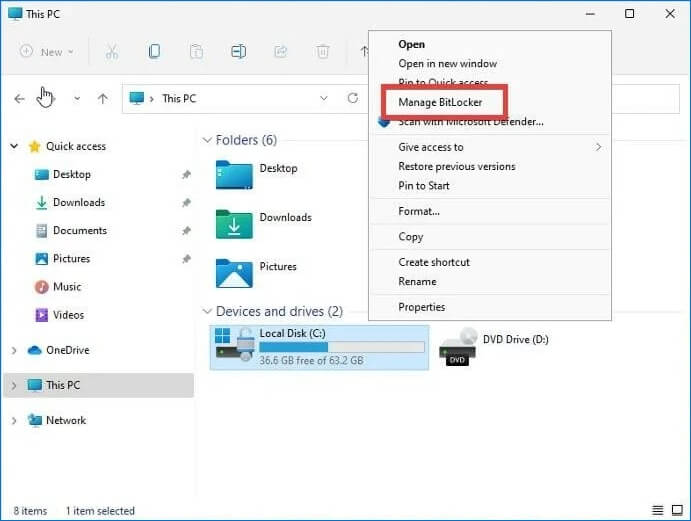
- Right-click on the encrypted drive
- Click Manage BitLocker to access the encryption menu for your drives.
- A small window should appear telling you that your drive has been decrypted. Depending on the size of the file, it can take some time.
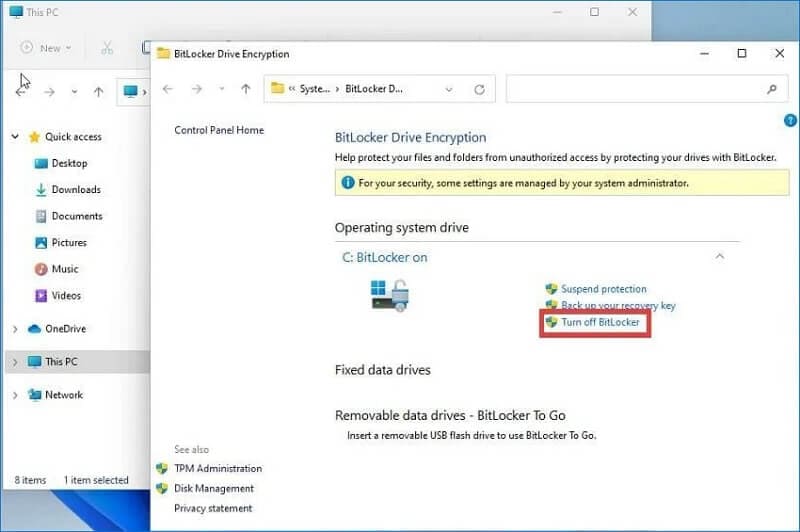
- Click on the button Turn off BitLocker
- Wait for some time until your computer decrypts the file.
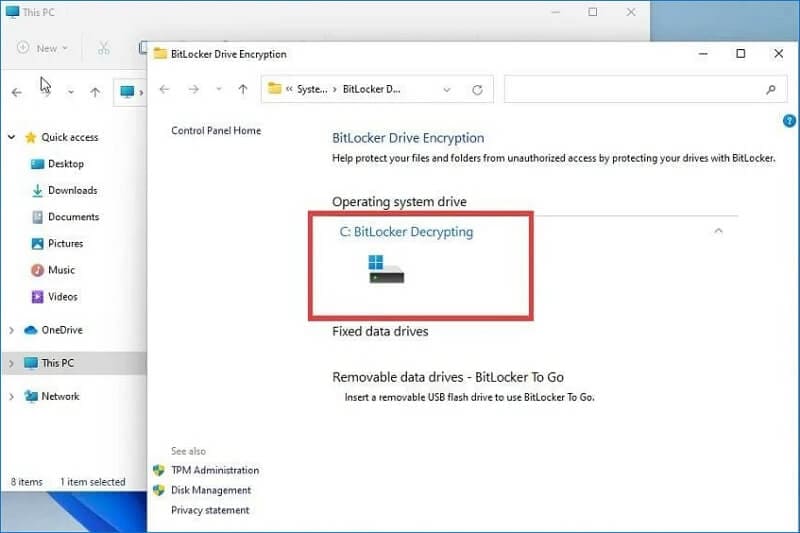
When the decryption process ends, the BitLocker Drive Encryption menu will tell you that the feature is now turned off.
Way 2. Disable BitLocker Encryption on Windows 11 in Control Panel
To turn off BitLocker on your Windows 11 computer, all you need to do is to open your search bar and follow the instructions below.
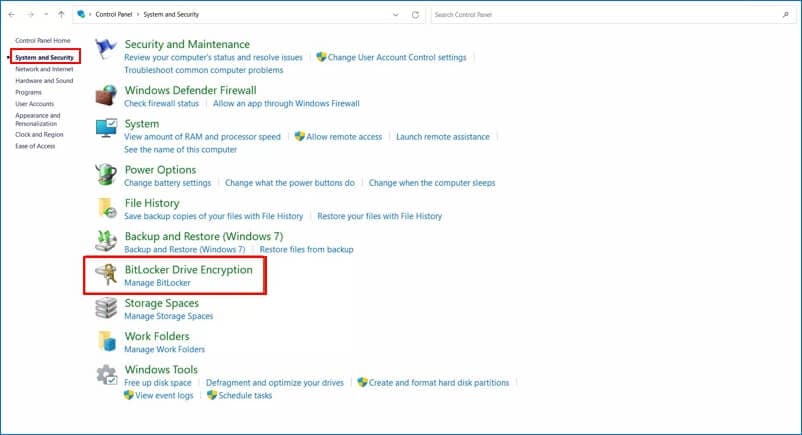
- Open the Control Panel from the Start menu and choose the System and Security option.
- Click the BitLocker Drive Encryption option.
- Click the Turn off BitLocker on the right.
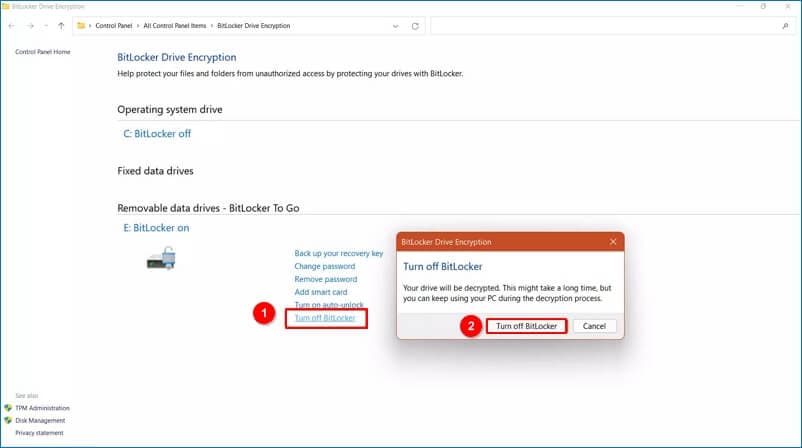
- Confirm the Turn off BitLocker and give it some time. Depending on your drive size, the app will decrypt in an hour or two.
Way 3. Disable BitLocker Encryption on Windows 11 through the Settings App
Removing BitLocker from the Settings app slightly differs from how it is done via Control Panel.
- Go to the Startmenu.
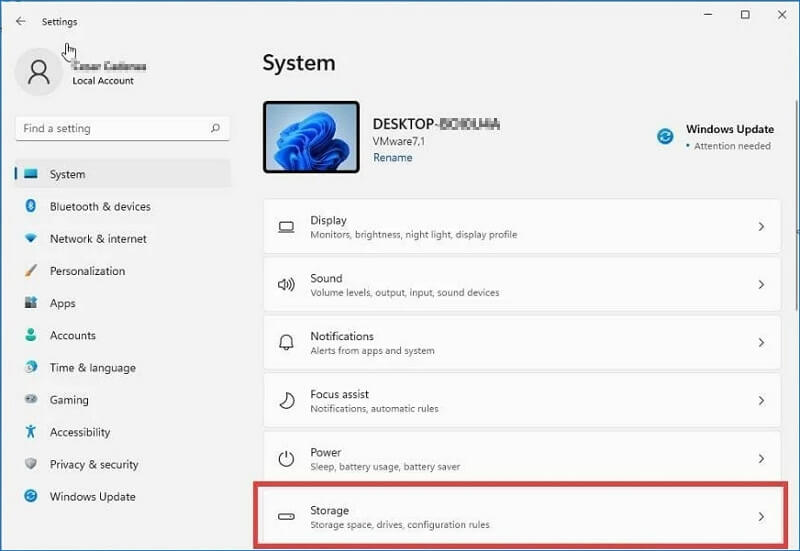
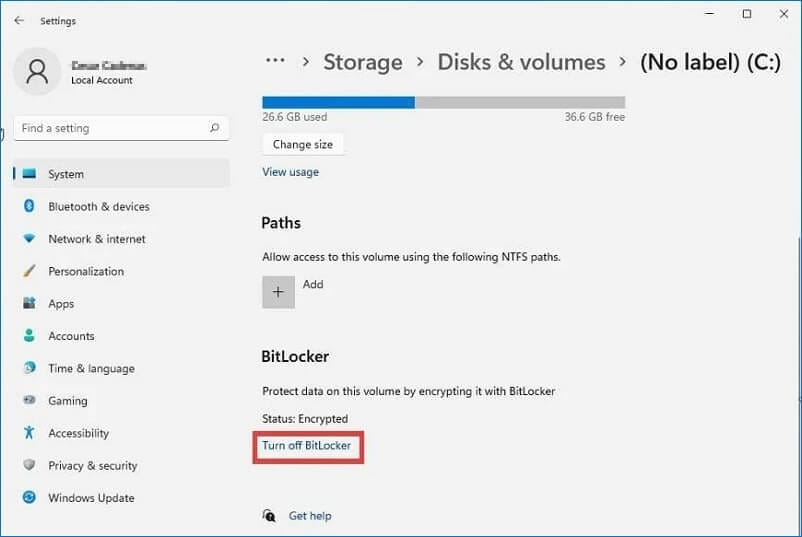
- Tap on Settings > System > Storage
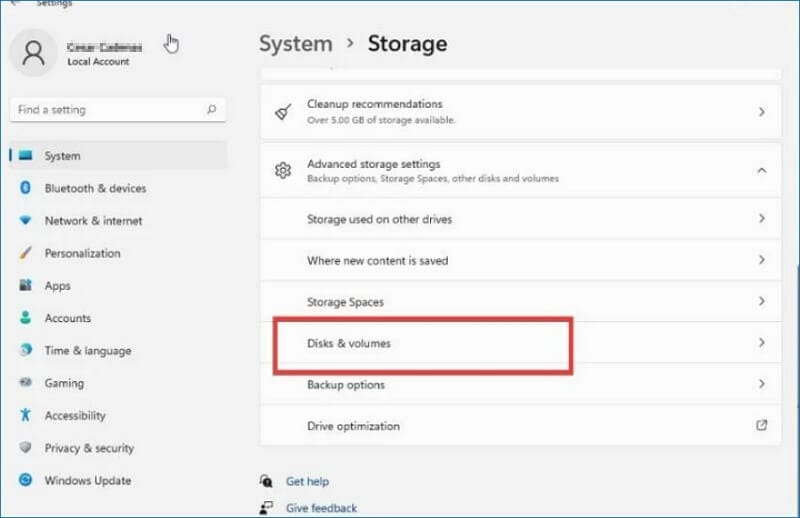
- Scroll and find Advanced storage settings
- From the menu, select Disk & volumes.
- Select the Drive. For example, Drive C
- Click on Properties
- Scroll to find the BitLocker section
- Tap on Turn off BitLocker.
- BitLocker Drive Encryption menu will appear.
- Tap on Turn off BitLocker to confirm removing BitLocker encryption.
The process will take some time. Wait until that happens.
Way 4. Disable BitLocker Encryption on Windows 11 via the Command Prompt
A couple of commands are sufficient to turn off BitLocker on Windows 11.
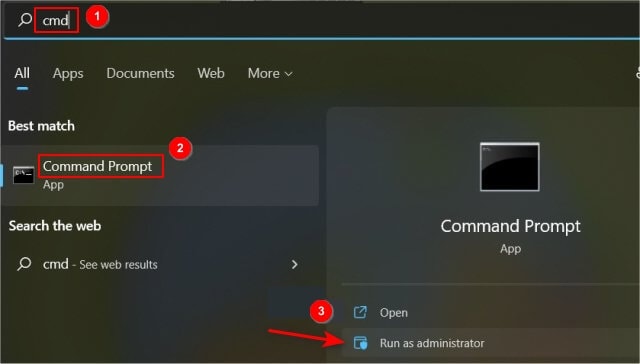
- Run the command Prompt Admin from the Start menu
- Type the command: manage-bde -unlock Drive-Name: -RecoveryPassword Recovery-Code. to unlock the BitLocker Encrypted Drive
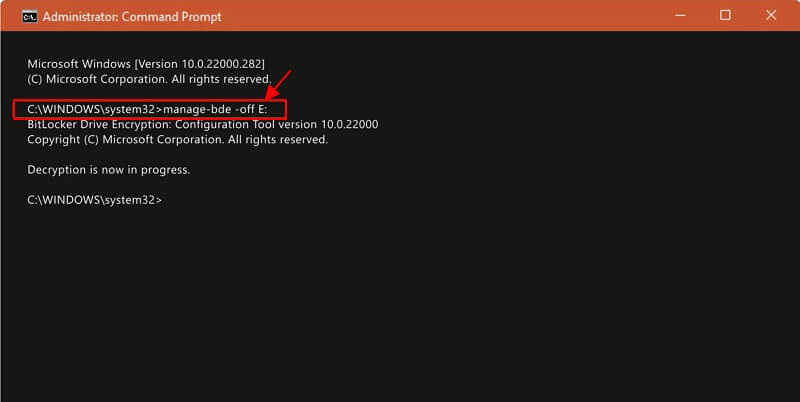
- Type: manage-bde -off Drive-Name: to turn off BitLocker using the command prompt
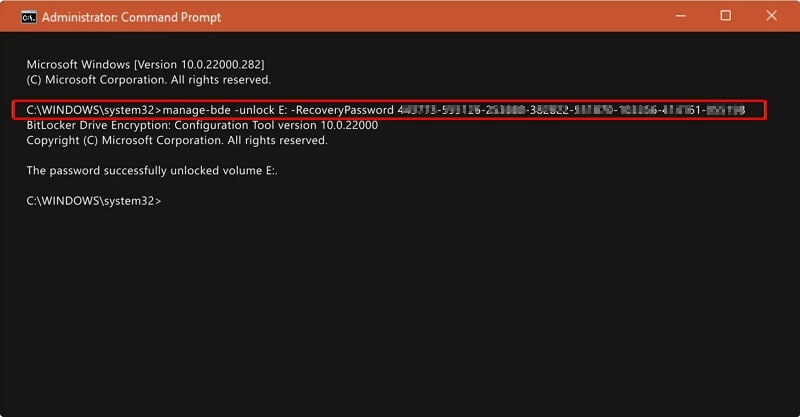
Important note: Replace Drive-Name with the Drive Letter. Replace the Recovery-Code and BitLocker Encrypted Drive with the actual BitLocker recovery key allotted while encrypting the drive.
Way 5. Disable BitLocker Encryption on Windows 11 via PowerShell
Windows Powershell allows you to uninstall BitLocker in the following manner.
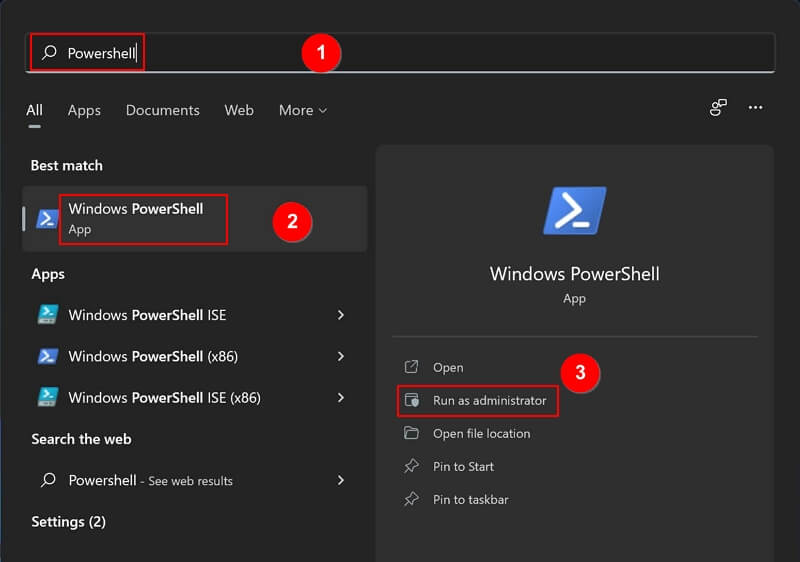
- Open the Start menu. Then type powershell to search Windows Powershell and select Run as Administrator.
- Type the command: Disable-BitLocker -MountPoint Drive_Name:
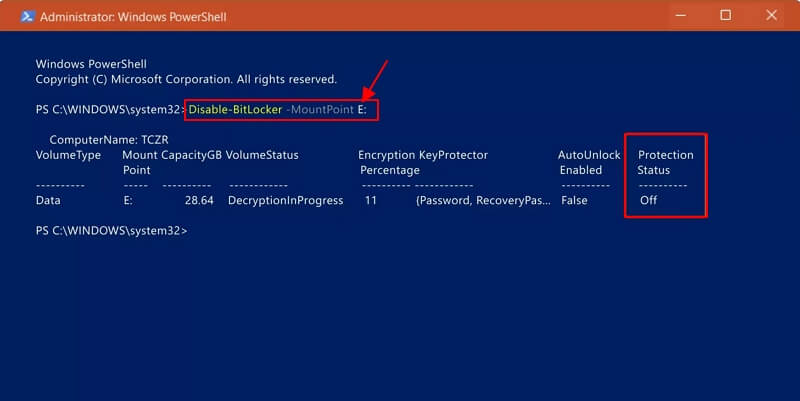
- Type the Drive_Name with the Drive Letter of the BitLocker encrypted drive. Wait until the decryption process finishes. Then, verify the Bitlocker decryption status.
- Your computer will prompt you to restart the system. Restart it
Way 6. Disable BitLocker Encryption on Windows 11 from Windows Services
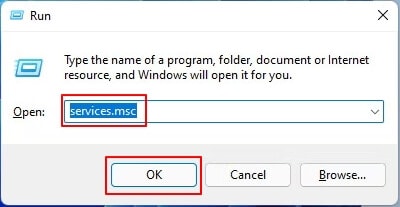
- Open Windows Run by pressing the shortcut “Windows key + R” and type msc. Then hit OK.
- Scroll down and double-click on BitLocker Drive Encryption Service.
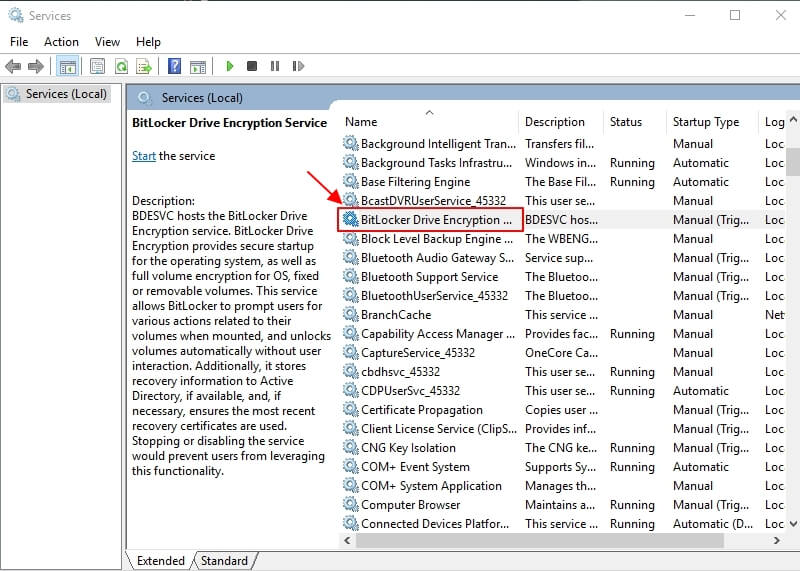
- Set the startup type to Disabled. Click on Apply.

- Restart your computer
Way 7. Disable BitLocker Encryption on Windows 11 via Local Group Policy Editor
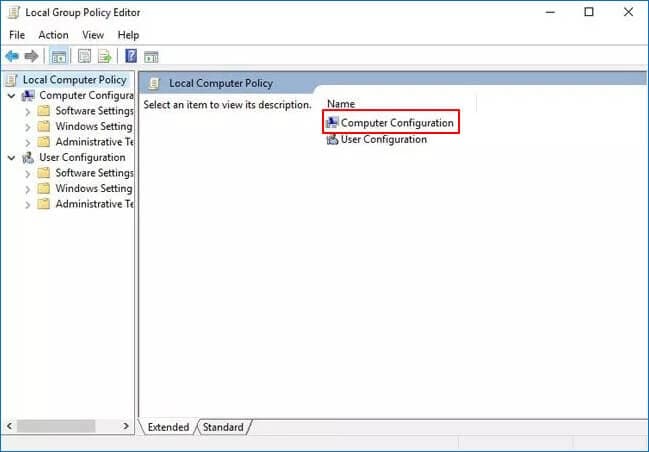
- Press the Windows + R shortcut and type msc to open the Local Group Policy Editor.
- Then click Computer Configuration > Administrative Templates > Windows Components > BitLocker Drive Encryption > Removable Data Drives.
- Double click on the Control use of BitLocker on removable drives
- Select Disabled and tap on the OK

When enabled, this policy setting will allow BitLocker for removable data drives. Turning on the feature does not affect system volumes or boot disks.
The use of BitLocker can have a significant impact on the security and privacy of your data. You might consider configuring this policy setting or disabling it entirely if you don't need removable drives that often.
Way 8. Formatting the Encrypted Hard Drive to Remove BitLocker
The answer to this question is a resounding "yes!" You can easily format an encrypted hard drive, but it's not always as simple or straightforward. Formats don't work on damaged disks either, so ensure you have enough time before formatting your precious data.
It is possible to format an Encrypted Hard Drive, but the process may be more intricate than formatting a normal one.
- Go to the Search bar.
- Type Disk Management and click on it. Enter the Disk Managemen Window.
- Now, see your Systems Drives listed in the Disk Management window. Identify which one is BitLocker encrypted and right-click on it to get started formatting. Hit format.
- When you click on the pop-up panel, check that your drive is labeled correctly with its correct system and allocation size.
- The drive is going to be erased! You might receive a warning notification, so make sure you back up all of your data before clicking "OK." You can't sacrifice your hard drive! So make sure you back up all the data on this machine before clicking "OK."
- BitLocker will be formatting your drive; please wait a few minutes before accessing the BitLocker-protected Disk on the system again.
BitLocker encryption has successfully formatted your drive, but now all the data on it is lost. You can restore everything from a backup if you have one or not; otherwise, everything stored within will be permanently gone. However, there are ways to get data back after formatting, learn how to recover data from BitLocker Encrypted Drive.
Note:
1. The encryption process will ask you for the password to unlock it. If entered correctly, formatting an encrypted hard drive is possible and successful.
2. Formatting an encrypted drive is not always easy, but there are ways to do it without using the tools mentioned above. However, if you try this, then your HDD will remain Encrypted after formatting.
How to Fix ‘This PC Doesn’t Currently Meet Windows 11 System Requirements’
Summing up
While disabling BitLocker encryption on Windows 11 may be necessary for some businesses, it is important to weigh the risks and benefits associated with doing so. Microsoft provides several resources to help make the process as smooth as possible, but it is still crucial to understand what steps are being taken and why.


