

 TL;DR:
UNetbootin allows Mac users to create bootable USB drives for various operating systems, but successfully running it on newer macOS versions typically requires formatting the drive to FAT32 and manually overriding Apple's security blocks.
● USB drives must have at least 4GB of free space, be formatted to MS-DOS (FAT32) using Disk Utility, and have full read/write permissions enabled in the macOS "Get Info" menu.
● If UNetbootin fails to launch or detect the USB due to macOS security restrictions, bypass this by running the application with administrator privileges using the `sudo` command in Terminal.
● Choose UNetbootin for cross-platform bootable disk creation directly on macOS, Windows, or Linux, whereas the alternative tool Rufus is strictly designed for Windows PCs and best suited for users needing more advanced features.
Ask AI for a summary
 ChatGPT
 Perplexity
 Gemini
 Claude
 Grok
Grok
UNetbootin is a well-known utility for making bootable USB drives quickly and efficiently. It's a handy solution for installing Linux or other operating systems without relying on CDs or DVDs. Many Mac users look for clear instructions to use UNetbootin smoothly on macOS systems.
Creating bootable USB drives on Mac can be tricky. UNetbootin for Mac offers a simple solution. However, users often face issues when they download UNetbootin for Mac. This article explores frequent issues users encounter and offers practical solutions.
Mac users need reliable methods to create bootable USB drives. UNetbootin macOS support makes this task easier. We will show you how to use UNetbootin on Mac step by step. You will also learn to solve common UNetbootin problems on Mac.
In this article
Part 1: Common Issues – UNetbootin Problems on Mac
1.1 What Is UNetbootin?
UNetbootin or Universal Netboot Installer is a cross-platform that lets you create bootable USB drives for Linux distributions. You can also use the program to load ISO files of other operating systems, such as Windows 7, 8, and 10, and Mac.
1.2 The Features of UNetbootin
Below are the main features of UNetbootin software:
- Security: The program doesn't erase any files because it does not format your USB flash drives or external hard drive devices.
- Supported Distributions: UNetbootin supports various Linux distributions, including Ubuntu, Kubuntu, Xubuntu, Lubuntu, Debian, openSUSE, Arch Linux, Damn Small Linux, SliTaz, Linux Mint, Zenwalk, Slax, Elive, CentOS, FreeBSD, NetBSD, 3CX, Fedora, PCLinuxOS, Sabayon Linux, Gentoo, MEPIS, LinuxConsole, Frugalware Linux, xPUD, and Puppy Linux.
- Supported System Utilities: UNetbootin software can be used to load various system distributions, such as Parted Magic, SystemRescueCD, Super Grub Disk, Dr.Web Antivirus, F-Secure Rescue CD, Kaspersky Rescue Disk, Backtrack, Ophcrack, NTPasswd, Gujin, Smart Boot Manager and FreeDOS.
- Non-destructive Installation: The Unetbootin uses Syslinux to download non-destructive installation on Mac.
Other feature includes loading files with custom disk image, automatic detection of mass storage, and creating a bootable USB drive.
Mac users often encounter various problems when using UNetbootin. These issues can prevent successful bootable USB creation. Understanding these problems helps you prepare better solutions.
1.3 Common UNetbootin Problems on Mac:
- Permission Errors: Mac security blocks UNetbootin from accessing USB drives
- USB Not Recognized: UNetbootin fails to detect connected USB devices
- Slow Creation Process: Bootable USB creation takes too much time
- Boot Failure: Created USB drives fail to boot properly
- File System Errors: Wrong file system format causes creation problems
- App Crash Issues: UNetbootin crashes during the creation process
- ISO File Problems: Downloaded ISO files show corruption errors
- macOS Version Conflicts: Newer macOS versions may not support older UNetbootin
Part 2: What is UNetbootin? Can I Use UNetbootin on Mac Easily?
UNetbootin, short for "Universal Netboot Installer," is a versatile tool designed to create bootable USB drives using ISO files. It supports a wide range of operating systems, such as Linux and Windows, making it a go-to choice for many users. With compatibility on macOS, UNetbootin also serves Mac users looking for a reliable way to set up bootable media.
The software simplifies the bootable USB creation process. You can download UNetbootin for Mac from the official website. It supports various Linux distributions and other bootable images. However, how to use UNetbootin to create a bootable USB on Mac requires some technical knowledge.
Mac users can use UNetbootin with some limitations. The tool works better on older macOS versions. Newer Mac systems may need additional steps for proper functioning. You might need to adjust security settings to run UNetbootin successfully.
Part 3: How to Use UNetbootin on Mac
UNetbootin is a handy tool for creating bootable USB drives. It’s especially useful when installing Linux or other operating systems. Mac users can also take advantage of its simple interface.
No technical background? No problem. This guide is designed with simplicity in mind, making each step easy to follow.
Whether you're building a rescue disk or exploring a new operating system, you'll find everything laid out clearly. Let’s walk through the process together—step by step.
Step 1: Download and Install UNetbootin for Mac
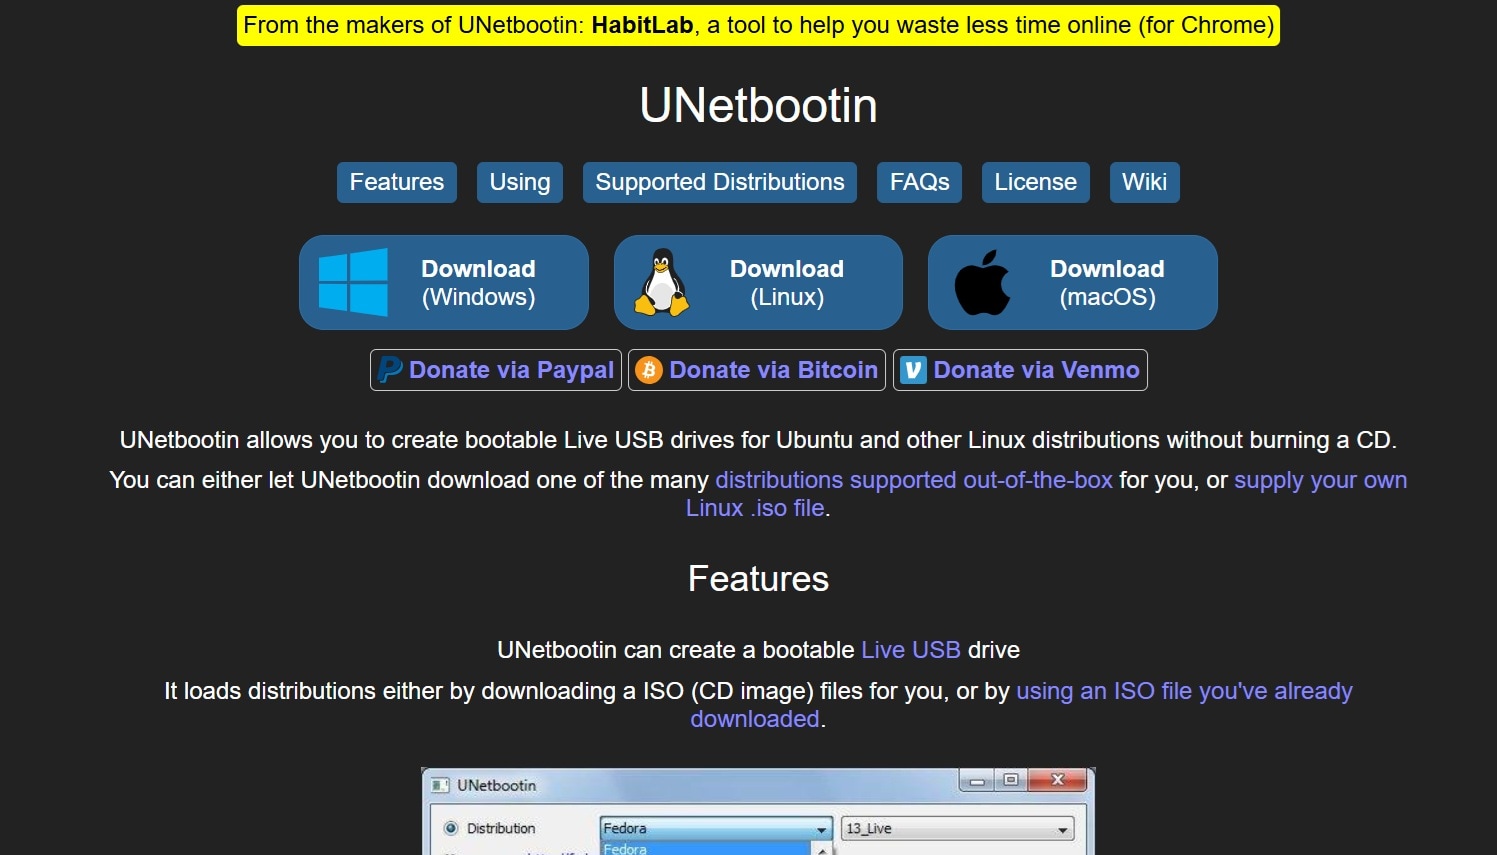
First, visit the official UNetbootin website. Download the UNetbootin for Mac version. Look for the macOS download link on the main page. The DMG file size is usually small and downloads quickly. Make sure you download UNetbootin for Mac from the official source only.
Once you've downloaded UNetbootin, head to your Downloads folder to find the file. Double-click it to begin the installation process.
MacOS might display a warning about the app being from an unidentified developer. To proceed, open System Preferences, navigate to Security & Privacy, and grant permission to install.
Step 2: Create a Bootable USB Drive on a Mac
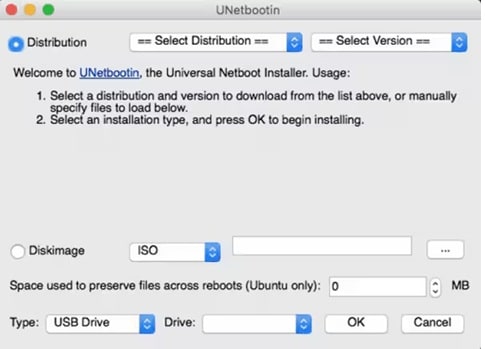
Connect your USB drive to the Mac before starting UNetbootin. The USB should have at least 4GB of free space. Launch UNetbootin from your Applications folder or through Launchpad. Once opened, you'll see a simple interface with options to create bootable USB drives.
You can choose a distribution from the list or load your own ISO file. The tool guides you through the setup with clear prompts.
UNetbootin will detect your connected USB drive automatically. Click the USB drive from the dropdown menu to select it. Make sure you choose the correct drive to avoid data loss. Click OK to proceed.
Step 3: Use Terminal to Launch UNetbootin
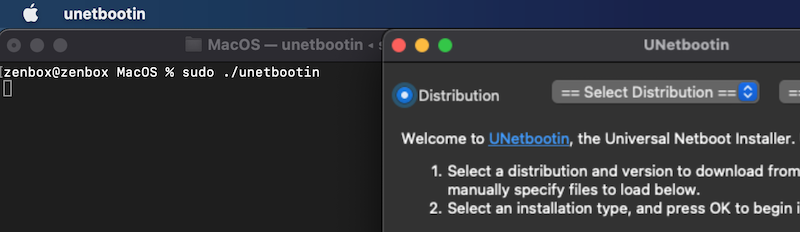
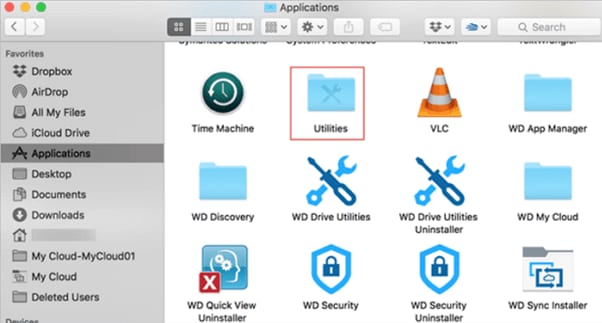
Sometimes UNetbootin may not launch through normal methods. Open Terminal from Applications > Utilities folder. Type the command to navigate to UNetbootin's location. Use the "sudo" command to run UNetbootin with administrator privileges.
Terminal method helps bypass permission issues on macOS. This approach works when the regular launch fails. Type your admin password when prompted by the system. The Terminal method ensures UNetbootin gets necessary system permissions. This step often solves how to use UNetbootin to create a bootable USB on Mac problems.
Step 4: Check USB Format and Permissions
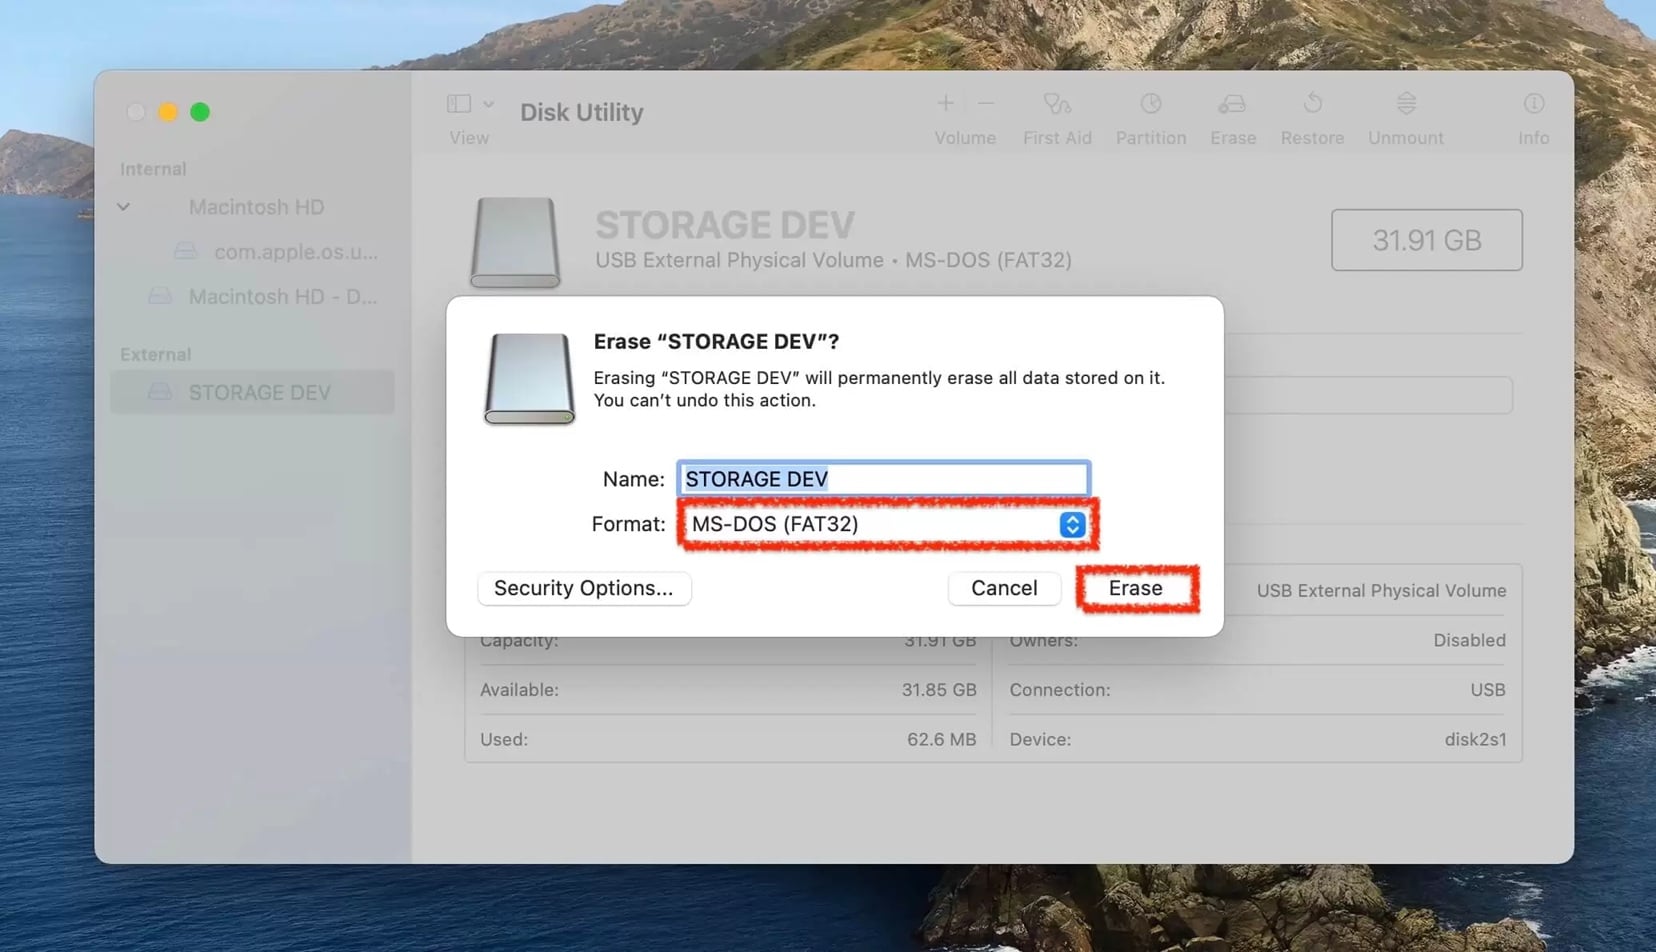
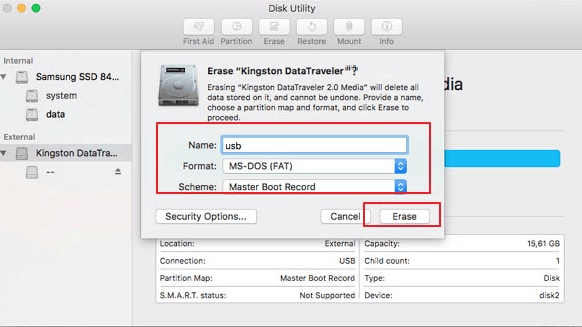
Your USB drive format affects bootable drive creation success. macOS is compatible with several file systems, including FAT32 and exFAT. To ensure your USB drive is ready for use with UNetbootin, open Disk Utility and inspect its current format.
If the drive isn't already set to FAT32, reformat it accordingly. This step is important for smooth operation when creating bootable media with UNetbootin on a Mac.
Permission settings also impact the creation process. To check your USB drive’s permissions on a Mac, right-click the drive and choose "Get Info." In the info window, look for the Sharing & Permissions section. Ensure that your user account has both read and write access. If permissions are limited, click the lock icon to make changes and grant full access.
Having the correct permissions is essential—it allows UNetbootin to write data and successfully create a bootable USB drive.
Step 5: Got Stuck? Seek Help from Forums or Communities
Online communities offer great support for UNetbootin users. Reddit has active communities discussing UNetbootin macOS issues. Stack Overflow provides technical solutions for complex problems. These platforms help when you face unique issues.
Part 4: Lost Data While Using UNetbootin? Use Recoverit Data Recovery Tool
Try Recoverit to Recover Lost Data
![]() Security Verified. Over 7,302,189 people have downloaded it.
Security Verified. Over 7,302,189 people have downloaded it.
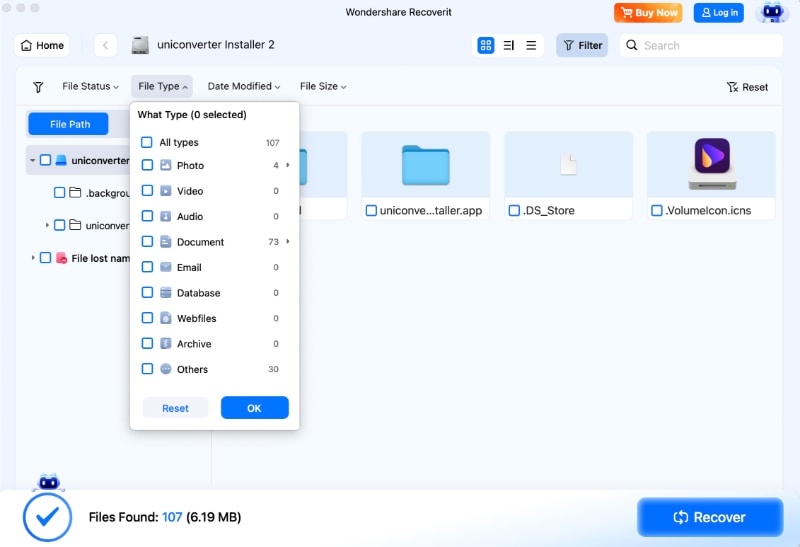
Data loss can happen during the bootable USB creation process. USB formatting erases all existing data on the drive. Sometimes the process may corrupt files on your Mac. Recoverit Data Recovery Tool helps recover lost data effectively.
Recoverit works smoothly with Mac systems. It restores files from formatted USB drives. The software supports many file types like documents, photos, and videos. It has a high success rate for data recovery.
It uses smart scanning algorithms. These help find lost or deleted files. Even damaged storage devices can be recovered. The tool digs deep to locate hidden data.
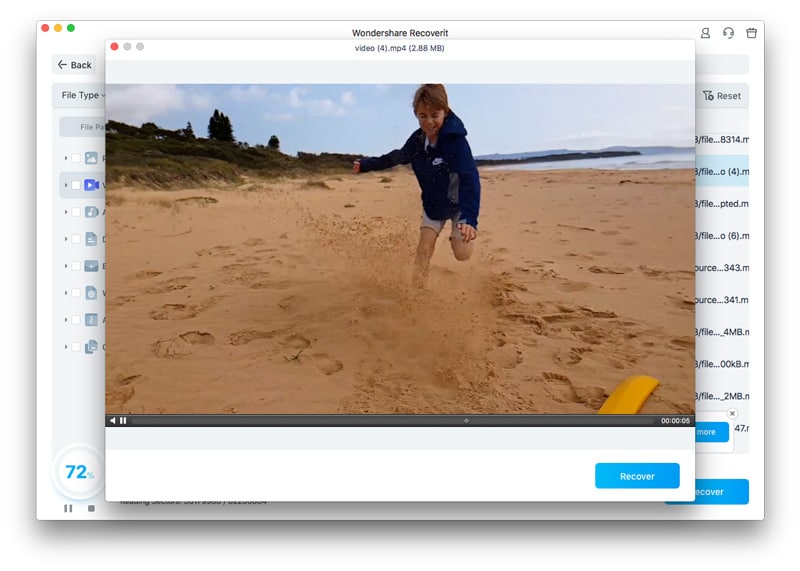
Recoverit also offers a preview feature. You can see files before restoring them. This helps you pick only what you need. It's fast, simple, and effective.
How Recoverit Helps:
- Multiple File Format Support: Recovers photos, videos, documents, and more
- Deep Scan Technology: Finds files that other tools might miss
- Preview Before Recovery: See files before deciding to restore them
4-Step Recovery Process:
Step 1. Get Recoverit on your Mac. Choose the USB drive or Mac location to scan.

Step 2. Let Recoverit scan for recoverable data.
Step 3. Select files and restore them to a safe location.
Part 5: Pro Tips to Use UNetbootin on macOS
Professional users have developed effective strategies for using UNetbootin. These tips help avoid common problems and improve success rates. Following these recommendations makes the process smoother and more reliable.
Professional Tips for UNetbootin macOS:
💾 Always Back Up Data
Before you start creating a bootable USB, make sure to back up any important files on your computer and the USB drive. The process can sometimes overwrite or erase data, so it's better to be safe than sorry.
🔌 Use Quality USB Drives
Choose USB drives from reputable brands like SanDisk, Kingston, or Samsung. Cheap or generic drives may fail during the writing process or cause issues when booting, leading to wasted time and frustration.
✅ Check ISO File Integrity
After downloading your ISO file, verify its integrity using checksums (like SHA-256 or MD5). This ensures the file hasn’t been corrupted or tampered with, which could prevent the USB from booting properly.
🧹 Close Other Applications
Shut down unnecessary apps and background processes before launching UNetbootin. This frees up system resources and reduces the risk of interruptions or errors during the USB creation process.
🔌 Use Shorter USB Paths
Avoid using USB hubs or extension cables. Plug the USB drive directly into your Mac’s port to ensure a stable connection and faster data transfer during the writing process.
🧠 Monitor System Resources
Make sure your Mac has enough free RAM and CPU capacity. Running UNetbootin alongside heavy applications can slow down the process or cause it to fail unexpectedly.
🔄 Keep UNetbootin Updated
Always download the latest version of UNetbootin from the official site. Updates often include bug fixes, improved compatibility, and support for newer operating systems.
🧪 Test Created USB
Once the bootable USB is ready, test it on your Mac or another system before relying on it for installations or recovery. This helps confirm that everything works as expected and avoids surprises later.
Bonus Part: Troubleshooting
While using Unetbootin, you might encounter some common problems. Please don’t worry, and we've discussed some common issues and their solutions below:
UNetbootin Can't Download The Distribution
If you are trying to download the distribution in UNetbootin but facing a problem. Don't fret, as you can use the manual method of downloading the ISO file straight from the official website for the PC and then import the file to the software using the diskimage option. Make sure you download the ISO file on your USB drive.
My USB Stick Isn't Booting.
Some users might experience trouble while booting their USB drive via UNetbootin. To resolve the issue, reformat the USB drive as FAT32, and use UNetbootin again to put your distribution on it. To do so, follow these steps:
Step 1: Head to Applications and open Utilities.
Step 2: Under Utilities, open Disk Utility. Select the USB drive and click Erase.
Step 3: Select MS-DOS(FAT) as the format, choose Master Boot Record for the scheme and click Erase. Your USB flash drive will be formatted to FAT32, and you can now try to boot it again using UNetbootin.
My USB Stick/Hard Drive Isn't Detected
If UNetbootin is not detecting your USB drive, reformat the USB drive as FAT32, and use UNetbootin again. If it still isn't showing up, use the targetdrive command line option to specify the target device to install.
Below are the command lines for different OS types.
macOS:
/Volumes/UNetbootin/unetbootin.app/Contents/MacOS/unetbootin installtype=USB targetdrive=/dev/targetdrive
You have to replace the "targetdrive" with the appropriate target disk type, such as /dev/disk2s1, /dev/disk3s1, or diskutil list.
Windows:
c:\users\geza\downloads\unetbootin-windows-647.exe installtype=USB targetdrive=targetdriveletter\
Make sure to replace "targetdriveletter" with the appropriate Windows drive letter: D:\, E:\, or F:\
Linux:
unetbootin installtype=USB targetdrive=/targetdisk
Replace “targetdisk” with the correct drive name, i.e., /dev/sdc1, /dev/sdb. You use mount or fdisk -1 if you don't know the correct letter.
A Quick Verdict: UNetbootin and Rufus, Which One to Choose?
Apart from UNetbootin, Rufus is another software that you have possibly heared about. So if you're looking for a simple and easy way to create a bootable USB drive, you can't go wrong with either Rufus or UNetbootin. Moreover, both programs are free to download and use.
So which one should you choose? Let’s help you figure it out.
If you're using a Mac, UNetbootin is the better choice because Rufus is only designed to work with Windows PCs and does not support the Mac system unless you download Windows on your Mac as a secondary operating system.
However, Rufus is the way to go if you're looking for a program with more features and options. Whichever program you choose, you'll be able to create a bootable USB drive in just a few minutes. The table below will give a clear overview to help you understand which software is best for your needs.
Features |
Rufus |
UNetbootin |
| Price | Free to use | Free to use |
| Compatibility | Windows | Linux, Windows, and Mac |
| G2 Review | 4.7 | N/A |
| Security | 100% safe | 100% safe |
| Utility Rating | 66% | 34% |
| Best for | Overall best booting software | Best booting disk creator for multiple operating systems |
Conclusion
UNetbootin remains a useful tool for creating bootable USB drives on Mac. Understanding how to use UNetbootin to create a bootable USB on Mac requires patience. The process becomes easier with proper knowledge and preparation.
Common problems have simple solutions when you know the right steps. Download UNetbootin for Mac from official sources only. Follow security guidelines to ensure smooth installation and operation. Remember that UNetbootin macOS compatibility may vary with different system versions.
Professional tips and community support make the process more manageable. Data recovery tools like Recoverit provide backup options for accidents. With proper preparation, you can successfully create a bootable USB on Mac. UNetbootin continues to serve Mac users who need reliable bootable drive solutions.
FAQs:
-
Q1: Is UNetbootin compatible with the latest macOS versions?
UNetbootin works with most macOS versions but may have issues with newer releases. Apple's security changes can affect how UNetbootin functions on your Mac. Download UNetbootin for Mac and test it on your specific macOS version. Some users report better compatibility with older macOS releases. If you face problems, try running UNetbootin through Terminal with admin privileges. Alternative tools like Balena Etcher might work better on newer Mac systems. Check online forums for your specific macOS version compatibility reports. -
Q2: Why does my Mac show security warnings when using UNetbootin?
Mac security systems protect against unauthorized software installations and executions. UNetbootin may not have Apple's developer signature verification. Go to System Preferences > Security & Privacy to allow UNetbootin execution. Click "Open Anyway" when the system shows security warnings about UNetbootin macOS compatibility. This process is normal for third-party applications on Mac. You can also disable Gatekeeper temporarily through Terminal commands. Remember to re-enable security features after using UNetbootin successfully. -
Q3: What should I do if UNetbootin fails to create a bootable USB on Mac?
First, check if your USB drive has enough space and proper formatting. Try formatting the USB to FAT32 using Mac's Disk Utility. Ensure you have administrator privileges when running UNetbootin on your Mac. Download a fresh ISO file as corrupted files cause creation failures. Close other applications to free up system resources for UNetbootin. Try using Terminal to launch UNetbootin with sudo commands. If problems persist, consider alternative tools like the dd command or Balena Etcher. Online communities often provide specific solutions for create a bootable USB on Mac issues.


