

 TL;DR:
Native iPhone ProRes RAW video recording is strictly limited to the iPhone 17 Pro and 17 Pro Max generation when using the Final Cut Camera app and a compatible external SSD.
● ProRes RAW is a dedicated video workflow offering post-production RAW metadata controls, unlike Apple ProRAW which produces still photos, Apple Log which is just a color encoding option, or the regular Apple ProRes format supported by earlier devices like the iPhone 14 Pro and 16 Pro.
● Sustained 4K ProRes RAW recording requires a verified external USB-C drive, and you must import the untouched original files into a Mac editor like Final Cut Pro to access native exposure, ISO, and white-balance settings.
● If original footage is deleted, data recovery software can only scan the accessible external SSD or computer drive; standard desktop tools cannot perform direct block-level recovery on the internal flash storage of an iPhone attached by USB.
Ask AI for a summary
 ChatGPT
 Perplexity
 Gemini
 Claude
 Grok
Can you shoot RAW video on an iPhone? Yes, on supported recent iPhone Pro models with the right recording app and storage setup. But Apple ProRAW photos, conventional ProRes video, and actual ProRes RAW video are three different things. This guide starts with that distinction, then shows a safe recording-to-editing workflow.
In This Article
Part 1. Can an iPhone Record RAW Video?
Yes, but the recording format and available controls depend on the specific iPhone, iOS version, recording application, and storage setup. The word RAW is often used for three different Apple imaging technologies; knowing which one you need avoids the wrong workflow.
ProRes RAW vs. ProRes vs. Apple ProRAW
ProRes RAW retains image information for supported RAW video workflows and exposes compatible RAW processing controls in post-production. Apple ProRes is a high-quality video codec, not necessarily RAW. Apple ProRAW produces still photographs, not RAW video. Apple Log is a video color encoding option and is not equivalent to RAW sensor recording. Apple explains the regular Apple ProRes recording requirements separately from RAW workflows.
Which iPhone Models Support ProRes RAW?
For the supported built-in camera workflow, Apple introduced iPhone ProRes RAW recording with the iPhone 17 Pro and 17 Pro Max generation. Check the current device-specific Final Cut Camera documentation before relying on recording availability or choosing a new model; a general Pro-branded iPhone is not automatically a ProRes RAW camera. Earlier supported Pro iPhones can record conventional ProRes video, which is different.
Important: File format availability can vary with the application, operating-system release, capture resolution, frame rate, and attached storage. ProRes RAW footage is not enabled by turning on Apple ProRAW under photographic settings.
When ProRes RAW Is Worth Using
Choose ProRes RAW when you need a supported professional RAW color workflow and have fast, spacious external storage and compatible editing software. Choose ordinary ProRes or HEVC when easier sharing, playback compatibility, or smaller files matters more. A 4K recording or a flat-looking Log image alone does not establish that the source is RAW.
Part 2. How to Record ProRes RAW on a Compatible iPhone
Begin by confirming your exact model and installing a compatible camera application. For this workflow use Apple’s Final Cut Camera documentation, rather than instructions for the ordinary Camera app ProRes toggle.
Check the Camera and Codec Settings
Step 1. Open the latest supported Final Cut Camera app on a compatible iPhone. If the app or codec menu does not offer ProRes RAW, check device support and the app release instead of renaming an existing recording.
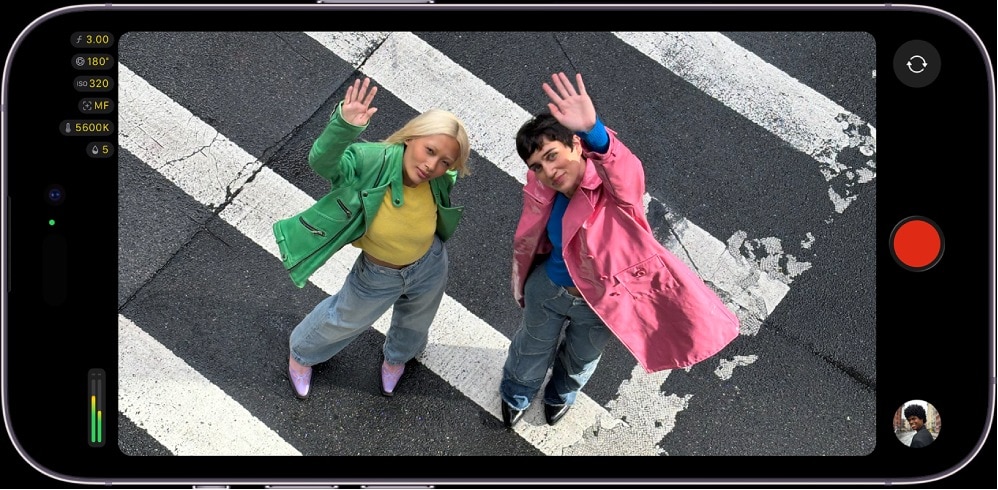
Step 2. Open the recording format or codec controls and select ProRes RAW when it appears on the supported device. Choose resolution, frame rate, and any applicable color or RAW settings that your device and connected storage allow. Apple’s Final Cut Camera settings guide describes the applicable settings.

Step 3. Make a short test recording. Stop it normally and review that the file exists, can be opened by compatible software, and has the expected codec and duration before starting a long shoot.
When this method does not apply: Some iPhone models offer ProRes LT, ProRes 422, or HEVC but not ProRes RAW. Do not assume that choosing a 4K ProRes option makes the video RAW.
Part 3. Prepare Storage Before Shooting 4K ProRes RAW
Large, sustained recordings require careful media preparation. Storage support is more important than the amount of free space shown by Photos alone.
Connect and Test a Compatible External SSD
Step 1. Check Apple’s model-specific ProRes recording support and external storage requirements and the recording app’s supported USB-C accessory requirements. Use a suitable cable and external SSD; avoid assuming that every drive or cable sustains the recording bitrate.
Step 2. Connect the SSD, confirm the recording app detects it, and review codec, frame rate, remaining capacity, and estimated recording time.

Step 3. Record a short sample to that drive and review it. If the app reports insufficient speed, reduced options, or a disconnect, change the cable or drive and test again. Do not format a drive that contains the only copy of important footage.
Note: The pictured capacity display is an authentic Final Cut Camera example showing ProRes LT. It illustrates the storage readout only, not proof of ProRes RAW selection.
Part 4. Transfer and Edit iPhone ProRes RAW on a Mac
The recording is not finished until the original file is safely copied and verified. Work from the source file and keep an untouched backup while learning RAW controls.
Import Original Files Without Losing Camera Metadata
Step 1. Safely connect the original external SSD to the Mac or follow Apple’s supported Final Cut Camera transfer workflow. Copy complete original clips and any accompanying folders to a healthy working drive before editing.
Step 2. Open Final Cut Pro, select the library and event, and choose File > Import > Media. Locate the transferred original files, verify their filenames, and choose how the project should store them. Refer to Apple’s Final Cut Pro media import workflow for the exact software version.

Step 3. Confirm duration, image content, playback, and media linkage before erasing or reusing the recording SSD. If Final Cut Pro reports the media offline, locate the copied originals and relink before assuming deletion.
Adjust Actual ProRes RAW Controls
Step 1. Select a compatible ProRes RAW clip in Final Cut Pro and inspect the relevant info or ProRes RAW settings. The window and available controls depend on the origin of the clip and its metadata.

Step 2. Use the supported RAW processing mode, exposure, ISO, and white-balance controls when present. Apple’s ProRes RAW camera settings instructions describes the distinction between Standard and other processing modes for supported footage.

Step 3. View a representative scene before and after the adjustment. Check highlights, shadows, skin tones, and consistent color across clips. Export a short test and play it outside the editing application before exporting an entire project.
Important: RAW controls can change interpretation or make previously generated proxies out of date. Do not assume every older ProRes recording exposes them.
Part 5. Why RAW Recording or Playback Is Not Working
An absent RAW option and a damaged video are different problems. Use the following decision checks before attempting any repair or reset.
Diagnose the Symptom Before Taking Action
| Symptom | Likely next check |
| No ProRes RAW option | Verify supported iPhone model, app version, and external storage requirements; this is not proof of corruption. |
| Recording stops or storage not recognized | Check drive, cable, free space, connection stability, and supported recording settings; preserve existing footage. |
| Clip imports but RAW controls are absent | Verify the actual recorded codec; Apple ProRes, Apple Log, and ProRes RAW are not interchangeable. |
| Clip is slow or appears offline | Check decoding performance, original file location, project references, and proxy status before changing the source. |
| Recording was deleted from SSD | Stop writing to that device and evaluate backups and recovery before reformatting or shooting again. |
Verification: A successful troubleshooting session ends with a correctly identified codec, an accessible original clip, expected audio and video duration, and a verified copy on another drive.
Part 6. Recover a Deleted Original iPhone Video Only When Necessary
If your footage still exists but its editor cannot read the codec, recovery software is not the answer. Recovery becomes relevant when the only original was deleted from an accessible external SSD, memory card, or computer drive.
Protect the Source and Scan Only Where Appropriate
Step 1. Stop writing to the storage device, including recording, formatting, syncing, or installing software there. Check an existing verified backup first. If the external drive is repeatedly disconnecting or shows physical problems, seek professional help instead of repeatedly scanning it.
Step 2. If a healthy drive is detected by the operating system, connect it to a computer and consider Wondershare Recoverit video recovery for deleted originals. The recoverable formats and results depend on the device, file system, overwrite history, and the actual format; do not assume guaranteed native ProRes RAW recovery.
Step 3. Scan the affected location. If files are found, inspect the file name, size, preview availability, and output format. Restore selected files onto a different healthy drive, then reopen them in compatible editing software.
Limits: A standard desktop scan of an iPhone attached by USB is not the same as direct block-level access to the iPhone’s internal flash storage. After overwrite or secure deletion, software may not recover the original.
Part 7. ProRes RAW or Regular ProRes: Which Should You Choose?
Choose the recording format based on the editing task and the media you can reliably protect, not on the assumption that the highest-quality-looking setting is always RAW.
Practical Format Selection
| Format | What it is | Best fit |
| Apple ProRAW photo | Still-photo DNG workflow | Photo adjustments, not video |
| HEVC / H.264 | Compressed video | Easy sharing, long recording, smaller files |
| Apple ProRes | Professional video codec family | High-quality conventional editing, subject to device limits |
| Apple Log | Log-encoded video capture or interpretation | Color-grading workflow; not RAW by itself |
| ProRes RAW | RAW video codec | Supported camera-to-editor RAW processing workflow |
For more on professional RAW video formats beyond iPhone, read the dedicated {link("raw","RAW video formats and editing guide")}.
Conclusion
ProRes RAW is a specific RAW video workflow, not a synonym for every iPhone 4K or ProRes recording. First confirm compatibility and storage, test a short clip, preserve the original, and then edit it in software that understands its RAW metadata. Only consider file recovery when a source recording has actually been lost.
FAQ
-
Can an iPhone 14 Pro or 16 Pro shoot ProRes RAW?
These earlier Pro models can record supported conventional ProRes formats, but this should not be confused with native ProRes RAW recording. Check Apple’s current model-specific recording specification before purchasing a camera or changing a workflow. -
Is Apple ProRAW the same as ProRes RAW?
No. Apple ProRAW is a still-photo format, while ProRes RAW is for supported RAW video workflows. -
Does recording Apple Log make the video RAW?
No. Log concerns tonal or color encoding; it does not by itself mean that the file contains RAW image information. -
Can I record ProRes RAW directly in the iPhone Camera app?
Use the Apple-documented compatible capture workflow and check the currently supported app, model, codec settings, and external SSD requirements. A generic Camera-app ProRes setting is not proof of RAW capture. -
Why is the ProRes RAW option missing?
First verify your iPhone model, application version, storage connection, and allowed recording modes. An unsupported device will not acquire the codec through a filename change. -
Can Recoverit restore deleted ProRes RAW footage?
Recovery may be possible from some detectable storage devices, but support for a particular camera codec and recovery completeness must be checked case by case. Stop using the source, recover to a different disk, and verify in a compatible editor. There is no guarantee after overwrite.


