
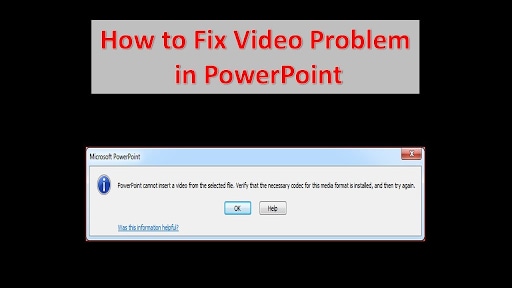
Powerpoint is one of the leading Microsoft applications to represent presentation ideas and to display them visually. But the situation becomes troublesome when it doesn’t allow you to insert the desired video into the presentation file. There could be several reasons for occurring the “PowerPoint cannot insert a video from the selected file” error, be it the corrupted file, inappropriate file format, or more.
But the best thing is that you can easily resolve the error by using the methods listed below. So, what are waiting for? Keep scrolling the page and the guide will walk you through the major reasons that trigger the error and effective solutions to fix it.
Major Reasons That Trigger “PowerPoint cannot insert a video” Error
Before getting into the solutions, it’s essential to learn about the major reasons that trigger the error. Here, we’ve enlisted some of them.
- Missing file
If the file you are trying to insert into your presentation is missing or moved to some other location, it generates the error.
- Incompatible file format
It might sound surprising but PowerPoint doesn’t support certain video formats; hence leading to the trouble. The file format should be compatible with MS Powerpoint to insert the video in the presentation.
- Inappropriate video codec
Sometimes the video codec for PowerPoint doesn’t support by the MS office, leading to this trouble.
- Corrupted file
MS PowerPoint cannot insert a corrupted file, resulting in the error. The file can be corrupted for several reasons, including unexpected shutdown, inappropriate transfer, etc.
Tips: Learn how to Recover an Unsaved PowerPoint in Windows 10
Methods to Fix this Powerpoint Issue
Getting annoyed with the trouble and wondering about how to fix it? Here, we’ve put together some of the practical methods that will definitely resolve the trouble in no time.
Video Tutorial on How to Fix PowerPoint Cannot Insert a Video From the Selected File
Method 1: Check the path of the video
One of the common reasons that trigger the error is the missing video or inappropriate file path. Hence, you need to go to the system’s explorer to check the path of the video. It’s recommended to copy the path and paste the link or video directly on the MS PowerPoint to avoid any error. Also, you can save the file on any secure path to avoid trouble in the future.
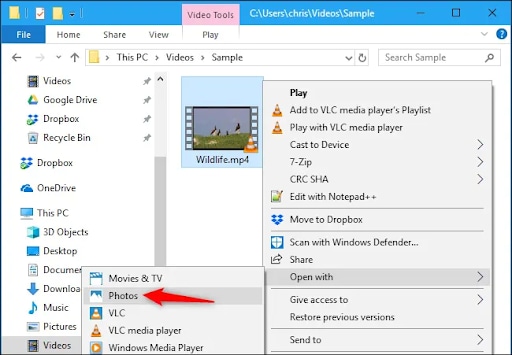
Additionally, you can also check whether the file is playing or not is to opening the file with other applications and finding if it is loading.
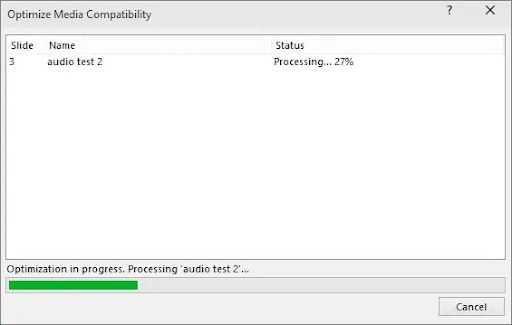
Method 2: Turn on the media compatibility feature
Sometimes, the “PowerPoint cannot insert a video from the selected file” error occurs due to an unsupported video file. In that case, the users need to use the Media Compatibility feature of PowerPoint to fix the trouble. Follow the instructions mentioned below to carry out the process.
- Launch the MS PowerPoint on your system and click on the Menu > File > Info Section.
- After that, go to the Optimization Compatibility Feature and enable it so that the application will start supporting the inserted media file.
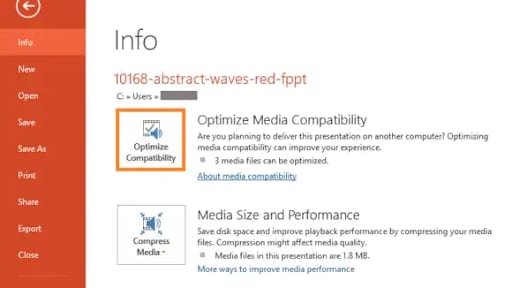
- Once you are done with this, the application will then automatically detect it and try to optimize the same.
Method 3: Convert the video into WMV format
It might be possible that the error is occurring due to an incompatible file format. You’ll be surprised to know that like all other software, MS PowerPoint also doesn’t support some of the formats. For example, MPEG files with fast bit rates aren’t compatible with PowerPoint 2010 or 2013.
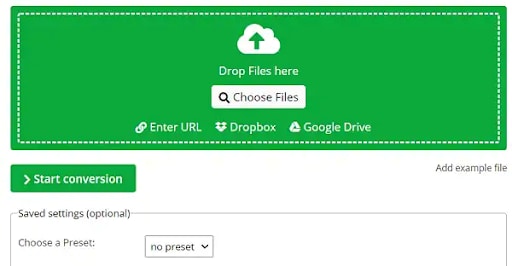
But, don’t panic as you can easily fix the trouble by converting the file into WMV format. The users can use any online tool to make the conversion.
Once you are done with converting the files, save the WMV video and insert it into your presentation.
Method 4: Enable the Developer Options in Powerpoint
If the “PowerPoint cannot insert a video from the selected file” error still persists, try using the Window Media Player controls in the application to fix the issue. For this, you need to enable the Developer Option to include the media player controls. Follow the steps to execute the process.
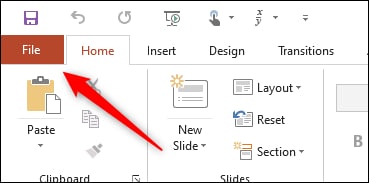
- Launch the MS PowerPoint application on your system.
- Go to Menu > File option.
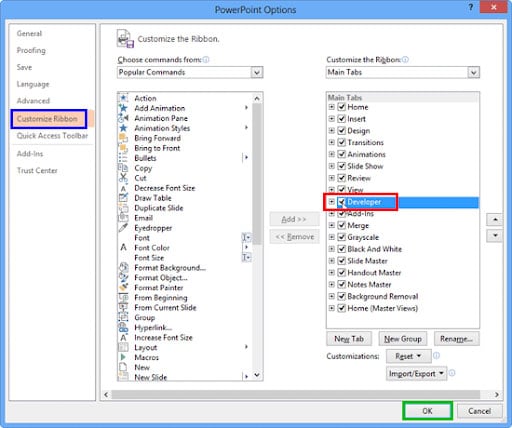
- Click the “Customize” ribbon. Choose the “Developer” option from the list and add it to the application.
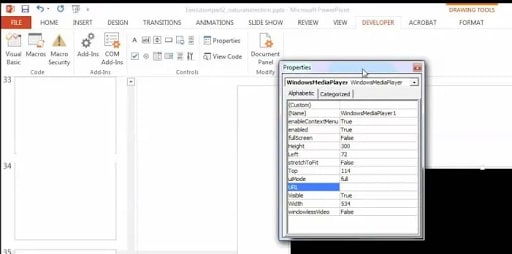
- After that, you will locate the specific Developer option in the toolbar. Navigate to the section and go to the “More Tools” tab to enable the Window Media Player Controls in the application.
- From here, you’ll get the dedicated media player controls that you can use to insert any video into the presentation.
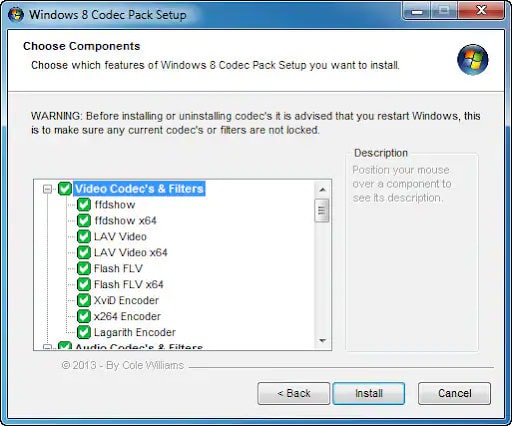
Method 5: Install third-party video codec
If you have entered the right video path and the file is compatible with the application but still, the error continues, it means that you might have missed the video codec for PowerPoint. A codec is an essential software that decodes the digital media files so that files can be played as audio or video.
To fix the error, you need to install the entire package of codecs on your system. Here’s how you can do it.
- Visit the free codecs website and check different packages. It’s recommended to select the Standard Pack.
- Click Download and accept normal made to begin the installation. Tap on the Next and move further.
- Accept the installation preferences as you need and click on the Next. Choose the Decoding Method under the Hardware Acceleration. Now, configure the settings and click on the “Install” button to get the codec pack installed.
Method 6: Video Corrupted? Fix With Third-party Software
Sometimes, the “PowerPoint cannot insert a video from the selected file” error appears when the video file gets corrupted. To fix this, you need to take the assistance of a reliable and professional tool. Here we recommend Recoverit to help you repair the videos you 're going to insert in Powerpoint
It is a high-tech data recovery tool that retrieves the content from any device regardless of the level of damage.

Wondershare Recoverit - Recover Your Precious Videos
5,481,435 people have downloaded it.
It has 95% recovery rate, one of the highest in the industry.
Restore data from all kinds of storage drives like USB Drive, SD card, SSDs, HDDs, Floppy Disks, Pen Drive, etc.
Recover all of your data from USB Drive empty due to various reasons like Malware attacks, corruption, accidental deletes, damage, etc.
Preview files before you recover them.
Free version to try and paid version to enjoy more.
Find the step-by-step guide to use the Wondershare Recoverit software.
Step 1: Upload the Corrupted Video
- First of all, you need to get the Wondershare Recoverit and launch the application on your system. Move your cursor to the left dashboard and click on the “Corrupted Video Repair” option.
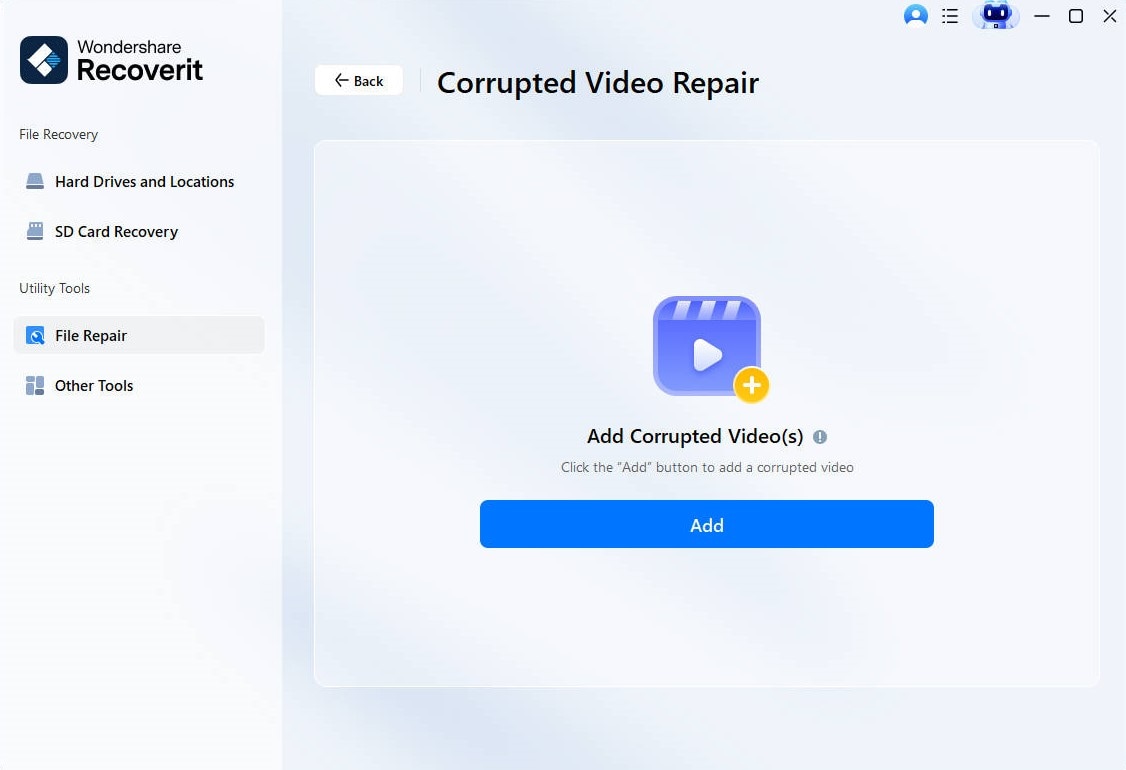
- Now, browse the folder where the corrupted videos are stored and upload them to the tool by clicking the “Add” button. The application allows you to add multiple videos at once.
Step 2: Start Repairing Videos
- Click the “Repair” option to initiate the process.

- Wondershare Recoverit takes a few minutes to complete the process until then, you can check the progression on the screen. A prompt will be generated to notify you of the completion of the repairing process.
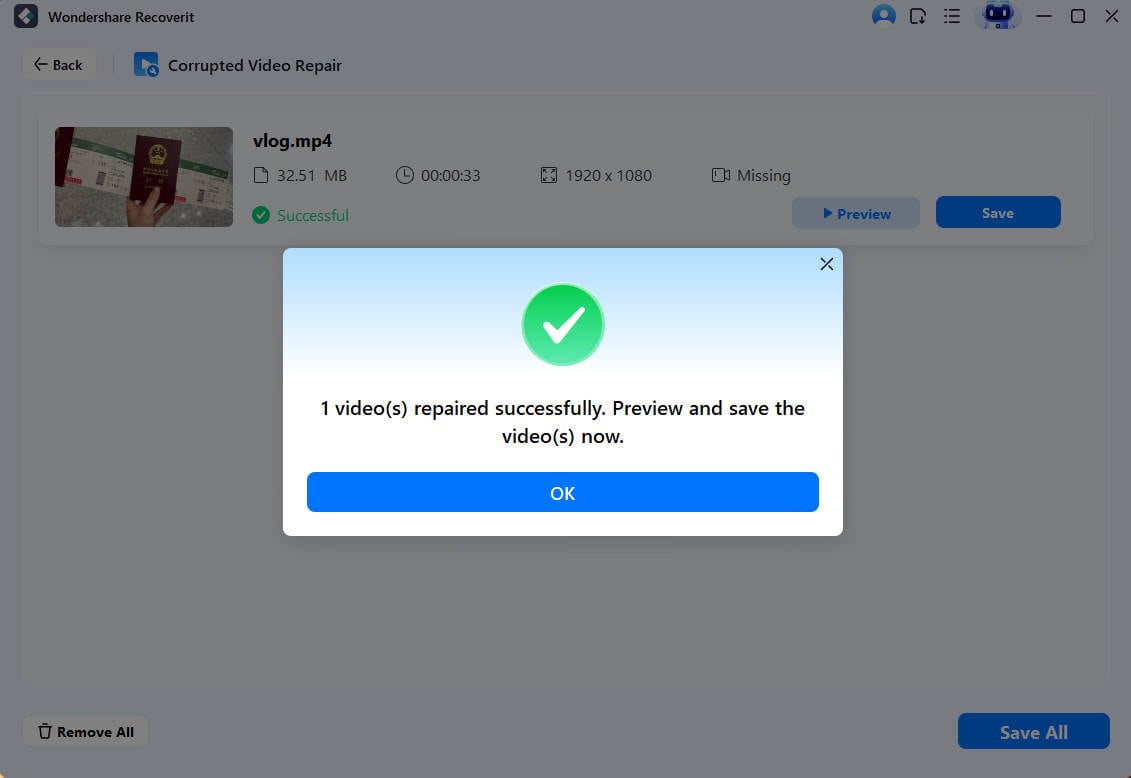
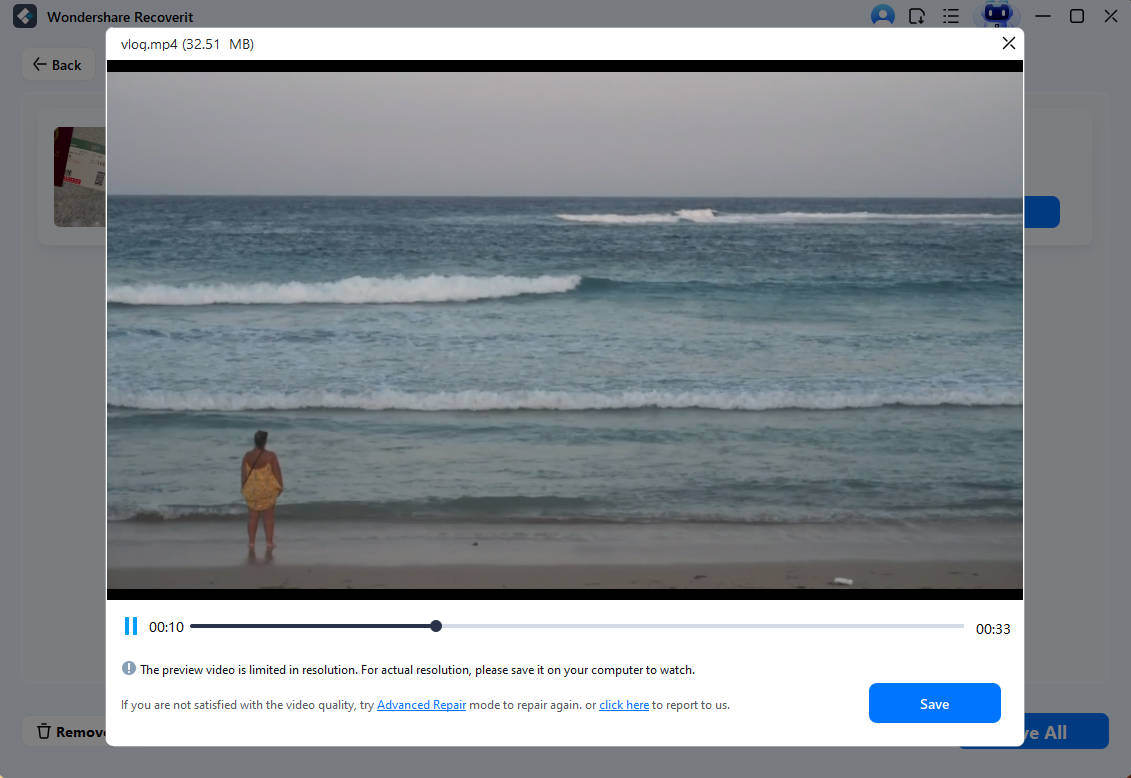
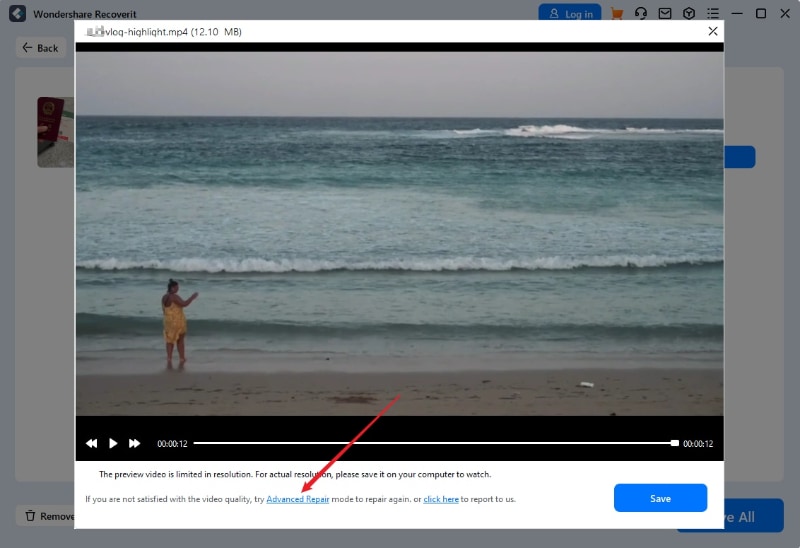
Step 3: Preview the repaired video
- Once the video gets repaired, you can click on the “Preview” button to check whether the result meets your expectations or not. If yes, then tap “Save” to store the file.
Steo 4: Initiate Advanced Repair
- Sometimes, the file gets damaged badly and could get repaired with the basic repair. In that case, you can click the “Advance Repair” option to start repairing the file again.
- Upload the sample video file that should be of the same format as of the oringal one. Moreover, you must upload the video from the same device you have used earlier.
- Once the tool matches the sample file with the previous one, click on the “Repair” button to initiate the process.
Step 5: Preview and Save
- A “Preview” button appears beside the repaired file as soon as the application is done with the repairing process. Tap on it to check the final video.
- Click on the Save button to save the video to the dedicated folder.

Conclusion
That’s all about it!! We hope you would be able to fix the “PowerPoint cannot insert a video from the selected file” error after reading the guide. The post outlines the common reasons that trigger the error along with the possible solutions to get rid of the trouble. All the methods listed above are working and will surely fix the error.
But if you looking for a one-stop solution that guarantees to troubleshoot the issue, turn your heads to the Wondershare Recoverit. This powerful and high-end recovery tool allows batch processing and can recover multiple files at once to save your time and effort.

