
 TL;DR:
You can back up your Mac to a QNAP NAS using Time Machine by manually configuring a dedicated shared folder with SMB3 enabled or by utilizing the built-in Hybrid Backup Sync (HBS3) application.
● Both backup methods require a QNAP NAS running QTS 4.3.0 or later and a Mac operating on OS X 10.5 or newer.
● Manual configuration requires creating a dedicated NAS user account, designating a new shared folder specifically for Time Machine, and setting the Highest SMB Version to SMB3 within the Microsoft Networking options.
● The HBS3 method simplifies the setup by allowing you to enable a shared Time Machine account, enforce a maximum storage capacity limit in gigabytes, and connect directly to the auto-generated TMBackup folder via the smb:// protocol in macOS Finder.
Ask AI for a summary
 ChatGPT
 Perplexity
 Gemini
 Claude
 Grok
Grok

Many Mac users use vast-storage external hard drives to store Time Machine backups to overcome space issues. Keeping backup files via Time Machine can be more effective by opting for a QNAP Time Machine-supported NAS server.
Part 1. Can Time Machine Work on NAS?
Time Machine is a Mac utility used to back up your Mac files and store the backed-up files in a predestined location. The Time Machine can work on NAS if you intend to keep your backup data on it, considering it a secure storage space.
Related: Best NAS for Mac Time Machine
Part 2. How Does Time Machine Back up Your Files?
If you intend to use the Time Machine for the first time, then you're required to set up the Time Machine in the first place. Once the setup is done, the Time Machine initially backs up the entire Mac drive on an external hard drive or any other location, i.e., iCloud, NAS, etc. Afterward, it back up the new or modified files only.
QNAP NAS Requirements |
Time Machine Requirements |
| QNAP NAS with QTS 4.3.0 (or later) | Mac OS X 10.5 or later |

Part 3. How To Back Up Your Mac files to a QNAP NAS Using Time Machine
Backing up the Mac files to a QNAP NAS isn’t a big deal if you precisely perform all the required steps. Therefore, here is the comprehensive procedure for backing up your Mac to QNAP NAS via Time Machine:
Perform Time Machine Backup to Your QNAP NAS
You can back up your files readily to QNAP NAS if you have a Time Machine user account. However, create one if you don’t have a pre-created user account. Here’s how to do this:
Operational Steps:
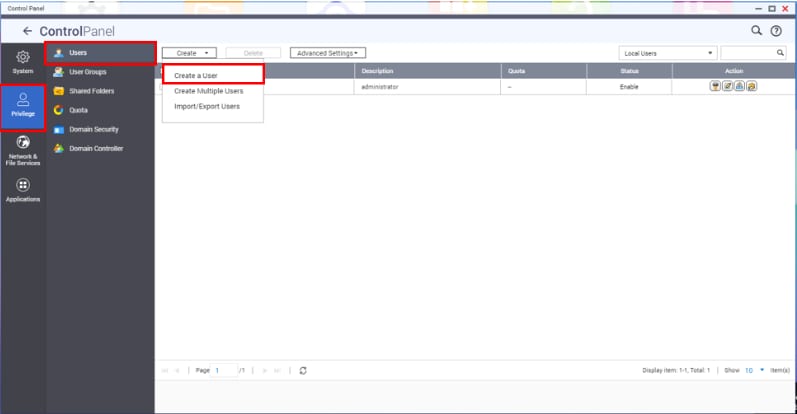
Step 1: Open up the Control Panel and navigate to Privileges on the left panel.
Step 2: Choose the User option from the menu and click Create a User.
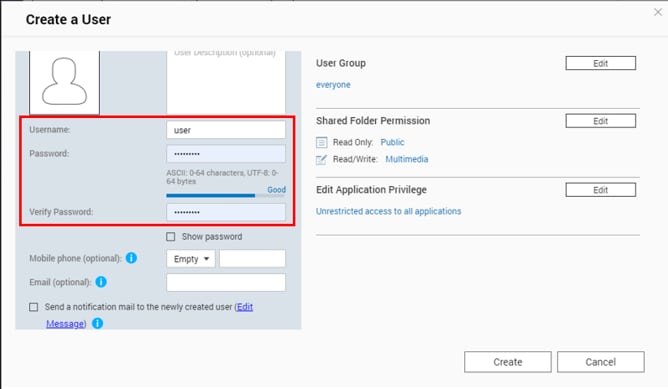
Step 3: Enter the username and password for user creation and click the Create button at the bottom.
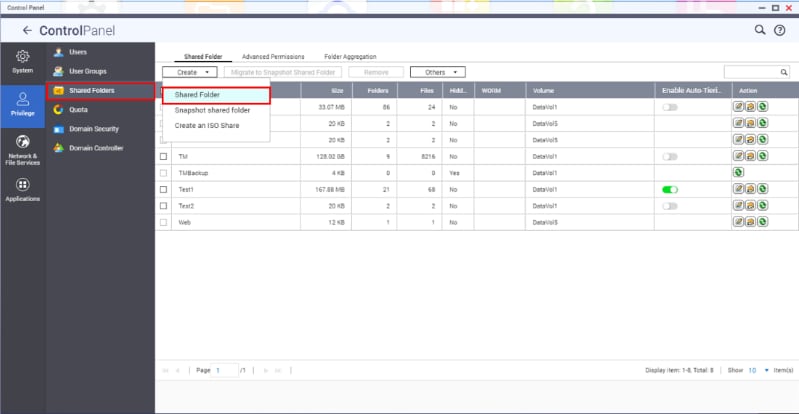
Step 4: Now, create a Time Machine shared folder; to do so, launch Control Panel.
Step 5: Navigate to Privileges and choose the Shared Folders option from the dropdown menu.
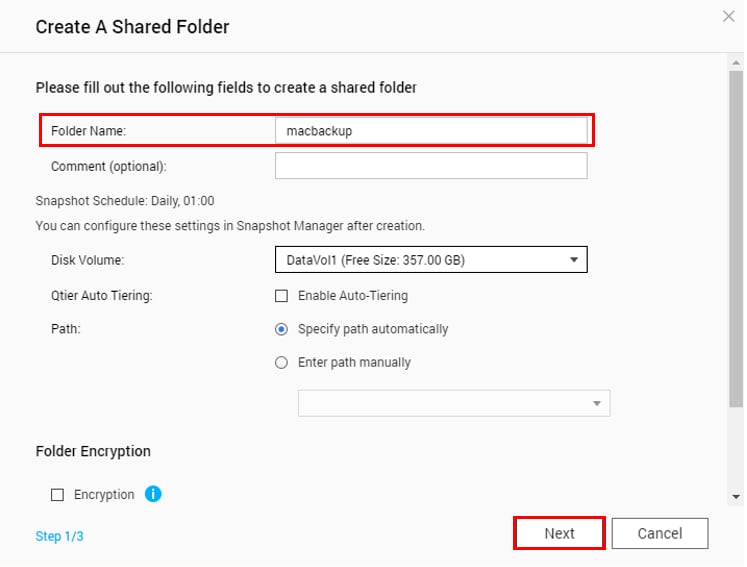
Step 6: Enter the necessary information and click Next to create a Time Machine shared folder.
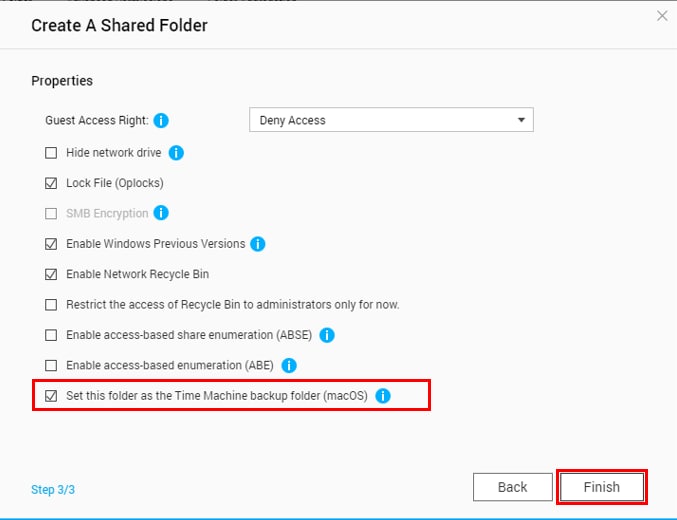
Step 7: Now, set this folder as Time Machine Backup Folder and click Finish.
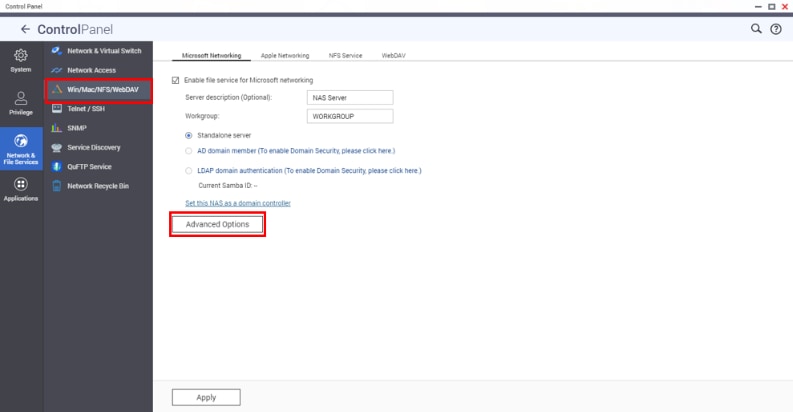
Step 8: Go to the Network & File Services in Control Panel.
Step 9: Choose Win/Mac/NFS and click Microsoft Networking from the tabs at the top.
Step 10: Click the Advanced Options button.
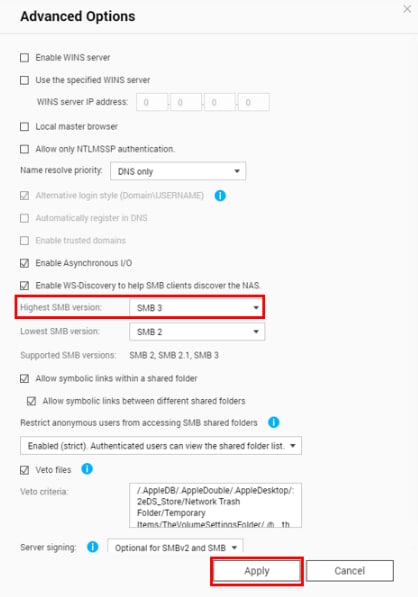
Step 11: Select the SMB3 option from the dropdown menu next to the Highest SMB Version option, and click Apply.
Step 12: Now, attach your QNAP NAS to your Mac.
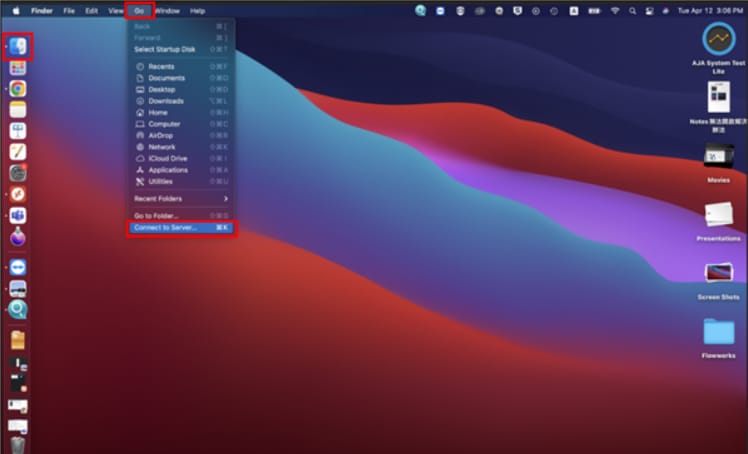
Step 13: Launch Finder or your mac and navigate to the Go tab.
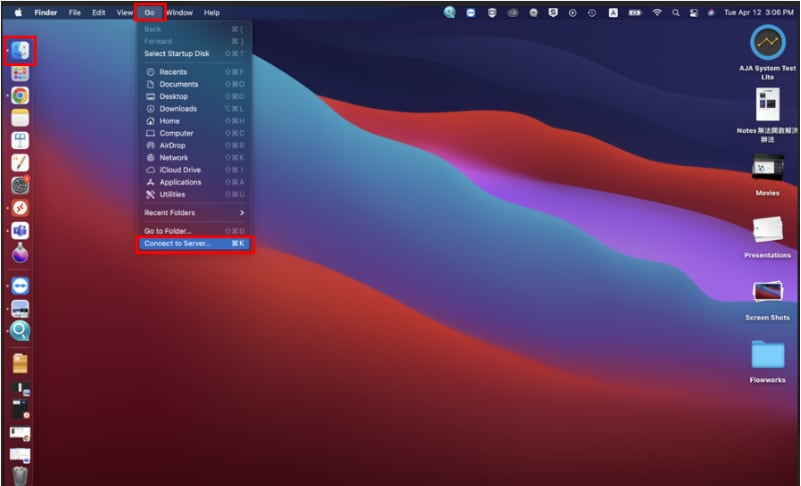
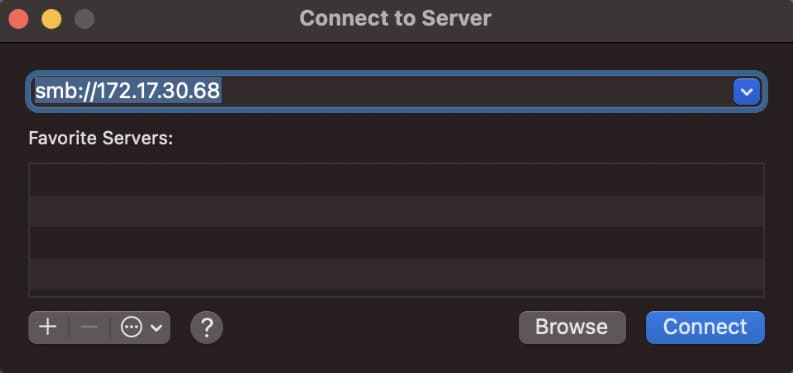
Step 14: Click Connect to the Server option.
Step 15: Enter your IP Address or smb://<NAS name.local>.
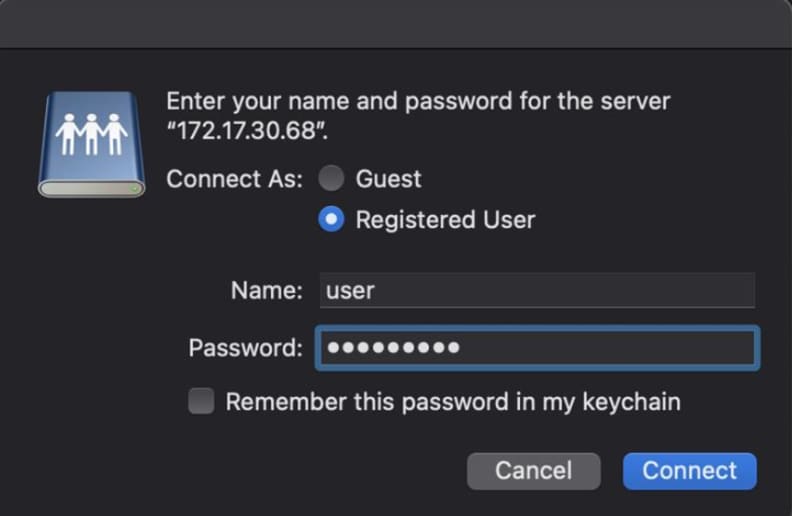
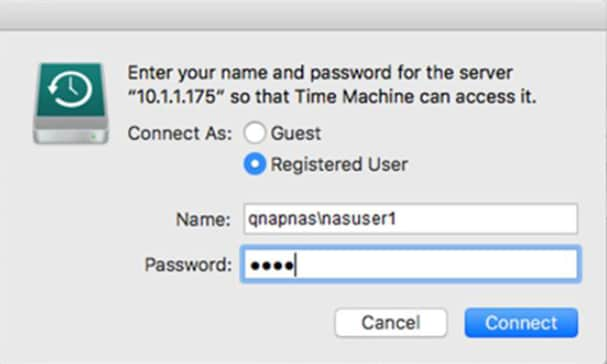
Step 16: Now, enter the username & password of your Time Machine user account and click Connect button.
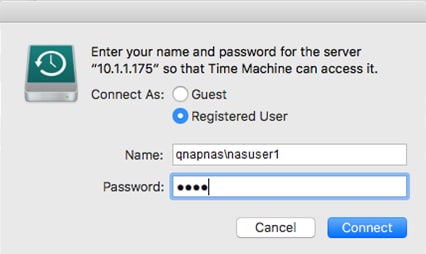
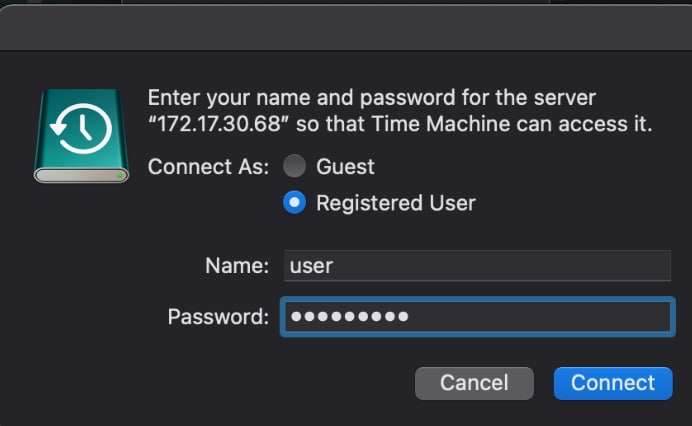
Step 17: Enter the username and password of your NAS device so that Time Machine can access it.
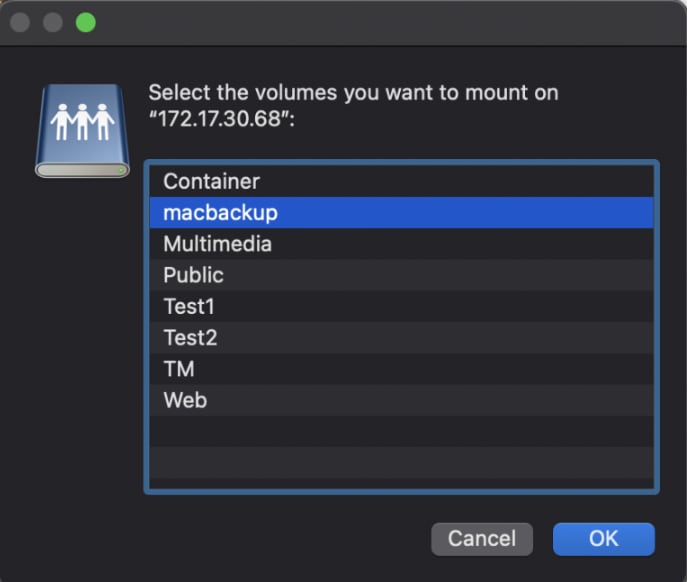
Step 18: Now, choose the NAS Shared Backup Folder.
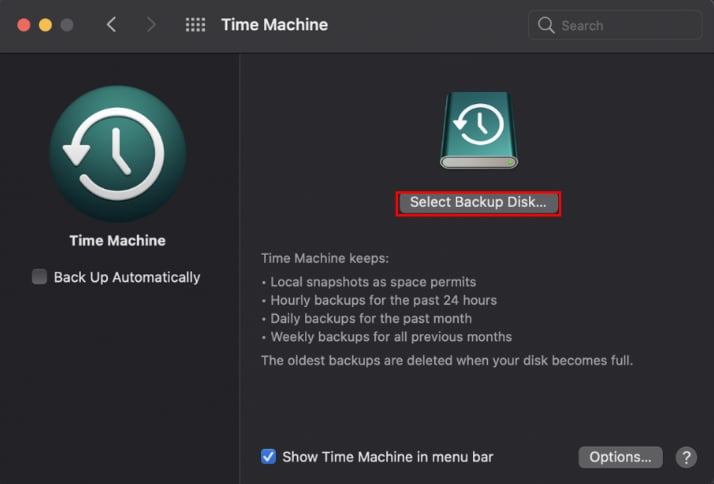
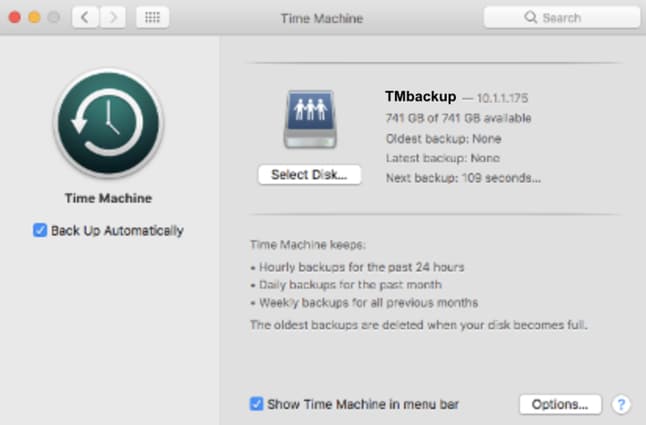
Step 19: Launch the Time Machine app on your Mac.
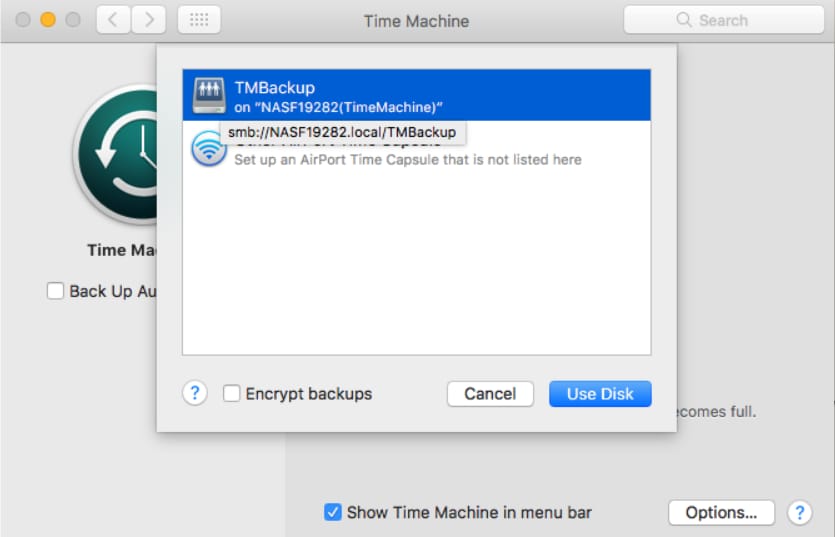
Step 20: Click the Select Backup Disk option.
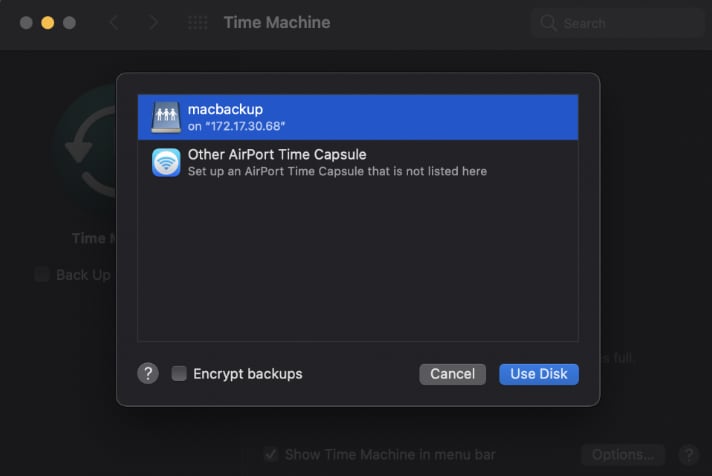
Step 21: Choose the NAS Shared Backup Folder you created and click the Use Disk button.
Step 22: Now, enter the username and password of the NAS user account and click Connect. You can now back up your Mac data to your QNAP NAS.
Backup Your Mac with Shared Time Machine Account in HBS3
HBS stands for Hybrid Backup Sync, a built-in backup solution in QNAP devices. You can integrate HBS3 with Time Machine and perform a backup for your Mac. To back up files using a shared Time Machine account in HBS, follow the below-given steps:
Operational Steps:
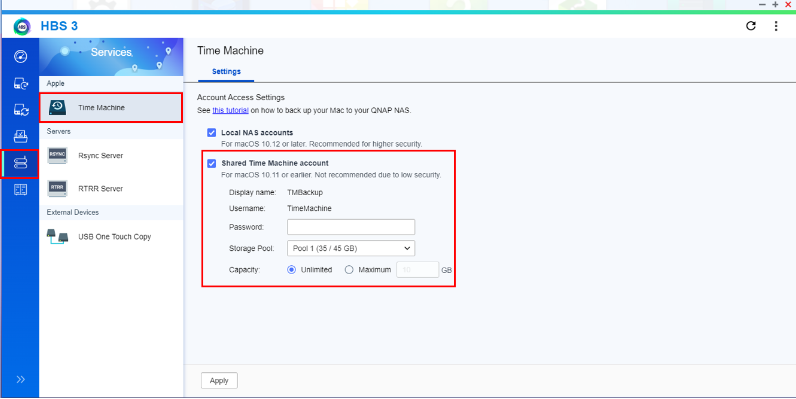
Step 1: Launch HBS3 and navigate to Services.
Step 2: Choose the Time Machine option from the left panel and checkmark the Use Shared Time Machine Account option.
Step 3: Enter the username and password of your Time Machine account and set the storage capacity as Maximum.
Step 4: Input the total size in GB and click Apply.
Step 5: Launch Finder and open the Go menu.
Step 6: Click Connect to Server and enter your IP Address or smb://<NAS name.local address>.
Step 7: Log in to the Time Machine user account you created.
Step 8: Launch the Time Machine app and choose the Select Backup Disk option.
Step 9: Use the QNAP NAS folder TMBackup and click Use Disk.
Step 10: Use your Time Machine account's username and password again.
Step 11: Now connect your backup folder to your Time Machine user account so that Time Machine can access it. To do so, enter the login details of your NAS server and click Connect.

Step 12: Now, you can use Time Machine to back up your Mac on the QNAP NAS server.
Part 4. How To Recover Data From Your QNAP NAS?
Although QNAP NAS is considered the safest way to store your backup files, nevertheless some rare uncertain events can lead to data loss, such as your NAS device may encounter some logical issues or physical failure.
Given the data loss concern, you might be fully fretful in such cases. Still, instead of worrying, you should instantly attempt to recover it using a reliable data recovery tool. Therefore, Wondershare Recoverit proves to be quite effective in recovering data from QNAP NAS in any scenario.
Highlights of Wondershare Recoverit
Recoverit is considered a highly recognized and efficient data recovery tool worldwide, allowing you to recover lost or deleted files in any format. You can conveniently use it in all sorts of data loss scenarios, such as the lost data of Windows, Mac, Linux, and NAS Storages devices.
Pros
Efficient and reliable
Safe to use
Supports multiple file formats
Allows to preview files before recovery
Available in free version also
Cons
Data limitations in the free version
Limitation on the preview feature
Operational Steps:
Step 1:Launch the Wondershare Recoverit application on your system.
Step 2:Choose the particular location where you lost data. You can select the external hard drive option to indicate the NAS option further and click Start.

Step 3:The Recoverit will initiate the scanning process to dig out the lost files for the initial preview.

Step 4:Once the scanning process is over, you can preview selective files using the filter option.

Step 5:Select the desired recoverable files and click the Recover button to start recovery.

Conclusion
QNAP NAS is an optimum storage option for storing your macOS backups without encountering space issues. It can be used in various ways to work with Time Machine. Therefore, we have explained how you can effectively use the QNAP NAS Time Machine feature and set up a QNAP Mac-supported server.
For Windows Vista/7/8/10/11
For macOS X 10.10 or later


