
 TL;DR:
Disabling BitLocker on Windows 10 requires your encryption password or PIN when using standard interfaces like the Control Panel, but administrative tools like PowerShell or Command Prompt allow for system-wide decryption management.
● Standard methods via Control Panel or Settings require your current PIN or password, while running the Local Group Policy Editor as an administrator can disable the service across all user accounts without the PIN.
● Command Prompt and PowerShell require executing specific decryption commands like manage-bde -off or Disable-BitLocker, initiating a background process that must not be interrupted by system changes or file access.
● If you lack the password for removable drives protected by BitLocker to Go, you must retrieve the BitLocker Recovery Key saved on your OS drive or Microsoft account to unlock the device before turning off the encryption.
Ask AI for a summary
 ChatGPT
 Perplexity
 Gemini
 Claude
 Grok
Grok
Encrypting your hard drives adds another layer of protection to secure all your data offline. Earlier, you needed a third-party software to do so, but Microsoft made the task easier by including BitLocker decryption and encryption as standard since Windows 7. It has been an in-built feature ever since. Although, many users might find it a bit annoying, especially when they forget their BitLocker PIN or password. Well, worry no longer, as this guide will describe the various ways to disable BitLocker Windows 10.
Tips: Bitlocker is a encryption feature that protects your data by encryption in case your physical disk or computer is lost or virus-attacked. Therefore, we would recommend turning on BitLocker.
In this article
Way 1: Disabling BitLocker Encryption Windows 10 via Control Panel
It is the most user-friendly way to turn off BitLocker Windows 10. You don’t need any command lines or third-party software since BitLocker is part of the system settings. To remove BitLocker encryption using the Control Panel:
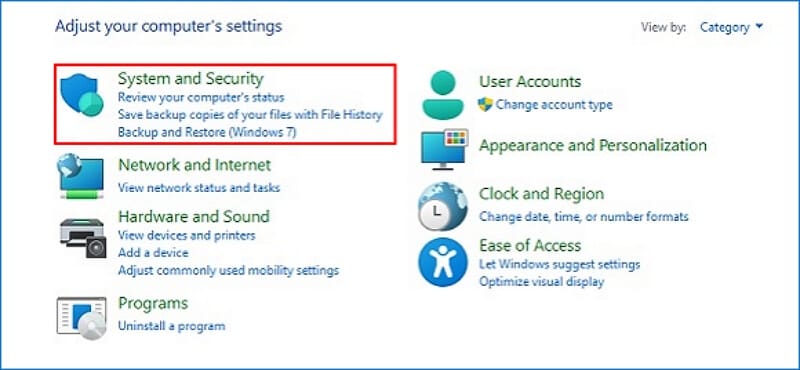
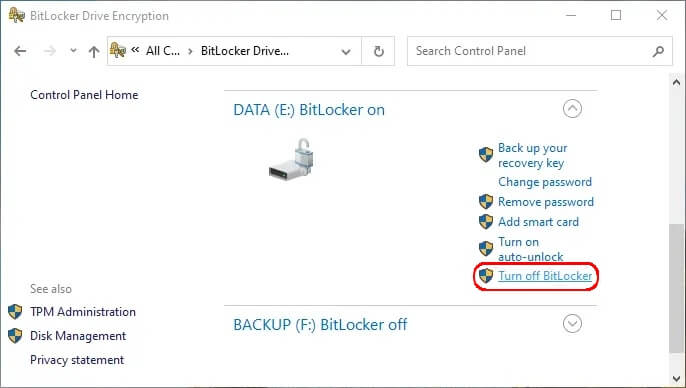
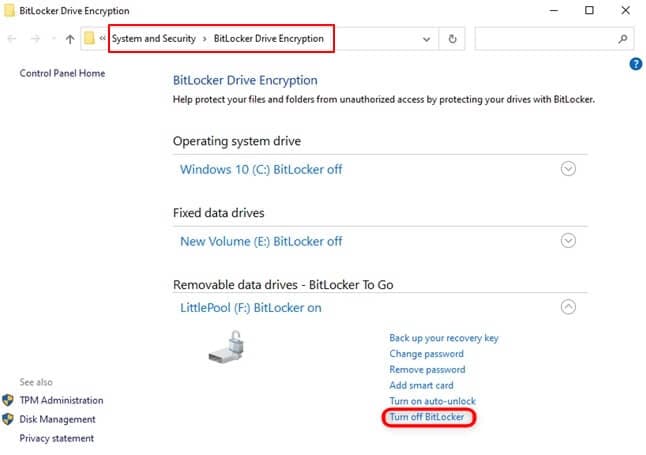
- Launch the Control Panel from the Start menu and go to System and Security. You should see the Manage BitLocker option from the menu. Alternatively, you can search for Manage BitLocker from the Search bar.
- Open the tab, and you should see the drives with BitLocker active. Next to those drives is the option to suspend BitLocker or disable it altogether.
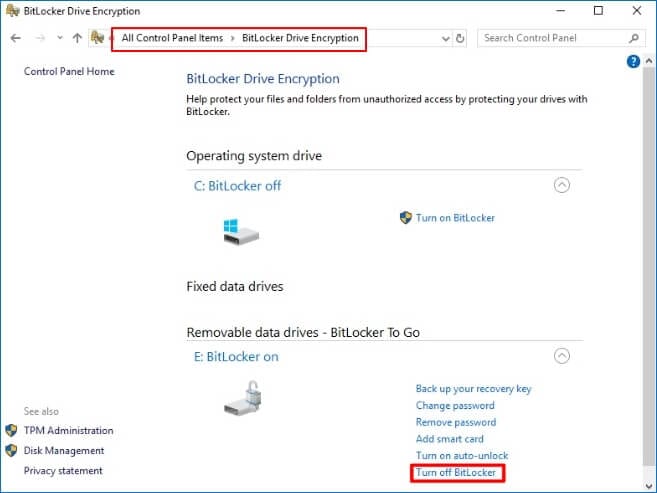
- Choose the appropriate option and confirm your changes.
Note: You should note that this method requires you to have your BitLocker PIN or password handy. If that is not the case, it is better to use other ways described in this guide.
Way 2: Disable BitLocker Windows 10 via Settings
Windows 10 has a Settings app that helps you monitor your system configuration more inclusively. For example, to remove BitLocker Windows 10 using Settings:
- Launch the Settings app from the Start menu or locate it using the Search function. You can also go for a shortcut by pressing the Windows + I keys together.
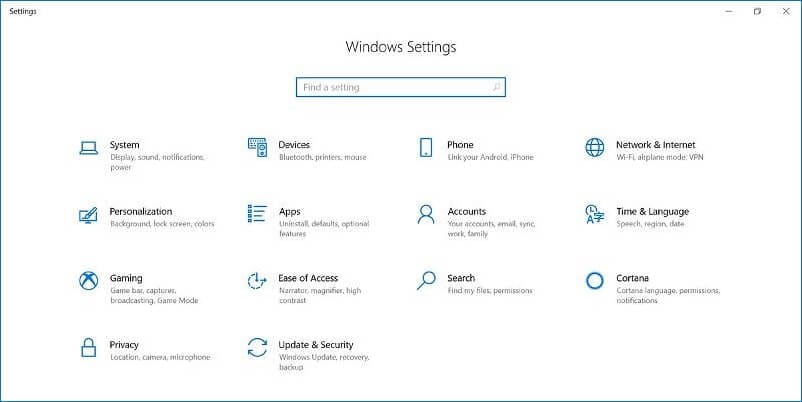
- Go to the System tab.
- Choose the About option in the left-hand side panel from the pop-up window.
- Browse to the Device encryption section from the main screen. Select the 'Turn off' option for the appropriate devices.
- Confirm your changes.
Like turning off BitLocker on Control Panel, you need your BitLocker password or PIN to disable the encryption through Windows Settings.
Way 3: Disable BitLocker Encryption Windows 10 via Local Group Policy Editor
The local group policy editor lets the administrator control the access and permissions of various users and applications on the computer. It can also turn off BitLocker Windows 10 service on your system if you use the following method.
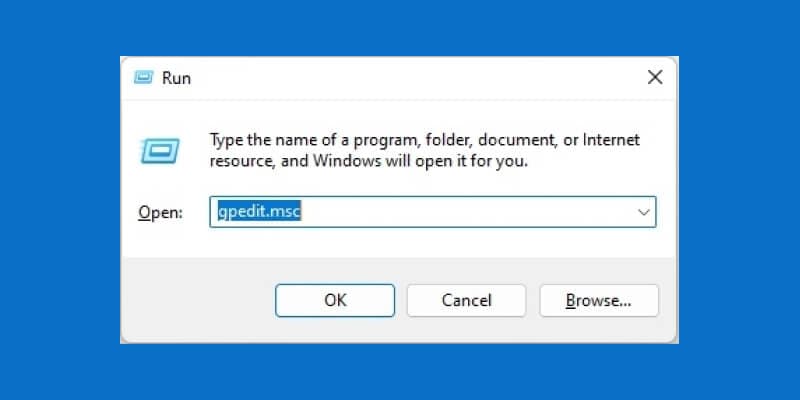
- Open the Run application from the Start menu or search for it from the taskbar.
- Type "gpedit.msc" in the dialogue box and click OK.
- In the pop-up window, go to the Computer Configuration tab and open Administrative Templates.
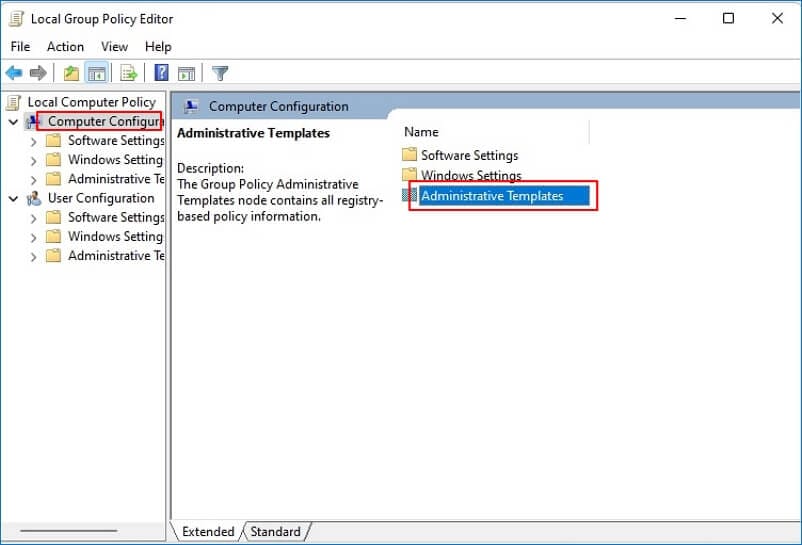
- Double-click on the Windows Components folder.
- Browse through the menu till you find the BitLocker Drive Encryption option. It is best to use the Standard view past this point.
- Choose the Fixed Data Drives option from the dialogue box.
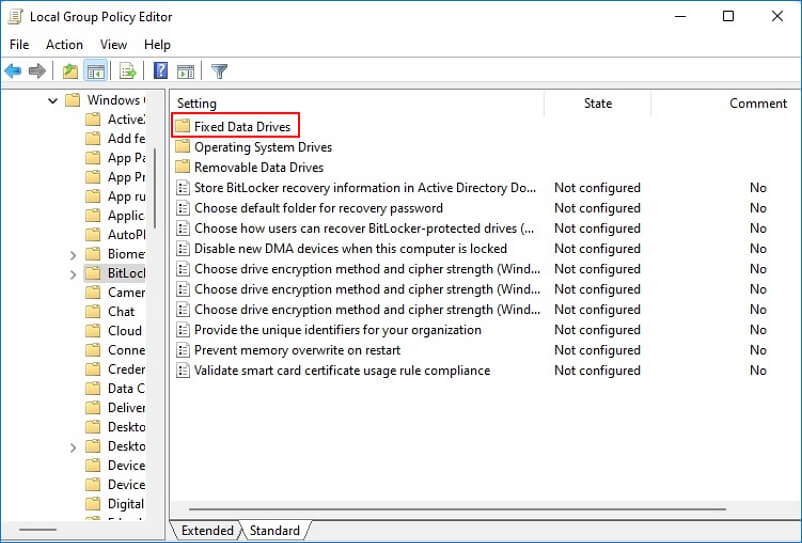
- From the pop-up menu, select 'Deny write access to fixed drives not protected by BitLocker.'
- Just below the last option, select the Disabled option. Next, click on Apply, then OK to confirm your changes.
If you run the group policy editor as an administrator, you may not need to enter the BitLocker password or PIN. The best part is that the same settings apply to all drives and users on the system.
Way 4: Remove BitLocker Windows 10 Using PowerShell
Windows PowerShell allows you more control over your system's applications than your regular browser. Think of it as Command Prompt Lite. The commands are more straightforward, although it takes a few more steps to complete any tasks and any processes are a bit slower. To remove BitLocker Windows 10 on any drive on your computer:
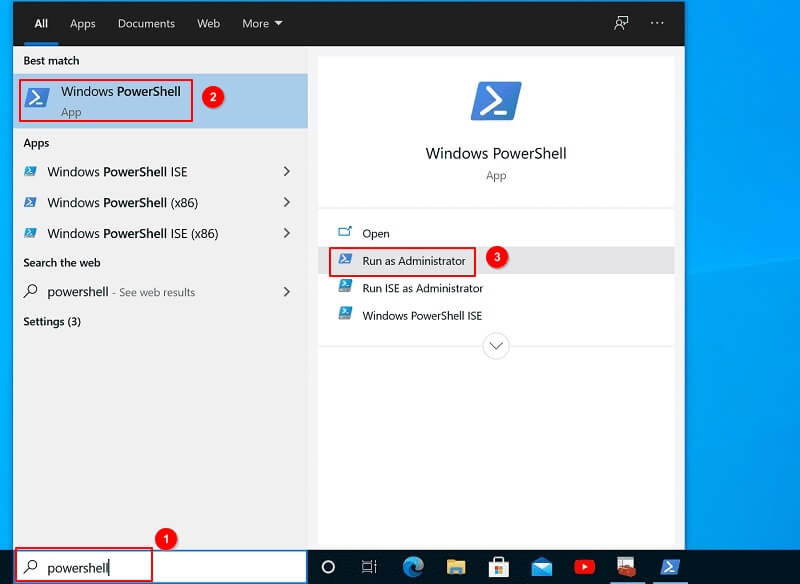
- Launch Windows Powershell by pressing the Windows + S keys together. You can also locate the app from the Search function on the taskbar. Ensure that you run the app as an administrator.
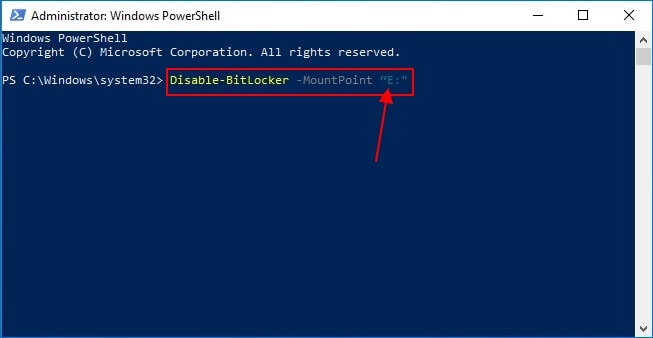
- To disable BitLocker for a specific drive, type the following command and press Enter: Disable-BitLocker -MountPoint "X:". Replace the letter 'X' with the specific drive you desire for BitLocker decryption.
- To disable BitLocker for all the drives at once, use the following commands instead:
$BLV = Get-BitLockerVolume
Disable-BitLocker -MountPoint $BLV
The command assigns the location of all the drives with BitLocker encryption to the 'BLV' variable. You can switch it with any other variable as per your preference.
You should know that this process takes a while to complete. When underway, it is imperative not to interrupt the system or open files from the drives undergoing BitLocker decryption.
Way 5: Turn Off BitLocker Windows 10 Using Command Prompt
Like most other tasks on your computer, the command prompt reduces a lengthy multi-step process to a couple of lines of code. Follow the steps below to remove BitLocker encryption on your Windows 10 computer through CMD:
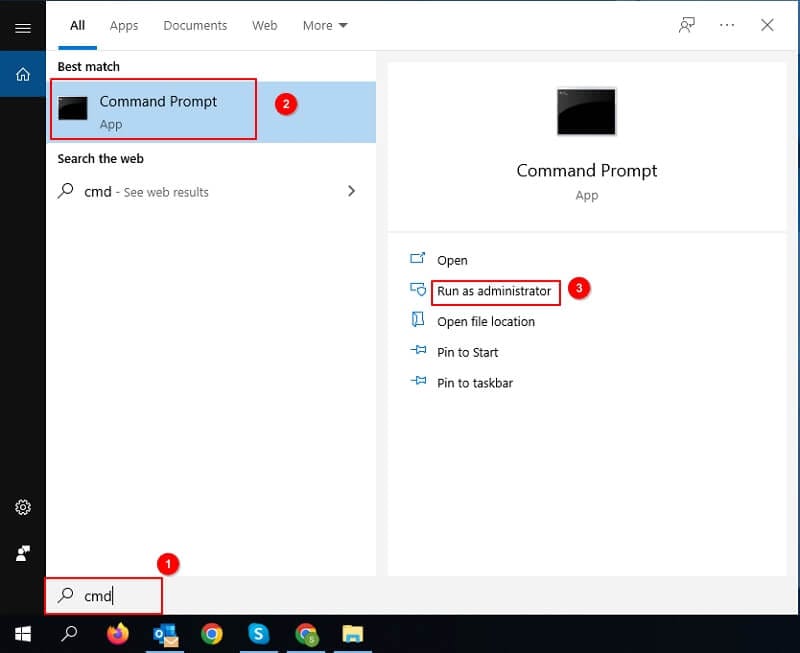
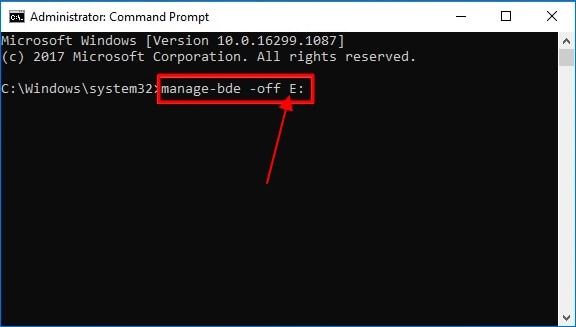
- Launch the Command Prompt window from the taskbar or use the search option from the Windows menu. Be sure to launch it in Administrator mode.
- Type the following command to check the encryption status: manage-bde -status.
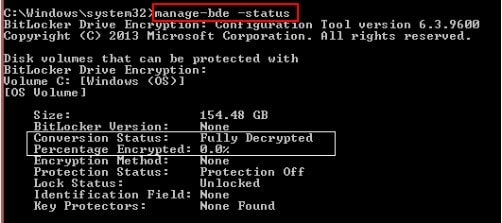
- Observe the process that occurs next. First, it shall check all the drives where the BitLocker encryption remains active. You shall also see a "Percentage Encrypted" message below it. It will take some time to reach 100%.
- Once the process concludes, use the following command for BitLocker decryption:
manage-bde -off X:. Replace the letter 'X' with the appropriate drive letter.
- Wait a few minutes and use the "manage-bde -status" command to recheck the status.
If all goes well, you should receive a 0% encryption when checking the status of the drives. If there are drives that still have BitLocker encryption, repeat the process with the relevant drive letter.
Way 6: Disable BitLocker Service
BitLocker is just like any other Windows system service. It runs in the background as soon as you boot up your system. Therefore, you can disable the encryption from the background tasks window. To do it, follow the below-mentioned procedure.
- Open the Run dialogue window from the Windows menu or by pressing your keyboard's Windows + R keys together.
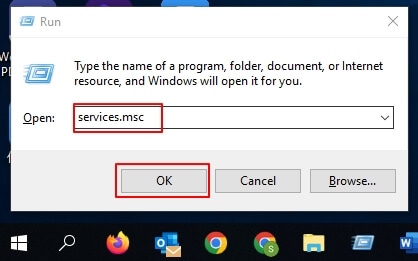
- In the pop-up window, type "services.msc" and click OK to display a list of all the active services on your computer.
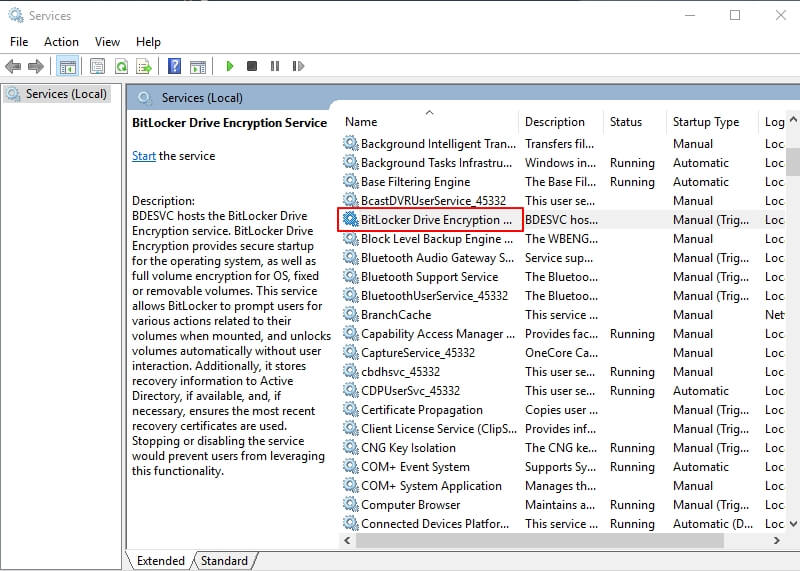
- Browse through the Services list till you find the BitLocker Drive Encryption Service. Double-click on it.
- Look to the Startup type section of the service and switch it to Disabled.
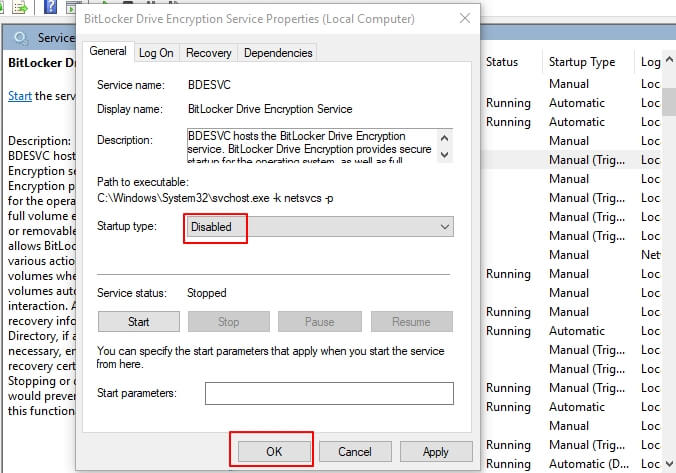
- Select Apply and then OK to save the changes.
The BitLocker encryption service shall shut down after this. You can confirm it by accessing the Processes section of the Task Manager. To open it, press Alt + Ctrl + Delete on your keyboard and select Task Manager from the screen.
Way 7: Format Encrypted Hard Drive
Formatting a hard drive should be the last resort in any case. It erases all the data and restores the hard drive to factory settings. It works when you want to get rid of a nasty worm or malware. However, the same method also assists in BitLocker decryption.
You can follow a few helpful tips to format a BitLocker encrypted drive. These apply to formatting a hard drive as well.
Way 8: Unlock BitLocker to Go to Turn Off BitLocker Encrypted External Drives
BitLocker to Go retains the encryption protocols for a drive even when it is removed from the computer. It is an excellent feature that lets you use BitLocker encryption for USBs and removable hard drives. You can unlock the devices with BitLocker to Go by the following methods.
When You Know the Password/PIN
A pop-up window will inform you that it's encrypted when opening the drive. Use the BitLocker password or PIN to unlock it for the session. You can choose to leave it unlocked whenever you access it from the system.
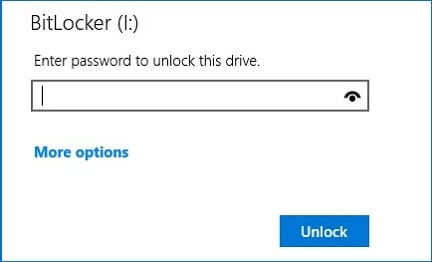
When You Don’t Know the Password/PIN
BitLocker creates a few recovery keys in case you forget your encryption password. It is usually in your OS drive, and you can locate it by searching for 'BitLocker Recovery Key' from your system's search bar. You can also access them through your Microsoft account under the Devices section.
Copy and paste the key into the Enter Recovery key box under the More Options section. Click Unlock, and you will be able to access your drive.

To disable BitLocker Windows 10 from the drive, right-click it and select the Manage BitLocker option. Next, click on Turn off BitLocker from the open window and confirm your choice.
Video Tutorial on How to Retrieve Bitlocker Recovery Key?
For Windows XP/Vista/7/8/10/11
For macOS X 10.10 or later
Conclusion
BitLocker is a simple yet secure process to encrypt your hard drives. Still, it has no backward compatibility with earlier versions of Windows and can often get annoying when you're just trying to browse the files on your system. We hope this guide lets you breathe a bit easier, although we recommend leaving BitLocker active on your drives, particularly the ones that you carry along on your person.


