
 TL;DR:
Format your external hard drive to the exFAT file system to ensure full read and write functionality across both Windows and macOS, bypassing the macOS read-only limitation on default NTFS drives.
● While the FAT32 format also supports both operating systems, it strictly limits individual files to 4GB and partitions to 32GB, making exFAT the required alternative for large-capacity drives.
● When formatting via Windows Disk Management, you must initialize drives larger than 2TB using the GPT partition style, whereas drives under 2TB require the MBR style before applying the exFAT format.
● When using Mac Disk Utility to erase the drive, you must select the GUID Partition Map scheme and complete a full data backup beforehand, as the formatting process permanently deletes all existing files.
Ask AI for a summary
 ChatGPT
 Perplexity
 Gemini
 Claude
 Grok
Grok

You might find the NTFS format problematic using the same external hard drive on both Mac and Windows. The reason is that although NTFS is the default format of most external drives, it does not allow writing data on Mac OS. Therefore, formatting the external hard drive is the most suitable method to make your drive compatible with both OS.
Part 1. What Is the Best Format for an External Hard Drive for Windows and Mac?
Before choosing the best file system format for an external drive, it is crucial to comprehend which file system supports both Windows and Mac. There are several file system formats, some of which support only Mac or Windows, while others support both operating systems.
So, before learning how to format a hard drive for Mac and Windows, you need to understand each format's pros and cons.
FAT32
FAT32 is a file system frequently used in floppy disks, SD memory cards, USB, digital cameras, and a wide variety of embedded and portable devices.
Pros
Universal compatibility with all Mac, Windows, Linux, game consoles, and other USB-port devices
Cons
Incompatible with files larger than 4GB or partitions bigger than 32GB
Does not support files larger than 2TB on MacOS
Susceptible to disk errors and lack security
exFAT
exFAT is the current FAT file system (FAT32) version, making it an excellent alternative for external hard drives, particularly large-capacity portable media devices. ExFAT is frequently used in firmware for devices with little power and memory requirements, such as cameras, cell phones, media players, etc.
Pros
Excellent partition support and can hold data bigger than 4GB
Compatible with Windows and Mac
Cons
Unsuitable for several commonly used older operating systems
Unfit for disks smaller than 32GB since it cannot optimize space consumption for its cluster size arrangement
NTFS
Microsoft created the exclusive writing format known as NTFS. It is the Windows system hard drive's default file system. Because of its encryption, access permission management, and log file, NTFS performs well in data security.
Pros
Enhanced security, disk space use, and performance
Excels in terms of data management and data security
Compatible with the newest hardware and all Windows versions
Cons
You have to rely on third-party utilities to resize a partition
Enables read-only and cannot write in MacOS
Mac OS Extended
Before macOS High Sierra, HFS+ was the default file system on the startup drive. Mac OS Extended supports older Mac OS versions.
Pros
Compatible with macOS 10.12 and all versions of Mac OS X
Journaling, compression, and encryption features
Cons
Lacks Access Permission Control
When dealing with many files, the program performs slowly or crashes
Data recovery is more challenging when an HFS+ drive becomes corrupted
APFS
The APFS file system is Apple's latest exclusive file system. It determines the amount of data available on disk; therefore, it is well-known for enhancing read/write speed on solid-state drives (SSDs) and storage space.
Pros
Enables single-key or multi-key full-disk encryption for increased security
Efficient in managing available storage
Crash prevention to minimize system crashes from causing corruption
Cons
Only works with macOS High Sierra & later
Part 2. How To Format an External Hard Drive on Mac?
You can format the external hard disk after getting insight into which file system both operating systems will support. Use Mac Disk Utility to carry out hard drive formatting for mac. However, if you reformat an external hard drive, all of its information will be lost, so it is suggested to back up any important files beforehand.
Operational Steps:
Step 1: Mount an external hard drive to your Mac (Specific external hard drives need an extension cord).
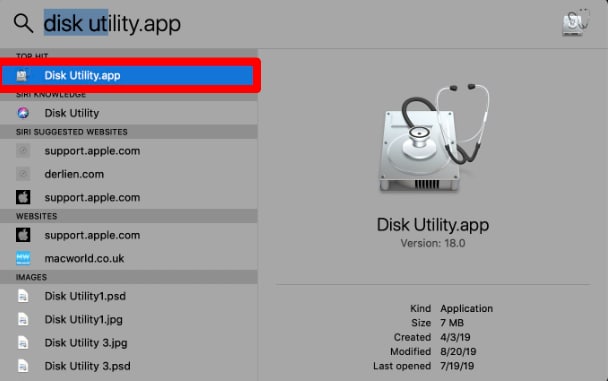
Step 2: Use Spotlight Search to search for Disk Utility. Open the Disk Utility application; it will display all connected internal and external drives on your Mac.
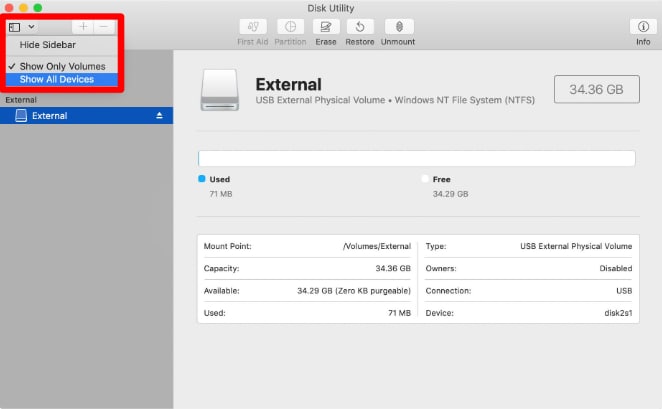
Step 3: Click Show All Devices in View from the window's top-left corner.
Step 4: Select the external hard drive you want to format.
Step 5: Click on the Erase option present at the top.
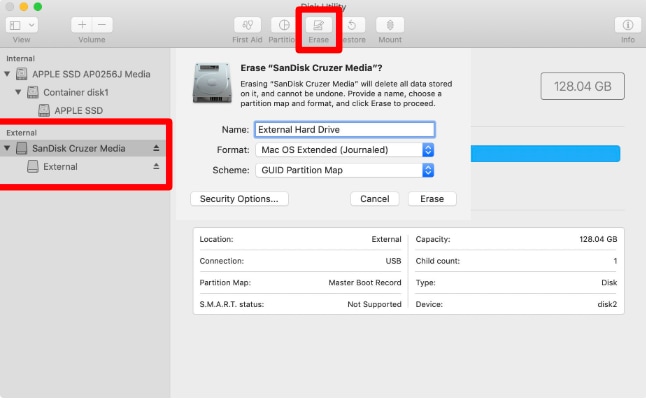
Step 6: A warning window will notify you about the permanent data wiping. Click Erase.
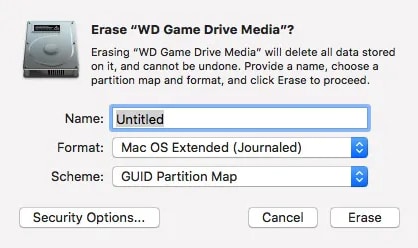
Step 7: Name the hard drive, and choose its format and scheme. Although you can use any name for your scheme, you should select GUID Partition Map.
Part 3. How To Format an External Hard Drive on Windows?
Similar to Mac, Windows computers have a program called Disk Management that allows you to format your drive. Here's how to go about it:
Operational Steps
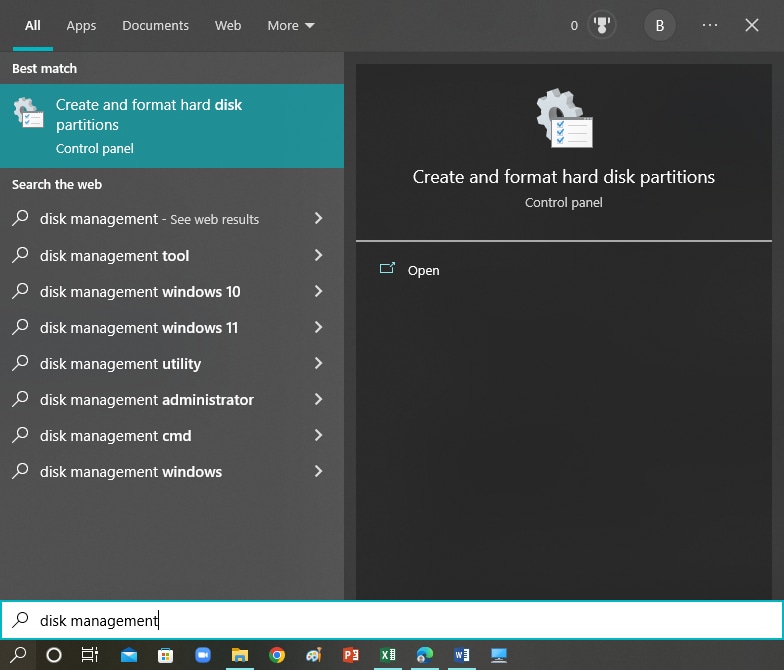
Step 1: Search Disk Management in the search bar by clicking the Windows icon, then select Create and Format Hard Disk Partitions.
Step 2: Select Initialize Disk or Online from the context menu by right-clicking the disk that indicates Not Initialized or Offline.
Note: Some external USB hard drives lack the initialization option. They are formatted and allocated a drive letter in these situations. Ensure the drive letter you assign is distinct from the one currently used for other hard drives.
Step 3: Decide on the partition style; hard drives with a capacity greater than 2 TB should use GPT, while MBR is for hard disks with less than 2 TB of storage space.
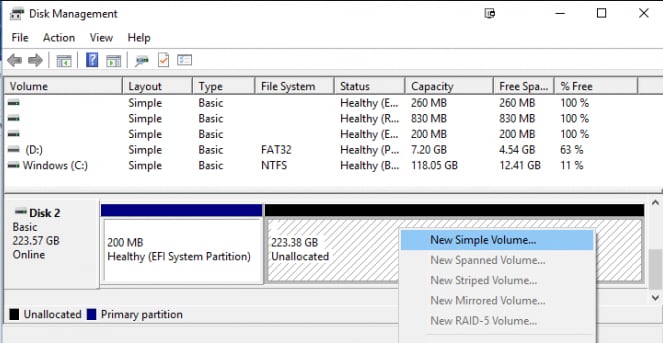
Step 4: Right-click the Unallocated Area, choose New Simple Volume and comply with the prompts.
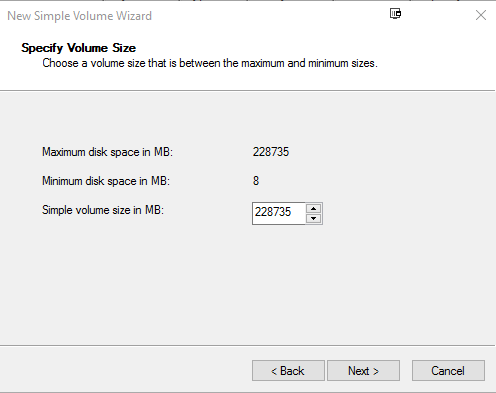
Step 5: Specify the volume size of your external hard drive.
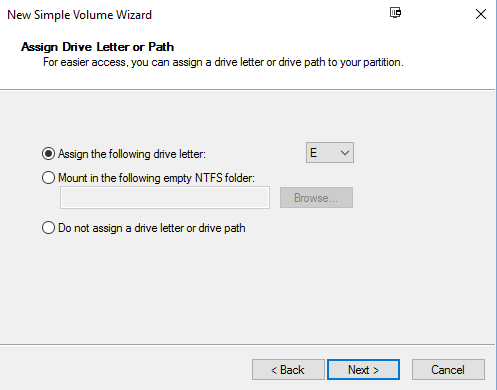
Step 6: Assign your external hard drive a specific letter.
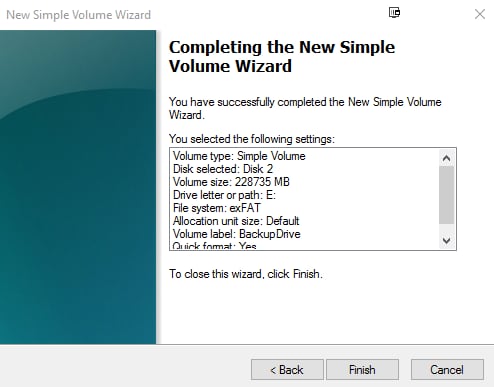
Step 7: Choose the exFAT file system to make your drive compatible with Mac and Windows.

Step 8: Click Finish to complete the formatting process.
You can utilize the drive on both Windows and Mac after Windows formats the drive as exFAT.
Part 4. How to Recover Data on Windows/Mac Easily and Quickly?
We advise you to back up your critical data before embarking on an external drive format. However, if you mistakenly formatted your hard drive and lost important data, you must get professional data recovery software like Wondershare Recoverit.

Wondershare Recoverit – Your Safe & Reliable Recovery Software
5,481,435 people have downloaded it.
Recover lost or deleted files, photos, audio, music, and emails from xD-Picture cards effectively and completely.
Recover data after sudden deletion, formatting memory card damage, virus attack, system crashes, etc.
Restore files from 5000-storage devices like digital cameras, camcorders, drones, USB Drive SD cards, SSDs, HDDs, etc.
Preview files before you recover them. No payment is required if the files are unrecoverable.
Recoverit is Free to try, and paid version to enjoy more.
Operation steps:
Step 1: Open Recoverit and choose the external hard drive on your Mac or Windows as the scanning and searching destination.

Step 2: Start scanning the external hard drive and find the necessary files for recovery using a filter.

Step 3: Preview the files before proceeding with the data recovery and click Recover to retrieve them.

Pros
Easy-to-navigate interface
2000+ Storage Devices Supported
Support 1000+ File Types and Formats
Multiple backup options
Efficient scanning process
Available in free version
Supports Windows & macOS
Cons
Larger files consume more time
The free version imposes data limitations in recovery
Conclusion
Formatting an external hard disk for Mac or Windows is straightforward. If you have a single external hard drive storing vital files and want to swap it between PC and Mac systems, you must carry out formatting as an easy and viable solution. It is advisable to format your drive with the exFAT format since it supports both Windows and Mac OS.
For Windows XP/Vista/7/8/10/11
For macOS X 10.10 or later


