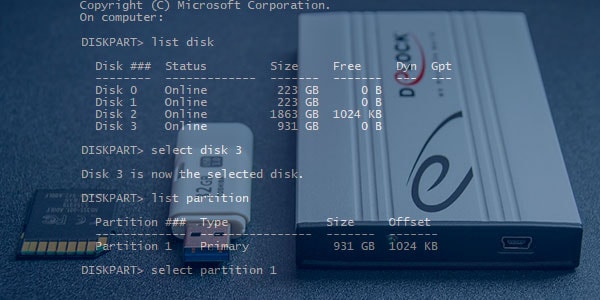
When you want to erase disk data, few other default tools are as effective as the DiskPart utility. It is fast, doesn't drain system resources, and you don't need additional software to use it. However, the command-line interface can get a bit confusing for users, especially those who feel uncomfortable with programming.
Throughout this guide, you'll learn about how DiskPart clean partition works in Command Prompt. You'll also get to distinguish between DiskPart clean and clean all commands and viable troubleshooting if they don't work.
In this article
Part 1. Difference Between DiskPart Clean and DiskPart Clean All
Although they seem the same, there is plenty of difference between DiskPart Clean and DiskPart Clean All commands. You can take a quick glance at the table below to understand the difference.
Criteria |
DiskPart Clean Command |
DiskPart Clean All Command |
| Purpose | Removes data and partitions | Completely wipes the disk, removing data and partitions to bring it to its original state. |
| Data Recovery | Data recovery is achievable | Data recovery is challenging; only possible till no data is overwritten |
| Duration | Takes a short time to complete | Takes a long time to complete |
| Suitable For | Quickly erasing hard drive data or resetting file formats while leaving most of the data recoverable. | Wiping the drive to restore factory settings, removing any malware or bad sectors |
DiskPart Clean vs. Clean All: Working Principle
With the DiskPart Clean command, you can delete all the data within the disk, along with any disk partitions that may be present. However, there are still data images left behind that make it possible to recover that data in the future.
On the other hand, Clean All makes DiskPart erase all partitions on the disk alongside the data. As a result, the drive receives a complete wipe, and the data on it is overwritten. Therefore, the data deleted by Clean All becomes unrecoverable.
DiskPart Clean vs. Clean All: How Long Do They Take?
DiskPart Clean can erase a 120 GB drive within a few minutes. The Clean All command enables DiskPart to delete all partitions at a rate of about 320 GB per hour. Of course, you can boost that a bit if your system has ample RAM and processing power.
DiskPart Clean vs Clean All: Security
When you use the DiskPart Clean command, there is a slim chance that any virus or malware on the drive can make its way back or activate once you recover data from it. With the Clean All command, DiskPart wipes the drive clean. It's one of the best ways to dispose old hard drives. So, using the same or another system is much safer.
DiskPart Clean vs Clean All: Application
You can utilize the DiskPart Clean command to quickly erase the drive and start over while leaving most of the data recoverable. But, if you're going to completely erase all data and reset the drive to its factory state, then DiskPart Clean All may suit you better. It is also more effective in cleaning any corrupted sectors and refreshing the drive's input/output performance.
Part 2. Critical Instructions Before Deleting All Partitions Using DiskPart Clean
Before you remove all partitions on a hard drive using DiskPart, it is best to follow a few critical instructions to safeguard your data.
- Use a reliable antivirus to scan the drive for any potential threats. Recovering data from the disk afterward may activate them.
- Back up all the data on an external HDD or a cloud-based service.
- Ensure that all the drives are firmly connected to the system and are in a writeable state.
- Your system needs to have a consistent power supply. If you use a laptop, make sure that it's fully charged. It is best to use a UPS (Uninterrupted Power Supply) for a desktop.
Part 3. How To Delete All Partitions Using DiskPart Clean Command
If you decide to remove a partition using the DiskPart Clean command, follow the process mentioned below.
Step 1: Open Command Prompt on your system with Administrator privileges.
Step 2: Type in DiskPart and press Enter.
Step 3: List all the drives on your PC using the command list disk.
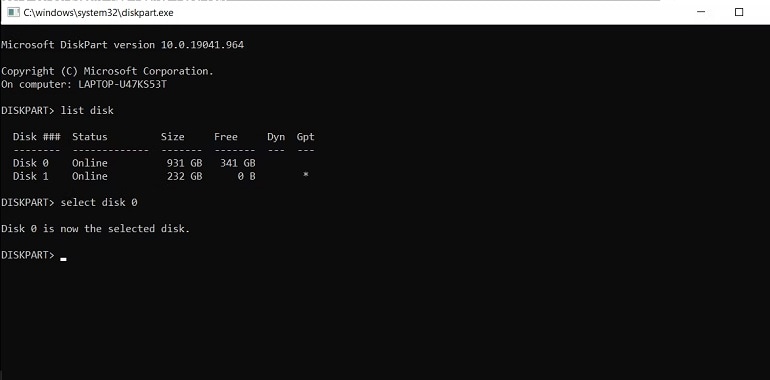
Step 4: You can select any of the disks on the system using select disk 2 (replace '2' with the appropriate disk number).
Step 5: Type in the clean command and press Enter.
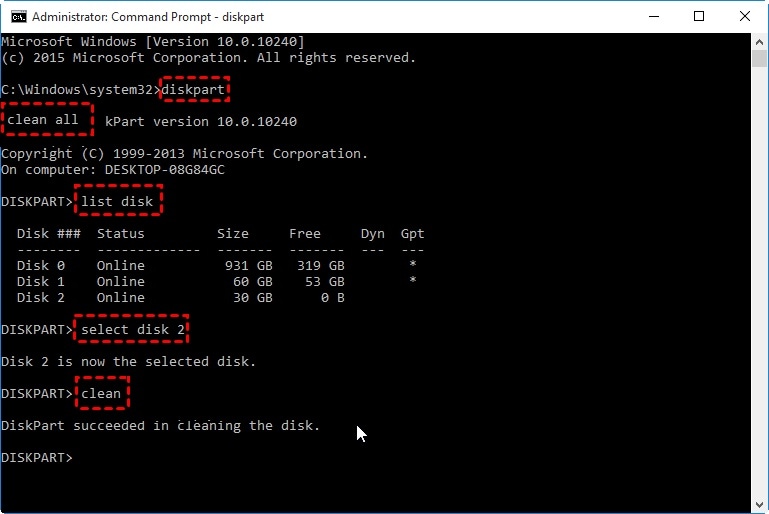
Step 6: Once the process concludes, use the exit command to leave the program.
Part 4. How To Delete All Partitions Using DiskPart Clean All Command
In order to use the Clean All command in the DiskPart utility, you must go through the following method.
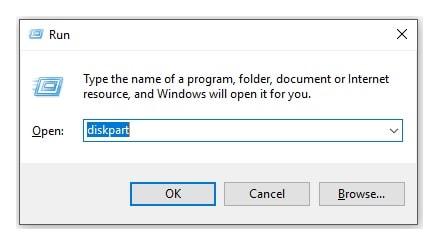
Step 1: Open the Run program on your computer and type in 'diskpart' in the dialog box.
Step 2: When you press Enter, you're taken to the Command Prompt window with the DiskPart utility already running.
Step 3: Type in list disk and press Enter.
Step 4: Use the select disk 1 command to choose your preferred drive (replace '1' with the appropriate disk number).
Step 5: Type the clean all command and press Enter. You need to wait a while for the process to finish.
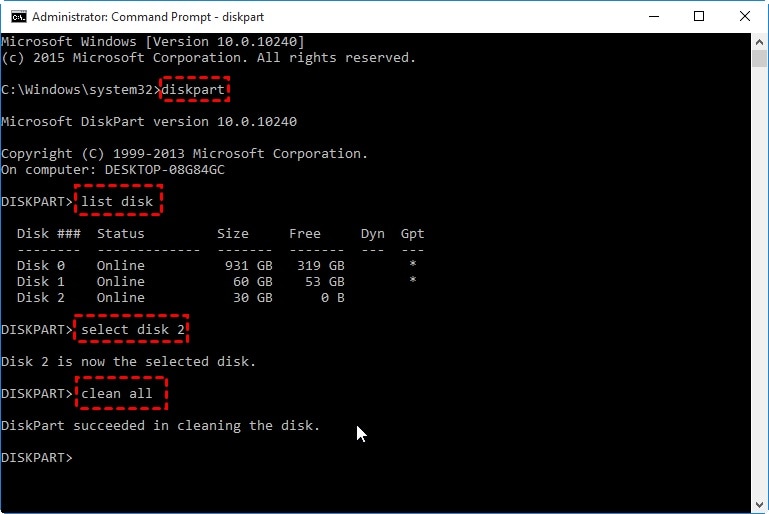
Step 6: To exit the DiskPart utility, type exit and press the Enter key.
Part 5. How To Fix DiskPart Clean Not Working
Sometimes, the DiskPart utility may fail to erase all the data and partitions on a disk. If you encounter any such event, you can try the following methods to troubleshoot the issue.
Error 1: DiskPart Clean All Stuck
DiskPart clean can get stuck if you have a power outage or a system crash. In such a case, it is helpful to start the process all over again. However, if the issue remains persistent, you may need to use third-party software. One reliable option is AOMEI Partition Assistant Standard. You can use it to clean one or more drives on your PC.
Step 1: Download and install the AOMEI Partition Assistant Standard version suitable for your OS.
Step 2: Launch the program. It shall show all available drives on your system.
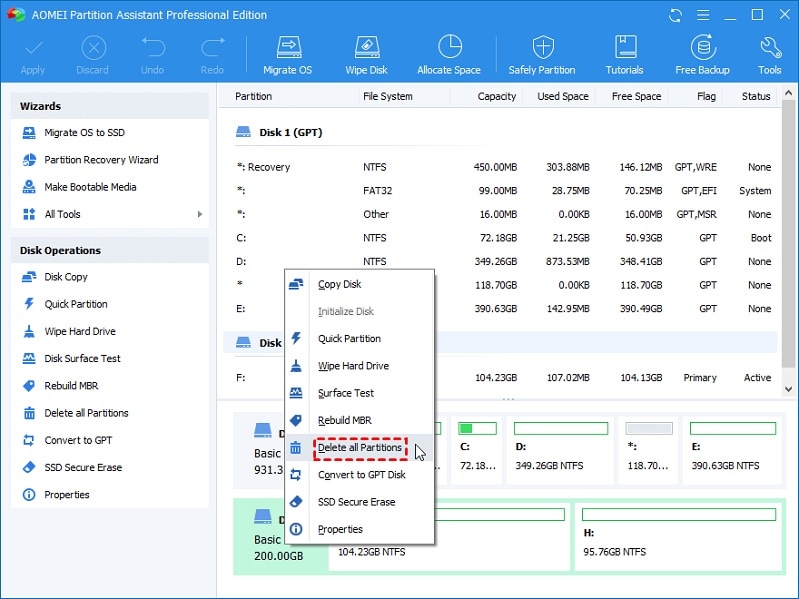
Step 3: Right-click on the drive you want to wipe and choose the Delete All Partitions option from the drop-down menu.
Step 4: Choose the preferred action from the dialog box and select OK.
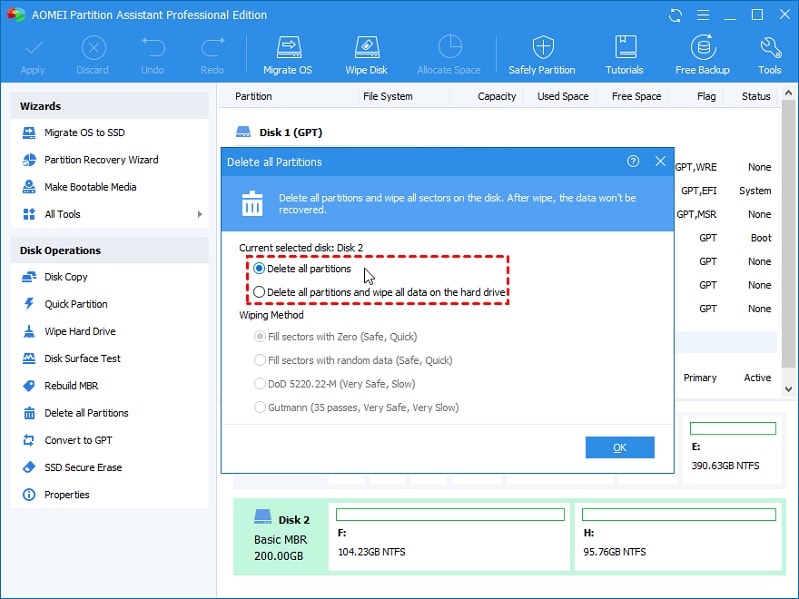
Step 5: Click on Apply in the top pane and wait for the process to complete.
Error 2: DiskPart Has Encountered an Error
If you encounter DiskPart errors other than getting stuck, consider taking the following precautions.
- Ensure that you're running Command Prompt as an Administrator.
- Double-check the SATA or other cable connections with the storage device.
- Check whether the drive is not password-protected and in a writable state.
- If you're working with USB drives or memory cards, check the safety notch that prevents your system from reading the data. It should be in an 'off' position.
- Turn off any software that may be using the drive, like games or streaming apps.
Part 6. How To Recover Erased Partitions If You Wrongly Deleted It
It helps to ensure that you back up all the data on the drive before you erase all partitions using DiskPart Clean or Clean All. Still, if you missed some of it and used the DiskPart clean command, you can retrieve it using Wondershare Recoverit. It is a robust program compatible with both Windows and Mac devices.
Wondershare Recoverit - The Most Reliable Deleted Partition Recovery Tool
5,481,435 people have downloaded it.
Recover deleted or lost partition data safely, efficiently, and completely.
Ability to recover more than 1000 file types from almost any file system.
An intuitive interface that lets you preview the files before recovery. No payment is required if the data is unrecoverable.
Support to recover data from 500+ data loss scenarios, including unexpected deletion, formatting, hard disk corruption, virus attacks, computer crashes, etc.
You can follow the process mentioned below to recover any data lost in the deleted partitions.
Step 1: Select the Lost Partition
Launch the Recoverit partition recovery software after the installation. Then, choose the Lost Partition that is marked in red under the Hard Drives and Locations tab.

Step 2: Scan the Deleted or Lost Partition
Recoverit will start scanning the data in the deleted partition automatically. It may take seconds to minutes, depending on the file size in the partition.

Step 3: Preview and Recover
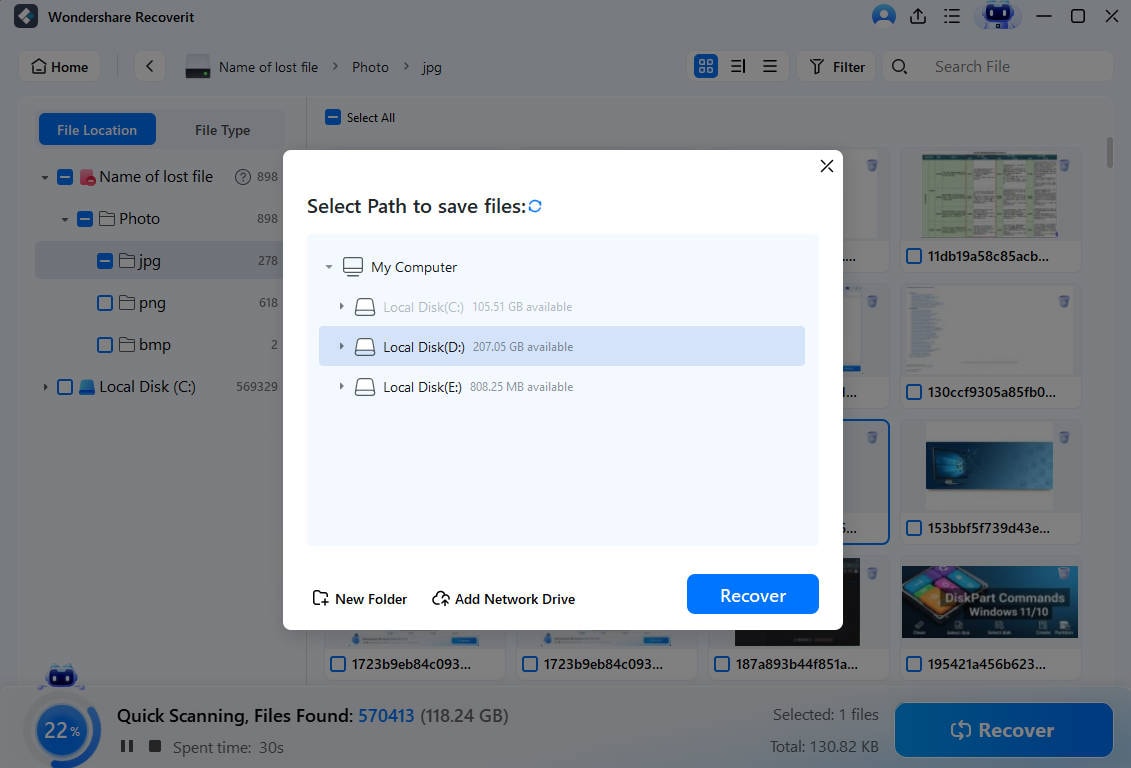
Once the scan concludes, you can choose the files you want to retrieve. Use the Preview button to ensure that they are the files you desire. Finally, Click the Recover button to retrieve the files to a safe location.
For Windows XP/Vista/7/8/10/11
For macOS X 10.10 or later
Wait for the process to finish. Once complete, you can view the recovered files in your designated location. For a more comprehensive guide, you can view a video of the procedure mentioned above on our official Youtube channel.
For Windows XP/Vista/7/8/10/11
For macOS X 10.10 or later
Frequently Asked Questions
Does DiskPart Clean delete everything?
Yes. When you use the clean command, it erases all the data on the disk. Although, it still leaves data recovery in the disk possible.
Is DiskPart Clean All secure?
DiskPart is an integral part of Windows OS. It is entirely safe to use. Moreover, you can use the clean and clean all commands to eliminate any troublesome viruses and malware.
How long does DiskPart Clean All take?
The performance of the clean command depends upon each system's RAM and processing power. A Clean command can clear a 120 GB drive for a regular workstation within a few minutes. In the case of the Clean All command, it removes 320 GB per hour.
Does DiskPart Clean wipe data?
No. Using DiskPart clean only erases the data of the disk. However, its image is still imprinted, allowing you to recover it should you choose.
Is DiskPart Clean the same as format?
No. Formatting a drive enables you to determine a suitable file system. In the case of cleaning a disk, the storage space is unallocated and unformatted.
Can I recover data after using DiskPart Clean command?
Yes. You can use suitable data recovery software to retrieve any lost data post a DiskPart clean command.

 ChatGPT
 Perplexity
 Google AI Mode
 Grok
Grok


