
 TL;DR:
You can convert a Windows 10 system from Legacy BIOS to UEFI without data loss using the built-in MBR2GPT command-line tool or AOMEI Partition Assistant Professional, provided your motherboard was manufactured after 2014.
● Windows 11 natively requires UEFI and a GPT partition table, making this conversion strictly for Windows 10 users seeking an OS upgrade or needing support for hard drives larger than 2.2 TB.
● The native conversion requires running Command Prompt as an administrator, executing mbr2gpt /validate /disk:0 /allowFullOS to verify the disk, followed by mbr2gpt /convert /disk:0 /allowFullOS.
● You must manually change the boot mode from Legacy to UEFI in your firmware settings immediately after the conversion completes to prevent a black screen error on startup.
Ask AI for a summary
 ChatGPT
 Perplexity
 Gemini
 Claude
 Grok
Grok
BIOS Stands for Basic Input Output System. It is stored on your motherboard and is the first software that runs on your computer. In older motherboards, Legacy BIOS is more common, while new Windows versions use UEFI, which can accommodate hard disk spaces larger than 2.2 TB.
This article will cover how you can convert Legacy BIOS to UEFI effectively.
In this article
Part 1. How To Check Whether You Are Using Legacy BIOS or UEFI?
Before you plan to convert legacy to UEFI on Windows 10 without data loss, you must be sure of the type of BIOS you are using. You can check this in your system easily. Follow the steps to proceed:
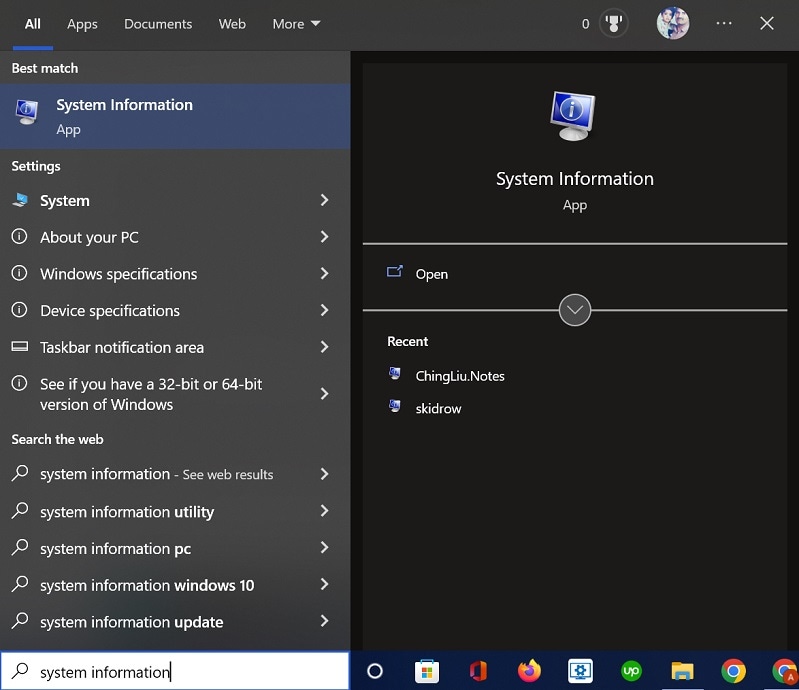
Step 1. Open the System Information dialogue box by typing its name in the desktop search bar.
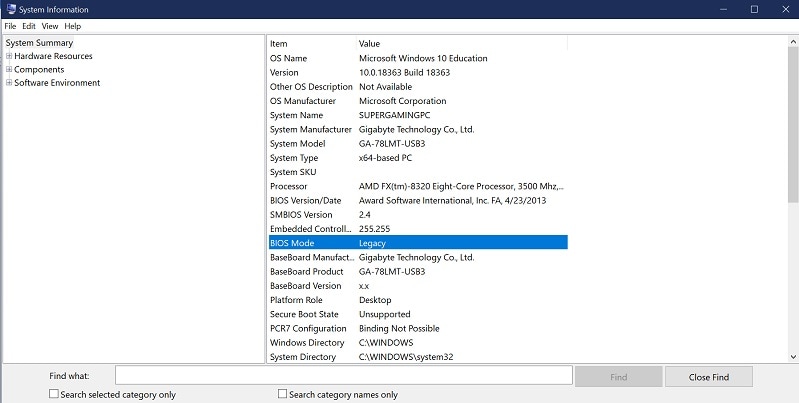
Step 2. Look for the BIOS section in the right column. It will be either UEFI or Legacy BIOS.
Part 2. Why Should You Switch Legacy BIOS to UEFI?
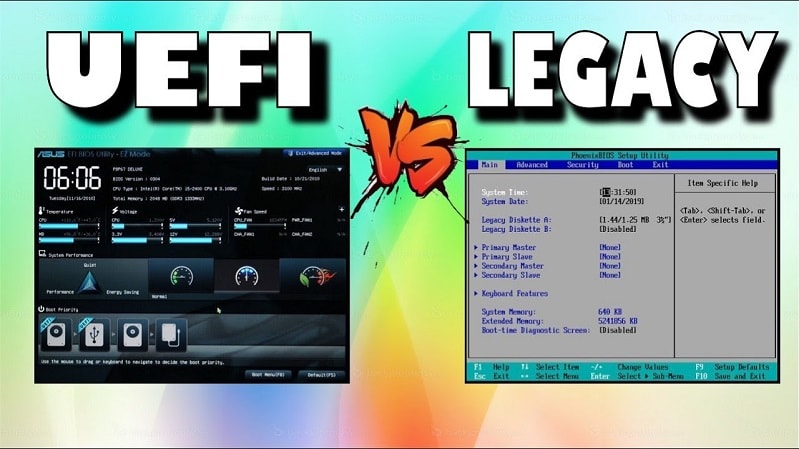
🖥️ Technical Comparison: Legacy BIOS vs. Modern UEFI
Understanding the architectural differences between these firmware designs highlights why moving to a modern structure improves system efficiency:
Technical Feature Specification |
Legacy BIOS Environment |
Modern UEFI Environment |
| Max Partition Capacity | Limited to 2.2 TB per volume | Up to 9.4 Zettabytes (ZB) |
| Primary Partition Limits | Maximum of 4 primary disk partitions | Up to 128 distinct partitions natively |
| Underlying Partition Map | Master Boot Record (MBR) | GUID Partition Table (GPT) |
| Boot Optimization Speed | Slow 16-bit execution code path | Fast 32-bit or 64-bit parallel initialization |
| Built-In System Security | No native verification methods | Secure Boot prevents rootkit execution |
| Interface Controls | Low-resolution, keyboard-only text | High-resolution GUI with mouse support |
Hence, it might make sense to convert MBR to UEFI due to the above advantages.
Part 3. Do You Need to Change Legacy BIOS to UEFI on Windows 11?
There is plenty of Legacy BIOS to UEFI converter software out there. But do you need to change legacy to UEFI on Windows 11? Well, the answer is No because upgrading Windows 10 to Windows 11 requires the UEFI boot mode and GPT partition table. Therefore, there is no Windows 11 with Legacy BIOS. All Windows 11 PCs are already in UEFI mode.
You will get some worthwhile upgrades, including better performance and added security features on Windows 11. Also, the UEFI will provide fast booting times while eradicating compatibility issues.
Part 4. How To Convert Legacy BIOS to UEFI Without Data Loss on Windows 10
The safest way to convert your system drive from MBR to GPT without formatting is using the native Windows command-line tool MBR2GPT.exe. This utility modifies the disk layout structure without deleting your personal files or user data.
Before installation, verify that:
- Verify your motherboard supports UEFI boot modes before running these utilities (typically any hardware built after 2014).
- Ensure you create a full backup of critical storage blocks on a separate, external backup drive.
Data Safety Note:
If a power failure or system freeze disrupts the partitioning layout mid-conversion, your drive may turn into a RAW volume. If this happens, deploy Wondershare Recoverit immediately to run a deep sector scan and extract your files safely.
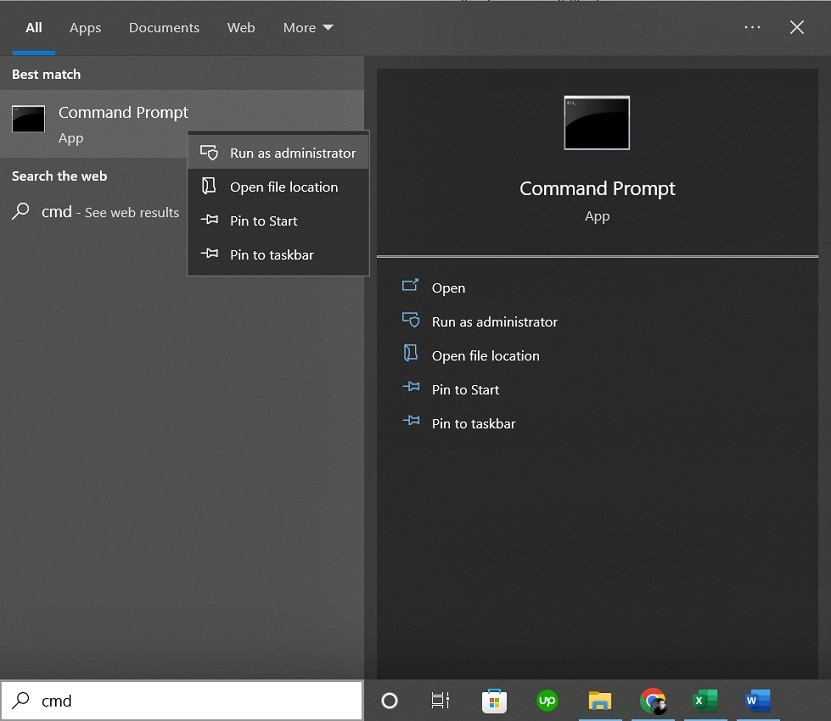
- Launch an Elevated Command Prompt Console (Open terminal with administrator rights)
Typecmdinto your Windows desktop search bar. Right-click the Command Prompt icon from the results list and select Run as administrator. Click Yes on the system permission prompt.
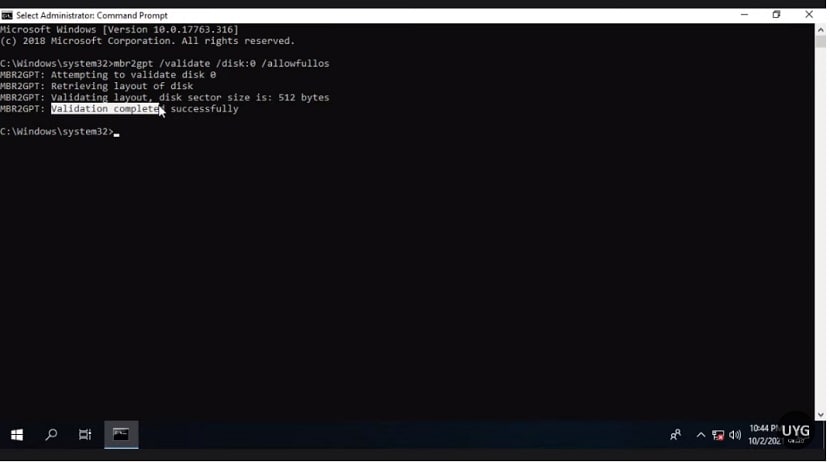
- Validate the Targeted System Storage Disk (Verify partition map layout compliance)
Before changing any sectors, verify that your disk layout meets the utility's configuration requirements. Input the following command and press Enter:mbr2gpt /validate /disk:0 /allowFullOS(If your operating system is installed on a disk index other than 0, replace0with your actual system disk number). Wait until the terminal returns aValidation completed successfullystatus message.
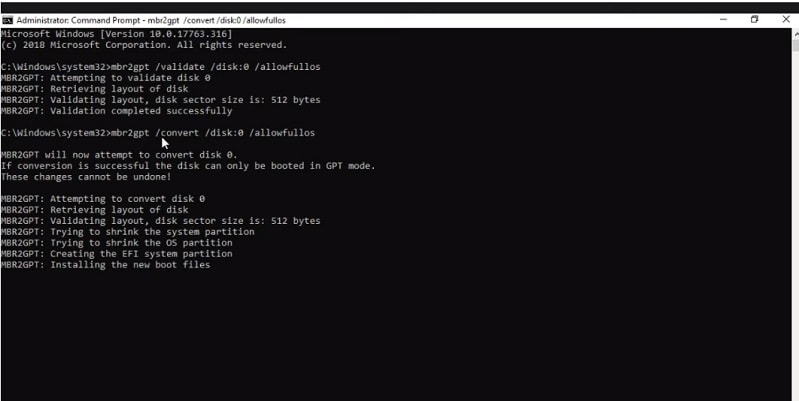
- Execute the Partition Schema Conversion (Convert MBR structures into GPT mappings)
Once validation succeeds, run the conversion sequence by entering the following command line, then press Enter:
The program will begin creating new GPT system partitions and moving boot configuration data. Do not shut down or restart your computer during this step.mbr2gpt /convert /disk:0 /allowFullOS
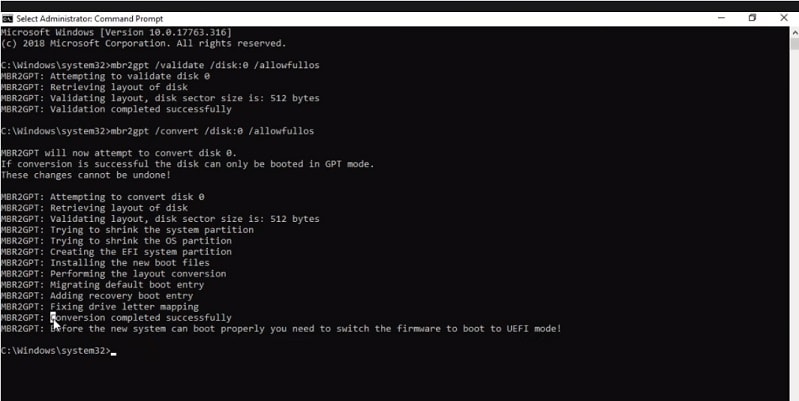
- Confirm Execution and Exit Terminal (Verify conversion logs)
Monitor the logs until the console displaysConversion completed successfully. Once confirmed, close the Command Prompt window.
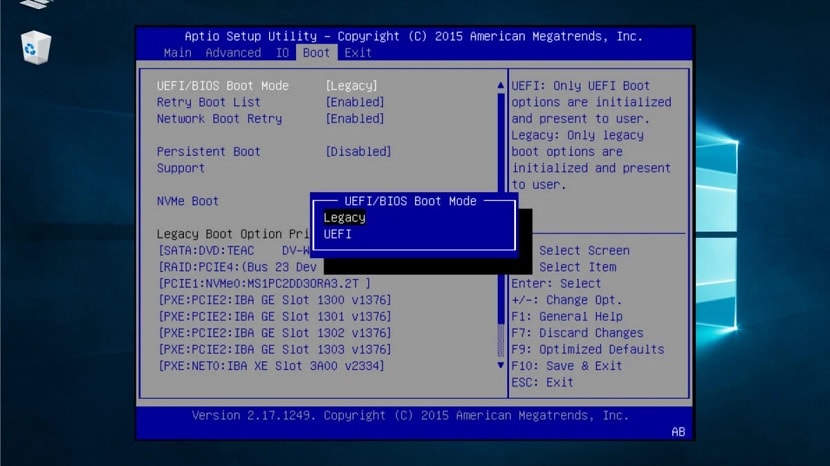
- Reconfigure Your Motherboard Firmware Boot Profile (Switch from Legacy to UEFI in BIOS)
Restart your computer immediately. During the initial splash screen, tap your motherboard's configuration key (typically Del, F2, or F12) to enter your BIOS setup utility. Locate the Boot Mode configuration option, switch the setting from Legacy to UEFI, enable Secure Boot, then save your changes and exit to boot into Windows.
Part 5. How To Convert Legacy BIOS to UEFI Without Reinstalling Windows
You can convert Legacy BIOS to UEFI safely with the help of a tool named AOMEI Partition Assitant Professional Assistant. The software helps you manage partition disks in Windows 11,/10/8/7. AOMEI comes loaded with features such as converting MBR to GPT for Windows 11 upgrade, migrating OS to SSD or HDD, moving apps from one drive to another, and recovering lost or deleted partitions.
Follow this video to learn how to convert Legacy BIOS to UEFI without reinstalling windows.
FAQs
Can I convert MBR to UEFI?
Converting MBR to UEFI is a complex possibility. This is because MBR is a type of partition table while UEFI is a boot system. These are two different things. MBR is the Master Boot Record that holds the information of disk storage.
On the other hand, UEFI is the Unified Extensible Firmware Interface, which is the software interaction between an operating system and firmware. UEFI is the new boot mode that starts the computer.
Will I lose data if I change the legacy mode to UEFI?
Yes, you will lose data if you use the standard built-in software of windows. However, you can always use various types of third-party data recovery software to recover lost data or to even change the legacy mode to UEFI without losing data.
Can I go back to the legacy BIOS from UEFI?
Yes, it's possible to go back from UEFI mode to Legacy BIOS. However, the process in itself is pretty complicated. First, you will have to initiate an advanced setup and enter the UEFI firmware settings, then disable the UEFI secure mode on your system.
Why am I seeing a black screen after changing legacy BIOS to UEFI?
This can happen if you skip changing the BIOS settings of your system to UEFI. Your system will default pick up the legacy BIOS even after the conversion. And this will make the black screen appear. To solve this, press F11 on your startup and then change the BIOS mode to UEFI.
Sometimes, you can solve the black screen issue by reconnecting the power supply or the battery and restarting the system. After restart, the computer shall automatically continue the BIOS update. Do not remove the plug or battery during the process.
Summing up
Converting Legacy BIOS into UEFI is not a complicated process. However, before you begin the Legacy BIOS to UEFI conversion, you need to know your options and understand the terms you are dealing with. We hope that the above information helped you out and has empowered you to change Legacy to UEFI without the help of any technician.
For Windows XP/Vista/7/8/10/11
For macOS X 10.10 or later


