By creating a backup of your Gmail account, you can ensure that your messages, contacts, and schedule are preserved securely. In an emergency, such as a breach, malware infection, or accidental loss, you can swiftly recover your data and return to business as usual.
As Google is the most widely used email provider, losing access to your inbox might have serious consequences. This article will discuss five methods to help you back up Gmail emails to a hard drive. These methods are secure, and there is no risk of data loss. Please carefully and correctly follow the various solution steps.
Join us to celebrate World Backup Day. Let's take the pledge, and make data backups a regular part of your day. As you back up Gmail emails to a hard drive, you must realize the importance of data backup.
In this article
Method 1. Save Gmail Emails to a Hard Drive Using Google Takeout
Google Takeout is a built-in service provided by Google to back up Gmail emails to the hard drive. It enables users to export and download content from their Google account, including but not limited to email, documents, calendar events, and photos. This function allows users to save their Gmail messages in MBOX format. It's an online utility that copies all your Google data onto your computer.
The steps below will assist you in carrying out the process correctly.
- Enter your Gmail id and password to access your account.

- To proceed, select the Manage your Account option. Then, in the new window, select the Data and personalization option.

- Scroll down and select the Download your data option.

- Deselect all by clicking the Deselect all button.

- After that, scroll down and select the Mail feature, followed by the All Mail data included icon.

- Then, in the Mail Content Options tab, uncheck everything EXCEPT Include all messages in Mail.

- Scroll down and select Next Step.

- Select the Send download link via email option from the Delivery method drop-down menu.

- Then, select the File type and Size for which you want to back up your data.

- After that, click the Create Export icon to be notified when your archive is ready.

- The Export process status is displayed here, and you will receive an email when the process is finished.

- Finally, once the backup is complete, you will receive an email with a download link. Access it and click on the Download button. All of your previously backed-up data will be saved to your hard drive.

If you find this method of backing up Gmail emails to a hard drive too time-consuming, consider the alternatives listed below.
You may also be interested in: How to Backup Gmail emails with attachments
Method 2. Save Gmail Emails to a Hard Drive as PDF Files
Gmail emails can be saved as PDF files to a PC's hard drive. It is straightforward to perform. Here's a quick tutorial on how to save Gmail emails as PDF files to your hard drive.
- Launch Gmail in your browser and sign in with the necessary login details (Gmail email and password). Access the emails you want to save from the Inbox folder to your hard drive.

- Click the Print All button in the top right corner of your browser. You can preview the message on the selected email address here. Choose from the various built-in features such as Destination, Pages, Layout, and Color.

- Finally, click the Print button to start backing up your email. Then, a new tab will appear on your screen; enter the Image name and click the Save button to finish the process.

- Copy the email from your PC and paste it to the target hard drive after saving it as a PDF.
Method 3. Backup Emails to a Hard Drive Using MS Outlook
Regarding desktop email clients, Microsoft Outlook has the most users and popularity. This email program is a must-have if you're seeking a no-cost alternative. If you have logged your Gmail into MS Outlook, you can follow the steps below to store Gmail messages on your computer's hard drive.
- To save an email from MS Outlook, open the email and click File.

- Now, select Save As from the menu.

- Decide you want to save the email and then press the Save button. Your email will be saved in .msg format, a Microsoft format that you must open in Outlook.

On Windows, you can also drag and drop an email from Outlook into a folder. It is beneficial if you want to save multiple emails. Choose the emails you wish to save and drag them into a folder in Windows Explorer.
Method 4. How to Backup Gmail Emails to Hard Drive - Automatically Using Ubackit
Many Gmail backup tools are available when backing up your Gmail account to a hard drive, but only some are as reliable and versatile as Wondershare UBackit. By logging in to your Gmail account using an Outlook client, the program will automatically and regularly back up your Gmail emails to a hard drive.
The following are the main features of Wondershare UBackit:
Wondershare UBackit - Your Reliable Email Backup Tool
- Back up emails to local hard drives or external storage devices effectively, safely, and completely.
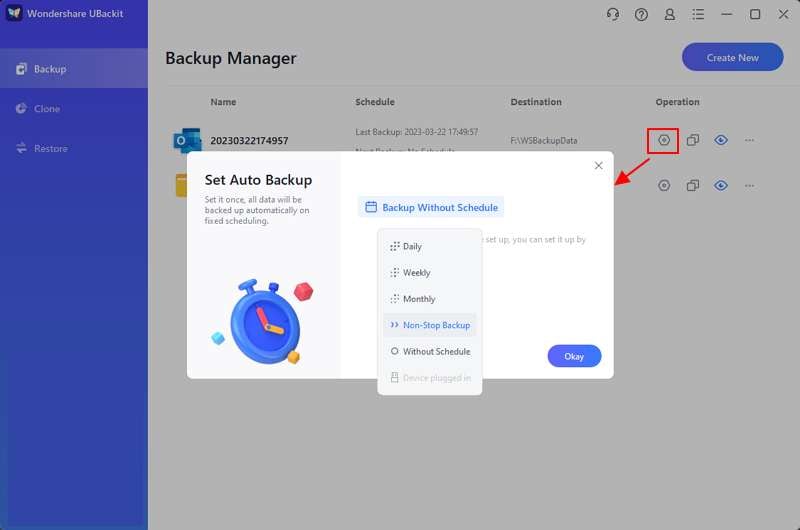
- Provide automatic backup to back up your email files daily, weekly, monthly, or non-stop.
- Set a password to protect your backups, keeping your data confidential should it be stolen, lost, or compromised.
- Support incremental backup, which saves only the changes made to your files since the last backup, reducing backup time and saving storage space.
Wondershare UBackit lends you a helping hand. With the help of Ubackit, you can back up your Gmail to a local PC hard drive, external hard disk, NAS, and USB flash drive. Follow the steps below to proceed:
Step 1. Select Outlook Backup
Open Wondershare UBackit and tap Backup & Restore. Then, click Create New and press the Outlook Backup option to establish a backup of your Gmail (logged into Outlook client) files.
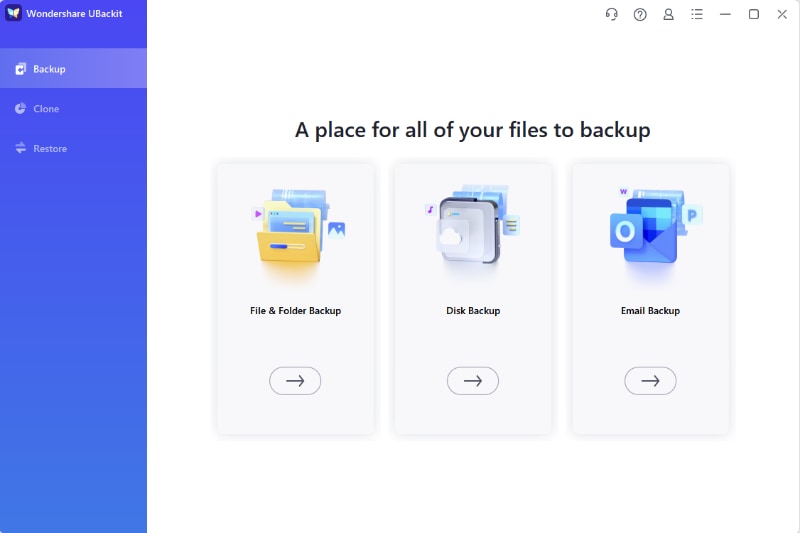
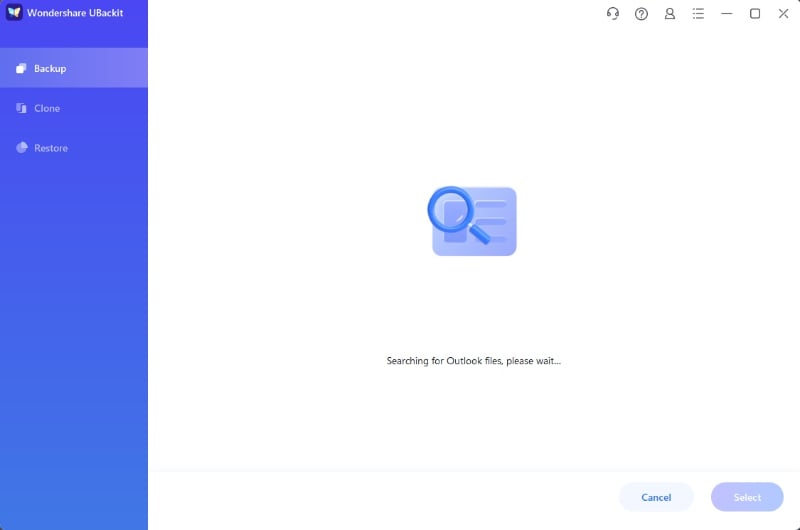
UBackit will start looking for the email files automatically. Wait a while before the files appear on your screen.
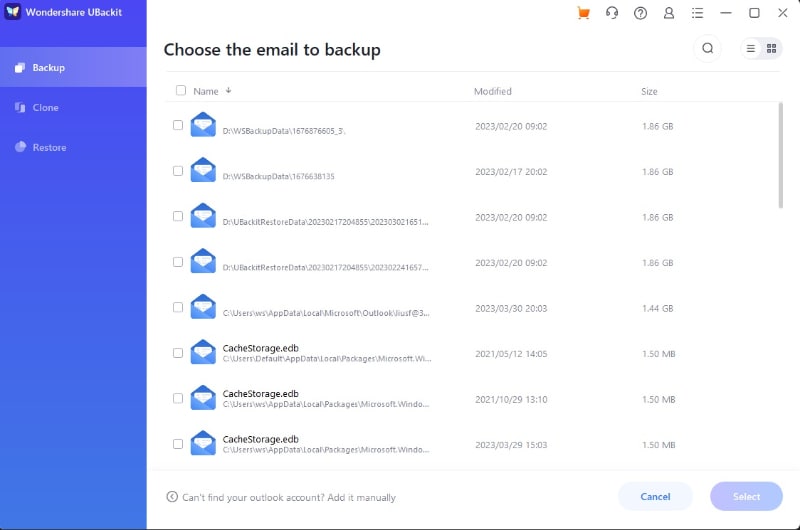
Step 2. Choose the Gmail Files
Now is the time to choose the Gmail files you want to back up. All you need is to check the boxes displayed before the Image names, as shown below. Once done, click the Select button.
Step 3. Choose the Gmail Backup Destination
Now, you can choose a preferred location for Gmail backup, such as a local or external hard drive. The application will display a list of available drives or external storage here.
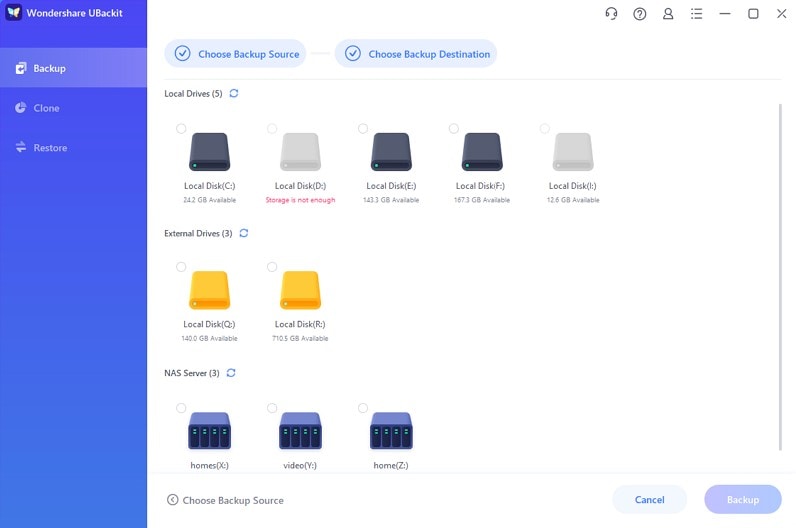
Step 4. Finish the Gmail Backup Process
Finally, click the Backup button to start the backup process. You can take a break while the application backs up your Gmail files. UBackit will notify you when the backup is finished.
You can set up automatic daily, weekly, or monthly Gmail backups by selecting the Schedule option. Additionally, you can access a password-protect feature by clicking the three dots in the top right corner.
Method 5. Backup Gmail Emails to External Hard Drive Using SysTools Tool
Systools Gmail Backup is a software tool that allows users to back up their Gmail account data to a hard drive. The tool offers a range of features that enable users to back up Gmail emails, attachments, contacts, calendars, and documents.
With Systools, users can select specific emails or data ranges to backup, choose from various file formats for the backups, and schedule automatic backups to ensure their data is always up to date.
Here are the simple steps to use SysTools to backup Gmail emails to the external hard drive:
- Navigate to the Start menu and select All Programs > SysTools Gmail Backup. After launching the software, enter the Gmail ID and App Password.

- The software will display the following prompt to redirect to the Gmail login page. Click the OK button. Now enter the login details for the Gmail account that will be backed up.
- Click the ok button.

- Click the Continue button to grant the application access to your Gmail account.

- Proceed by clicking the Activate tab.

- Select the file format in which the backup will be created from the next menu. There are several options available. You can export it as EML, PST, MSG, MBOX, PDF, VCF, and ICS.

Summing Up
This article shows 5 effective methods for backing up Gmail emails to a local or external hard drive. Depending on your situation, you can select the best one to protect your Gmail data. Compared to the first four methods, the last is more adaptable.


 ChatGPT
 Perplexity
 Google AI Mode
 Grok
Grok


