
 TL;DR:
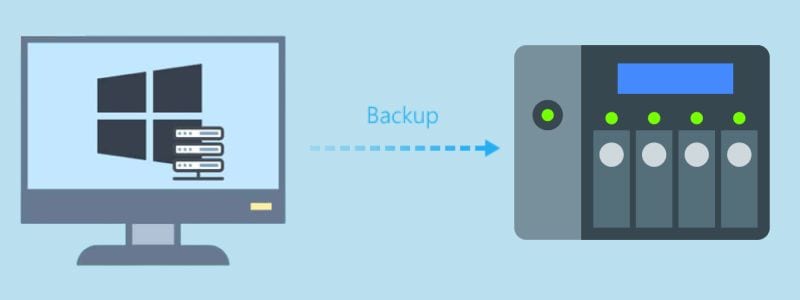
Backing up your Windows Server to a NAS device provides essential data redundancy through RAID configurations and centralized remote access that the native Windows Server Backup tool lacks.
● The built-in Windows Server Backup feature routes full server or custom data backups directly to a NAS without additional software by utilizing the shared network folder destination option in the Backup Schedule wizard.
● Synology Active Backup for Business requires installing a 32-bit or 64-bit agent on your Windows Server to connect via IP address, enabling retention policy management directly from the Synology Package Center.
● Using Wondershare UBackit to automate the backup process requires you to map the NAS device to your Windows system before selecting it as the target destination.
Ask AI for a summary
 ChatGPT
 Perplexity
 Gemini
 Claude
 Grok
Grok
Does your company need help with backing up data on your Windows Server?
You can’t only rely on the ingrained feature, Windows Server Backup. You should start backing up your Windows Server to NAS. We’ve prepared three methods for backing your Windows Server to a NAS device, with detailed, step-by-step instructions for each.
Besides the detailed guide, you’ll be able to familiarize yourself with the Windows Server Backup and the advantages of backing up your Windows Server to your NAS device.
What Is Windows Server Backup?
Windows Server offers a built-in feature called Windows Server Backup that allows users to back up their server information tools. However, you don’t need to do this on your own – Windows Server Backup can be configured to automate the backup process and make it easier for users.
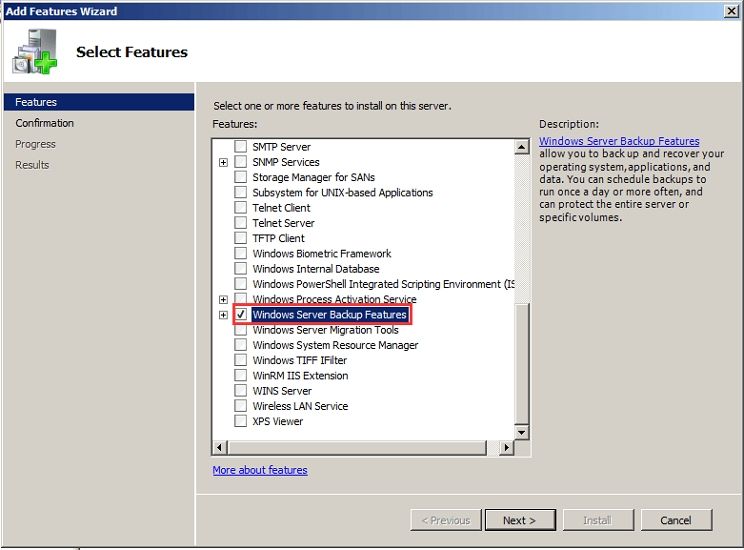
You can use it to back up an entire server or specific storage volumes and files. Specifically, it uses a set of wizards and tools to back up your files, folders, and system state for recovery purposes. Even though it’s very easy to use, backup is its only function, and it doesn’t offer any other options.
Related: How to recover lost on Windows Server 2016 to 2022
Benefits of Backing Up Windows Server to NAS
Since Windows Server is specifically made for businesses, you’ll find yourself in a situation where you’ll need some additional functionalities that Windows Server Backup doesn’t have to offer. Luckily, connecting it to a NAS device like Synology or QNAP NAS will prove extremely useful for businesses in those situations.
These additional functionalities that NAS devices can provide include:
- Data can be accessed remotely:Because NAS is a shared network, you will have access to the information of all the computers connected to the NAS, so you will have at your disposal any document or file on said network.
- Increase your storage:You no longer need to buy a large number of hard drives or storage devices. A NAS gives you more space so you can have it and avoid worrying about trying to save space.
- Backup and data redundancy:Many NAS drives come with built-in RAID options, which means you can duplicate data on multiple drives instead of just one, and that in turn means that if a driver suddenly breaks and stops working, you already have an exact copy ready and waiting.
- Data back up and sync:Most users are used to enlisting the help of data hosting services like Google Drive, Dropbox, or Microsoft OneDrive to keep files in sync between computers, but a NAS does the same job. It allows all your data to be available for each device you use, no matter where you are. Also, it may be cheaper if you need to support a large amount of information, since the investment to have a NAS is only the payment to get it and in the data hosting services, you will have to pay recurring subscription fees.
- Stream your videos on multiple computers and screens:A very common reason to get a NAS is to be able to stream movies, TV shows, music, and photos on multiple computers without having to keep one computer running all the time to address the problem.
- Higher speed to share data:A NAS server is always an option that provides higher speed than any hard drive connected to a computer and shared on a network. NAS units can have two or more high-speed network ports and can be expanded according to your needs.
How To Backup Windows Server to NAS [3 Method]
If you’ve decided to back up your Windows Server to Synology or QNAP NAS, let us show you how to do it. It can be done with several Windows Server backup software. Below are step-by-step instructions on how to back up your Windows Server to a NAS device using Windows Server Backup, Synology Active Backup, and Wondershare Ubackit.
Method 1. Backup to NAS Using Windows Server Backup
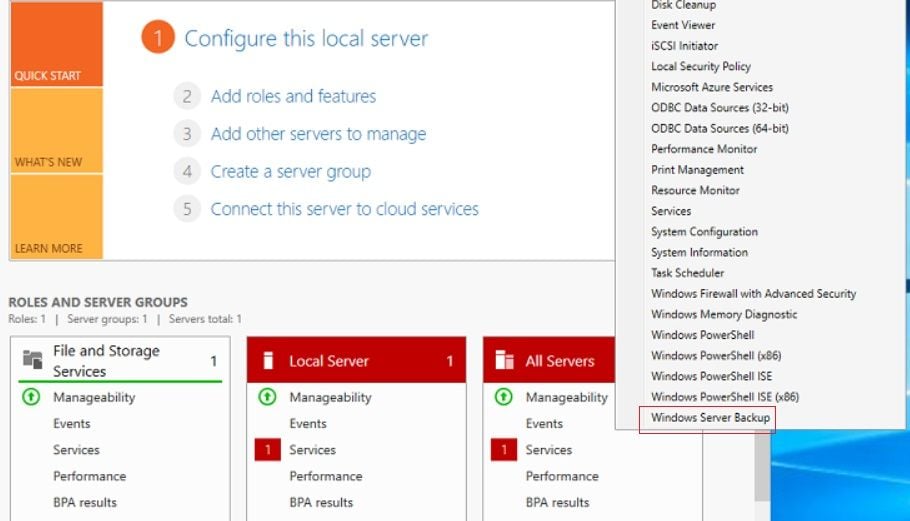
As we already mentioned, Windows Server comes with an ingrained Windows Server Backup feature. It’s another easy solution for backing up your Windows Server data to your Synology NAS device. The backup process is quite simple:
- Go to Server Manager, then to Tools, and open the Windows Server Backup
- Once it’s open, go to the right panel and click Backup Schedule.
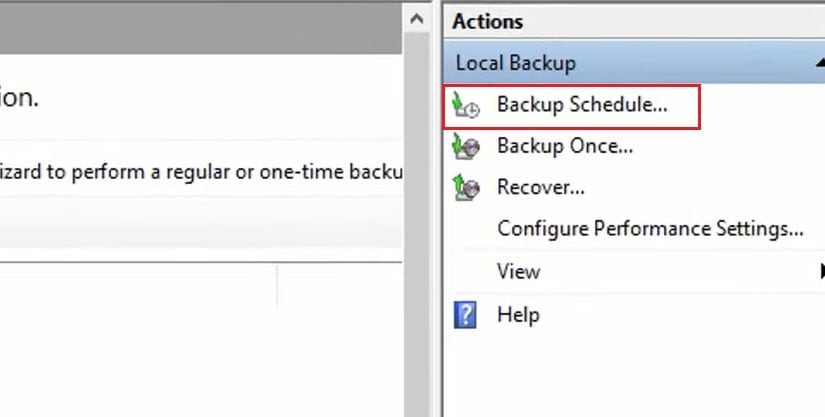
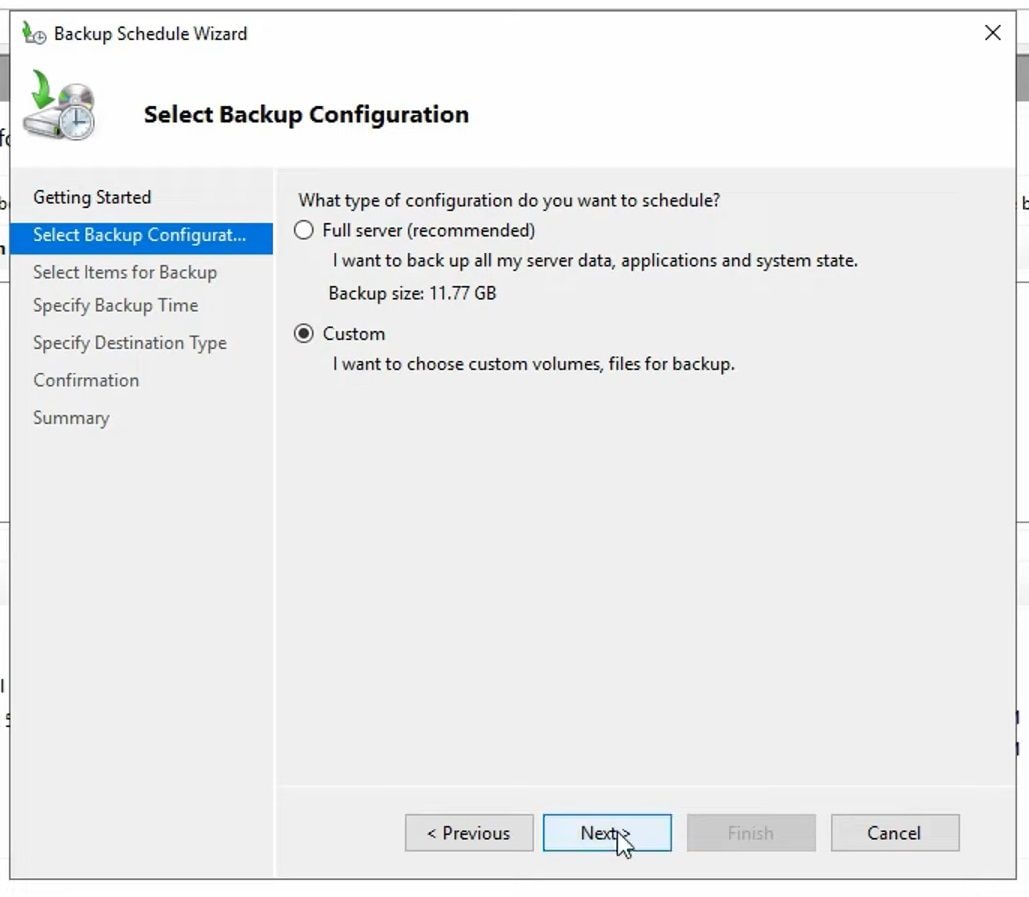
- On the pop-up window, you’ll see options for your backup. Here you can choose to backup a full server or custom data.
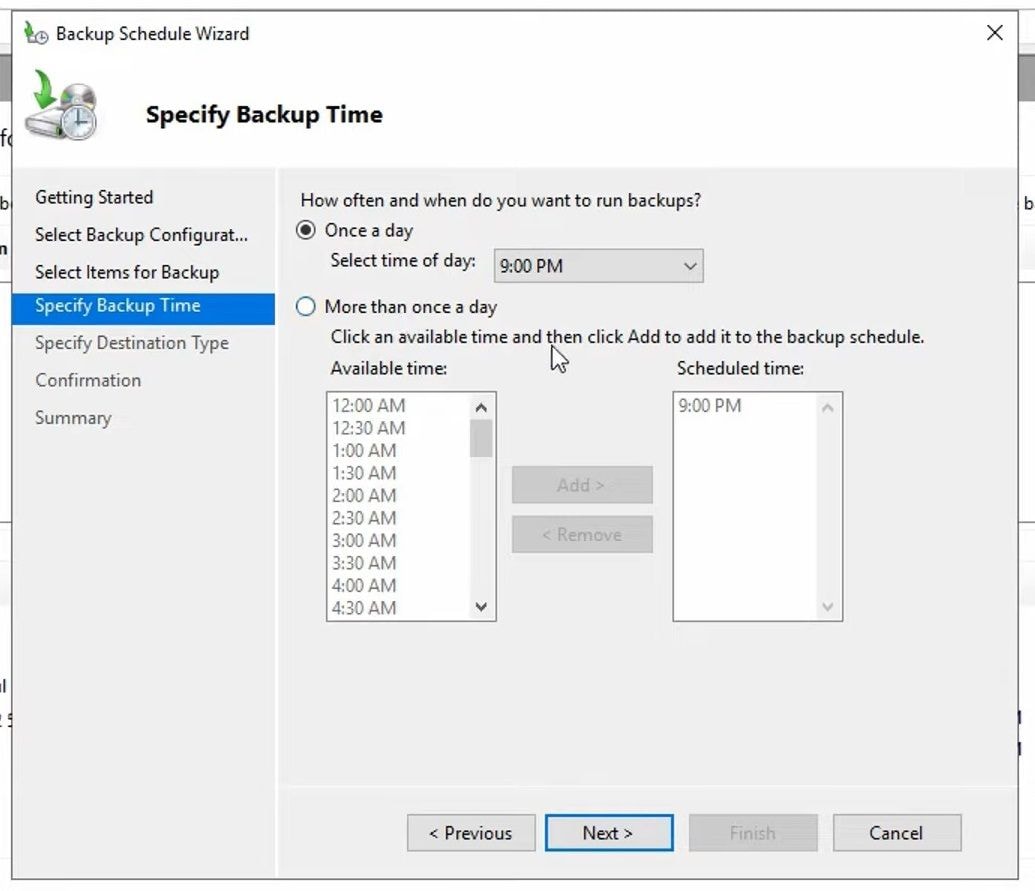
- Next, set the time for your backups.
- Then, choose the storage media or the destination type for your backup, which is your NAS device. Therefore, click on the Back up to a shared network folder option.
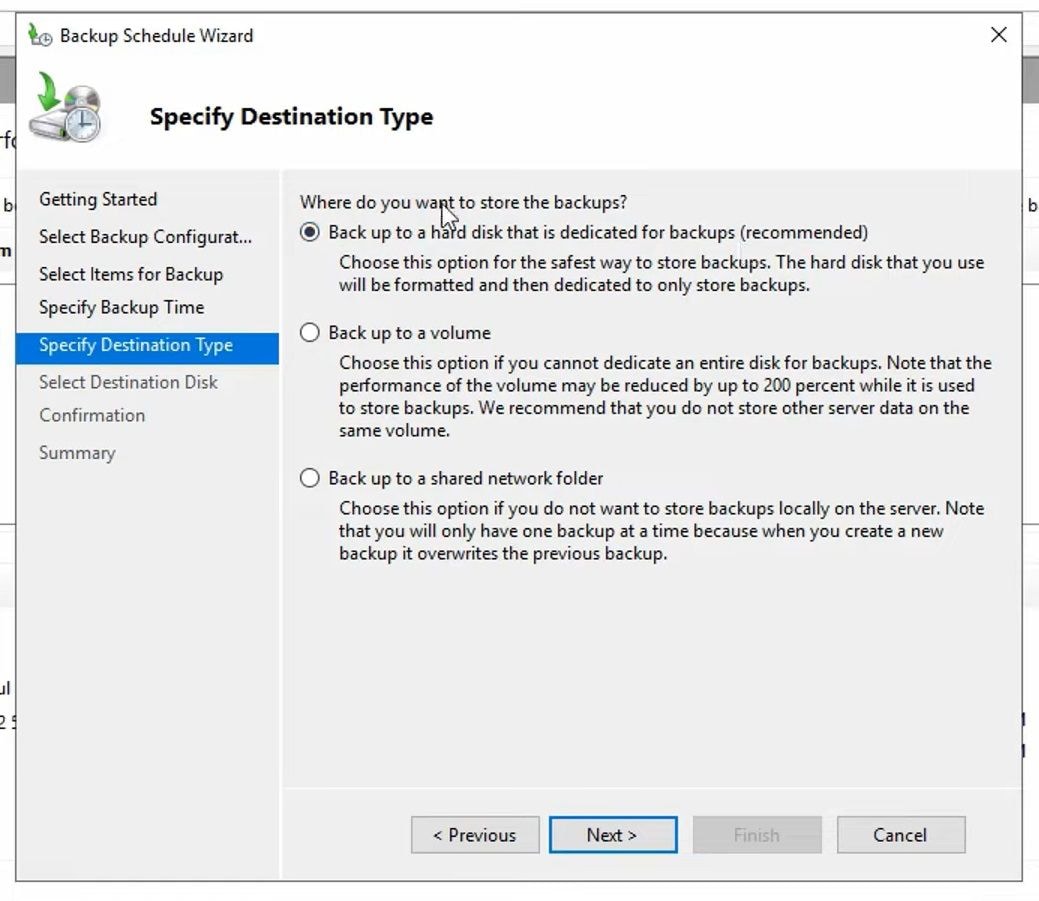
- Here, enter your NAS location and click Next.
- If everything is okay, click Finish.
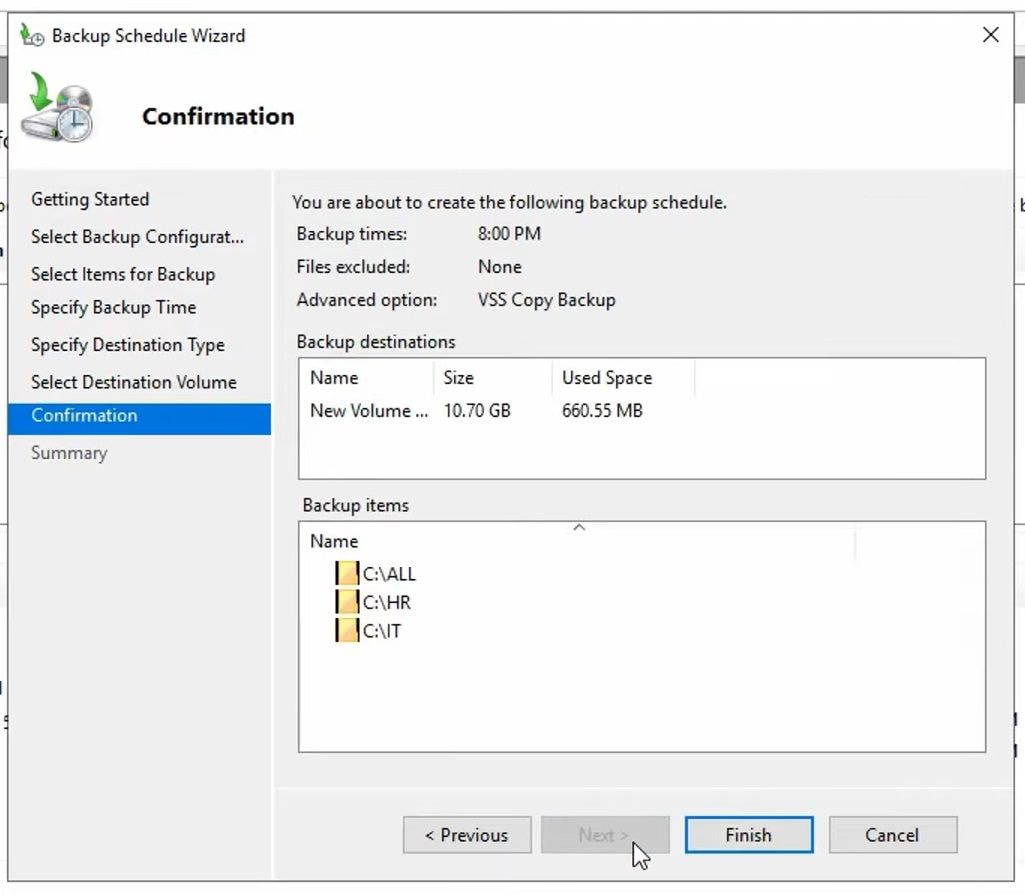
You’ve now successfully backed up your Windows Server to your NAS device using the Windows Server Backup feature.
Method 2. Backup Windows Server to Synology NAS Using Active Backup for Business Agent
The Windows Server can be backed up to a Synology NAS device using Active Backup for Business agent developed by Synology. This agent is completely free and easy to use. It’s an amazing tool for scheduling backups and choosing which backups to store in your Synology NAS device easily and neatly.
Let’s go through the process of connecting your Synology NAS device to your Windows Server using this software:
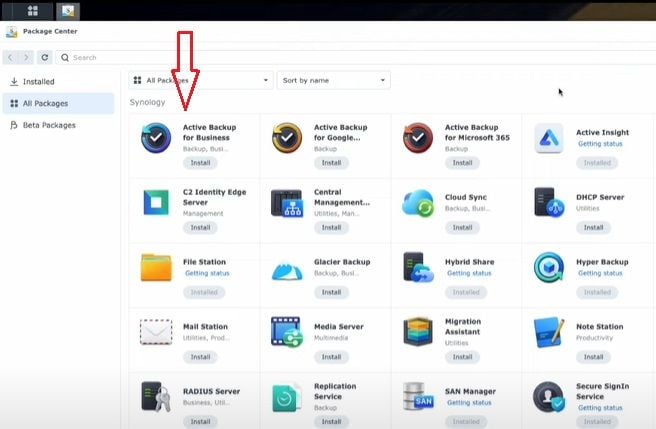
- Open Synology Package Center and find Active Backup for Business. Click on it, then click Install.
- Once installed, run the software and log in with your Synology account.

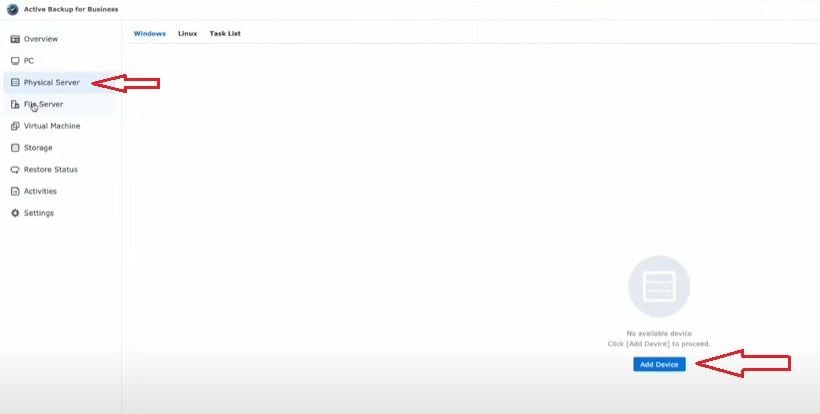
- On the left side of the screen, click on Physical Server, then click on Add Device.
- When you click OK, you’ll see a pop-up window that explains how to add a Windows Server device.
- It will say you need an agent to install it on the Windows server. You’ll see under the first step that they listed the option to choose between 32-bit and 64-bit. Click on the one you have.

- Click on the agent you’ve just downloaded and follow the steps to install it.
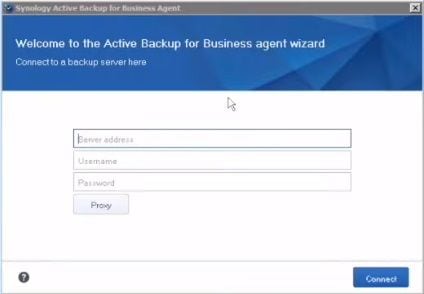
- It will ask you for your server address, which is the IP address of your Synology NAS, and your username and password. Once you’ve typed that in, click Connect, then OK.
- You’ve now successfully connected Active Backup for Business agent to your NAS device, and you can see it in the PC section.
Now that you’ve installed the Synology NAS device to your Windows Server, let’s see how you can start the Windows Server to Synology NAS backup process:
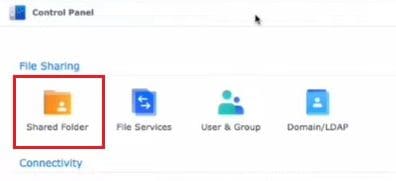
- Open the Control Panel on your Synology NAS and click on Shared Folder.
- There, create a new folder for your Windows Server backups.
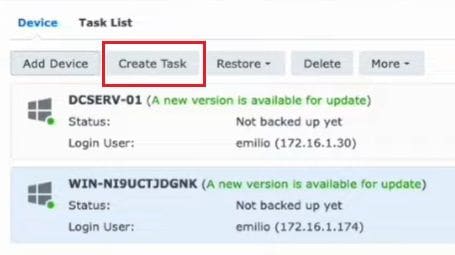
- Now, go to Active Backup for Business agent and, under the PC section, click on Create Task.
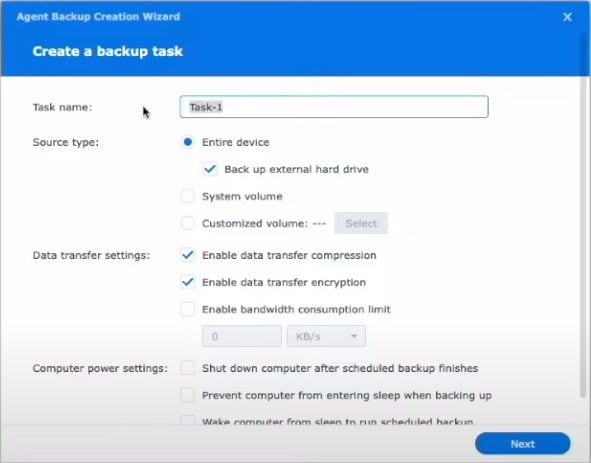
- Choose a name for your backup task, click on what you want to back up, then click Next.
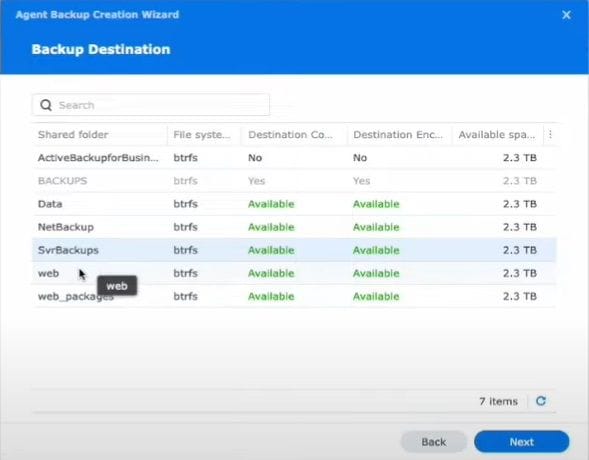
- Then, choose the backup destination, which is the new folder on Synology NAS you’ve created. Click Next.
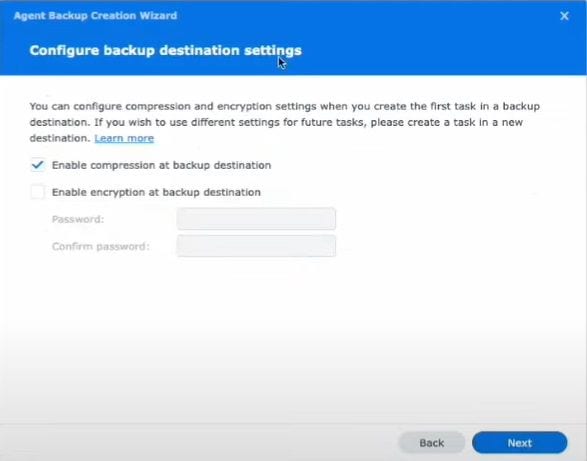
- Choose the destination settings you prefer and click Next.
- The next window will ask you if you want a manual backup or a scheduled backup, which is an automated backup for which you set the time of backup. Then, click Next.
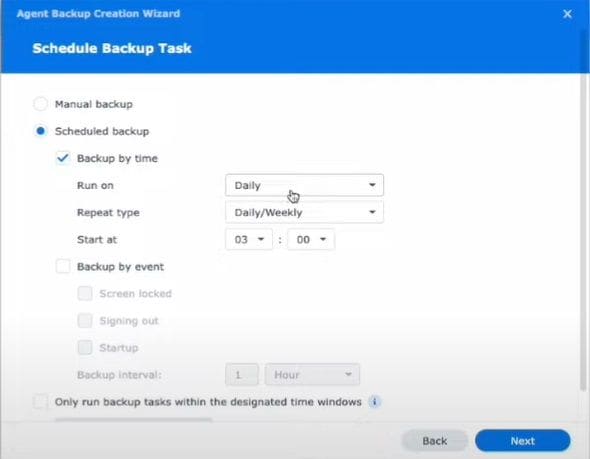
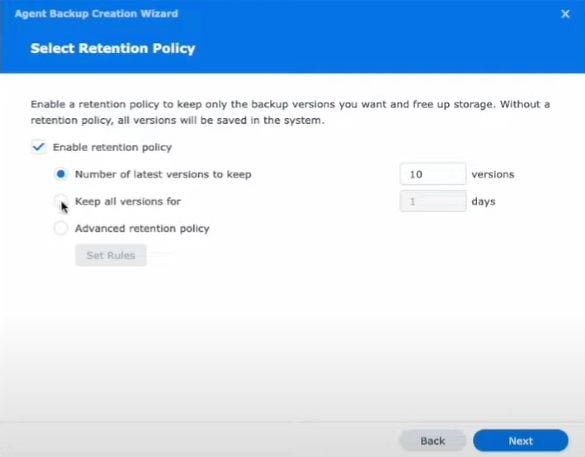
- Select the retention policy that asks you how long you want to keep your backups. Click Next again, then click Done.
You’ve now successfully started the Windows Server to Synology NAS backup process, which you can check in the Task List.
Method 3. Backup Windows Server to NAS Using AOMEI Backupper
Wondershare UBackit is an amazing tool for backing up data from your Windows Server to a NAS device. It’s practical and has a user-friendly interface that offers amazing facilities such as backup management and automation of the process.
Once you’ve mapped your NAS to your Windows system, you can start the process of backing up your Windows Server to a NAS device like Synology, QNAP, WD, etc. The steps are the following:
- Download and install Wondershare Ubackit on your Windows device. Then, open the app and click on Backup > Files & Folder Backup.
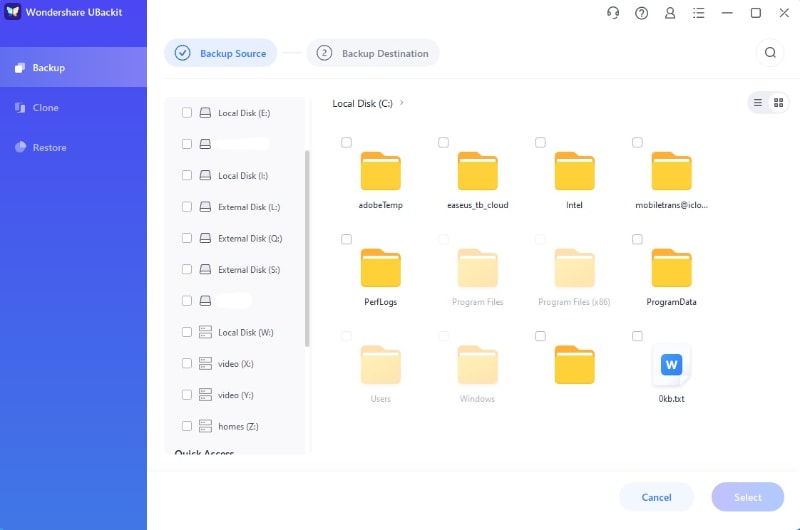
- Here, select a place for all of your files to back up, which is your NAS device.

- Then choose the backup source, meaning the location of the data you want to backup.
- Next, choose the backup destination, which would be your connected NAS device. Finally click the Backup button to start the Windows Server backup to NAS process.

- Once you’ve done all that, the backup process will start. When the backup process is finished, you’ll see all your backed-up data listed there.
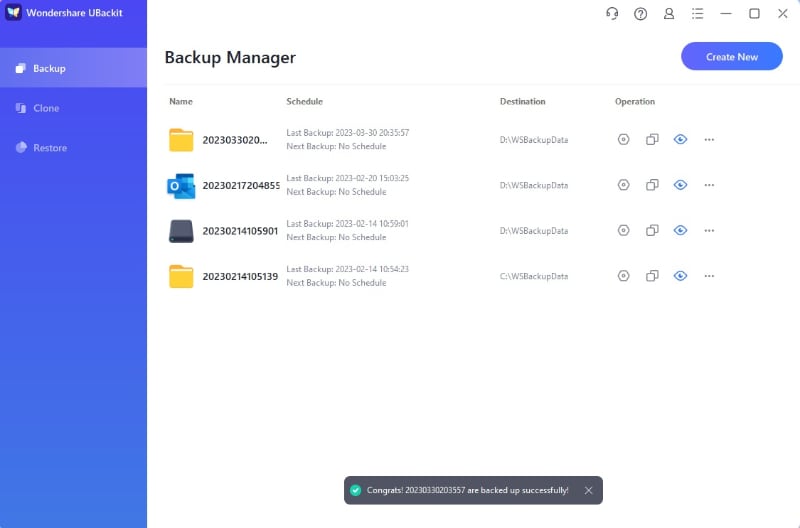
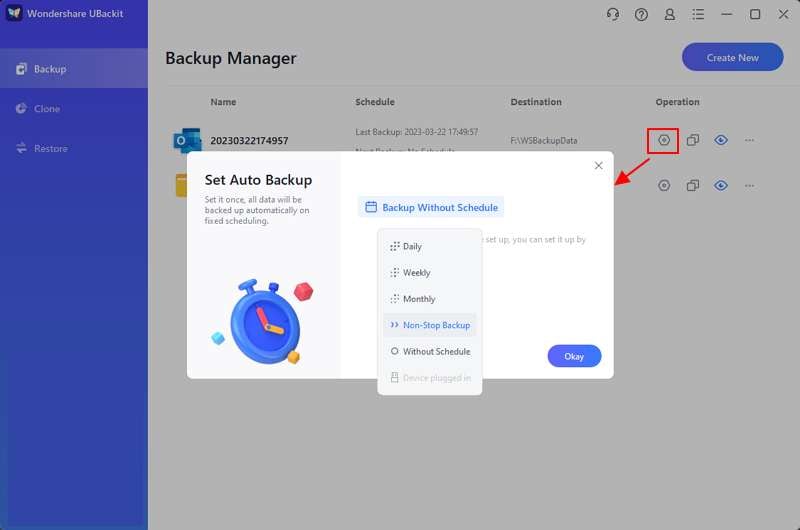
- Furthermore, the backup item displays four icons- Schedule, Backup, Preview, and Rename/Encrypt/Delete. For instance, by selecting the Schedule icon, you can establish an automated backup schedule to update your backups regularly, be it daily, weekly, monthly, or uninterrupted.
And you’re all done. UBackit is extremely easy to use and offers a quick backup process. Now, you can have all your data from your Windows Server safely secured and backed on your NAS device.
Conclusion
Windows Server offers a built-in feature to back up your entire server, files, folders, etc. However, Windows Server Backup offers only that – a backup option. That’s why it’s best to implement a NAS device in your workplace.
Not only does it provide backup purposes, but it also offers many other features, such as centralized storage, remote access, additional storage capacity, etc. There are three easy ways to back up your Windows Server to NAS using Active Backup for Business agent, UBackit, and Windows Server Backup.
With this backup guide, you’ll be able to enjoy the numerous benefits of using NAS in a business environment.


