
 TL;DR:
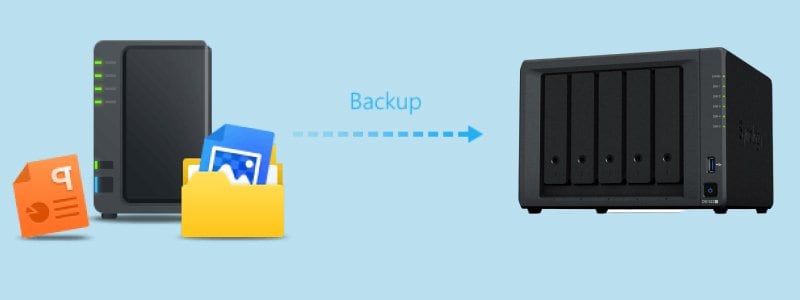
Back up a Synology NAS to a remote NAS directly using Synology Hyper Backup for native device-to-device transfers, or use Wondershare UBackit on a connected computer for automated daily, weekly, monthly, or continuous scheduling.
● Synology Hyper Backup requires both the source and destination NAS devices to run DSM 6.0 or higher and must be installed on both systems prior to configuration.
● Wondershare UBackit requires a PC intermediary, meaning you must first mount both NAS systems to your computer using their respective IP addresses and passwords before initiating the disk backup.
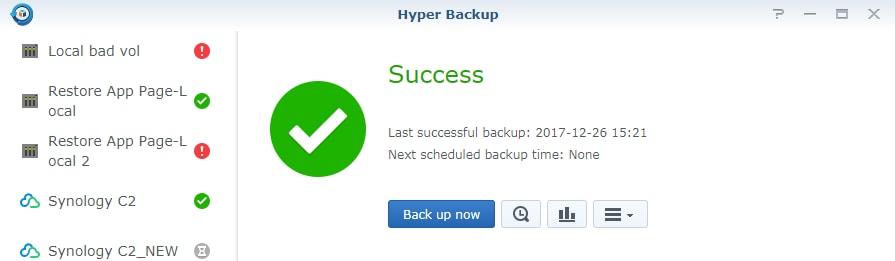
● Hyper Backup allows you to configure client-side encryption to restrict password-less access, compress backup data, and enable backup rotation directly within the NAS environment.
Ask AI for a summary
 ChatGPT
 Perplexity
 Gemini
 Claude
 Grok
Grok
Synology NAS has been on the market for some time now. One of the reasons why these devices are so popular is that they give flexibility, different access options, and backup options. Even though this is super convenient, it takes some time and work to set everything up.
If you already use a remote NAS or plan on setting one up, you should consider backing it up. You’ll be happy to know you can do this independently without anyone’s help. In this post, you’ll find everything you need to know about Backing Up Synology NAS to a remote NAS. So let’s start.
What Is a Remote NAS?
A remote NAS is a device you can access externally from any other device via the internet. DSM has all the tools you can use to set up remote access to Synology NAS quickly, allowing you to sign into various services using your web browser and entering a domain name.
Furthermore, if you need direct access to some services, you can add specific ports on your network-attached storage for each individual service with port forwarding rules. Some of the common methods used for accessing Synology NAS remotely are:
- Using port forwarding and mapping ports on routers to the desired IP address;
- Using DDNS to set up an IP address hostname for your network-attached storage;
- Using QuickConnect to create a customized IP address or ID and connect with a remote NAS.
Why Backup Your Synology NAS to a Remote NAS
Remote access is a massive benefit for anyone storing essential data on their NAS, which is especially true if you’re constantly adding and saving new data. On the other hand, remote access allows you to store files while on the go if you’re using your NAS for work and have to store new data constantly.
Even though setting up remote access is more complex than other methods, this option is also more secure. Hackers must go through multiple layers of devices and protocols before accessing your device. Most of the services and tools we use today are online, and this kind of setup allows you to move data from these applications to your NAS device directly.
That makes remote NAS a perfect option for backing up other devices. You can instantly secure your files and restore them if needed. It’s one of the most convenient backup options, especially if you must do this regularly and constantly make critical updates.
Set Everything Up Before Backing Up Synology to Remote NAS
You must do some things before backing up to a remote NAS.
- Set up a user since all services and apps you want to use with your NAS must have the right DSM account with all of the permissions.
- Configure the destination location so that users from that side of the connection can’t access anything outside the backed-up folder. Furthermore, you should consider permissions and how to use this backup.
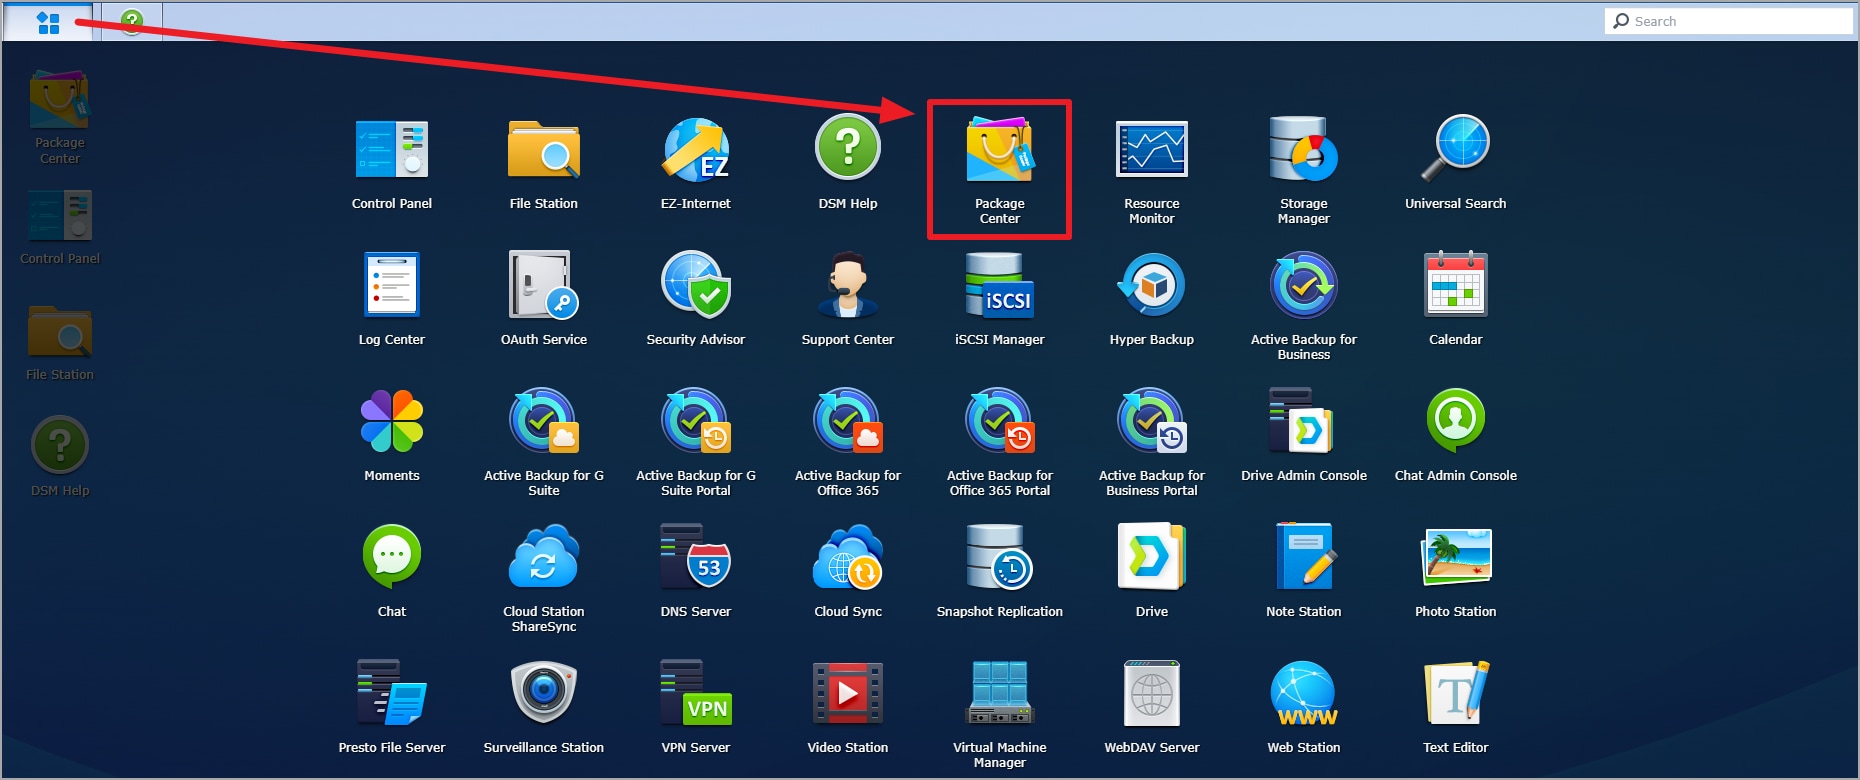
- Install Synology Hyper Backup on your remote NAS and the device you want to back up by following the steps below.
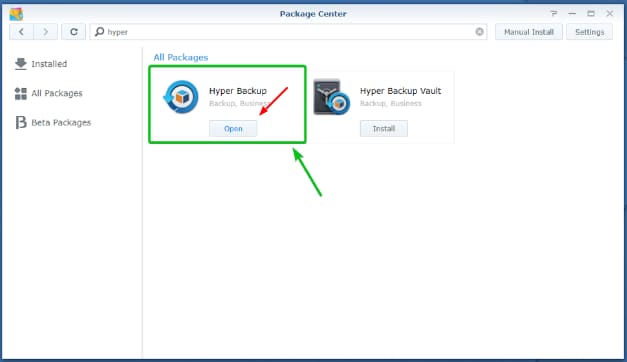
- Start Package Center.
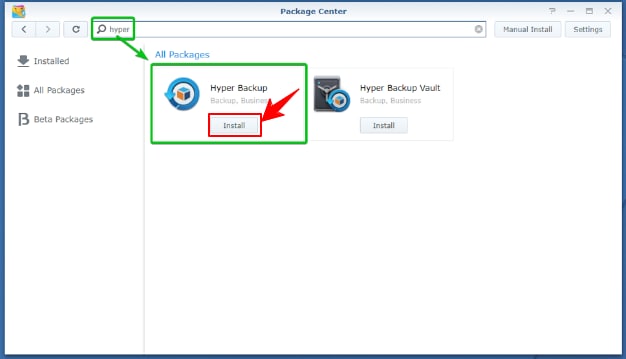
- Search for Hyper Backup in the search bar and click Install.
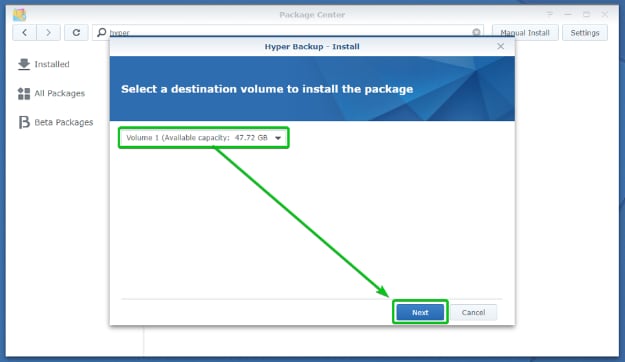
- Select your installation destination in the dropdown menu and then click Next.
- You will be redirected to the confirmation page. Click Apply to start installing.

- Wait until Hyper Backup has finished installing and click Open to start.
- Configure both NAS devices and connect before you can start the process. Remember that you must run on at least DSM 6.0 to use Hyper Backup.
How To Back Up Synology to a Remote NAS With Hyper Backup
- Step 1: Start Hyper Backup, click + in the bottom left corner, then click Data backup task.
- Step 2: When you reach the Backup Destination page, click Remote NAS Device and Next.
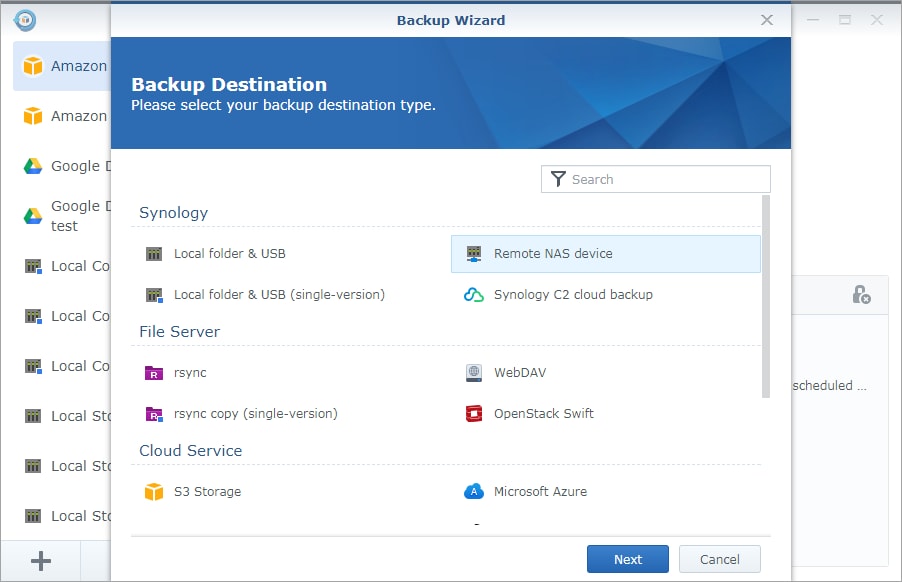
- Step 3: On the next page, select the Create backup task option and provide account information and IP address necessary for connecting to remote devices.
- Step 4: Select the shared folder as the destination, select the source folders you want to back up & the applications, and click Next.

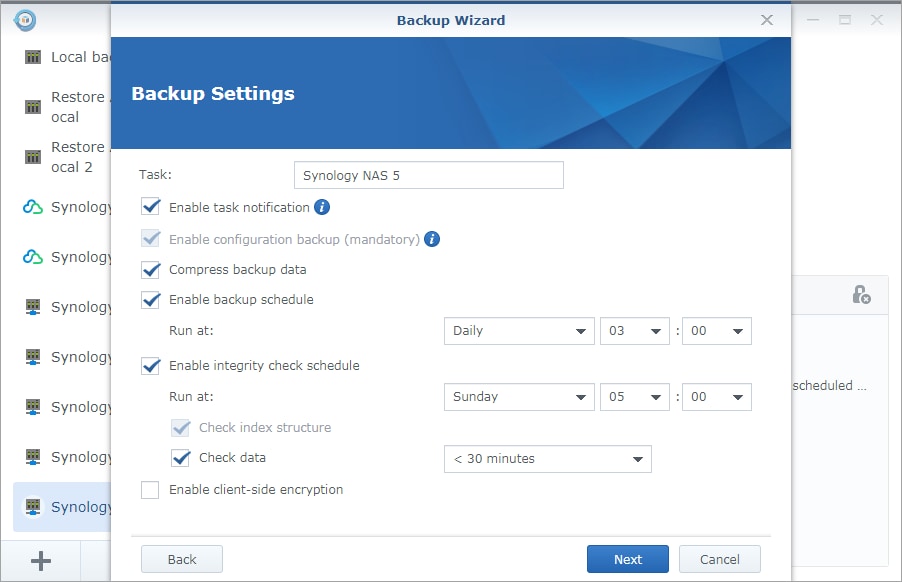
- Step 5: Configure backup settings.
- Give the name of your backup task (Task);
- If you want to be notified of the task status, check Enable task notification;
- If you want to compress backup files, check Compress backup data;
- To turn on automatic backups, check Enable backup schedule and specify time intervals;
- The Enable integrity check option lets you check data periodically for corruption;
- To prevent anyone from accessing backup data without a password, select Enable client-side encryption;
- Click Next.
- Step 6: On the next page, select Enable backup rotation and configure your backup rotations.
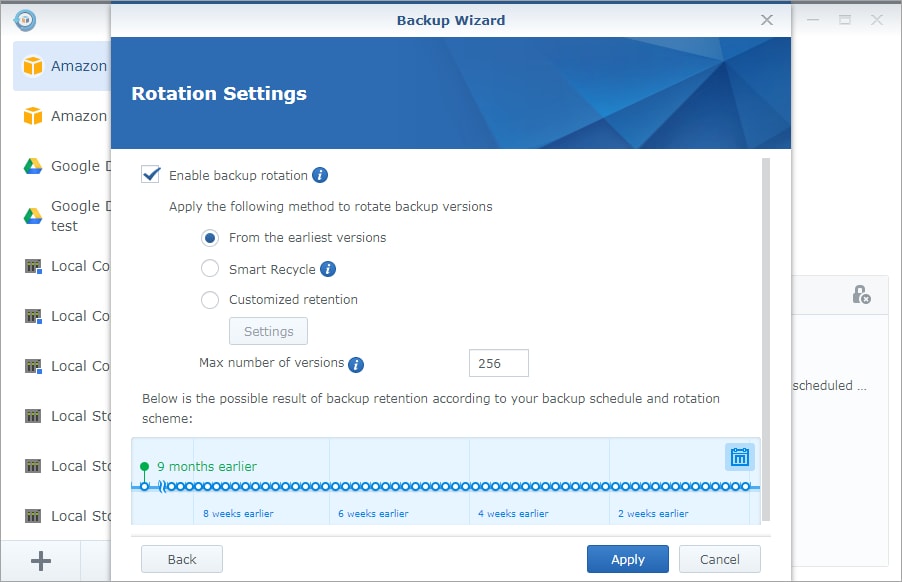
- Step 7: Once you’re done, click Apply, follow the instruction, and click Yes to complete your backup. Wait until Hyper Backup has completed the process.
How To Back Up Synology to a Remote NAS Automatically With Wondershare UBackit
Wondershare UBackit is one of the best backup tools currently on the market, giving you many backup options. The best thing about UBackit is that performing backups is so simple. Before you start the program, mount your NAS systems with the correct passwords and IP addresses to your computer.
Here’s how to back up Synology to a remote NAS after downloading and installing this backup software on your PC:
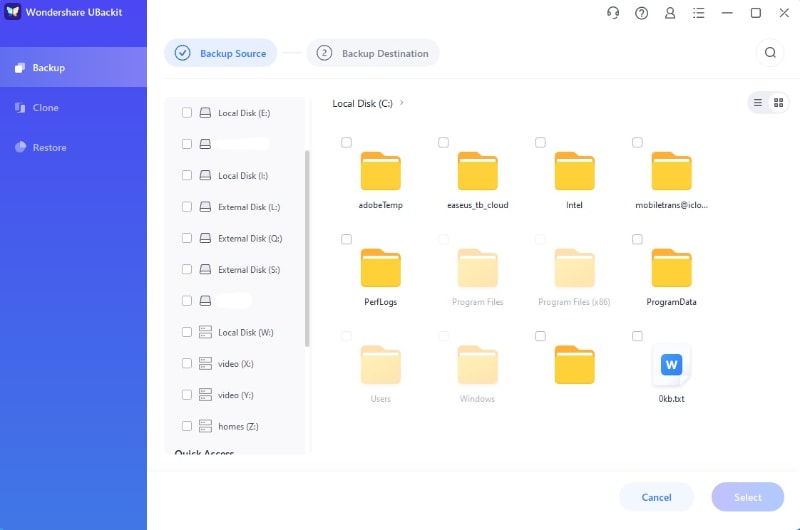
- Step 1: After starting Wondershare UBackit select the Disk Backup

- Step 2: Select the Synology NAS you want to backup and click Select.
- Step 3: Now, select the remote NAS as the backup destination in the NAS Server

- Step 4: Wait until the process is complete. Ubackit will notify you once the backup done.
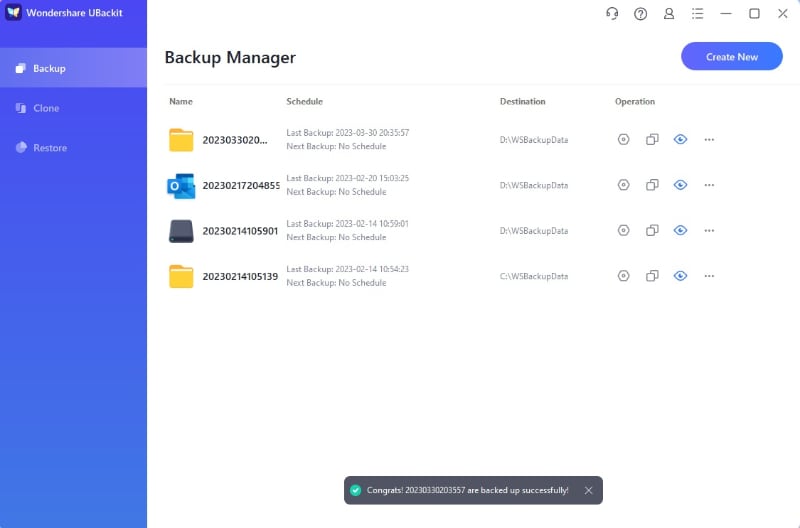
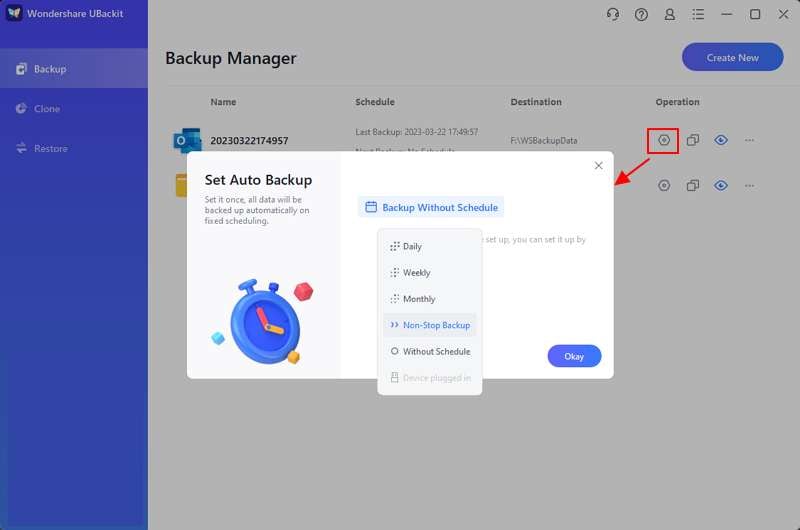
By clicking the Schedule icon located next to the backup, you can choose to set up automatic backup for your Synology data. This enables you to schedule a daily, weekly, monthly, or continuous backup to avoid any potential data loss.
Conclusion
These are the two best options to back up your Synology NAS to a remote NAS. We recommend trying Wondershare UBackit since it’s a much simpler method, and anyone can do it.


