
 TL;DR:
To back up a Mac to a Synology NAS using Time Machine, you must first create a dedicated NAS user with a designated Shared Folder, enable SMB or AFP protocols in DSM, and select this target via the Mac System Preferences.
● For DSM 7.0 and newer, enable SMB or AFP directly in the File Services tabs, whereas DSM 6.2 and older requires enabling the Bonjour Time Machine broadcast under the Advanced tab.
● Assign a storage quota to your newly created Time Machine user within the Synology DSM to prevent incremental backup data from consuming the entire volume space.
● If data is lost before a backup is completed, restoring files requires a third-party recovery utility like Wondershare Recoverit to scan the affected Mac drive or NAS server.
Ask AI for a summary
 ChatGPT
 Perplexity
 Gemini
 Claude
 Grok
Grok
Synology NAS products are top-rated for several reasons. These products offer quality, can work with multiple tools, and perform various actions. The Mac Time Machine is one of these tools that many people find useful.
Mac users have probably heard about Time Machine and want to learn more about it. Today we'll talk about how you can use Time Machine to backup data to Synology NAS on Mac devices. Before we get to that, let's get back to the basics to give you a complete perspective.
Part 1. What Is Time Machine?
Before anything else, let's learn more about Time Machine and its design.
Time Machine is a default macOS backup software that works with network disks and local storage devices. In most cases, Time Machine is used for external drives connected through Thunderbolt or a USB socket. The first Time Machine was introduced in the Mac OS X 10.05 Leopard version in 2007.
The software was refined and improved over the years, and ever since then, it has been a standard part of every macOS software package for desktop devices and laptops. Time Machine was eventually added with APFS support, allowing it to back up more quickly, reliably, and compactly.
The tool creates incremental file backs that you can restore in the future. Users can restore specific files or whole systems. Time Machine works with a huge number of apps, including iWork and Mail, and people often back up and restore presentations, text documents, contracts, etc.
How Does Time Machine Work?
Time Machine lets Mac users back up their devices over the network and back up to various NAS (Network Attached Storage) devices, depending on the software version. In other words, it's built to back up files to Synology NAS devices and different NAS servers.
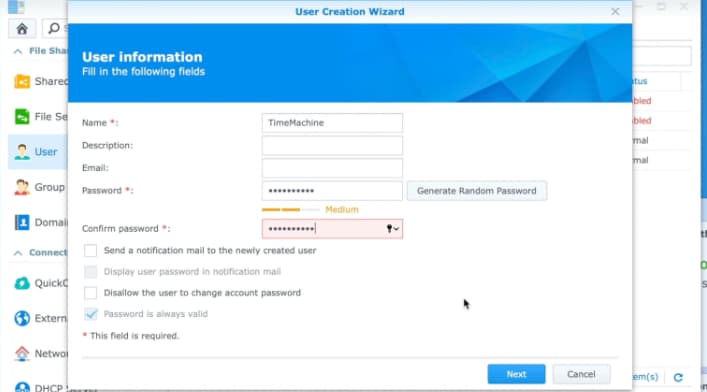
Time Machine supports both the SMB and AFP protocol, and it's equipped with everything you need to set up backups for your Synology NAS. Before you can do anything in Time Machine, you will have to create a user by following the steps below:
- Go to the Control Panel and click on User.
- Once you're here, you can click on User Creation Wizard.
- Fill out all the required information and add the name TimeMachine with your desired password.
Part 2. How To Back up on Mac to Synology NAS Using Time Machine
Here is a step-by-step guide on using Synology and Time Machine together to back up files to your NAS device using macOS.
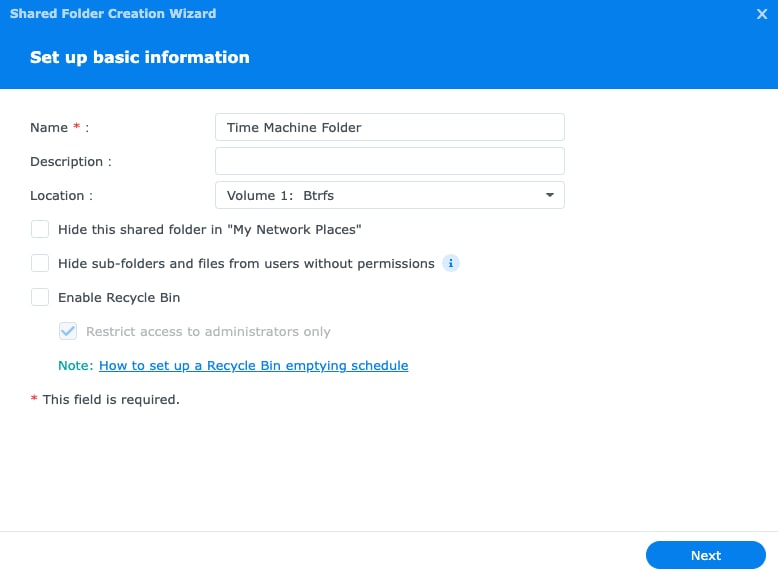
Step 1: Create a Shared Folder on Synology NAS
The first thing you need to manage and store files on Synology NAS is to create a Shared Folder.
- Open your Synology NAS DSM as Administrator
- Go through Control Panel > Shared Folder > Create to enter the Shared Folder Creation Wizard.
- Give a suitable name for this folder (e.g., Time Machine Synology NAS Device) and choose your desired location.
- Modify the advanced setups for the shared folder as appropriate and then continue through the wizard to finalize the procedure.
Step 2. Set the Shared Folder as Time Machine Backup Destination
After creating the Shared Folder, you need to select it as your Time Machine's backup target folder by following:
- Open the Control Panel> File Services in Synology DSM.
- Enable the file service based on your DSM version:
- DSM 7.0 and after: For SMB, move to the SMB tab and check the Enable SMB service For AFP, go to the AFP tab and click on the Enable AFP service choice.
- DSM 6.2 and prior: Travel to the SMB/AFP/NFS tab. Check the Enable SMB service box for SMB or the Enable AFP service box for AFP.
- Then, click the Advanced tab and pick the Enable Bonjour Time Machine broadcast via SMB or Enable Bonjour Time Machine broadcast via AFP option based upon what file service is used. After that, hit on Set Time Machine Folders.
- Select the Shared Folder you just created from the Time Machine directory and save your settings.
After that, you need to create a user for Time Machine in DSM. Additionally, assigning a quota to your backup records is recommended to avoid backup data taking up too much space on your volume. You can visit the Synology tutorial center to learn how to limit the space taken up by Mac Time Machine.
Step 3: Start Time Machine
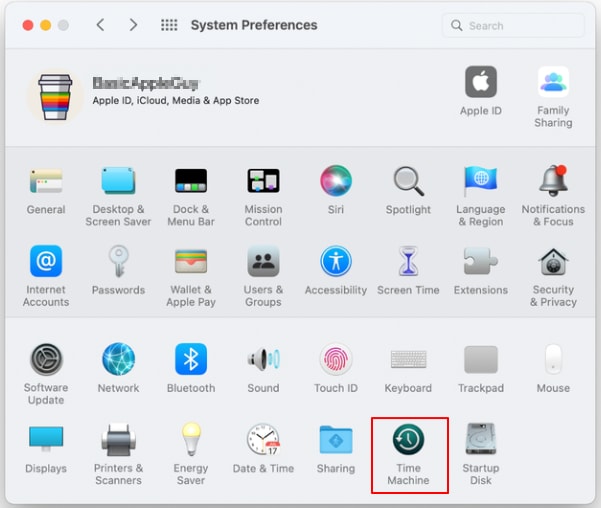
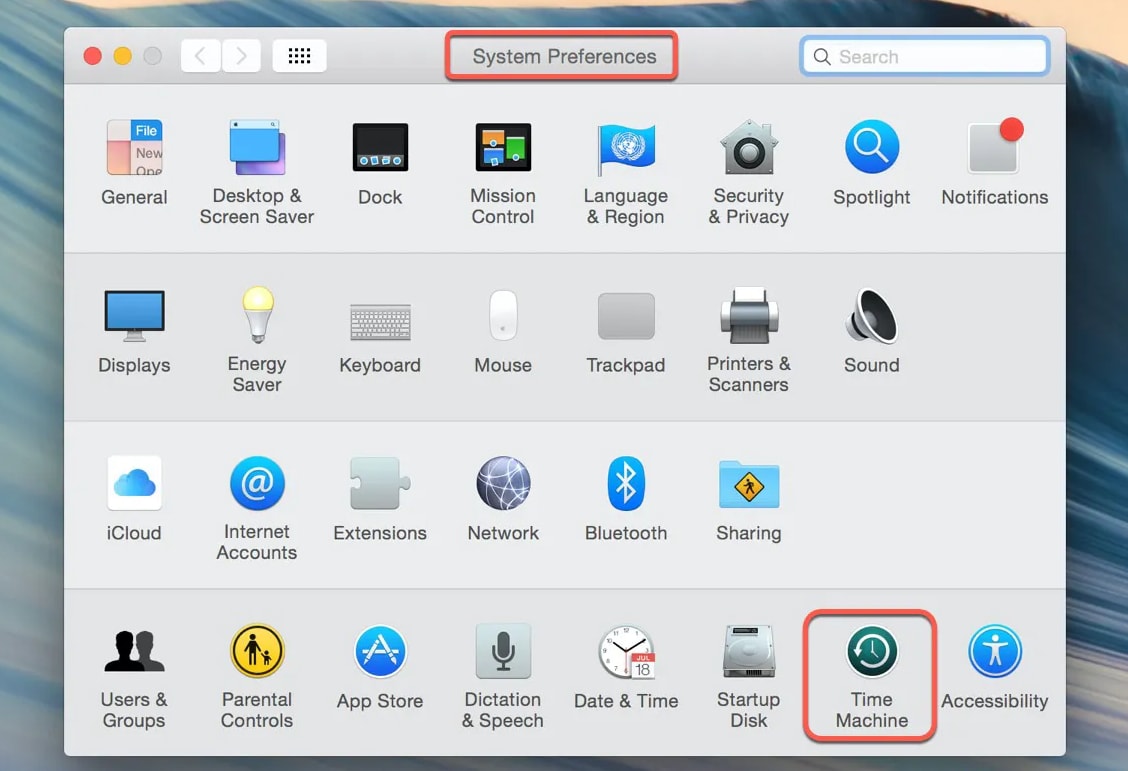
Now, you can start Time Machine on your Mac to proceed with the backup. Go to System Preferences, look for Time Machine, and then click on it. If you can't find Time Machine in System Preferences, you can search for it in the upper right corner and press Return/Enter to get the desired results.
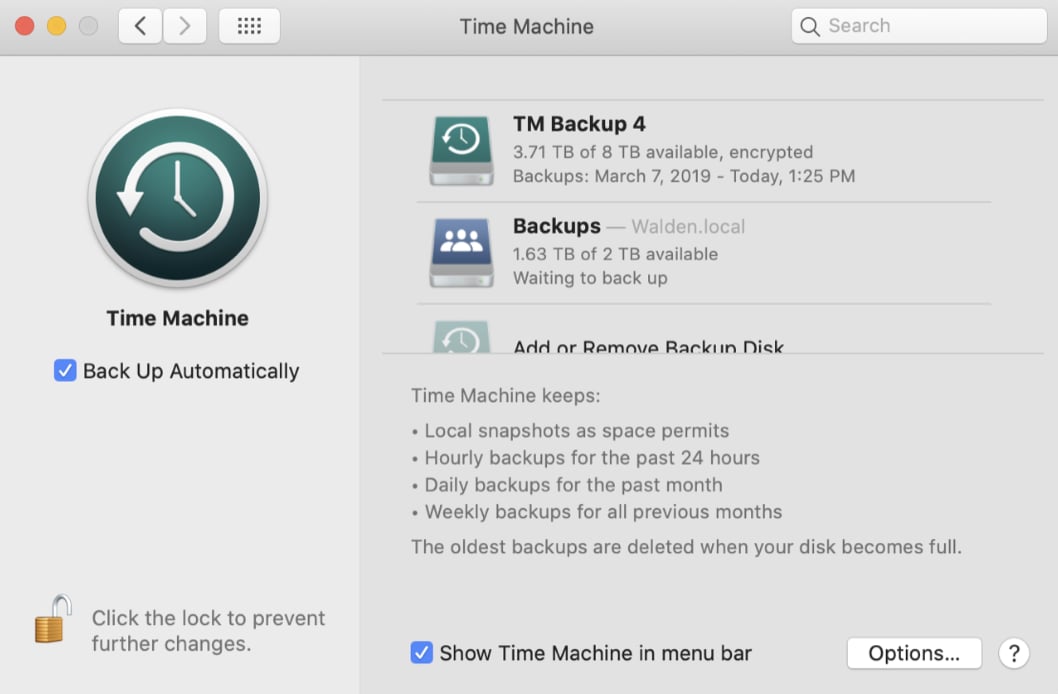
Step 4: Select Synology NAS as the Backup Disk
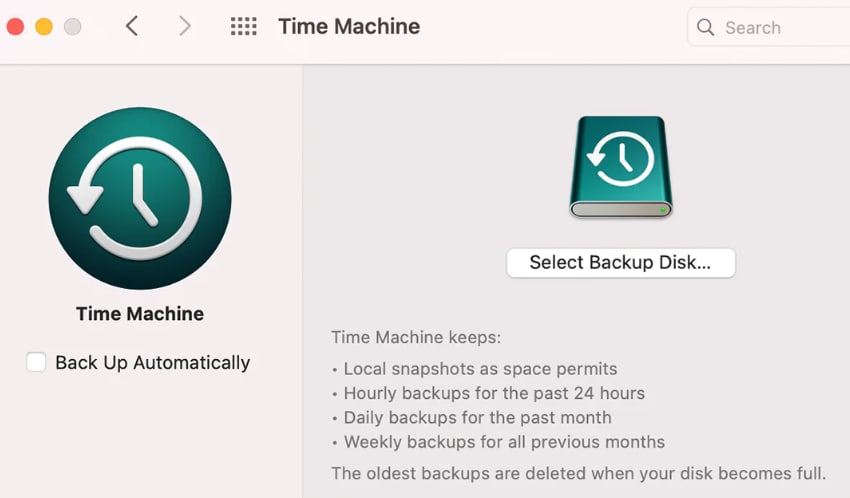
Once you've opened your Time Machine, you will see two backup options: Back Up Automatically and Select Backup Disk. Click on Select Backup Disk and choose the Shared Folder (e.g. Time Machine Synology NAS Device) you just created on your Synology NAS device to use.
Of course, you will have to connect your NAS first to your Mac device so that you can select it. You can also check the Back Up Automatically option if you want Time Machine to back up your Mac constantly.
Step 5: Add Your Credentials
You will be asked to provide account credentials to connect to the Shared Folder. Enter the username and password of the user you just created in Step 2. Then, select "Use Disk," and you will get a popup that asks you to confirm your connection.
Step 6: Start Backup
That's all! Simple as that, your Mac Time Machine will start backing up to Synology NAS. Depending on the size of files, your NAS device, and the performance of your computer, you will have to wait until Time Machine finishes backing up.
You may also be interested in: Best NAS for Mac Time Machine
Part 3. How To Restore Lost Mac Files From Synology NAS Backup
Now that you've set up your backups to Synology NAS, it's also good to learn how to restore files if you deleted or lost important data on your Mac computer.
Step 1: Go to "System Preferences" and Launch Time Machine.
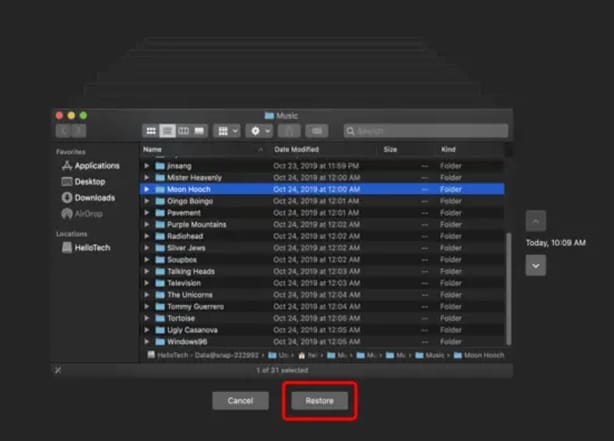
Step 2: Browse through the timeline using arrows to find local backups and snapshots.

Step 3: Select the files or folders you would like to restore, then click on them and click on the "Restore" button. Your files will be restored to their original location.
Part 4. How To Restore Lost Files From Mac Without Backup
Don't worry if you haven't yet backed up your files but need to recover them. There's a solution to this problem as well. You can use a third-party recovery tool like Wondershare Recoverit for Mac to do this.

Wondershare Recoverit – Leader in Data Recovery
5,481,435 people have downloaded it.
Ability to recover over 1000 file types from almost any storage media, such as Windows/Mac/Linux PCs, NAS Servers, USB drives, SD cards, external hard disks, digital cameras, etc.
Efficiently handle various data loss scenarios, including accidental deletion, emptied recycle bins or trash, formatting, lost partition, virus attack, RAW, and RAID.
An intuitive interface that lets you preview the files before recovery. No payment is required if the files are unrecoverable.
Here's how you can use Wondershare Recoverit to recover files from Mac:
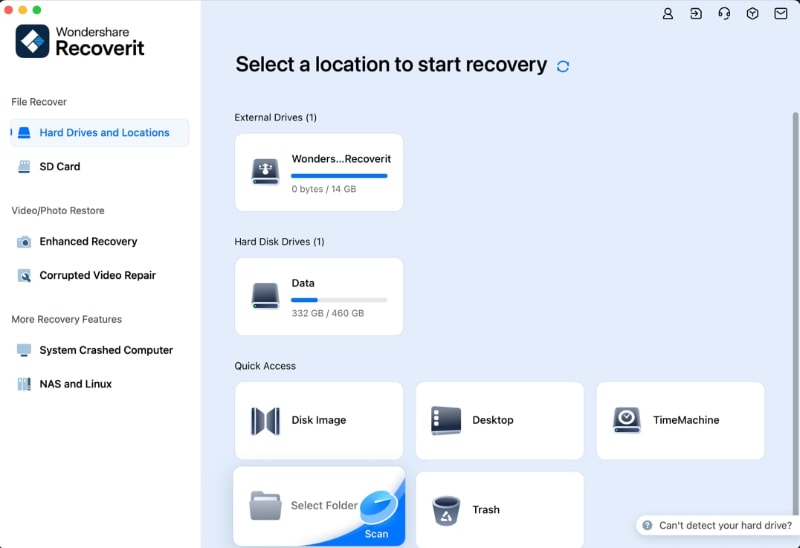
Step 1: Select the File Location
Launch the program after downloading and installing it on your Mac. Choose the disk or location where you lost your files under the Hard Drives and Locations tab.
Step 2: Scan for Lost Files
Recoverit will start scanning for deleted or lost files in the selected location immediately. You can stop the scanning process conveniently if you find your desired files.

Step 3. Preview and Recover
You can preview recoverable files before commencing the recovery stage. Finally, select the files you want and press the "Recover" button to have them back with you.

For Windows Vista/7/8/10/11
For macOS X 10.10 or later
Suppose you accidentally delete important files in your Synology NAS; you can also follow the video tutorial below to get your files back in no time.
For Windows Vista/7/8/10/11
For macOS X 10.10 or later
Conclusion
Follow these simple steps exactly as described, and you will back up to Synology NAS with Time Machine in no time. If you're doing this the first time, take each step slowly, and if you have to start the process from the beginning. Stay tuned and read our blog for more practical advice about using Synology.


