
 TL;DR:
You can back up a Synology NAS to another NAS by configuring a Network Backup task directly within DiskStation Manager (DSM) or by using third-party software like Wondershare UBackit.
● Before transferring data, both devices must share the same network, and you must choose between a one-way sync to preserve primary data or a two-way sync where deletions automatically affect both NAS devices.
● Native backups require DSM 4.x users to access the Backup Wizard through the Backup and Restore tab, while DSM 5.x users must create a network backup destination via the Backup & Replication tab.
● Wondershare UBackit supports cross-brand backups to devices like QNAP or WD, but this method requires mounting both NAS drives to a computer before executing a Disk Backup task.
Ask AI for a summary
 ChatGPT
 Perplexity
 Gemini
 Claude
 Grok
Grok

To keep your Synology NAS data safe, you can back it up to another Synology device. Why? Because that would ensure that you have a secure and stable system that enables you to save data from multiple sources, including other NAS devices.
Since NAS is a cutting-edge high-capacity storage solution of the 21st century, it’s only natural to rely on its storage options when saving your data. Read on to discover several backup methods to back up a Synology NAS to another NAS and the reasons to do this.
Steps to Take Before Backing Up Synology NAS to Another NAS
Before copying data between two Synology NAS devices, you must meet specific requirements to ensure your data is safe and secure. First, check your NAS connections to ensure both NAS devices share the same network.
Then, check the receiving NAS’ available space to ensure it can receive the files you wish to back up. In addition, you should decide how you want to sync your files. You have two options:
- One-way sync – back up your data to the receiving Synology NAS device but keep the primary data source unchanged.
- Two-way sync – this option will synchronize both NAS devices. Deleting data from one device will also delete the backup data on the other NAS.
Finally, decide whether to back up your data to another NAS manually or automatically. Keep reading to learn how to manually and automatically back up a Synology NAS to another NAS.
Back Up a Synology NAS to Another Synology NAS With DSM
Here are the steps to move your Synology NAS backup to another NAS running DSM 4.x or DSM 5.x.
With DSM 4.x
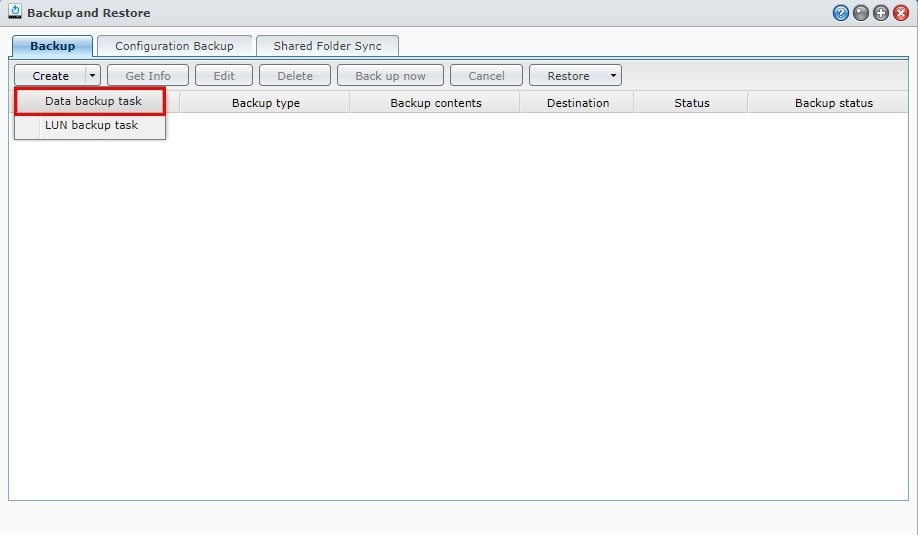
Step 1Sign Into DSM.
Run DSM, sign in, and locate the Backup and Restore tab. Select the Data backup task option.
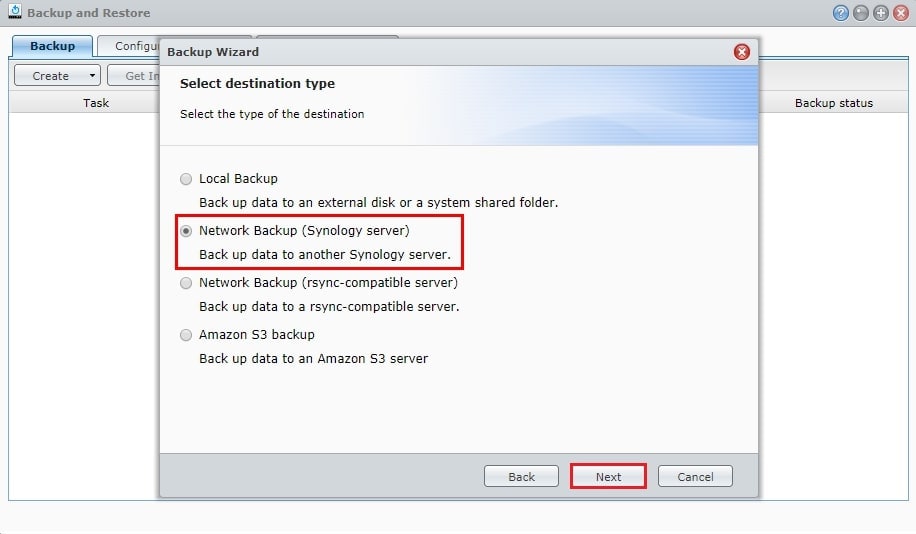
Step 2Run the Backup Wizard.
When the Backup Wizard window appears, click Network Backup (Synology server) to set another Synology NAS as the backup destination. Click Next.
Step 3Fill Out Server Information.
Enter the server information and select the backup destination in the Shared folder field. That will allow you to determine the shared folders, configurations, and application files you want to back up. Click Next.

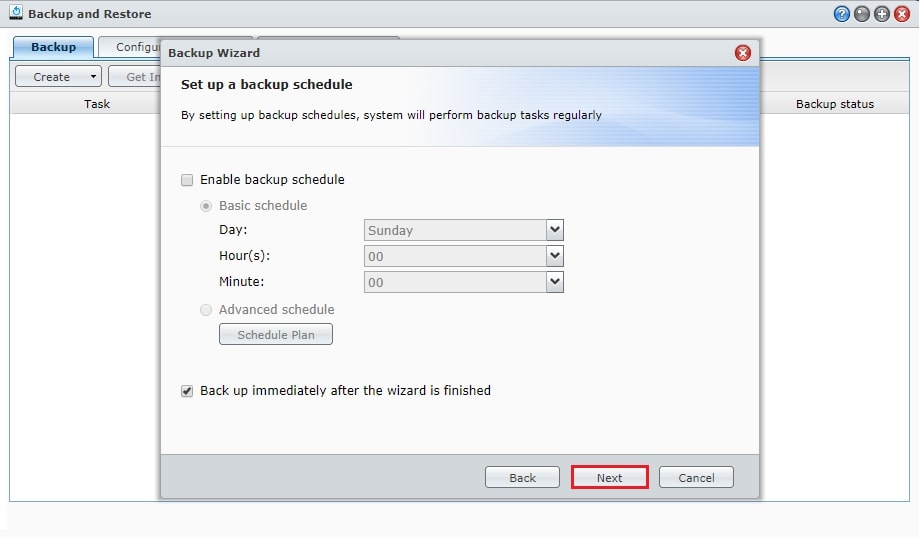
Step 4Set Up a Backup Schedule.
Tick the Enable backup schedule box to set the backup schedule manually or opt to Back up immediately after the wizard is finished. Click Next and wait for the system to complete the process. Click Apply to confirm your settings. The system will perform backup tasks according to your schedule.
With DSM 5.x
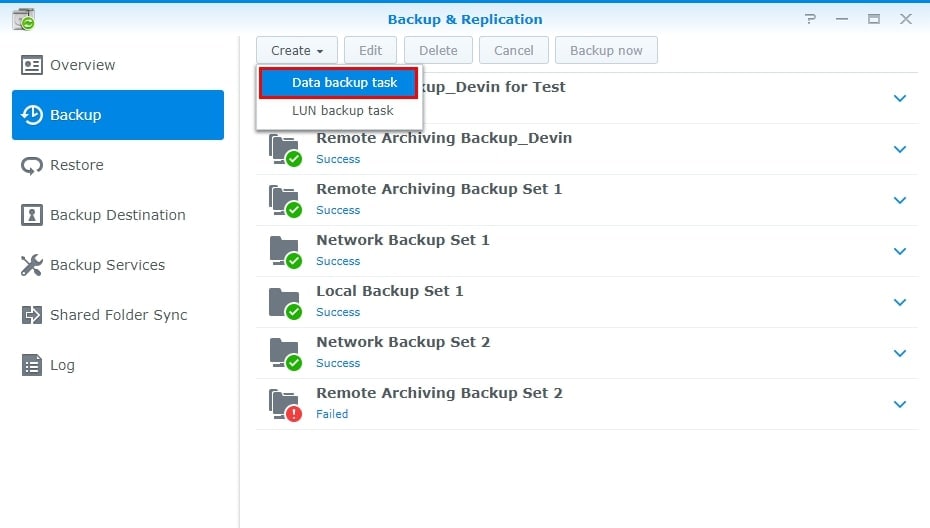
Step 1Sign Into DSM
Run DSM 5.x, sign in, and navigate to the Backup & Replication tab. Select Backup > Create > Data backup task.
Step 2Run the Backup Wizard
In the Backup Wizard, select Network Backup Destination and click Next.

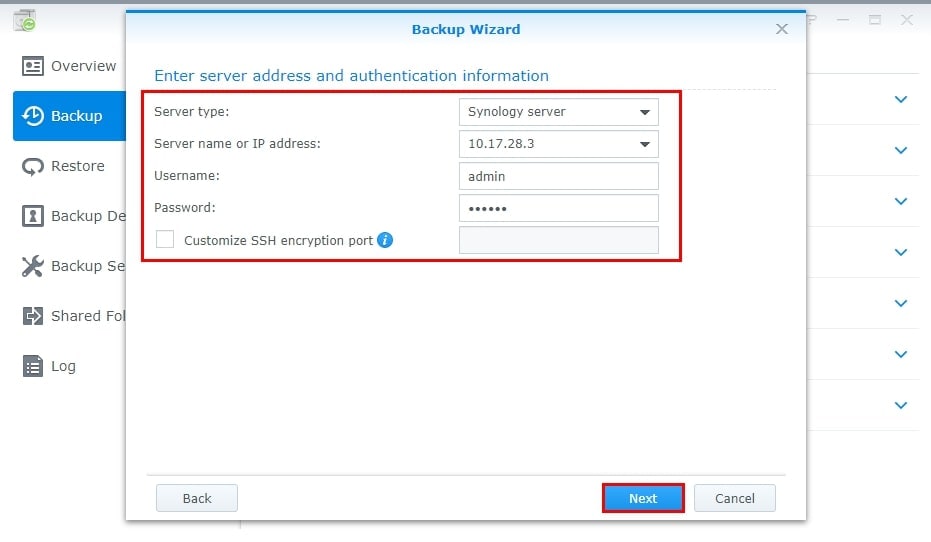
Step 3Enter Server Data
Fill out details such as server type, name, username, and password. Click Next.
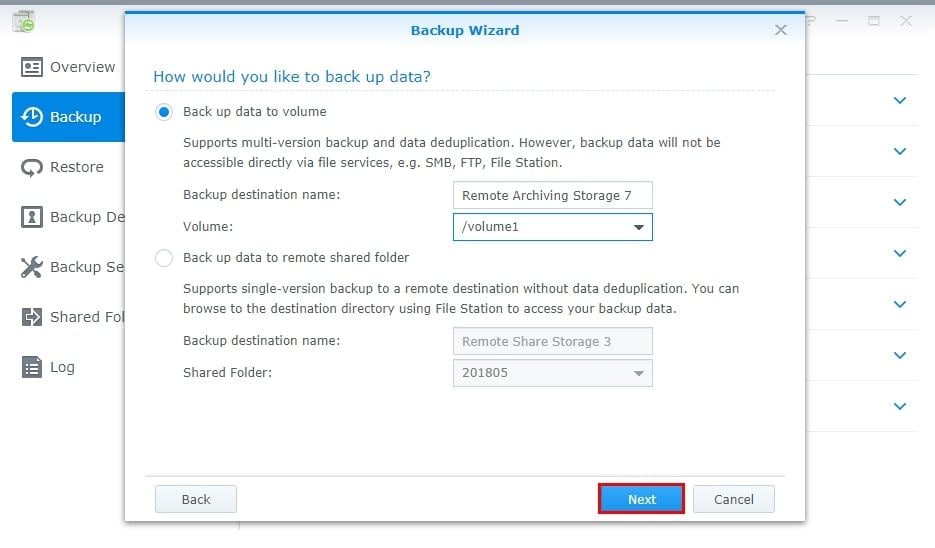
Step 4Select the Backup Option.
Choose how you want to back up your NAS data. Select the folders and applications for the backup and click Next. Configure backup and rotation options and click Apply.
Back Up a Synology NAS to Another NAS With Wondershare UBackit
If you want to use a third-party app to back up your Synology NAS data to another NAS, opt for Wondershare UBackit. The app allows you to back up your Synology NAS data to another Synology or all other popular NAS brands like QNAP, WD, AUSTOR, Drobo, etc. quickly. You need to mount both NAS devices to your computer to back up your files. Here are the steps to back up Synology to another NAS with Ubackit after the mounting process.
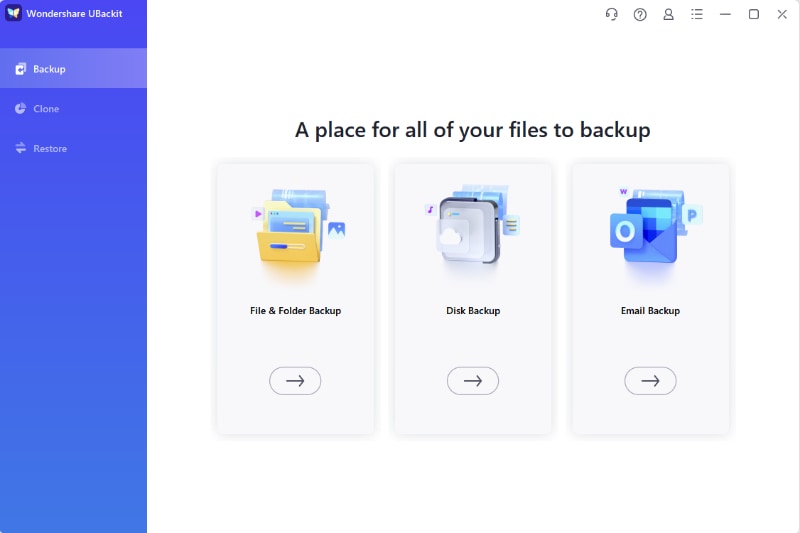
Step 1Select a Backup Option
Launch Wondershare Ubackit after downloading and installing. Then, choose Disk Backup in the Backup section.
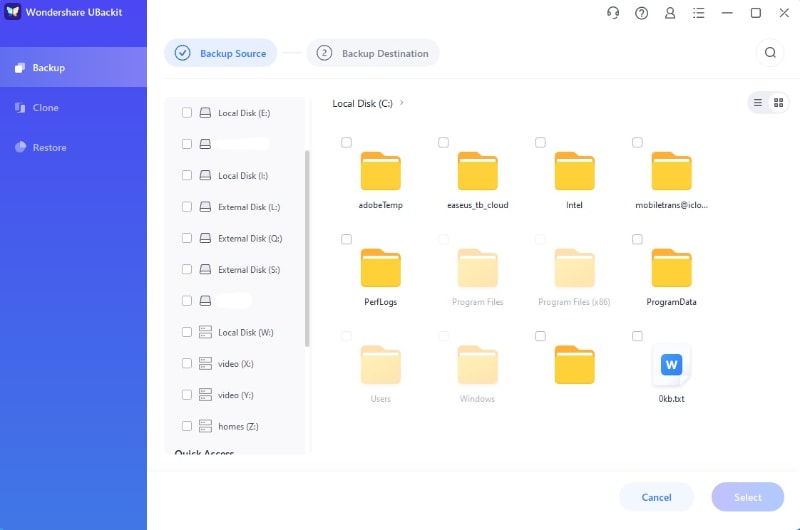
Step 2Choose a Synology NAS to Back Up
On the left panel, Ubackit will showcase all the available hard drives and connected NAS devices. Simply select the Synology NAS that requires a backup and click on Select.
Step 3Choose Another NAS as Backup Destination
Now, the backup software will display all available local drives, external storage devices, and other NAS systems connected to your computer. Select the NAS device with the data you want to back up and click Backup.

Step 4Complete Synology NAS to Another NAS Backup
UBackit will only need a moment to finish the backup process and notify you with a pop-up message.
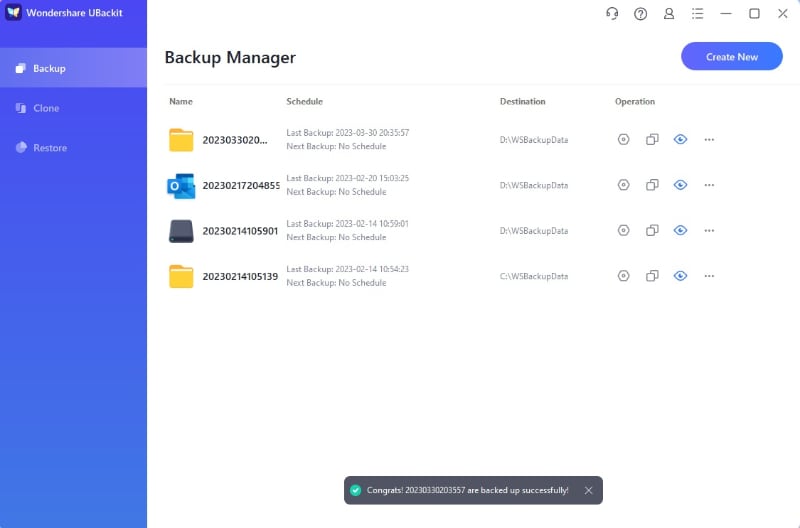
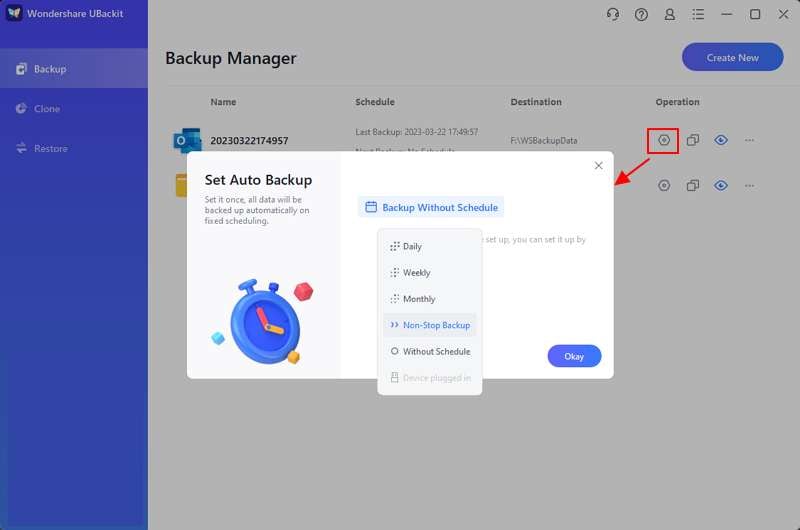
You can view your backup files when the app completes the backup process and set automatic backup according to your needs by clicking the Schedule icon.
Why Back Up Synology NAS to Another Synology NAS
Synology backup NAS to NAS is the process of saving data from one Synology NAS to another. There are many reasons you would want to back up Synology to Synology, such as:
- Avoiding data loss – If one NAS device fails, you’ll have a readily-available data backup on the other device. On the other hand, your data could become unavailable due to multiple users storing it on the same NAS device. Even though NAS is an ultra-fast and efficient storage device, you shouldn’t leave anything to chance.
- Freeing up space on your NAS – If you have multiple files you don’t use that often, you can move them to another NAS device for safekeeping to free up space on your primary Synology NAS.
- Accidental deletion – It’s so easy to delete precious data accidentally. Before you know it, your data is gone. That’s all the more reason to consider creating a Synology NAS to NAS backup of your data to recover deleted files from Synology NAS.
- Improving performance – Moving infrequently-used data to a secondary NAS device effectively enhances performance on the primary system by reducing the load.
- Creating offsite data backup – If a natural disaster destroys or damages your primary NAS system, an offsite data backup will help you restore your operations.
- Transferring NAS data – You can back up a Synology NAS to another NAS to avoid manually migrating data from an old device to a new one.
These are all legit reasons to consider the Synology-to-Synology backup option.
Conclusion
NAS devices are becoming a standard in the data storage realm. You can rely on Synology NAS to store and back up your data safely and securely. However, NAS devices typically come with a limited storage capacity.
If your primary NAS runs out of data storage, you can free up the space by backing up your files to another Synology NAS. Whether you prefer to do it yourself or use a third-party app, a NAS-to-NAS backup is an excellent safety option to avoid data loss.


