
 TL;DR:
Migrating a Windows 10/11 operating system from a C drive to an SSD without reinstalling requires a destination drive with capacity exceeding the current source data and a specialized tool like Wondershare UBackit, AOMEI Partition Assistant Professional, or Clonezilla.
● Pre-cloning requirements mandate verifying sufficient destination space, updating firmware, disabling device encryption or secure boot, and creating bootable recovery media for safety.
● Wondershare UBackit provides a user-friendly interface with a one-month free trial; AOMEI Partition Assistant Professional supports SSD partition alignment but requires manually switching BIOS boot modes from Legacy to UEFI if migrating from an MBR disk to a GPT SSD; Clonezilla is a free, open-source alternative that operates outside of Windows via a Rufus-created bootable USB.
● After the selected software completes the data transfer, you must manually enter the system BIOS to configure the new SSD as the first boot device to successfully launch the migrated OS.
Ask AI for a summary
 ChatGPT
 Perplexity
 Gemini
 Claude
 Grok
Grok
Upgrading your equipment is a good option for better device speed and performance. Moving your installation from an older and slower disk to a faster and larger drive is quick and easy with drive cloning. There are several ways to perform this, and this article will list the different tools you can use to clone C drive to SSD. Let’s get started.
Why Clone C Drive to SSD in Windows 10?
An SSD or Solid-State Drive has a higher reading and writing performance than an HDD (Hard Disk Drive). That is why many use it as a bootable drive. Thus, transferring your C drive to SSD is the solution to improving the performance of your present computer and to avoid C drive full issue. It involves transferring your present operating system, including system data and installed applications, to an SSD disk in Windows 10/11.
If your device takes an unusually long time to boot, or you have trouble running some large games on your computer, the C drive doesn't have enough space to run the applications smoothly. Thus, you must increase the C drive or transfer data to a larger disk.
Given these circumstances, cloning the C drive to SSD in Windows 10/11 will give greater performance than previously. The following sections will explain the step-by-step method of how to perform this.
Prerequisites
Before cloning your C drive to SSD, there are things you must prepare the following:
- An SSD drive: This can be used as the destination location to save data from the C drive while transferring data from the C drive to the SSD. Its size may be smaller than your present hard disk, but as long as the size of the SSD disk is greater than that of the C drive, some space in the SSD disk is reserved for future extensions.
- Connect the SSD drive to your existing PC: connect or install the SSD drive to your computer. Install it inside if your PC has two drive bays or connect it to a USB device.
How To Clone C Drive to SSD on Windows 10/11 With Top 3 Cloning Software
After completing the necessary preparations, cloning software is the easiest way to clone your C drive to an SSD in Windows 10 and 11. There are several reliable options available that can help you accomplish this task effectively. Here are some of the top C drive cloning software for Windows 10/11:
1. Clone C Drive to SSD With Wondershare UBackit
Numerous solutions are available for cloning C drive to SSD; most users are unsure which to choose. Wondershare UBackit is recommended by many as a top choice due to its extensive features and user-friendly interface. It allows you to clone partitions and drives if the backup destination's capacity exceeds the backup source's. Additionally, Wondershare Ubackit offers a one-month free trial, allowing you to clone your C drive to an SSD without any cost.

Wondershare UBackit - Your Reliable Outlook Backup Tool
Disk Clone: You can clone hard drive to SSD or another HDD easily. It supports a wide range of disk types, such as HDDs from all brands, SATA/M.2 SSDs, NVMe SSDs, USB drives, NAS drives, and SD cards.
Partition Clone: Instead of cloning the entire disk, you have the option to clone a particular partition.
Sector-by-Sector Clone: You are allowed to replicate a hard drive or partition bit by bit.
Supported OS: It is compatible with Windows 11/10/8.1/8/7, 32 bit and 64 bit.
Wondershare UBackit simplifies the process of cloning a C drive to an SSD. Take the following steps:
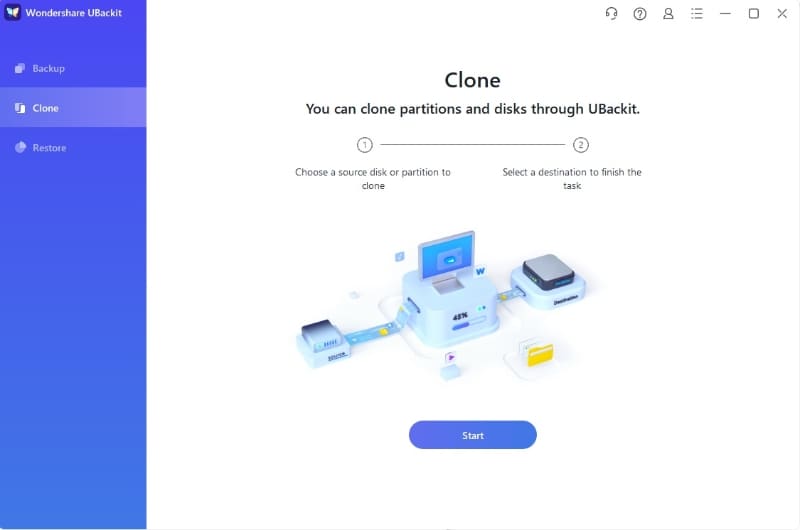
Step 1: Navigate to the Clone tab.
Run Wondershare UBackit on your device after installing it. Then, from the left-hand menu, choose Clone and click Start.
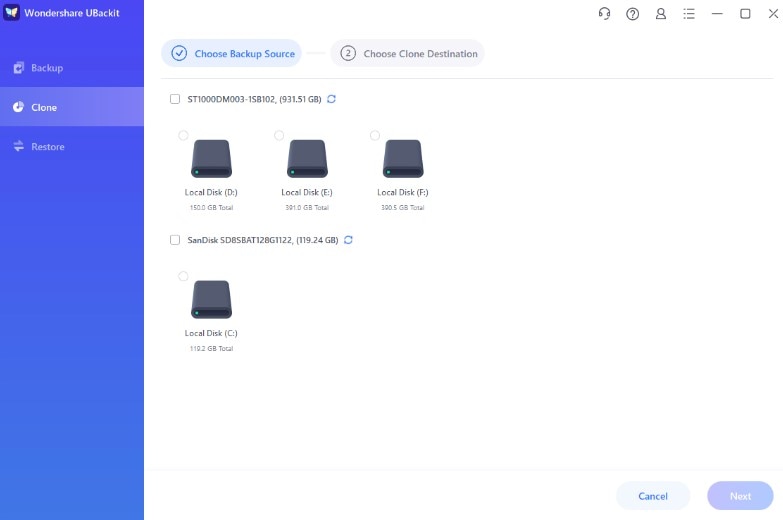
Step 2: Select a clone source and destination.
Select C drive as your source disk to clone and click Next.
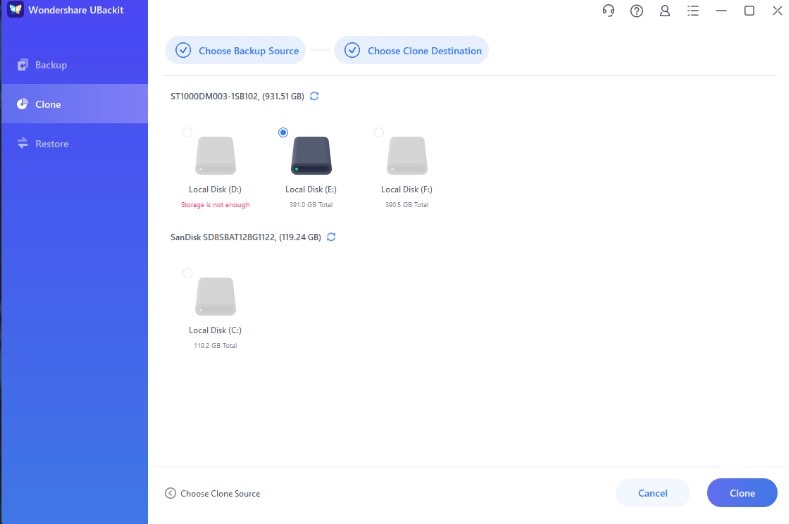
Select your SSD as your source destination after specifying the C drive as source disk. Then, click Clone to begin the C drive to SSD cloning process.
Step 3: Begin the cloning
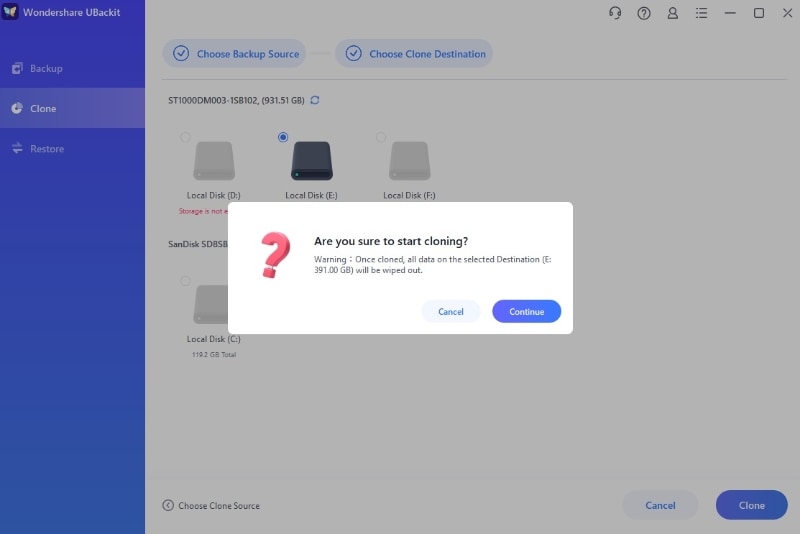
Confirm the C drive to SSD cloning process. Remember that hitting this button will erase all data from the selected C drive.
Depending on the data being processed, the disk cloning process will take some time.
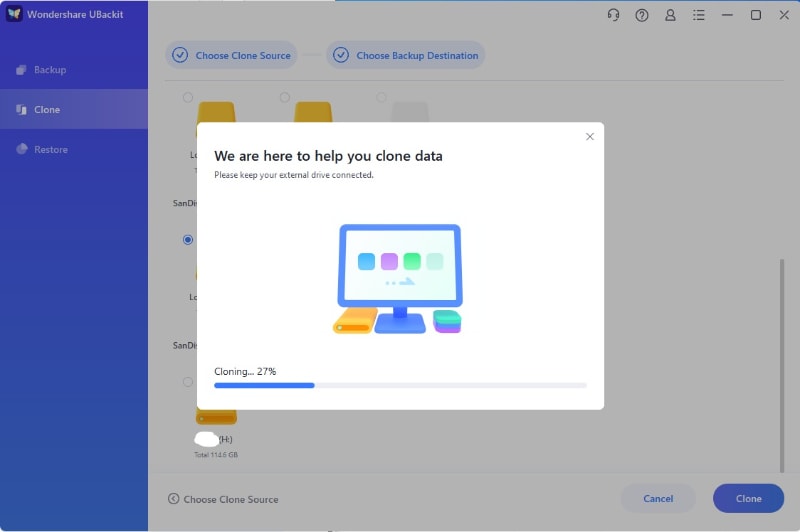
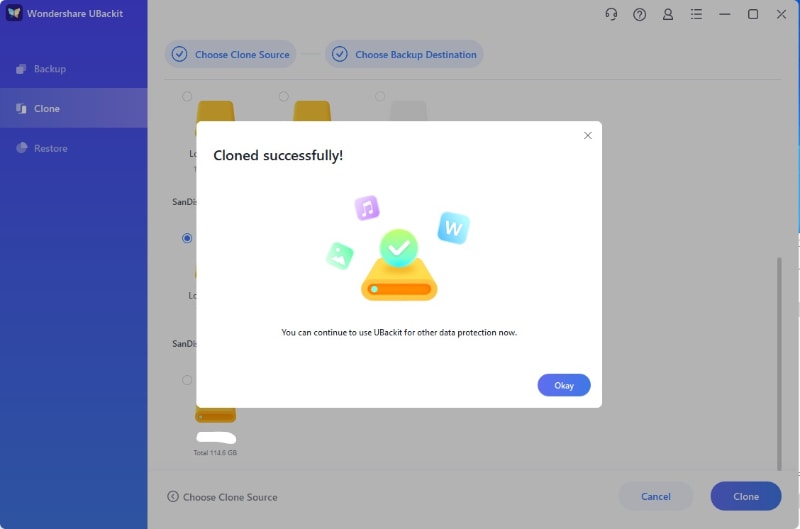
You will be alerted when the cloning procedure is complete.
2. Clone C Drive to SSD With AOMEI Partition Assistant
Another great, easy-to-use cloning software is the AOMEI Partition Assistant Professional. It supports SSD partition alignment and allows you to clone C drive from HDD to a smaller SSD to further improve SSD performance.
The "Migrate OS to SSD Wizard" included with AOMEI Partition Assistant Professional makes OS migration to another hard drive simple and successful. Follow the steps below to clone C drive to SSD in Windows 10 using AOMEI Partition Assistant Professional.
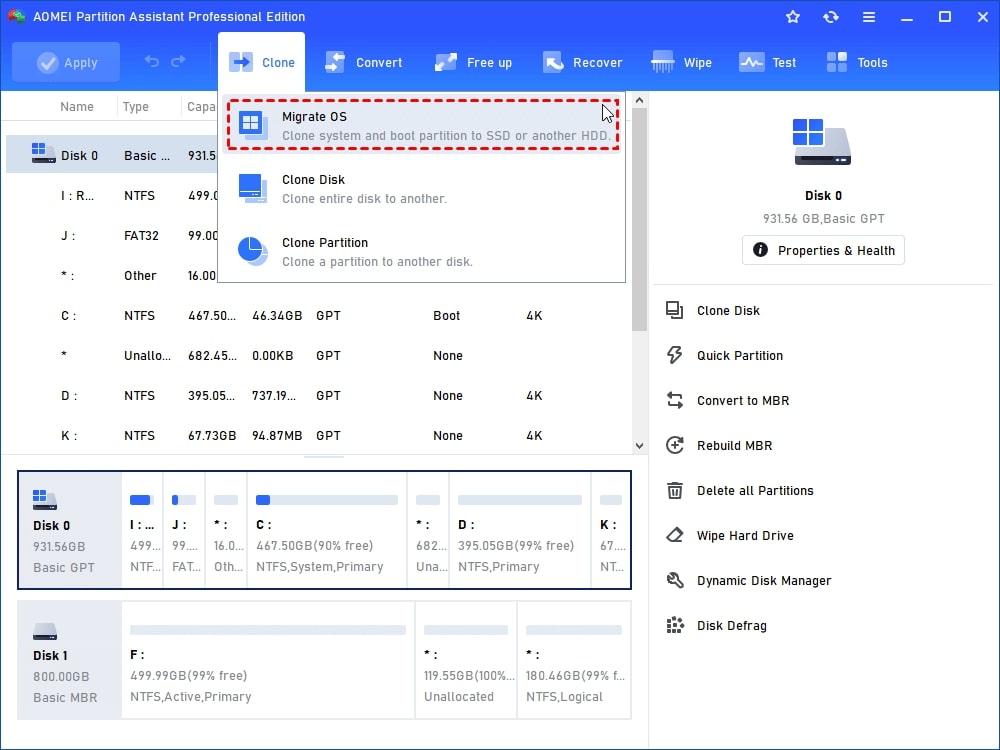
- Step 1: Install and run the cloning program. Click Migrate OS in the upper Clone column on the main screen.
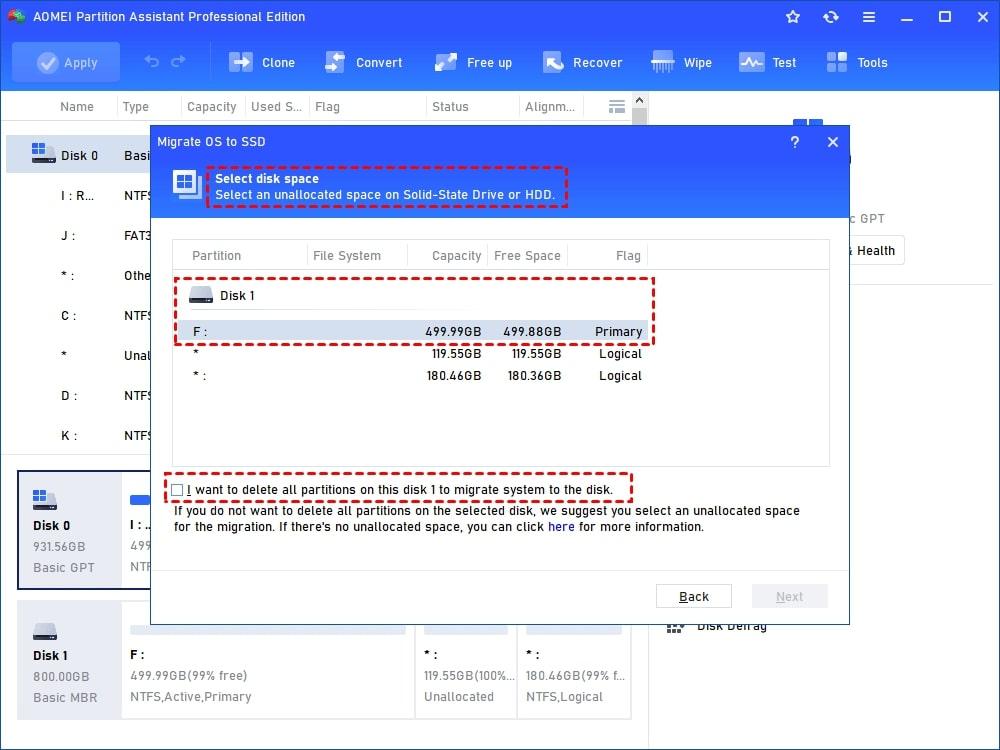
- Step 2: Click the unallocated space on the SSD device. If none, pick the F partition on Disk 2 (SSD), ensure "I want to delete all partitions on this disk 2 to migrate system to this disk" is checked, and then click Next.
You can also relocate the C drive to another location, such as a network share, NAS device, USB flash drive, external disk, etc.
- Step 3: Customize the size and placement of the newly created G partition in the following window. Next, press the Next button.
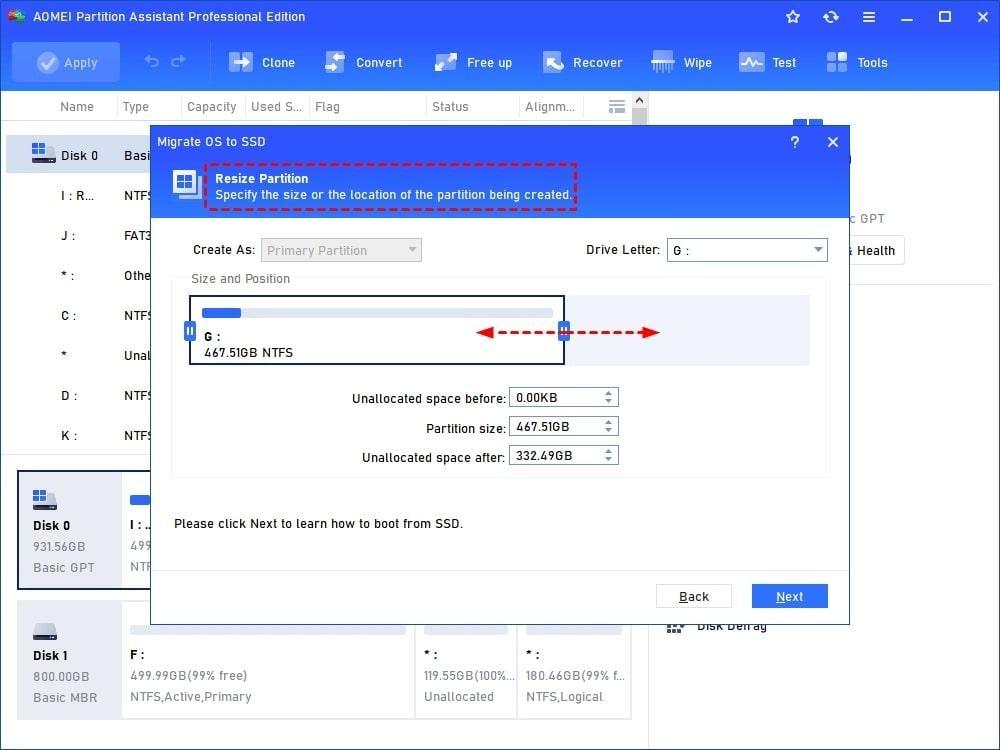
Note: If you don't want to erase all partitions on your SSD drive, resize your partition to get an unallocated space. Also, ensure that the unallocated space is larger than the size of the C disk.
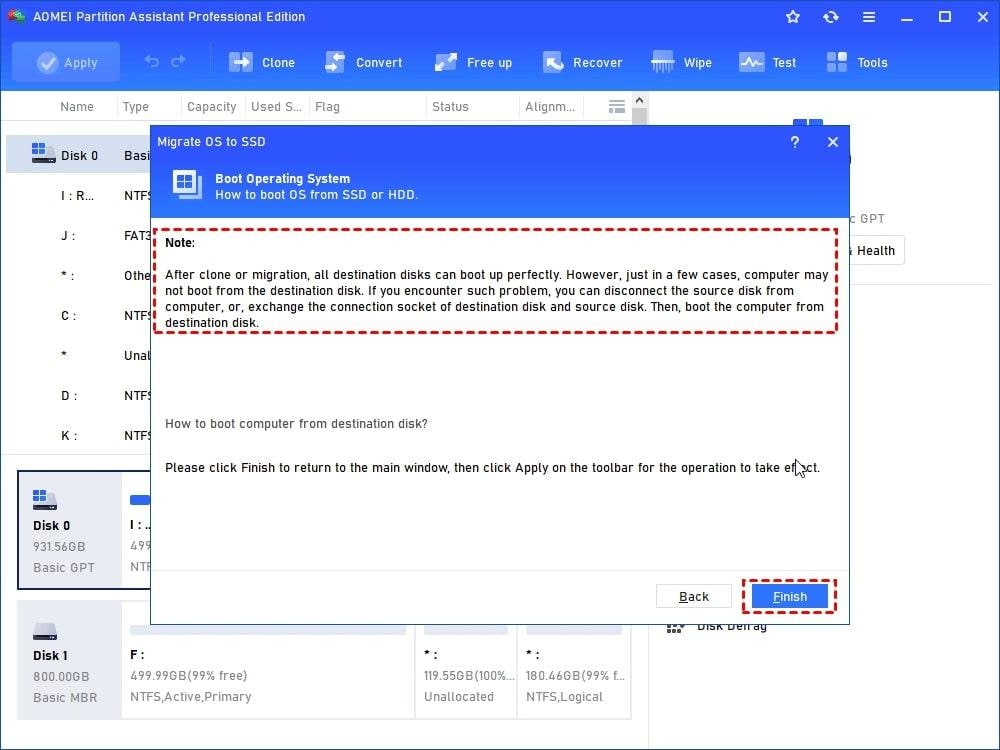
- Step 4: Once you've determined how to boot an operating system from an SSD or HDD, click Finish to proceed.
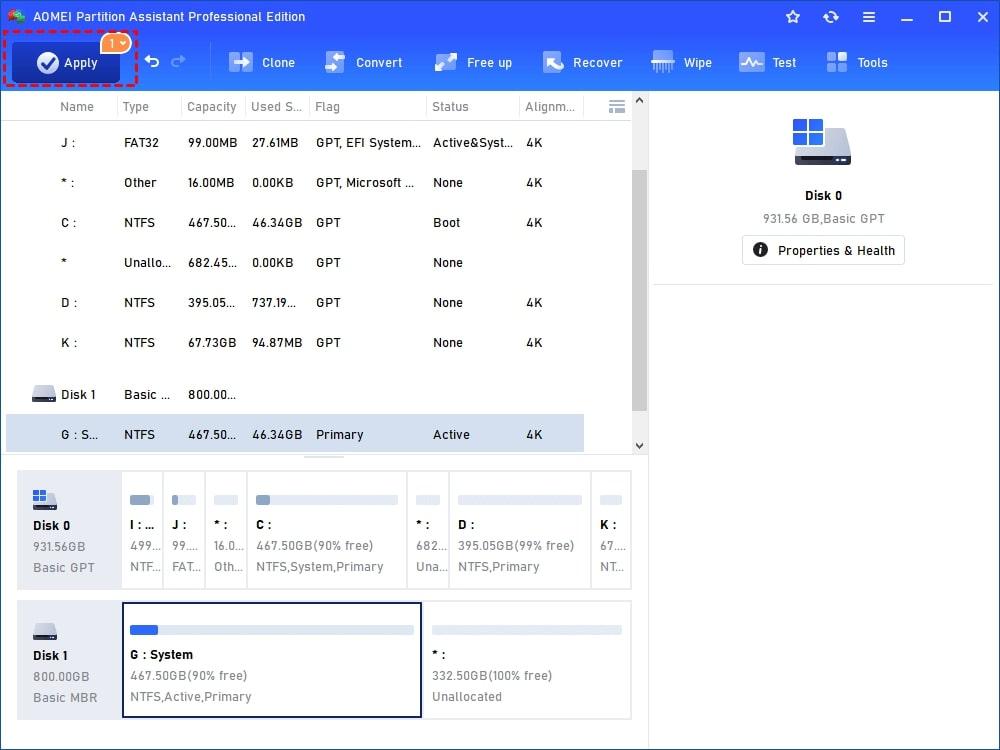
- Step 5: To migrate the C disk to SSD, preview the pending operations and modifications on Disk 2 (SSD) and click the Apply button.
Notes:
- The process will be finished in PreOS Mode, and your computer will restart.
- When the copy is complete, enter the BIOS and configure the SSD disk as the first boot device.
- If you move the C drive from an MBR disk to a GPT SSD drive, you must change the boot mode from Legacy to UEFI to boot from it. The opposite is also true.
3. Clone C Drive to SSD With Clonezilla
In addition to the previously mentioned options, Clonezilla is another great C drive cloning software for Windows 10. With its open-source nature and powerful cloning capabilities, Clonezilla offers a free reliable solution for users seeking to clone their C drive to an SSD.
Here are the steps to follow:
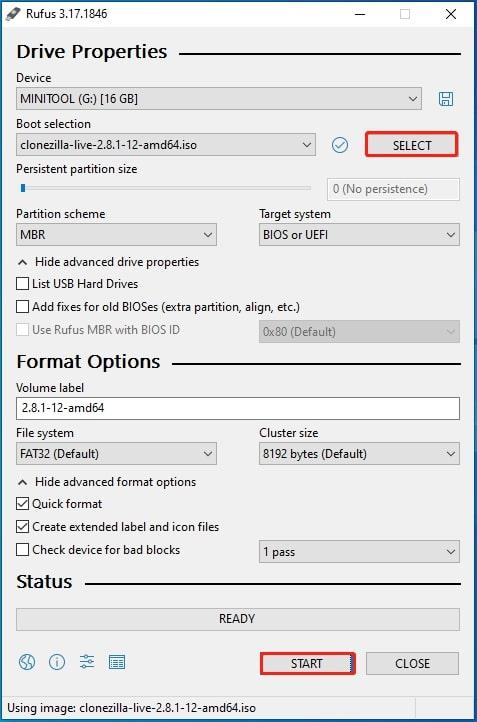
- Step 1: Download Clonezilla Bootable USB. Go to the Clonezilla download website, select amd64 from the CPU architecture area, set the file type to iso, and click Download.

- Step 2: Download this tool from the Rufus website, and connect your computer to a USB flash drive.
- Step 3: To run Rufus, double-click its executable file.
- Step 4: To create a bootable Clonezilla Windows 11/10 USB stick, click the SELECT button, select the Clonezilla iso file you downloaded, and then click START.
The Clonezilla bootable USB drive has been made due to these processes. You can boot the PC from this device to clone the HDD to SSD. Simply restart your computer, hit a function key to reach the BIOS menu, and then select the USB drive as the boot device. The setting varies depending on the manufacturer.
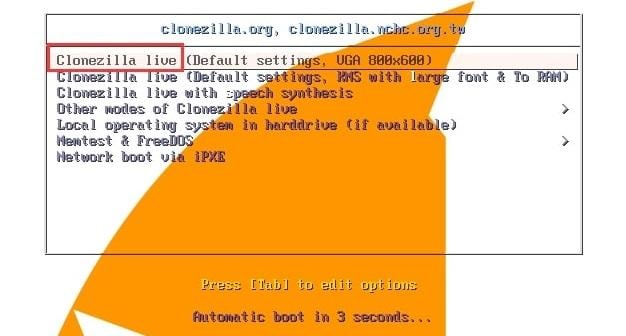
- Step 5: When you see the interface below after booting your PC from the bootable USB drive, select Clonezilla live and press Enter.
- Step 6: After selecting a language, press the Enter key.
- Step 7: Configure the keyboard layout. Keep the default or select another one.
- Step 8: Choose between starting Clonezilla or entering the login shell (command prompt).
- Step 9: To proceed, select a mode. Under Windows 11/10, highlight the “device-device work directly from a disk or partition to a disk or partition” and click Enter.

- Step 10: Select Beginner mode. Accept the default parameters to proceed.
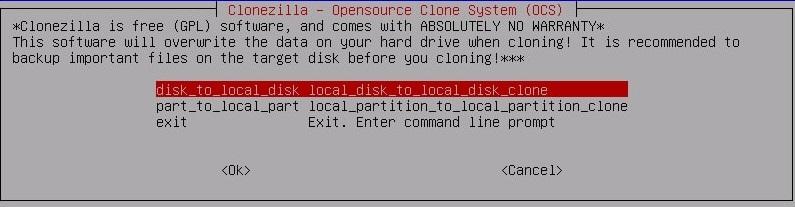
- Step 11: You must select a cloning method in the new box. To clone the complete HDD to SSD, select disk_to_local_disk local_disk_to_local_disk_clone and then Continue.
- Step 12: Select the source and target disks one by one. Select your HDD as the source disk and the SSD as the destination drives in Clonezilla HDD to SSD mode.
- Step 13: Set the advanced options. If you are unsure, leave the default setting alone.
- Step 14: Select between rebooting and powering off when everything is finished.
- Step 15: Press Y and Enter three times.
- Step 16: Clonezilla is currently cloning your hard disk to an SSD. Wait patiently while the cloning procedure takes a few minutes.

After cloning, you can restart the system, open your computer's casing, remove the old hard drive, and replace it with the SSD. Then, run your PC from the SSD to get the optimum performance.
If after cloning your C disk in an SSD you cannot start Windows, something likely went wrong during the process and to solve it you must first find out the origin of the problem. Read more to find the most common causes and learn how to fix Cloned SSD won't boot
FAQs
Is It Possible to Clone a Hard Disk to a Smaller SSD?
Yes, it is possible to clone a hard disk to a smaller SSD. It is valid if the user data on the hard disk is less than the SSD's capacity.
Does Cloning C Drive Migrate Windows OS?
Yes, cloning the C drive includes migrating the Windows operating system. The cloned C drive will have an exact copy of the OS, allowing you to boot and run Windows from the new drive without reinstalling the operating system.
What Should I Do Before Cloning a C Drive to an SSD?
Before cloning a C drive to an SSD: 1. Ensure the SSD has enough space; 2. Update firmware; 3. Disable encryption or secure boot; 4. Create a bootable recovery media for safety.


