
 TL;DR:
Backing up a Synology NAS to pCloud protects data against ransomware or drive failure and can be configured using either the command-line tool Rclone or the web-based service MultCloud.
● Using the Rclone method requires enabling root and SSH access via the DSM Control Panel, running installation scripts in the terminal, and configuring a user-defined script in the Task Scheduler to sync the remote destination.
● Opting for MultCloud provides a simpler graphical interface for the backup process, provided that the FTP server and WebDAV service are turned on within the Synology NAS prior to connection.
● pCloud supports access across iOS, Android, MacOSX, Windows, and Linux via a secure virtual drive, and offers unique capabilities for backing up social media accounts and WordPress websites.
Ask AI for a summary
 ChatGPT
 Perplexity
 Gemini
 Claude
 Grok
Grok
It is undeniable that Synology NAS is among the best NAS servers available worldwide. Many users use it, and it is particularly useful for business needs. However, creating a backup of your Synology NAS is one effective data security method. The tutorial mentions the two methods to back up Synology NAS to pCloud.
This tutorial will also provide you with an overview of the reasons why individuals prefer to back up their Synology NAS data to the pCloud, which will give you more specific information about your case. Therefore, carefully follow the instructions to put yourself in a comfortable situation.
Part 1. What Is pCloud?
pCloud is your personal cloud space to store all your files and folders. It has a user-friendly interface that clearly shows where everything is located and what it does. The software is available for almost any device and platform – iOS and Android devices, MacOSX, Windows OS, and all Linux distributions.
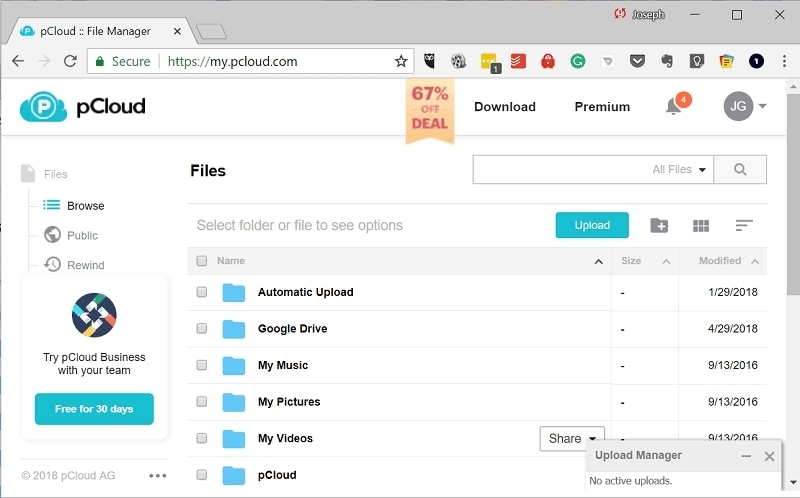
The app creates a secure virtual drive that expands your local storage space by installing pCloud on your computer (through its desktop application, pCloud Drive). Every change you make in your pCloud can be seen immediately on your computer, phone, or tablet. All your devices are instantly synchronized, and you have direct file access to any update you make.
🔍 Technical Architecture: Cloud Protocol Compatibility
While pCloud provides robust client software for standard consumer operating systems, integrating it with a specialized Linux-based Linux storage appliance like a Synology NAS requires an understanding of underlying network protocols. Because pCloud does not share a native app inside the Synology Package Center, storage administrators must leverage standard network endpoints to create a continuous data pipeline.
Sync Mechanism |
Network Protocol Layer |
Data Verification Method |
Best Used For |
| Rclone CLI Scripting | WebDAV / Native pCloud API | MD5/SHA-1 Hash Comparison | Automated, low-overhead system schedules |
| MultCloud Management | WebDAV / FTP Encrypted Tunnel | File Size & Timestamp Matching | Quick, manual browser-based transfers |
| Synology Cloud Sync | WebDAV (Custom Endpoint) | Block-by-Block Integrity Check | Continuous, real-time single folder sync |
pCloud is considered one of the best cloud services for various reasons. One of those is the multiple functions it offers to users without compromising money and data security. You can use pCloud on any device. As users can access it through any browser, you do not have to worry about compatibility issues.
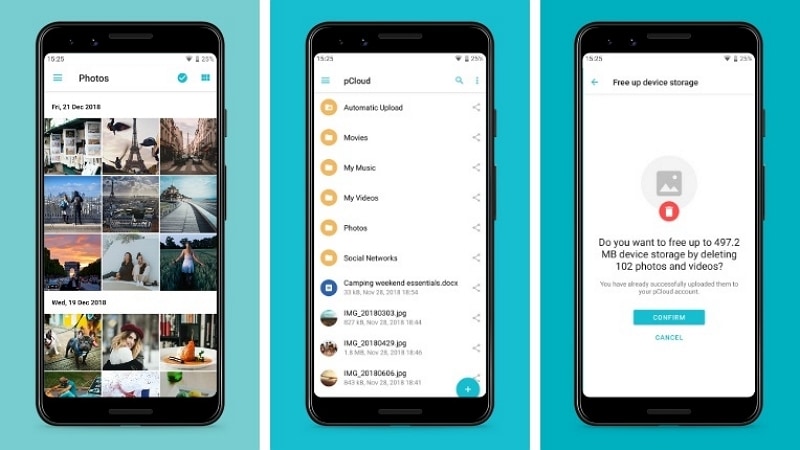
Apart from this, pCloud Drive allows you to access, synchronize and store your files in the cloud by creating a secure virtual drive on your PC. On the other hand, pCloud for mobile allows you to access and store your files anywhere at any time.
One of the many uses of pCloud is its unique capability to back up social media accounts and WordPress websites, which is impossible using other cloud storage. Moreover, you can also add your files as “favorites” so you can still access them even when working offline.
Part 2. Why Should You Backup Synology NAS to pCloud?
You gain a lot of benefits from backing up your Synology NAS to the pCloud, including:
- Data loss prevention: Your on-site data, including the data on your workstations and your NAS, is vulnerable to disasters from ransomware attacks because it is constantly linked to your computers. Finally, your NAS's hard drives may malfunction. One drive failure might not impact your data because your NAS is most likely configured in a RAID.
- Security: When it comes to storage servers, customer data is often secured by encryption during transit to and from the final destination. Consider encryption protocols when comparing pCloud companies, especially if you have particular security requirements.
- Automation: The built-in backup application on your Synology NAS allows you to schedule your pCloud backups in advance and continue your day.
- Scalability: Your pCloud backups expand as your data does. With pCloud storage, you can ensure that your data is adequately backed up without purchasing or managing additional hardware.
Accidentally deleted important files in Synology NAS without backup?
No worries. Wondershare Recoverit can get back your lost NAS files within 3 steps. The ultimate and professional NAS data recovery software is totally reliable and 100% safe.
Part 3. How To Backup Synology NAS to pCloud With Rclone
Rclone is a command-line tool for managing files on cloud storage. It has features and supports over 40 cloud storage solutions, like S3 object stores, consumer and commercial file storage services, and common transfer protocols like FTP. Users often refer to Rclone as "The Swiss Army Knife of cloud storage" and "Technology indistinguishable from magic."
Follow the instructions below to backup Synology NAS to pCloud With Rclone:
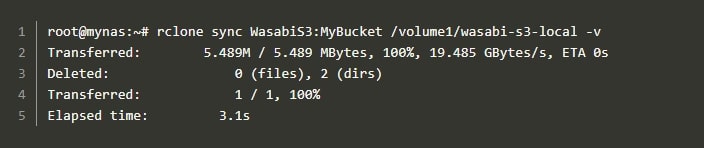
Note: You will need to ensure that Rclone can access a data source (also known as a remote). The example below will use IAM login information for a Wasabi S3 bucket. If S3 is not for you, you can use FTP or another connection supported by Rclone. You will require root access and SSH access for Synology. Additionally, you must set up a shared folder.
Step-by-Step Manual: Mounting pCloud WebDAV to Synology via Rclone
To configure a secure command-line backup pipeline from your Synology NAS directly to your pCloud repository using Rclone, follow this verified implementation guide:
- Enable SSH Access within Synology DSM
Log into your Synology DiskStation Manager (DSM) dashboard with administrator credentials. Navigate to Control Panel > Terminal & SNMP > Terminal. Check the box labeled Enable SSH Access, set the port to `22` (or a secure custom alternative), and click Apply.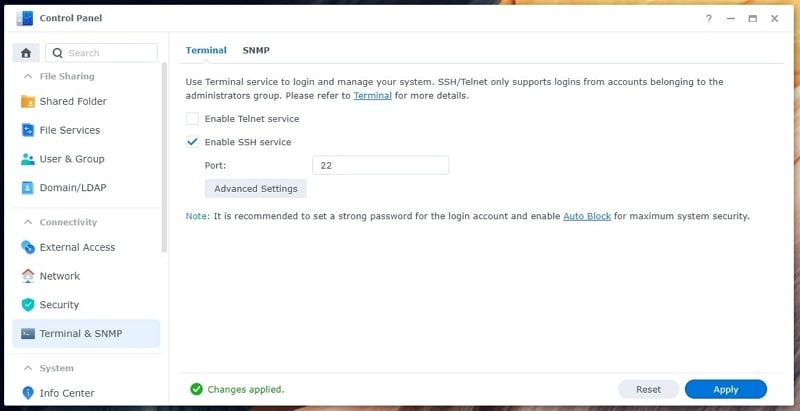
- Establish Root Access and Install the Rclone Binary Environment
Open your terminal utility (PuTTY on Windows or Terminal on macOS) and connect to your NAS by runningssh admin@your_nas_ip. Elevate your system permissions by typingsudo -iand entering your admin password. Run the following command block to pull and execute the official installation script:wget https://rclone.org/install.sh
chmod +x install.sh
./install.sh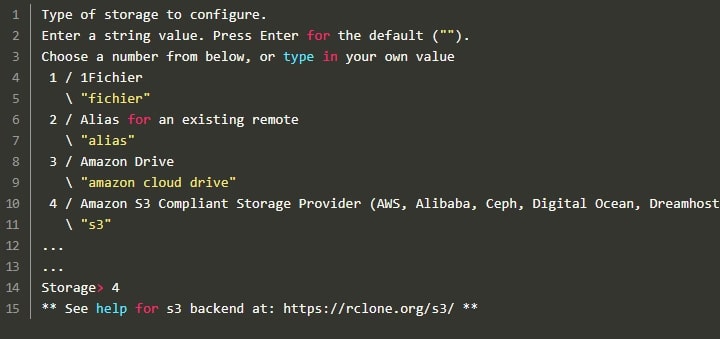
- Configure the pCloud WebDAV Remote Destination
Initiate the configuration wizard by runningrclone config. Typento generate a new remote layout and assign it a distinct descriptor name (e.g., `pcloud_remote`). When prompted for the storage provider type, select the option corresponding to WebDAV (typically index number `44` or search for `webdav`). Set the server URL tohttps://webdav.pcloud.com(usehttps://ewebdav.pcloud.comif your account is hosted in the European Data Region). Enter your pCloud login email and your encrypted app password.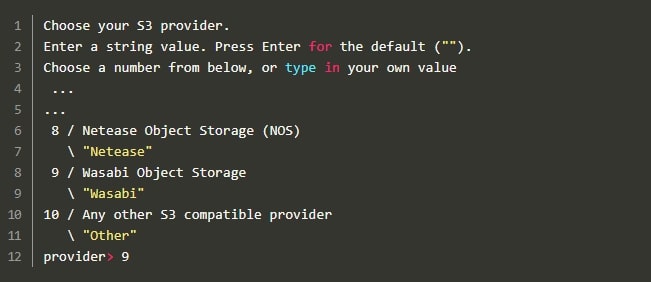
- Verify Linkage and Deploy the Synology Task Scheduler Automation
Test the connection structure by listing your primary cloud folders withrclone lsd pcloud_remote:. Once verified, go to your Synology DSM dashboard and navigate to Control Panel > Task Scheduler. Click Create > Scheduled Task > User-defined script. Under the Task Settings tab, paste your operational backup script line:rclone sync /volume1/YourSharedFolderName/ pcloud_remote:YourBackupFolder --verbose --log-file=/volume1/logs/rclone.log
Set your desired run schedule (e.g., nightly at 02:00) and save the configuration block.
📊 Performance Analysis: CLI Automation vs. GUI Web Transfer
Before choosing your sync path, use this diagnostic comparison table to weigh resource overhead against ease of deployment:
Operational Metric |
Rclone Command-Line Suite |
MultCloud Browser Engine |
| System Resource Cost | Minimal (Runs directly within native Linux kernels) | None on local hardware (Processed entirely server-side) |
| Execution Speeds | Maximum throughput; limited only by your ISP bandwidth | Limited by multi-server proxy routing paths |
| Encryption Support | Supports client-side folder encryption (rclone crypt) | Relies entirely on provider-side SSL/TLS tunnels |
| Automation Flexibility | Infinite (Fully customizable via DSM Linux Cron scripts) | Standard scheduling arrays inside web UI dashboards |
Part 4. How To Backup Synology NAS to pCloud Without Rclone
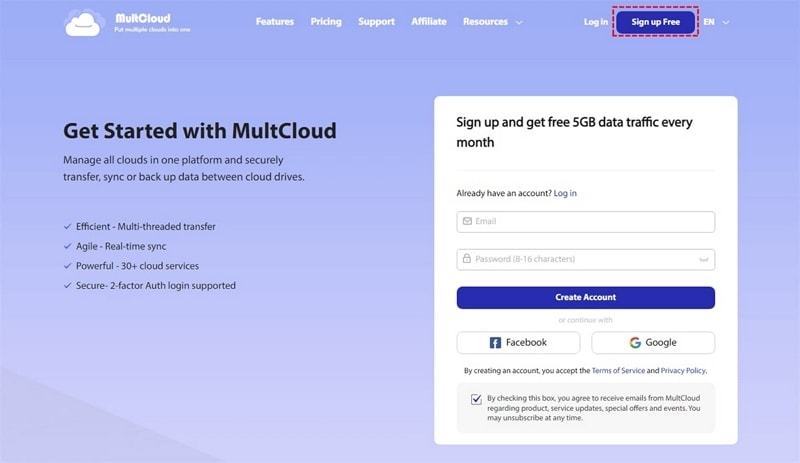
It's a bit complicated to back up Synology NAS to pCloud using Rclone. So, you may search for a Rclone alternative. MultCloud, a fantastic and cost-free cloud backup service, is the most straightforward and practical technique to back data from a Synology NAS to pCloud.
MultCloud is a reputable cloud file manager that enables users to back up files effectively between clouds. NAS, pCloud, OneDrive, Google Drive, Dropbox, Flickr, Box, MEGA, Amazon S3, FTP, and other services are currently supported by MultCloud.
Step-by-Step Manual: Linking Synology WebDAV to pCloud via MultCloud
If you prefer to avoid the command line, follow these steps to build a cross-cloud backup pipeline using a visual management dashboard:
- Activate WebDAV Server Privileges on Synology DSM
Log into your Synology DSM ecosystem and navigate to the Package Center. Search for the WebDAV Server package and click Install. Once installed, open the WebDAV app interface and ensure the check box for Enable HTTPS is marked active on port `5006`. Click Apply.
- Link Synology Access to the MultCloud Dashboard
Log into your MultCloud management dashboard. Click on the Add Cloud option located in the left sidebar navigation console. Select WebDAV from the supported storage array list. Input your public Synology WAN IP address along with your port configuration (`https://your-nas-ip:5006`), enter your NAS login credentials, and click Add WebDAV Account.
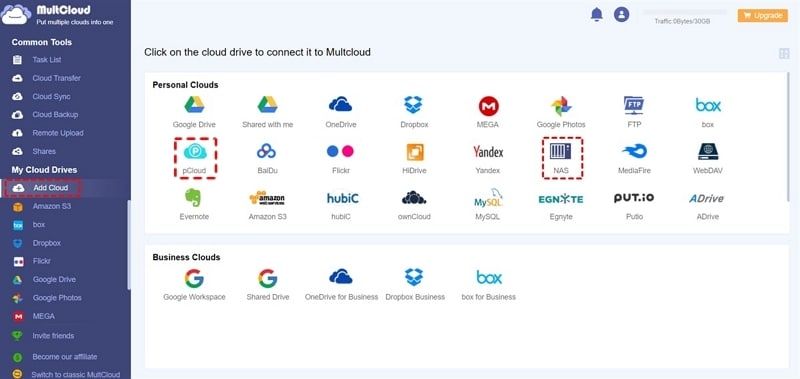
- Authenticate and Mount the pCloud Target Drive
Return to the Add Cloud interface option, choose the pCloud brand logo icon, and click to authorize. A secure OAuth popup window will open from pCloud; enter your account credentials and grant MultCloud full read/write privileges to link your cloud directory space.
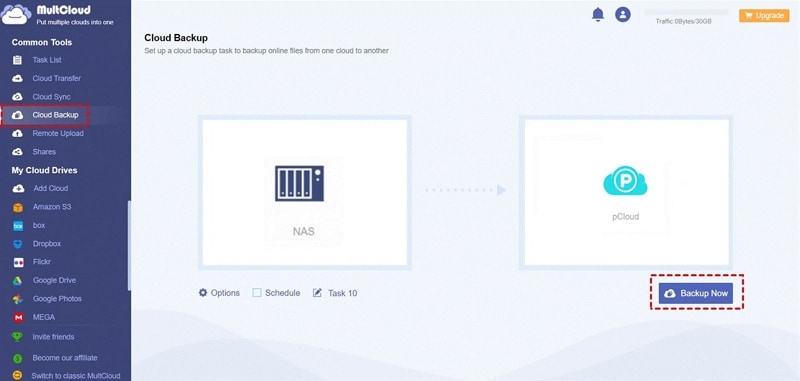
- Execute the Unified Cloud Backup Schedule
Navigate to the Cloud Backup option under the top tools panel. Define your source path by picking your mounted Synology NAS volume directory. Next, choose your pCloud folder destination as the target directory. Click the Schedule options button at the base of the UI to automate your backup interval, then click Backup Now to begin the migration.
In case you lost some important data during the backup process, don’t panic! You can perform Synology NAS data recovery. Also, pCloud is not the only way to back up Synology NAS. You can also back up Synology NAS to an external hard drive.
More Related:
Backup Synology NAS to Cloud
Sync Between Synology and iCloud
Conclusion
Almost all users use Synology NAS as the default storage server. However, due to inevitable disastrous circumstances, it is highly advisable to back up your Synology NAS to pCloud. This guide teaches you how to do it with and without Rclone, along with a description of what pCloud is.
For Windows XP/Vista/7/8/10/11
For macOS X 10.10 or later


