
 TL;DR:
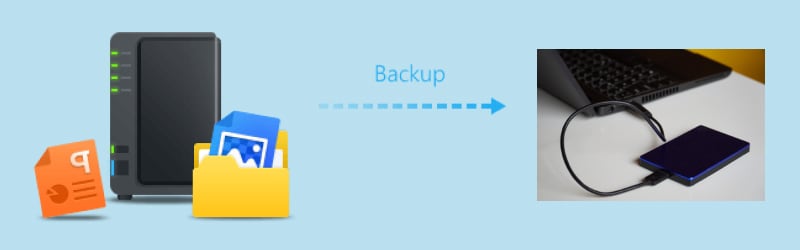
Backing up a Synology NAS to an external drive provides offline, portable, and hack-proof data access, which can be accomplished by mounting the NAS to a computer and using third-party software like Wondershare UBackit or Synology Hyper Backup.
● Before initiating a backup, you must map the Synology NAS to your local computer, ensure the external USB or hard drive has sufficient storage capacity, and secure a software tool since external drives lack native operating systems.
● Wondershare UBackit provides faster transfers with automatic scheduling, incremental updates, and encryption, whereas using Synology DiskStation Manager with the Hyper Backup package executes slower and requires navigating less user-friendly advanced settings.
● While both tools feature built-in data restoration options, recovering deleted files directly from a Synology NAS in a scenario where no prior backup exists requires standalone data recovery software like Wondershare Recoverit.
Ask AI for a summary
 ChatGPT
 Perplexity
 Gemini
 Claude
 Grok
Grok
You’ve just bought Synology NAS to serve you as your chief backup system, and now you’re being told that you need to backup files from it. Your confusion is understandable. Why does your backup need a backup of its own? Isn’t that a bit excessive?
The ugly truth is that your Synology NAS isn’t perfect.
Today, we’ll untangle the motives and reasons for having a double backup and help you better understand how external hard drives and USB drives work. If ultimately you decide to go through with it, we’ll show you how to backup Synology NAS to an external drive.
As you try to backup Synology NAS to an external drive, you must realize the importance of data backup. Join us to celebrate 2024 World Backup Day. Let's take the pledge, and make data backups a regular part of your day.
Benefits of Backing up Synology NAS to External Drive
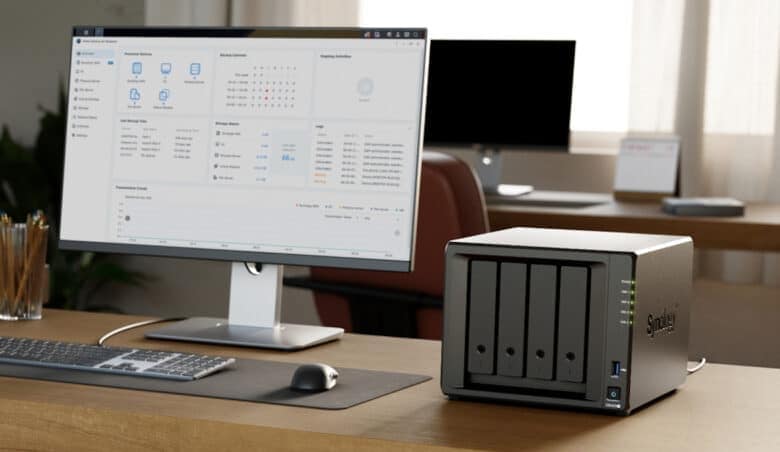
While Synology NAS is a better, safer, and more functional choice for both home labs and enterprise use, it can’t be used externally. What does this mean?
Well, you can’t fit a Synology NAS into your laptop bag and bring it along with you. Also, you can’t use it without an internet connection. That makes Synology NAS unsuitable for data transfer on the go and keeps your data tied to a network environment.
Luckily, you can always use an external drive as a backup.
In the intro, we mentioned that Synology NAS isn’t perfect. By this, we were referring to more than just convenience. NAS is a state-of-the-art storage solution in terms of reliability, but it’s not infallible. NAS devices break, too, resulting in data loss and theft.
Because they don’t use the internet, external drives cannot get hacked. They can also give you access to your data in urgent situations where NAS is unsuitable – whether in the absence of a trusty internet connection and power loss or while traveling.
To sum this up, the benefits of backing up Synology NAS to an external drive are not insignificant – they range from convenience to easy access and data safety.
Things You Need To Do Before Backing Up Synology NAS to External Drive
Would you agree that backing up Synology NAS to an external hard drive is not as excessive as you initially thought? Then you probably want to know how long it takes and what you need to do before a backup. It’s super easy, so don’t worry.
You’ll need to prepare a few things before you begin:
- Have your Synology NAS mounted to your computer. If you're not sure how to mount your Synology NAS to your computer, check out the tutorial here or watch the video tutorial below.
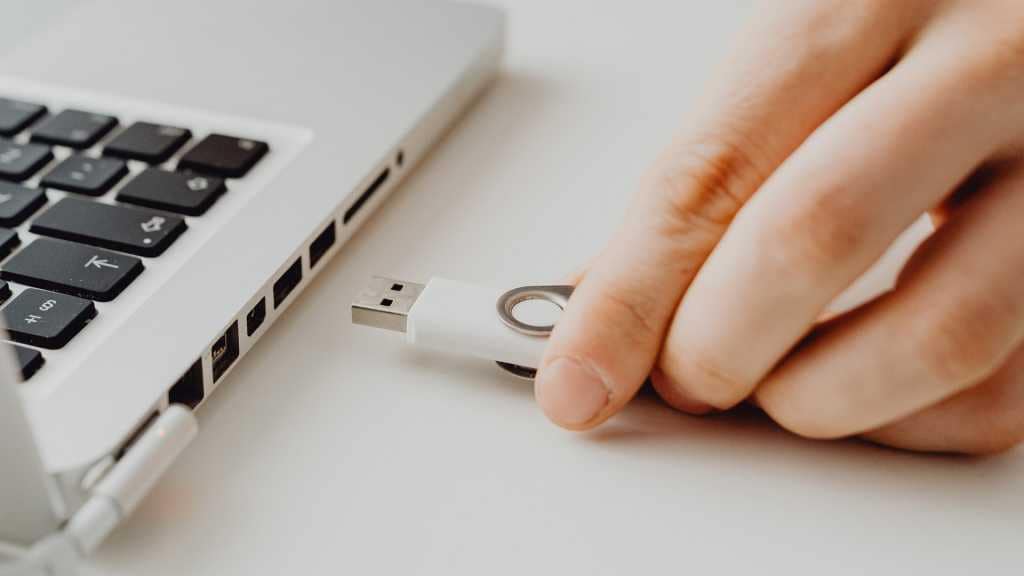
- Get your external drive such as USB drive or portable hard drive ready. There are many different types of external storage. If you’re feeling overwhelmed by choices, focus on quality and capacity. Make sure it has enough free space for storing data that you want to back up from Synology NAS.
- External drives don’t have operating systems, so you’ll also need a third-party application or software tool for creating your file backup.
All check? Great. Let’s dive right into it.
Two Easy Methods for Backing up Synology NAS to External Drive
There are several different ways to back up Synology NAS to an external drive. The following two backup methods are quick, simple, and intuitive.
Method 1. Backup Synology to External Drive Using Wondershare UBackit
One of the best backup tools for moving files from Synology NAS to a local drive, external hard drive or USB flash drive is Wondershare UBackit. Aside from letting you perform file backup with zero hassle, UBackit allows you to back up folders, partitions, and drives automatically and incrementally.
Let’s backup Synology NAS to an external hard drive with Ubackit as an example:
- Step 1. Download and install Wondershare UBackit on your computer.
- Step 2. Run UBackit on your PC and choose Backup from the sidebar. Next, click on File & Folder Backup.

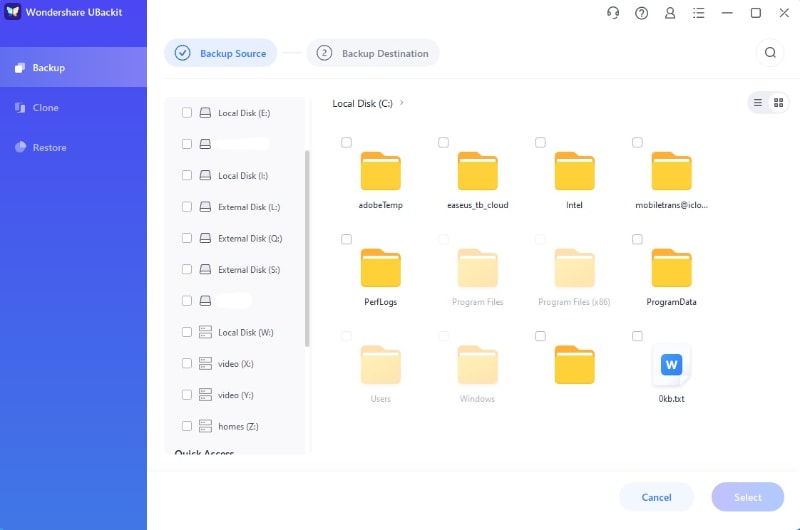
- Step 3. At this step, you will be prompted to choose your backup source. Access Synology NAS that mapped to your computer from Ubackit and select the files or folders you want to back up. Then, click Select.
- Step 4. Now, UBackit will show you all the external storage devices connected to your PC. Choose the external hard drive you want to use as a backup destination. Click on the Backup button in the right corner and wait until the process is complete.

- Step 6. UBackit will notify you when files are successfully stored on the external hard drive. At this point, you can safely disconnect the external drive from your PC.
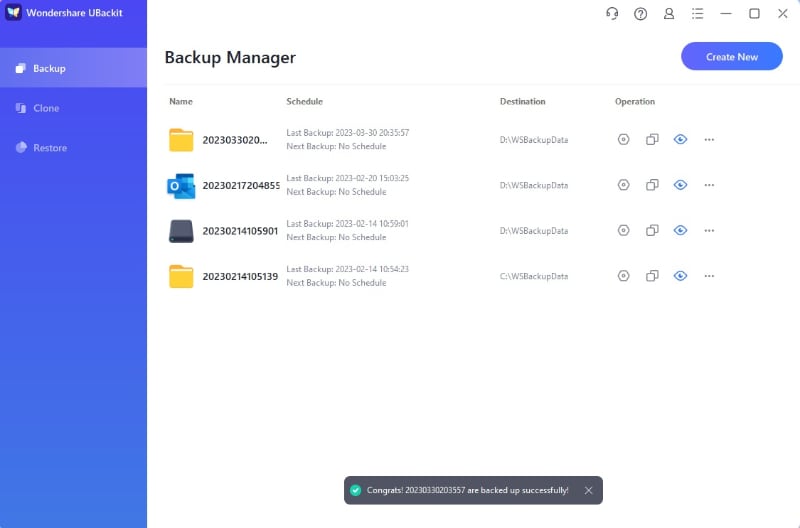
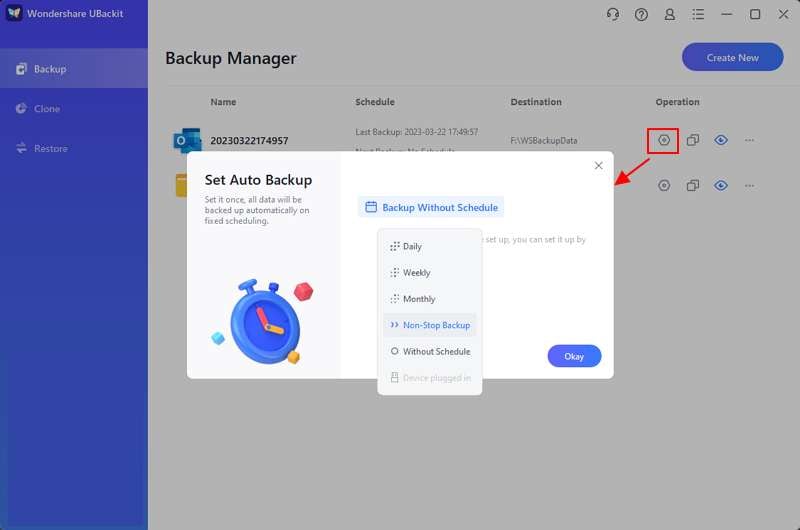
You’ll have additional options – Schedule, Backup, View, and Encryption – which allow you to schedule an automatic backup, update the backed-up files to the latest state, view the files you’ve just backed up, and password protect the backups to prevent unauthorized access. You can also start a new backup by clicking the Create New button.
Wondershare Ubackit has several other features that you might find useful:
- Automatic backup – For extra safety and peace of mind, we recommend putting your backups on auto-pilot. UBackit allows you to set a daily, weekly, and monthly backup schedule. It can even perform non-stop backups so that you don’t have to.
- Incremental backup – There’s no reason to back up old files if you’ve already done that a week or month ago. Incremental backup is a smart feature that tells UBackit to back up only newly added and changed files, thus saving your time and storage space.
- Backup encryption – If you care about data safety, you probably want to protect your backups with a password. Encrypting original files is of little significance if you don’t encrypt your backups as well. Luckily, you can do that with Wondershare UBackit.
- Disk cloning – If you want to create a functional one-to-one duplicate of your hard drive or a solid-state drive, you can do that with Wondershare UBackit’s advanced disk cloning feature.
Method 2. Backup Synology to External Drive Using DSM
If you would rather work with what you’ve got instead of installing a third-party tool, it’s possible to back up Synology NAS to an external drive using DiskStation Manager. Unfortunately, you’d still have to install a tool like USB Copy, Snapshot, or Hyper Backup.
For this guide, we’ve used Synology Hyper Backup.
Here’s how you can back up Synology NAS to an USB drive using a combination of two software – DiskStation Manager and Hyper Backup.
- Step 1. Log into and run your DiskStation Manager. Navigate to the Package Center, find Hyper Backup, and install it.
- Step 2. Open Hyper Backup and click on the + Next, go with the Data Backup task.
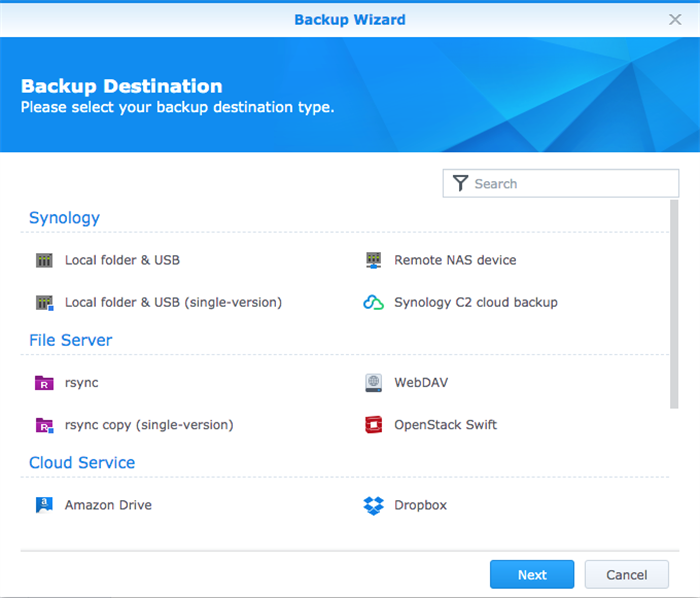
- Step 3. The Backup Wizard will prompt you to choose a target destination for your backup. In this case, choose , Local folder & USB and click
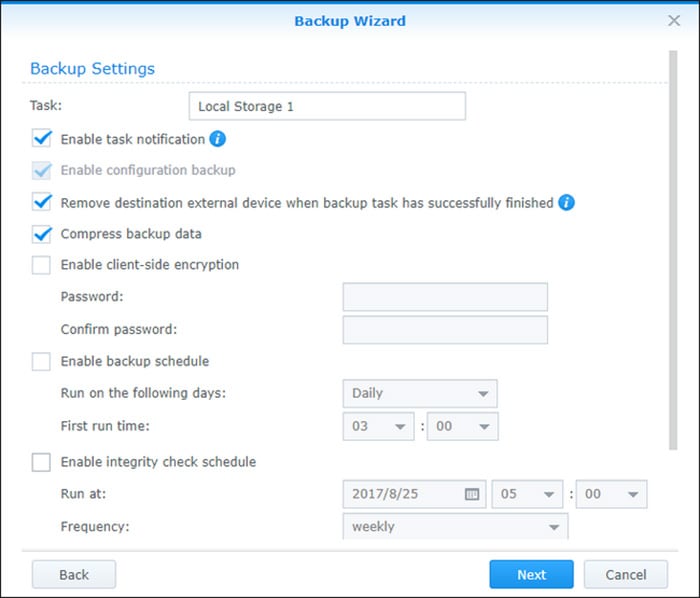
- Step 4. You’ll also be presented with advanced settings. After you finish adjusting the settings, click Apply and wait for the Synology NAS backup to USB drive to finish.
- Step 5. Your files are successfully backed up to the selected USB drive. You can disconnect your external USB drive now.

Before you choose one backup method over another, you should know that DiskStation Manager takes more time. Not only is backup itself slow, but you also need to install another tool and figure out the advanced settings that are not very user-friendly. Except backing up Synology NAS to external drives, you can also back up Synology to the Cloud.
How To Restore Backups From External Drive to Synology NAS

Did you know that 75% of data loss is due to human error?
We’re telling you this because it is not impossible to lose valuable data during backup. Sometimes, a single mistake can result in terrible data losses. The good news is that most of that is retrievable.
Restore Backups From External Drive to Synology NAS in Wondershare Ubackit
If you have backed up your files from Synology NAS to an external drive using Wondershare Ubackit, you can get your accidentally deleted or lost files back with a few clicks.
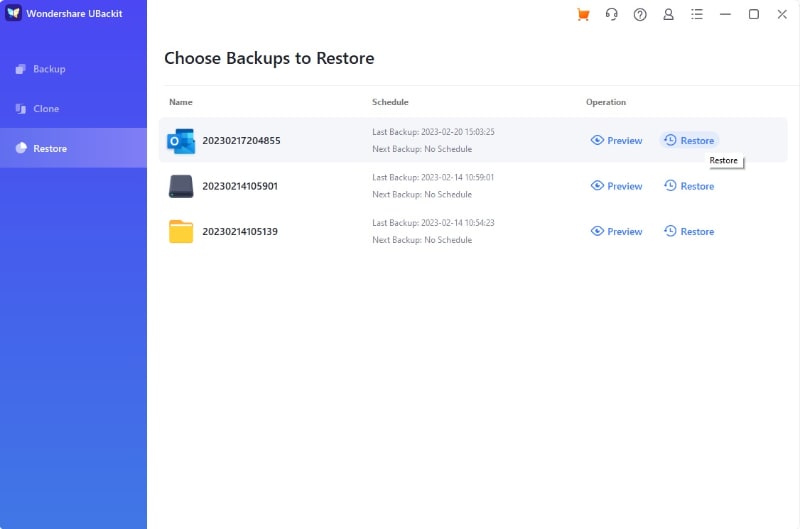
- Step 1. After launching UBackit, you’ll see a Restore option in the sidebar on the left. Click on it to access all backups you’ve saved using UBackit.

- Step 2. Select the backup that you want to retrieve and click the Restore
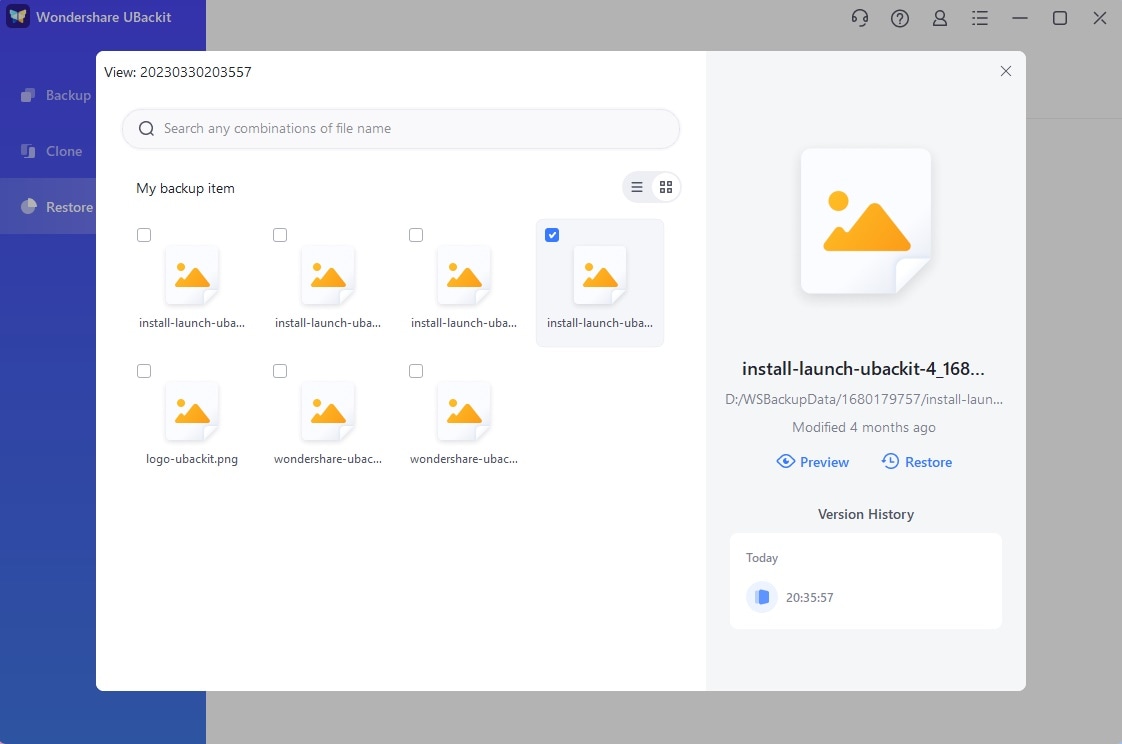
- Step 3. If you don't want to retrieve entire backup items, you can click the View button to see the files/folders and versions saved during the backup and restore them individually. Select the files and folders that you want to retrieve and click Restore on the right.
- Step 4. Next, you need to choose the target location where you want the backup to be restored. Click on Change to manually select the desired location on your PC, NAS server, or external drives.
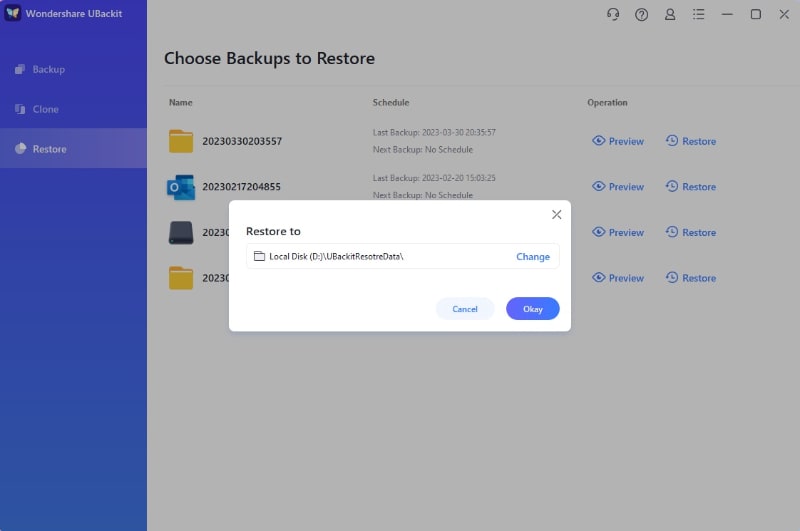
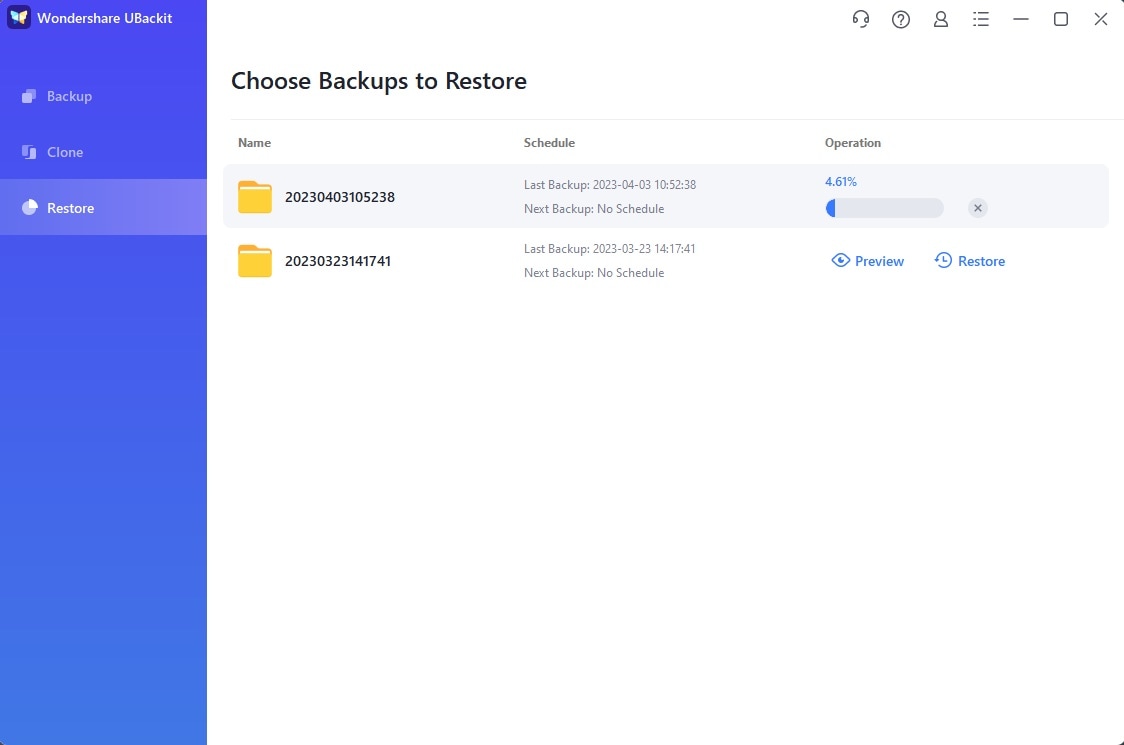
- Step 5. After you pick the target destination and click Okay, UBackit will start restoring your data. You can monitor the process while waiting for the program to finish.
Restore Backups From External Drive to Synology NAS in Hyper Backup
In case you’ve performed a backup from NAS to an external drive using a DSM and a tool like USB Copy, Snapshot, or Hyper Backup, you can try retrieving lost data with this backup tool. Many pick Hyper Backup for this, so let’s see how to use it in this scenario:
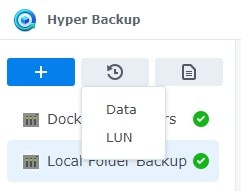
- Step 1. Select the Restore button and then click on Data.
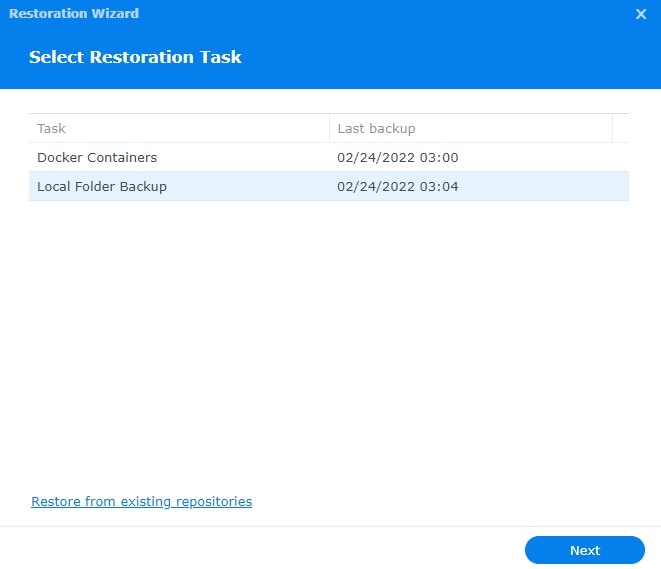
- Step 2. Select the Restoration Task and click Next.
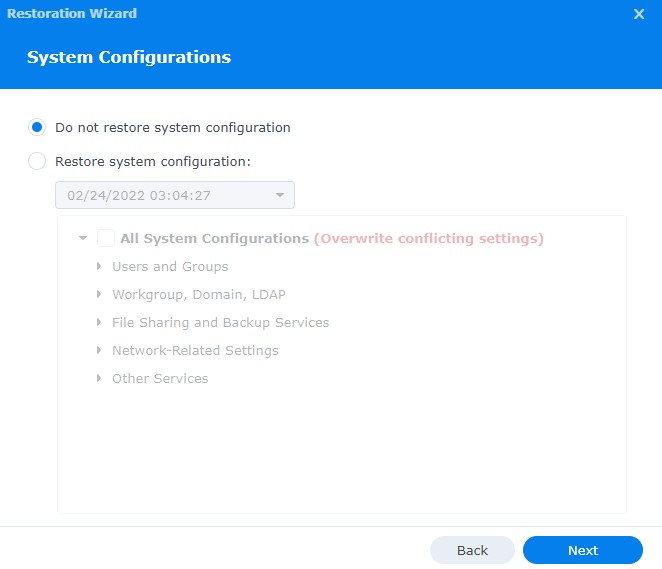
- Step 3. If needed, you can choose to restore the system configuration.
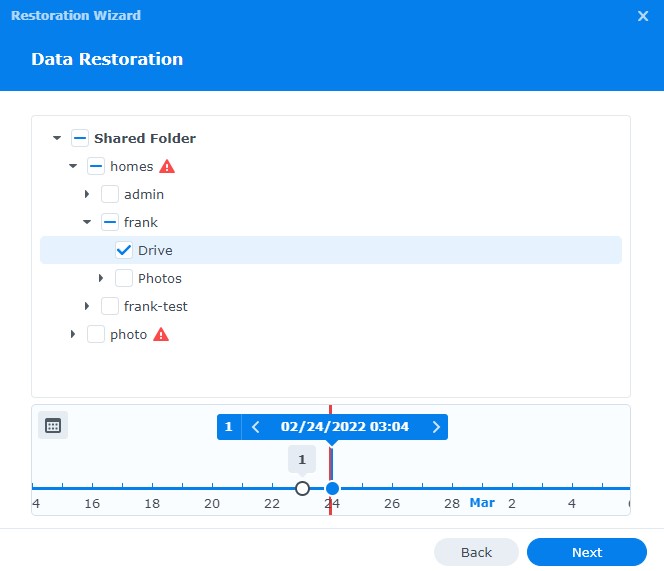
- Step 4. Select the folders and versions that you want to restore and click Next.
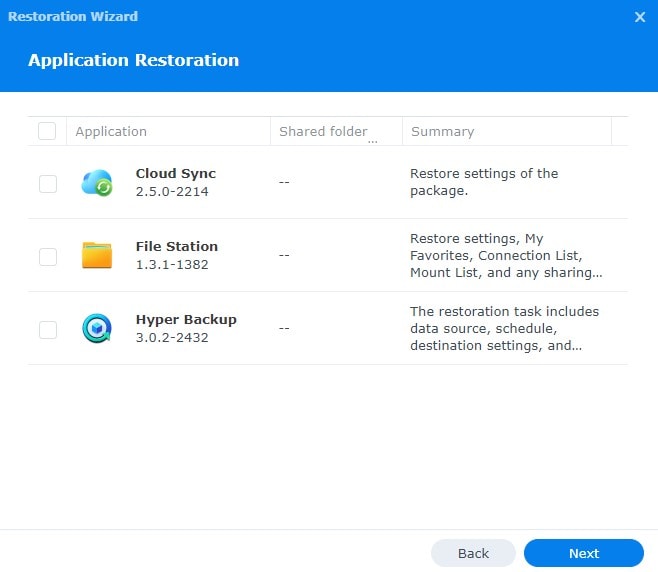
- Step 5. If you want to restore Synology Applications, specify that and click Next.
- Step 6. Click Done and wait until the tool is done restoring your backup.
If that doesn’t work, don’t worry. Sometimes, backup tools Like Hyper Backup are simply not equipped to deal with data loss the same way as restoration software.
While UBackit is powerful enough to restore most files with a backup, Wondershare has another specialized tool for data recovery without backup – Wondershare Recoverit. Recoverit can help you recover deleted files from Synology NAS in case you don’t have a backup at all.
Conclusion
Even though Synology NAS is a go-to device for data safety, you can never have too many backup options. External hard drives are more functional in scenarios with no internet connection, providing a complementary storage solution to Synology NAS.
Backing up Synology NAS to an external drive is quick and simple using Wondershare UBackit – why risk not having done this when it only takes a few extra steps?


