

 TL;DR:
To export Gmail to a Microsoft Outlook PST file, you can manually sync emails using the IMAP protocol within Outlook, or bypass native limitations by using third-party conversion software like BitRecover Gmail Migrator.
● The manual IMAP method requires connecting your Gmail directly to Microsoft Outlook to drag and drop items for export, but this process is time-consuming for large mailboxes and may result in partial data transfers.
● Because Google Takeout defaults to exporting data in MBOX format rather than direct PST, using third-party tools like BitRecover eliminates the need for an Outlook installation and handles large-scale conversions more reliably than free tools.
● Once your PST files are generated, you can use Wondershare Ubackit to configure automated, password-encrypted backups to local drives, external storage, or NAS servers to secure your archived data.
Ask AI for a summary
 ChatGPT
 Perplexity
 Gemini
 Claude
 Grok
Grok
If you're a Gmail user who relies on Microsoft Outlook for your email management, you might have encountered the need to export your Gmail data to PST format. By exporting your Gmail data to PST, you can easily import it to Microsoft Outlook and continue working seamlessly.
This article will explore different methods to export Gmail to PST, including using Google Takeout, the IMAP protocol, and third-party software. So, let's get started!
Table of Content
Understanding PST Format
PST (Personal Storage Table) is a proprietary file format used by Microsoft Outlook to store email messages, calendar events, contacts, and other data items. A PST file is created and stored on the user's computer or a network location and is especially useful for users who need to access their email messages and other data items when they are not connected to the internet or the email server. Additionally, PST files can be used to back up Outlook emails, archive old emails, and transfer data between different computers or email accounts.
Exporting Gmail to PST can offer several benefits for users relying on both Gmail and Microsoft Outlook to manage their emails and other data items. Here are some of the advantages of exporting Gmail to PST:
- Exporting Gmail to PST can help users create a backup of Gmail emails and other data items, which can be restored in case of a system failure or accidental deletion.
- Users can export their old emails and other data items to a PST file, freeing up space in their Gmail account and reducing the clutter in their mailbox.
- Exporting Gmail to PST can also help users migrate their emails and other data items from one email client to another or from one email account to another.
- PST files can be organized by folders, making it easier for users to manage their emails and other data items in a structured manner.
- PST files can be easily integrated with Microsoft Outlook, allowing users to access their Gmail emails and other data items alongside their other Outlook data.
Method 1: Export Gmail to PST Using Google Takeout (Without Outlook)
Google Takeout is a useful tool for exporting Gmail data, including emails, attachments, and labels, to various file formats, including PST. Users can export their Gmail data using this Gmail to PST export tool, making it a versatile solution for managing and transferring email data.
Exporting Gmail to PST using Google Takeout is a simple process. Here are the steps to follow:
- Step 1. Enable IMAP in Gmail
- Step 2. Access Google Takeout
- Step 3. Customize Export Settings
- Step 4. Start Export
- Step 5. Download and Import PST
- Sign in to your Gmail account. Then, click Settings > See all settings.

- Click the Forwarding and POP/IMAP tab, then enable IMAP access. Save the changes and exit the settings page.

- Go to the Google Takeout website at https://takeout.google.com/settings/takeout.

- Select the data you want to export by tapping the Deselect all button, then selecting Mail under Google apps.

- Customize your export settings, including the format, size, and delivery method. Choose PST as the format. Click Create export to start the process.

Wait for the export to complete. It takes time, depending on the data you export. Once the export is complete, you will receive an email with a link to download the PST file. You can then save the PST file to your computer and import it into Microsoft Outlook.
Method 2: Export Gmail to PST Using IMAP Protocol (With Outlook)
The IMAP protocol is another useful option for exporting Gmail to PST. IMAP stands for Internet Message Access Protocol, a protocol email clients use to retrieve email messages from a mail server. One benefit of using the IMAP protocol to export Gmail to PST is allowing users to download their emails directly to their computers without using third-party tools or services.
However, remember that this method can be time-consuming, especially if you have a large amount of data to download and need help to download all the data items successfully. In such cases, using third-party software may be a better choice.
- Step 1. Add Gmail to Outlook
- Step 2. Prepare for Export
- Step 3. Export to PST
- Open Microsoft Outlook on your computer. Click File > Add Account.

- Enter your Gmail email address and press Connect. Enter your Gmail account password and click Connect Outlook will automatically configure your Gmail account using the IMAP protocol.

- Once the account is set up, create a new folder in Outlook where you want to store the exported data items.

- Go to the Gmail account in Outlook and select the emails and other data items you want to export to PST. Drag and drop the selected items to the folder you’ve created.
- Once all the items are moved to the folder, right-click on the folder and select the Export.
- Please choose the location where you want to save the PST file and give it a name. Click the OK button to start the export process.

Wait for the export to complete. It takes time, depending on the amount of data you are exporting. Once the export is complete, you can close Outlook and access the PST file from your specified location.
Optionally, after logging your Gmail to Outlook, you can set up an automatic export and backup of your PST files using email backup software. This will help ensure that your important Gmail emails are regularly backed up and can be easily recovered in the event of unexpected data loss or corruption.
Wondershare Ubackit is a highly recommended software for this purpose. It offers a range of useful features to help keep your important data secure. It’s auto backup and encrypt features are a fantastic way to ensure that your important data is always protected. These features allows you to automatically back up your email data daily, weekly, monthly, or even non-stop, while also encrypting your files with a secure password to prevent unauthorized access. Follow the steps below to learn how you can do that.
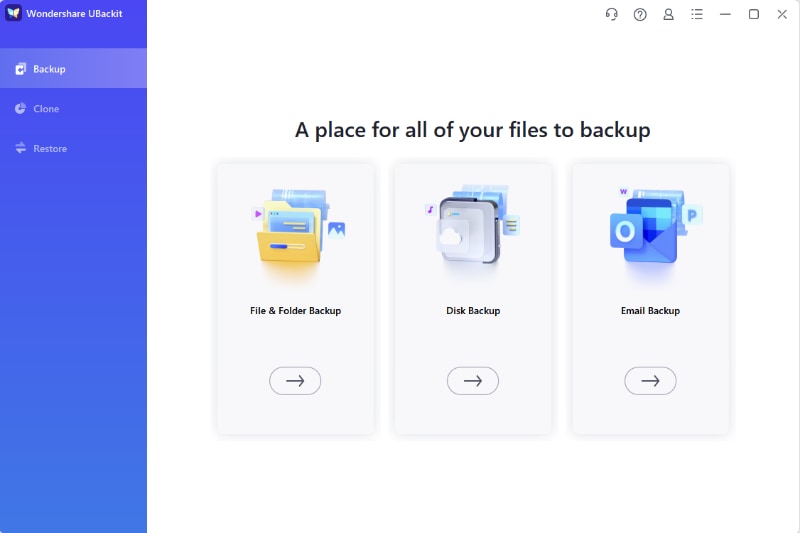
- Download and install Wondershare Ubackit on your computer. Then, choose Email Backup in the Backup section after launching the software.
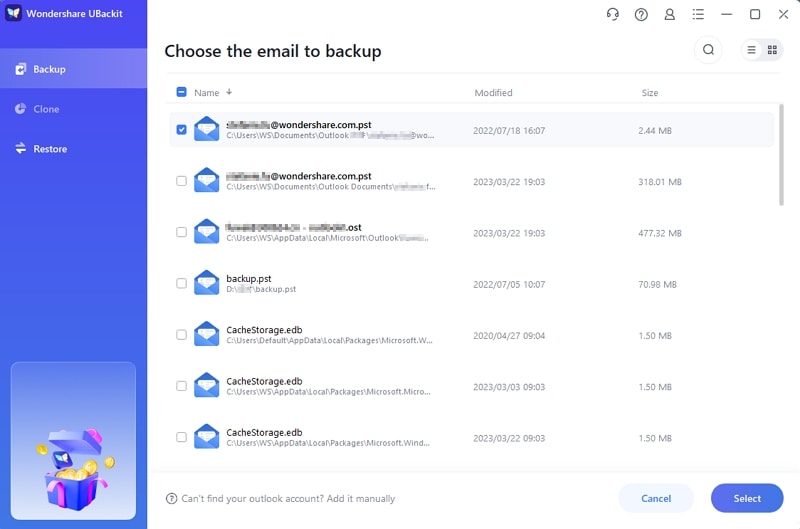
- Ubackit will search and display available Email files automatically. Select the Gmail account that you want to export to PST by checking the box beside it and click the Select button to continue.
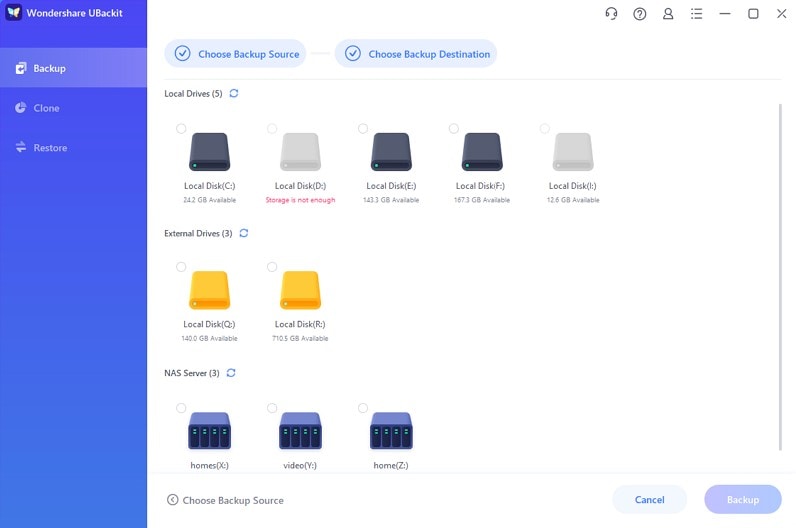
- Now, you need to choose the export location. Ubackit allows you to select the destination of your choice. You can choose to back up your files either locally, to external drives, or to a NAS server. Finally, click the Backup button to proceed.
- In just a few seconds, Ubackit will complete the backup process. Once finished, you can find the exported PST file in the selected destination. Besides, you can navigate to the backup manager section and click on the Schedule icon to set up automatic backups according to your specific requirements.
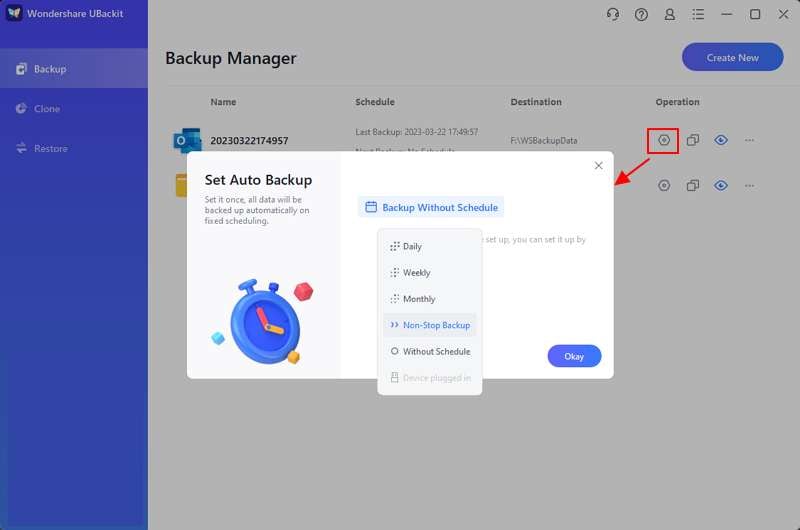
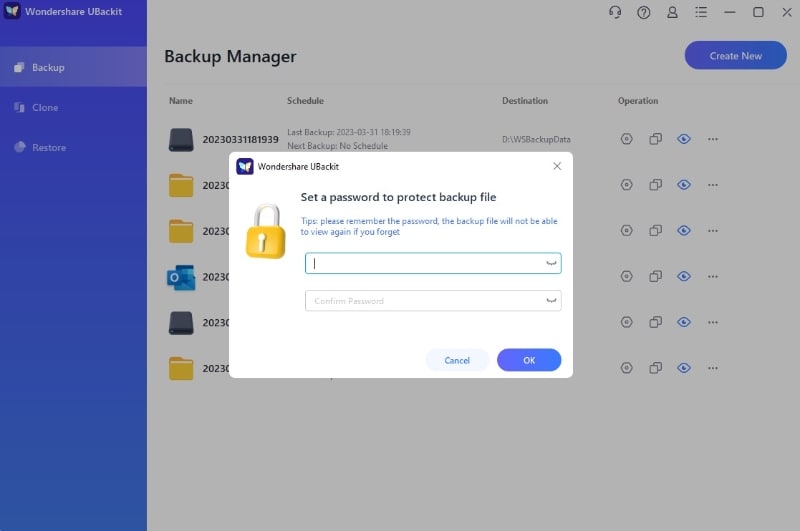
- If you're concerned about the security of your backed up email files, you can use Wondershare Ubackit's built-in encryption feature to password-protect them. To do this, simply click on the three-dot icon located next to the backup job that you want to encrypt and select the Encrypt option. This will prompt you to set a password for the backup file, which will prevent unauthorized access to the contents of your backup.
Method 3: Using Gmail to PST Export Software (Without Outlook)
While using IMAP control and Google Takeout to export Gmail to PST are viable options, there are still some limitations and drawbacks to these methods. For instance, the IMAP protocol and Google Takeout can be time-consuming and may only partially export some data items, which can be inconvenient for users with a large amount of data.
Given these limitations, third-party software is often the best option for users who want a quick and hassle-free way to export their Gmail data to PST. One such software that is highly recommended is BitRecover Gmail Migrator. Bit Recover has been assisting individuals and businesses in taking that leap of faith and transitioning to other cloud-based email services, clients, and formats. It has extensive experience converting Gmail emails with attachments to computers and your preferred webmail. You can use this Gmail converter tool to export Gmail to PST efficiently.
To convert Gmail emails to PST format with BitRecover, follow these steps:
- Step 1. Log in to Gmail
- Step 2. Select Data & Format
- Step 3. Confirm & Export
First, download BitRecover Gmail Backup Wizard and install it on your Windows or Mac operating system. After setting up, launch the tool and follow the on-screen instructions to convert Gmail to a PST file for Windows or Mac OS.
- Enter your Google Mail account information (Email Address or Password) and click Login.

- Select the exported Gmail folders and PST as the saving format.

- Click the “use advanced settings for selective backup” option.

- Confirm the default destination path.

- To export email messages from Gmail to a PST file, click the Backup Gmail emails are being exported to PST with a live conversion progressive report.

- The procedure for exporting Google Mailbox to PST is complete. To get the exported PST files, navigate to the selected destination path.

You may also be interested in: Import Outlook PST to Gmail
Conclusion
Exporting Gmail to PST is a great way to manage and access your Gmail data on the go. You can use an email client like Google Takeout, IMAP protocol, or third-party software like BitRecove. However, to ensure the safety and protection of your important email data, it's important to also back up both your PST file and Gmail emails using reliable backup tools or services. With these best practices, you can enjoy seamless email management and secure data protection for your Gmail data.
FAQs
-
Why Would I Need to Convert Gmail to PST?
Common reasons:
Migrating to Outlook/Office 365 for better offline access.
Backup & archival.
Legal/compliance requirements. -
Does Google Provide a Direct Way to Export to PST?
No, Google Takeout exports in MBOX format by default. You can use Outlook with IMAP to sync Gmail, then export as PST. Or use the Third-party tools, such as SysTools, Stellar Converter, for direct conversion. -
What Are the Risks of Using Free Gmail to PST Converters?
It may cause data loss/corruption and security risks. It's recommended to use trial versions of trusted software before purchasing.


