To increase computer performance, you may wish to replace your operating system disk with a larger one or a solid-state drive (SSD). One option is to reinstall the entire system and all your applications onto the new drive or SSD, then restore the extra files from a backup. It is not a reliable option as it lets you start with a fresh installation of the operating system, taking a long time.
Another faster approach is to clone the original disk onto a new one, including everything. It's a simple process with software like Acronis True Image, and this guide walks you through the steps to clone HDD To SSD using Acronis True Image.
Prerequisites
As an important reminder for all users, you must prepare before cloning HDD To SSD using Acronis True Image. You must verify the sector disk size and dynamic disks.
Verifying the Sector Size of a Disk:
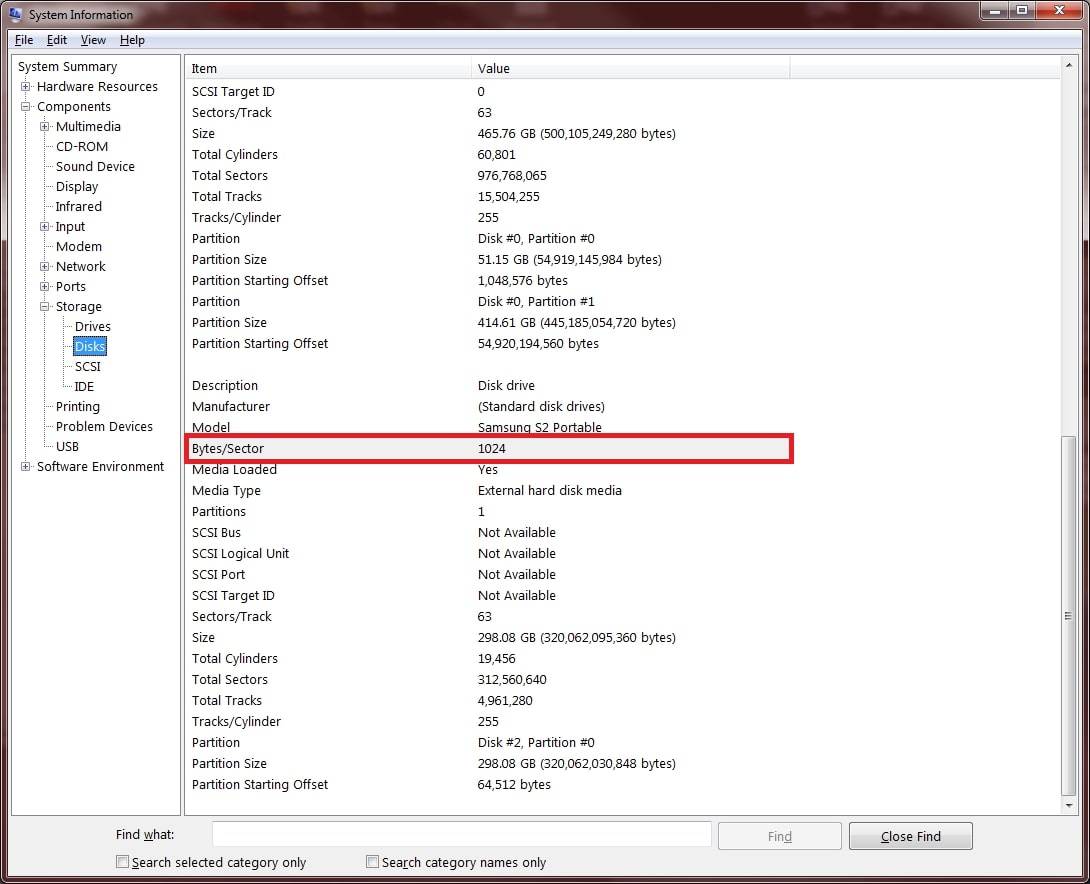
- Navigate to Start > Run > msinfo32.
- Find the desired disk by going to Components > Storage > Disks.
- The sector size will be shown in the Bytes/Sector line.
Determining Whether You have Basic or Dynamic Disks:
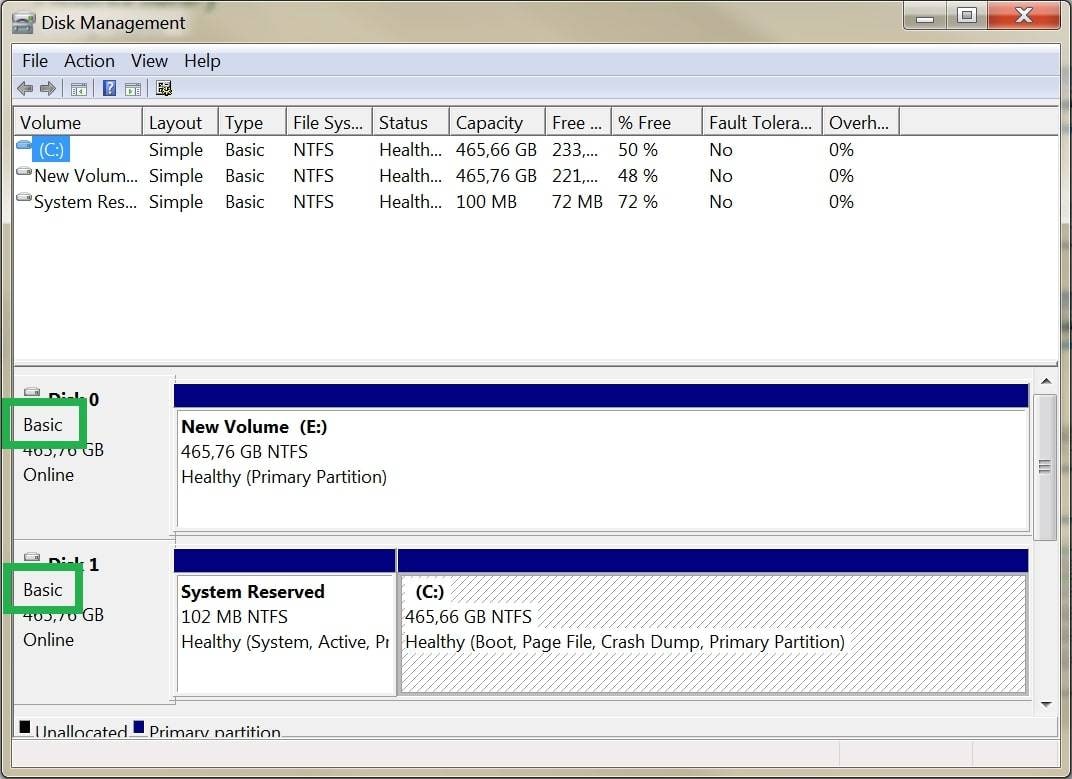
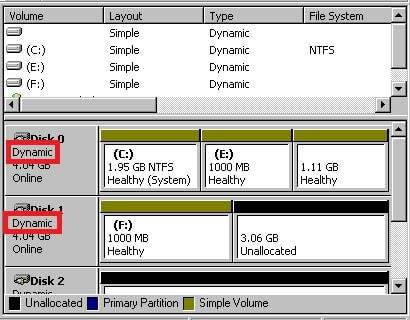
To determine whether you have basic or dynamic drives, use Windows Disk Management:
- Select Start-Run and enter diskmgmt.msc.
- If it says Basic, you can proceed with the cloning:
- If it says Dynamic, cloning is NOT an option:
Step-by-Step Guide to Clone a Disk Using Acronis True Image
Acronis True Image is a powerful disk cloning software that allows users to make exact copies of their disks or partitions. Whether upgrading to a larger hard drive or replacing a failing disk, Acronis True Image provides a reliable solution for seamless disk cloning.
This is paid software. It requires a purchase to access its complete set of features. The pricing structure of Acronis True Image varies depending on the specific edition and licensing options the user chooses.
- Essentials: $49.99per year
- Advanced: $54.99per year
- Premium: $124.99per year
To clone a disk using Acronis True Image, we covered two scenarios: Acronis Bootable Media for Acronis True Image 2017 or earlier versions and cloning from within Windows using Acronis Cyber Protect Home Office.
These two differ in accessing Acronis True Image for disk cloning. The Acronis Bootable Media allows you to clone a disk without accessing Windows, making it suitable for cloning the system drive. On the other hand, cloning from within Windows using Acronis Cyber Protect Home Office is used for cloning non-system drives or performing disk cloning tasks within the Windows environment.
Case 1. Acronis Bootable Media (For Acronis True Image 2017 or earlier version)
When using an older version of Acronis True Image, the cloning process requires creating a bootable media to initiate the disk cloning operation. Follow these steps:
- Step 1: Build a bootable rescue DVD, a standalone version of Acronis True Image. You can use it to start a crashed PC or a device that does not have an operating system and restore an image of your system.
To make a bootable media, follow these steps:
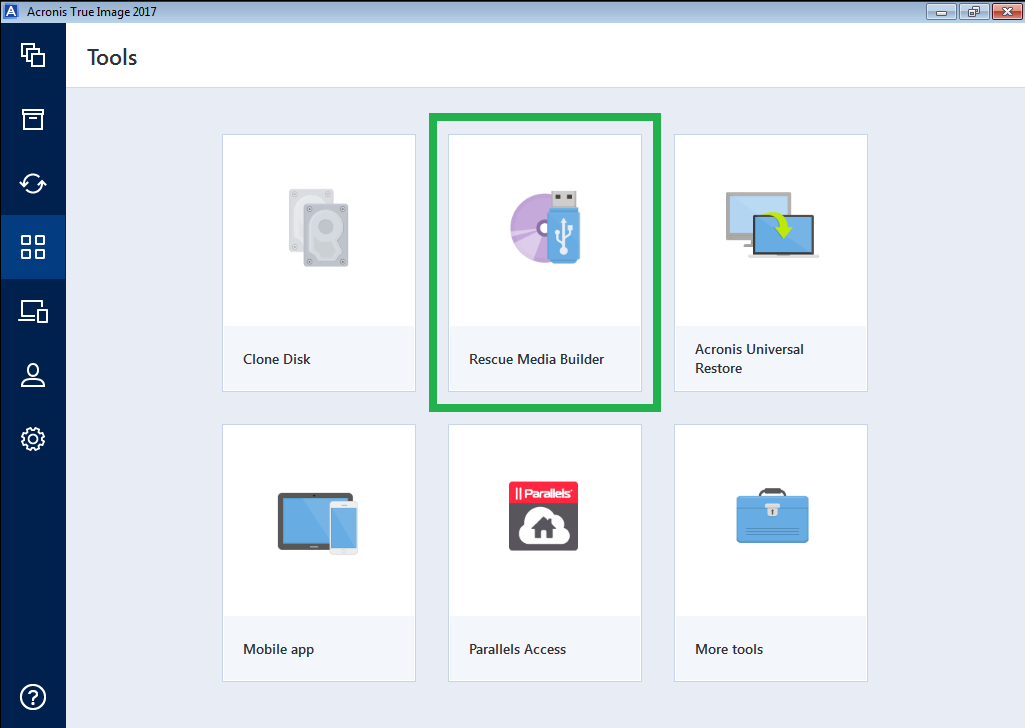
- Use the Rescue Media Builder in the software interface. Insert a CD/DVD or connect a USB flash device to your computer. Then, launch the product and select Tools > Rescue Media Builder.
- Choose ACRONIS BOOTABLE RESCUE MEDIA.
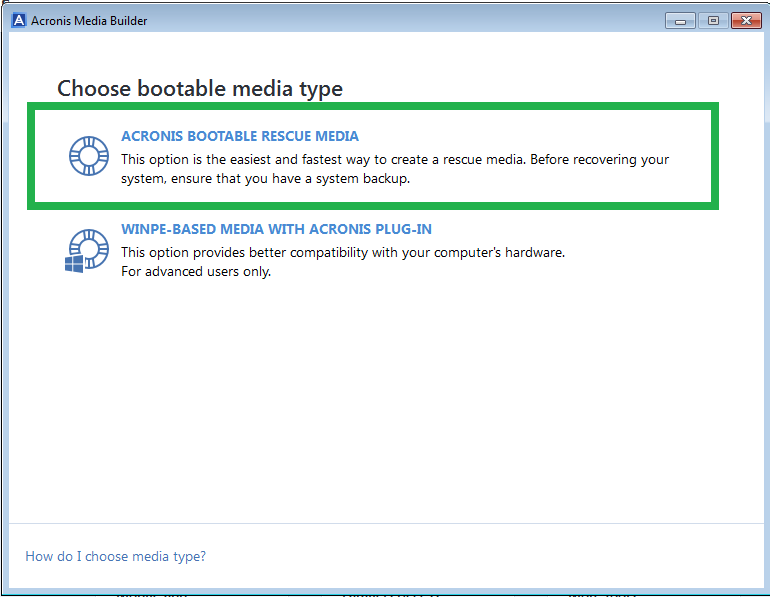
- Choose a media type.
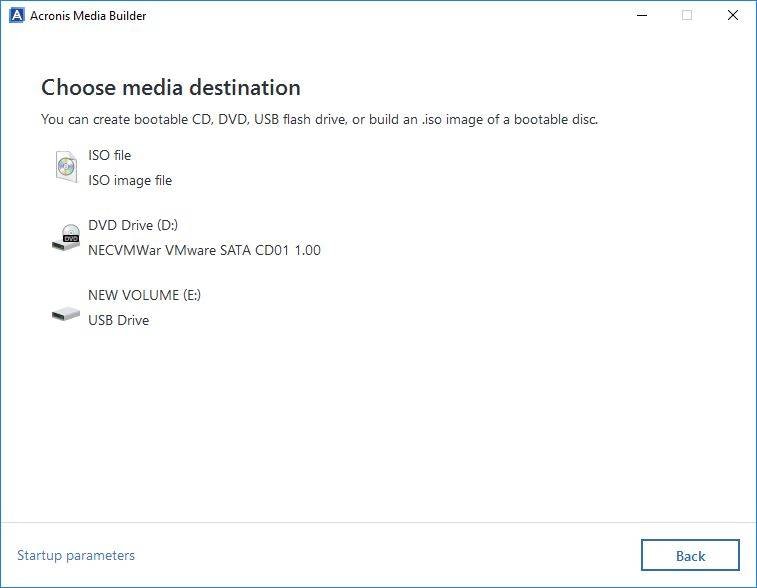
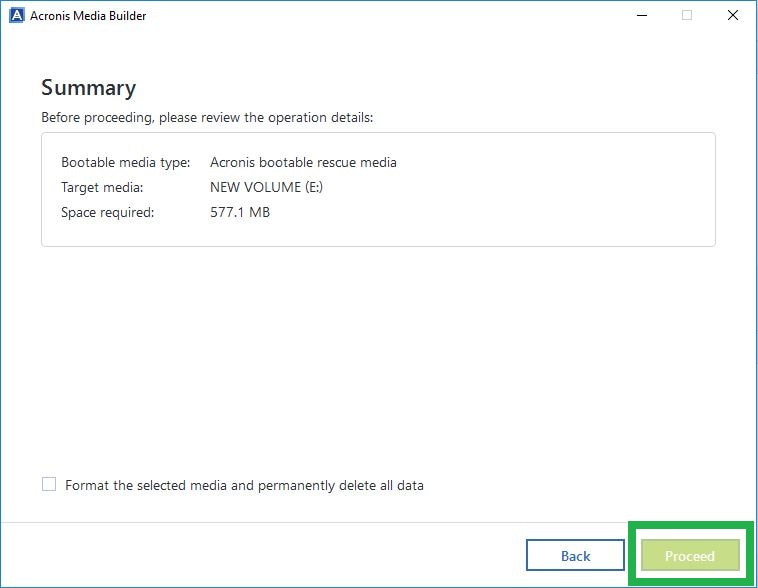
- Press the Proceed button.
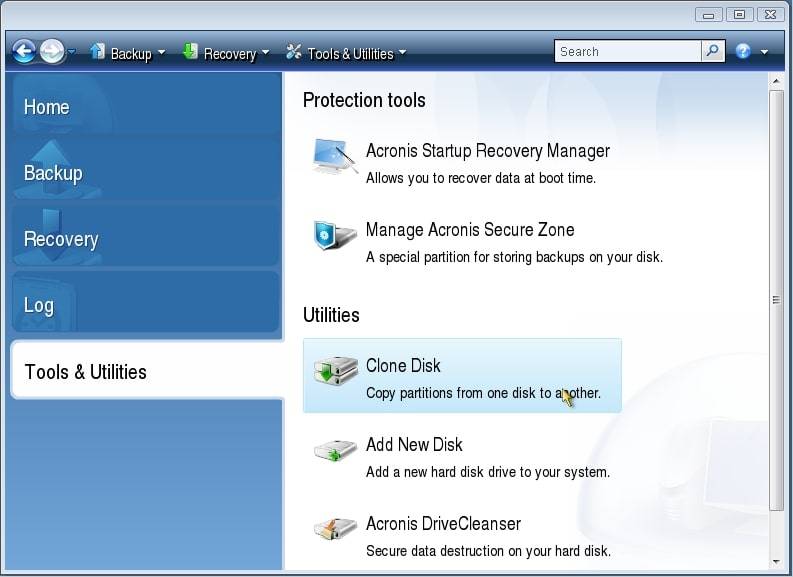
- Step 2: Select Tools > Clone disk after booting from Acronis Bootable Media.
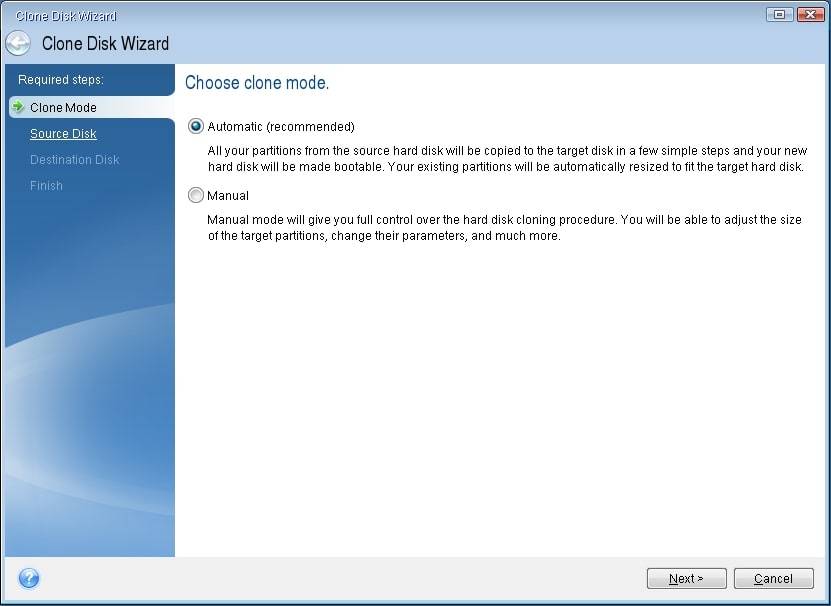
- Step 3: Select Automatic to adjust your old disk's partitions automatically and proportionally to accommodate the new disk.
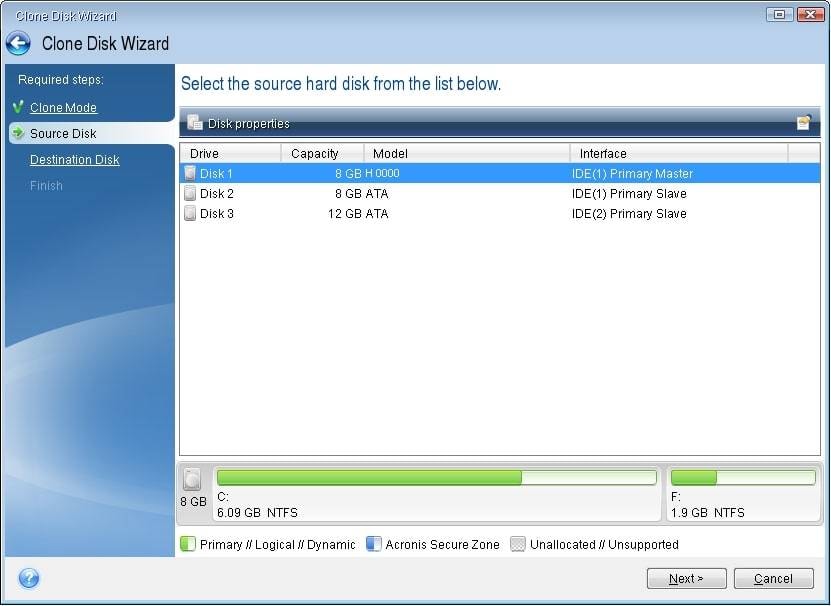
- Step 4: Choose your old hard disk as the source disk and press the Next button.
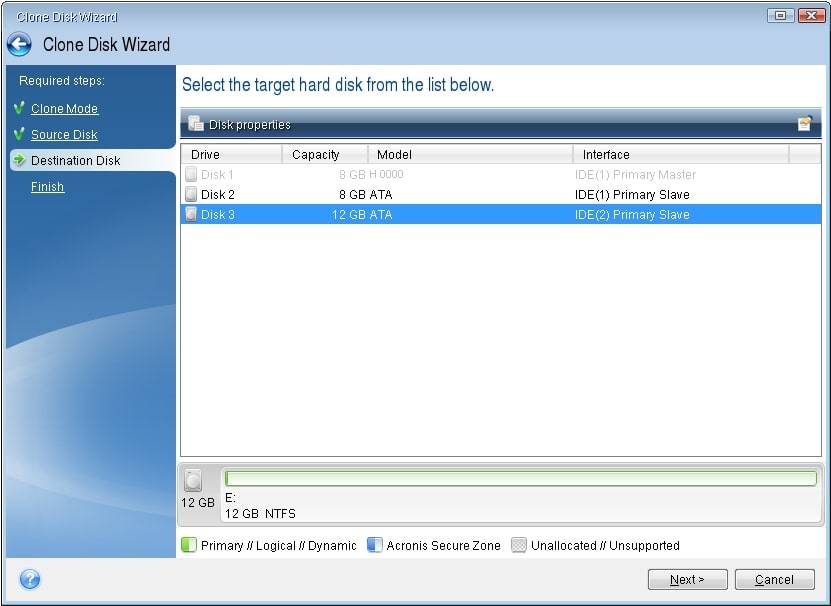
- Step 5: Select the new hard disk as the destination disk and press the Next button.
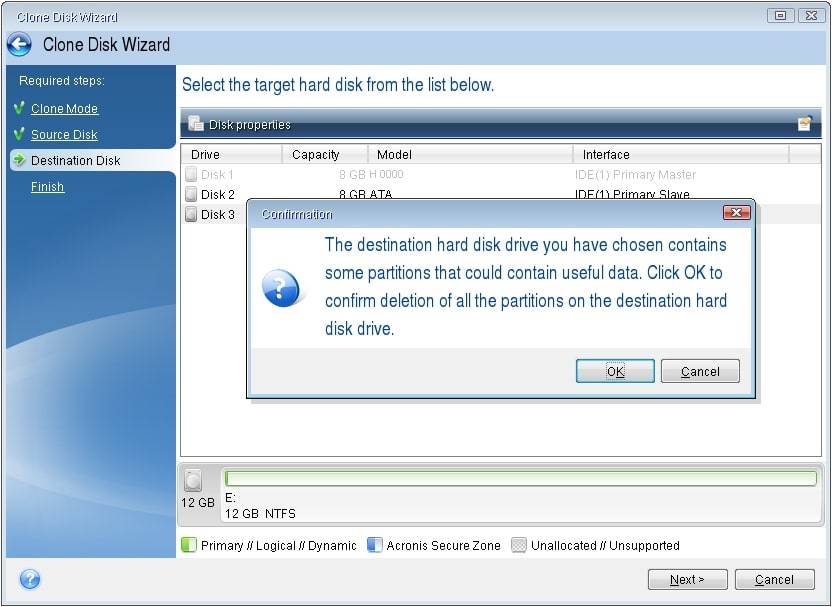
- Step 6: If the target destination disk is partitioned, click OK to delete all data from the disk.
- Step 7: Examine the operation in the Summary window and click Proceed to begin cloning.
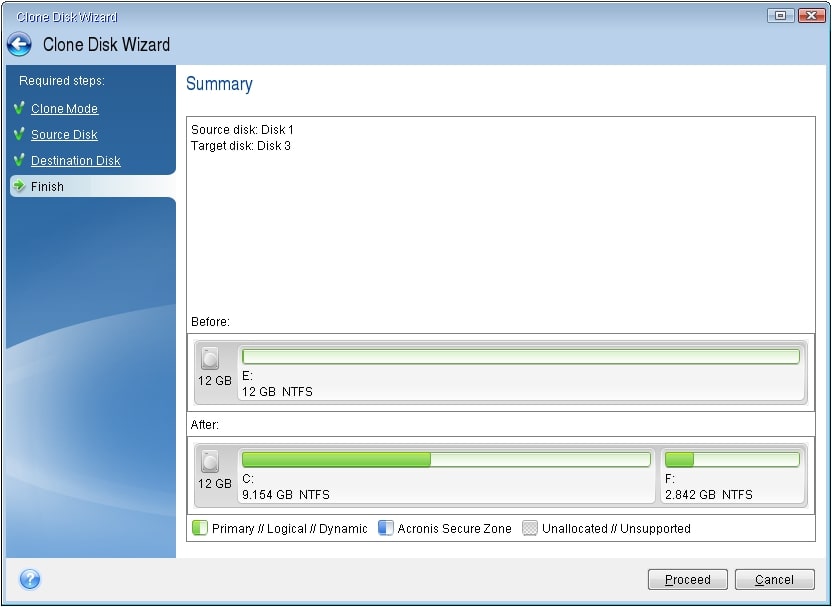
- Step 8: When the cloning is finished, turn off the device and remove one of the hard drives.
Case 2. Acronis Cyber Protect Home Office/Acronis True Image (Cloning from Windows)
After many years of being available to the public, Acronis True Image is changed to the renowned personal cyber protection solution called Acronis Cyber Protect Home Office. Using Acronis Cyber Protect Home Office, formerly Acronis True Image, you can perform the disk cloning process directly from within the Windows operating system. Follow these steps:
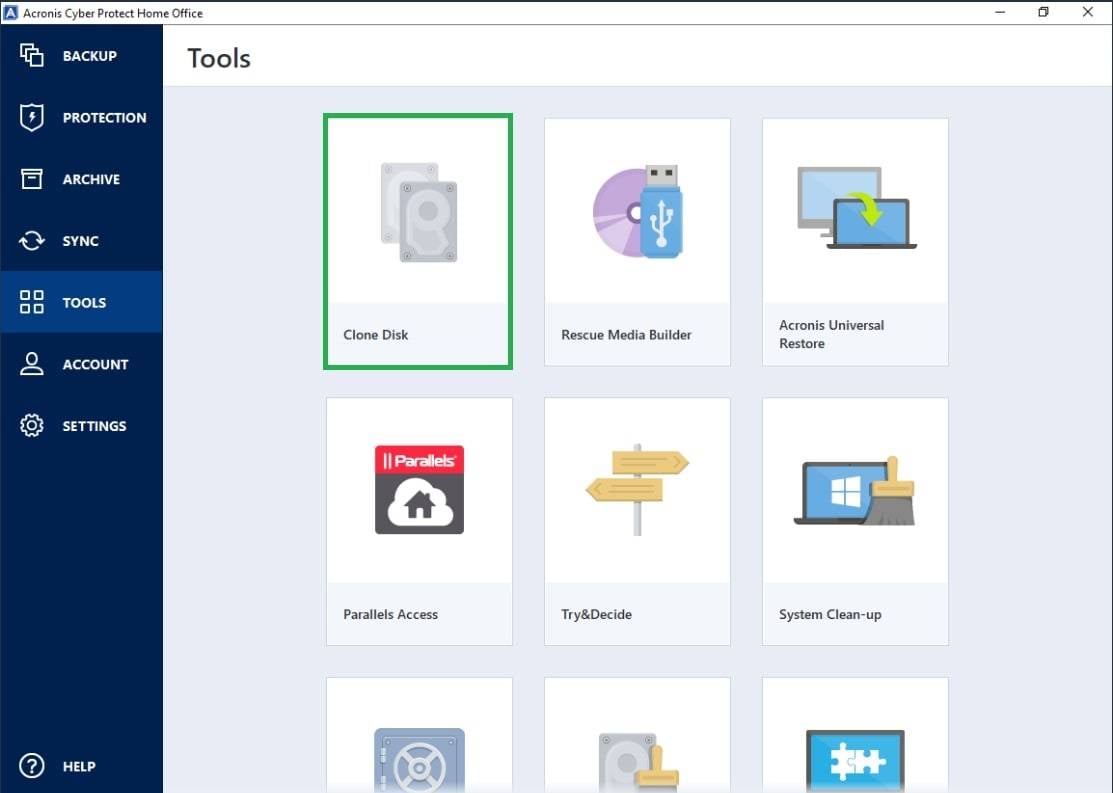
- Step 1: Launch Acronis Cyber Protect Home Office and navigate to Tools > Clone disk.
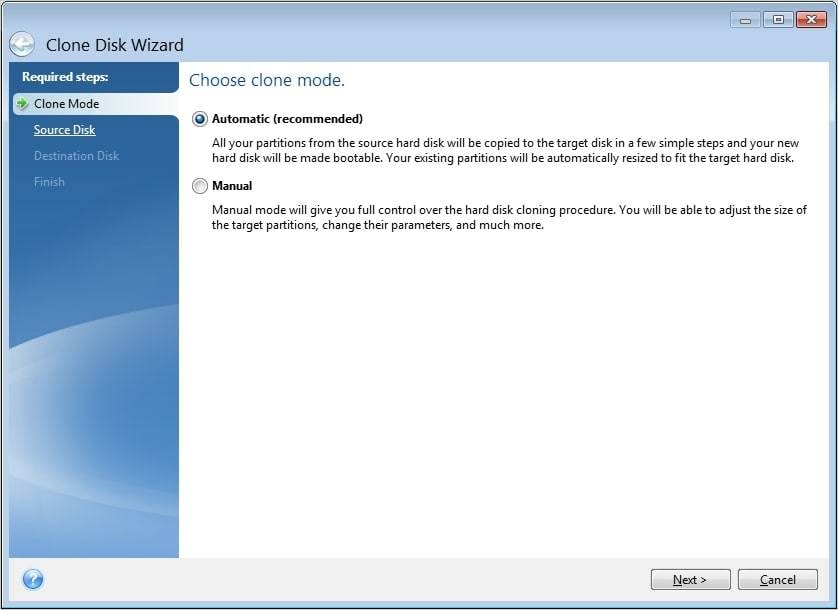
- Step 2: Select Automatic to adjust your old disk's partitions automatically and proportionally to accommodate the new disk.
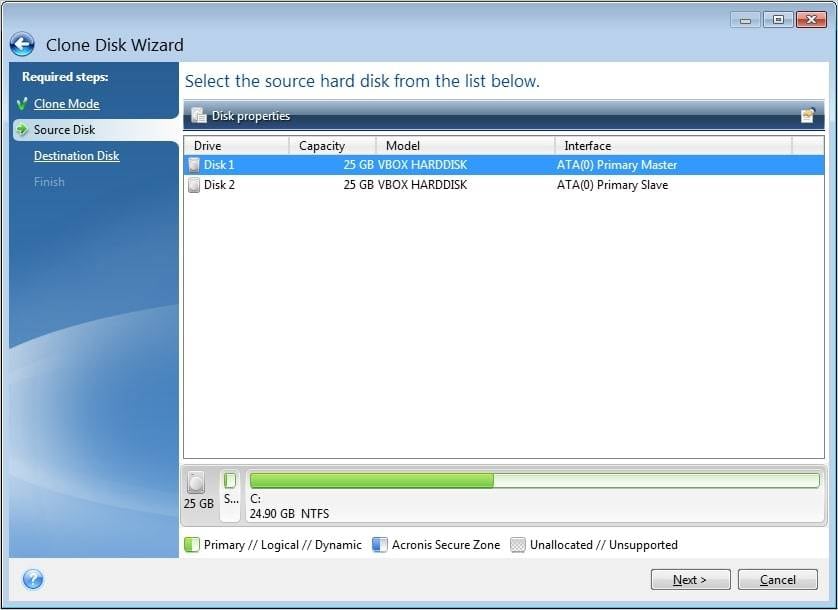
- Step 3: Choose your old hard disk as the source disk and press the Next button.
- Step 4: Select the new hard disk as the destination disk and press the Next button.
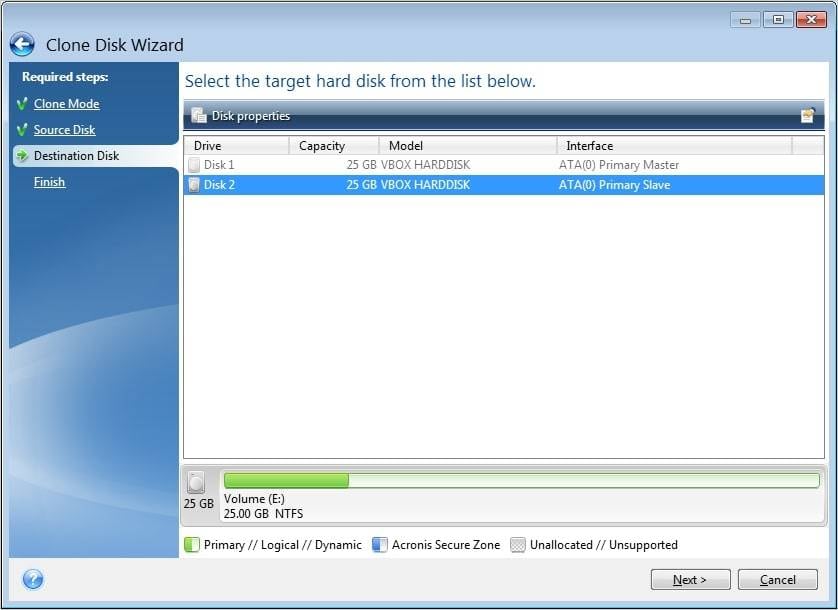
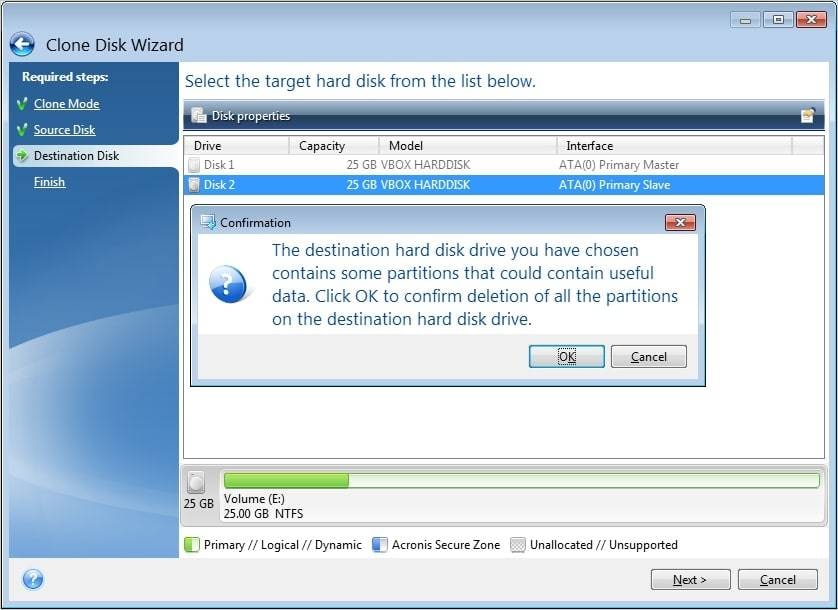
- Step 5: Click OK to allow the deletion of all data from the disk.
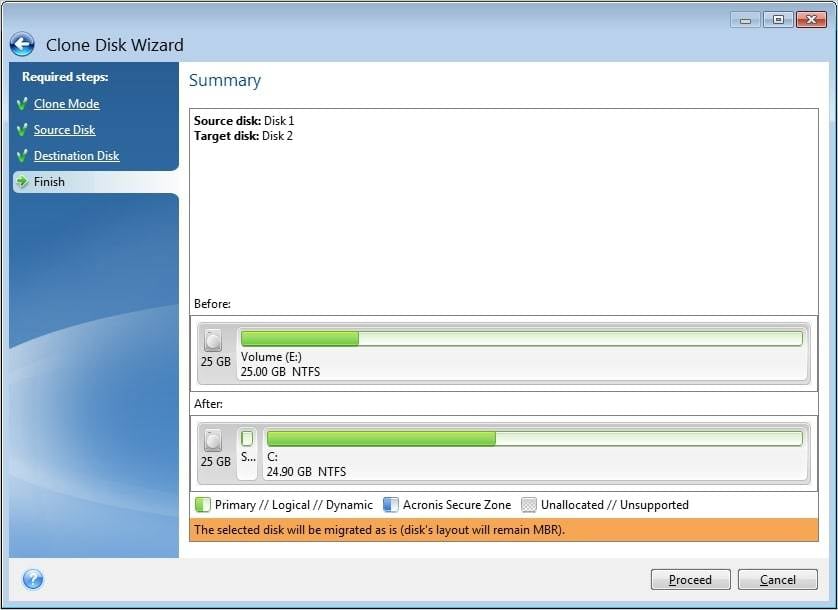
- Step 6: Examine the operation in the Summary window and click Proceed to begin cloning.
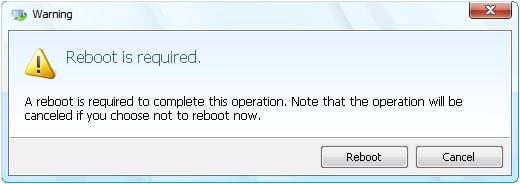
- Step 7: If you're cloning a disk with an active operating system, the application may prompt you to reboot. To continue cloning, press Reboot. The operation will be aborted if you press Cancel.
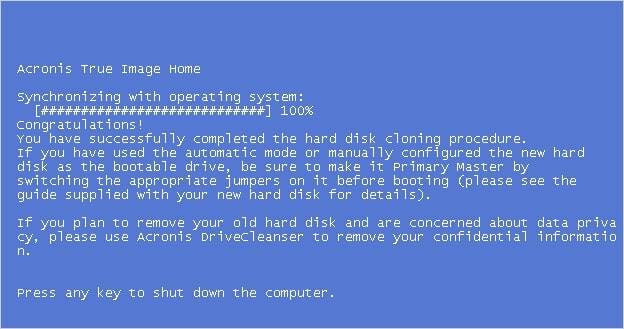
- Step 8: When the cloning is finished, you will be given the option to shut down the computer by pressing any key. Turn off the computer and remove one of the hard drives.
Best Alternative to Acronis True Image - Wondershare UBackit
Acronis True Image has been a popular user choice for disk cloning and backup creation. However, for those seeking a cheaper alternative with similar functionality and even more features, Wondershare UBackit stands out as an excellent option. With its one-month free trial, UBackit can be regarded as a free cloning software for Windows. This is particularly advantageous as disk cloning is typically a one-time operation, and the free trial enables users to perform it without any financial commitment.
Let's explore key features that make it a compelling alternative to Acronis True Image.

Wondershare UBackit - Your Reliable Disk Cloning Software
Disk Clone: You can clone hard drive to SSD or another HDD easily. It supports a wide range of disk types, such as HDDs from all brands, SATA/M.2 SSDs, NVMe SSDs, USB drives, NAS drives, and SD cards.
Partition Clone: Instead of cloning the entire disk, you have the option to clone a particular partition.
Sector-by-Sector Clone: You are allowed to replicate a hard drive or partition bit by bit.
Supported OS: It is compatible with Windows 11/10/8.1/8/7, 32 bit and 64 bit.
Step-by-Step Guide
Follow the steps below to clone HDD to SSD using this Acronis True Image alternative:
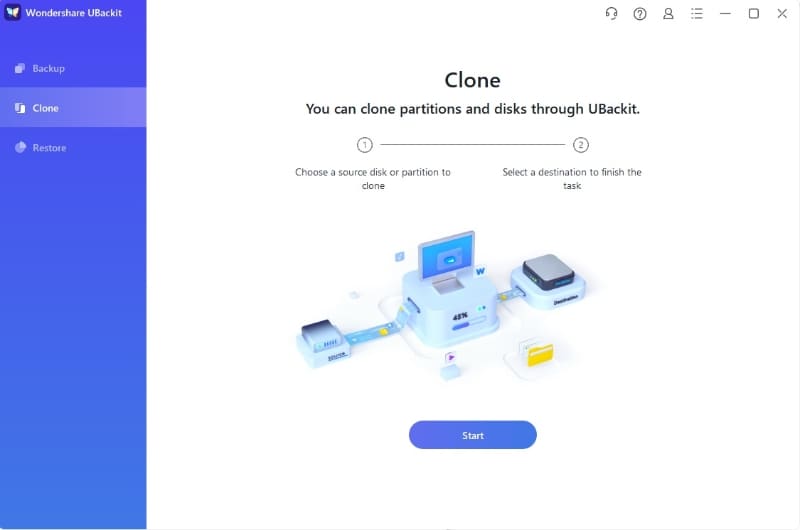
Step 1Select the Clone Tab.
Open Wondershare UBackit after downloading and installing it. Next, select the Clone tab and click Start Clone.
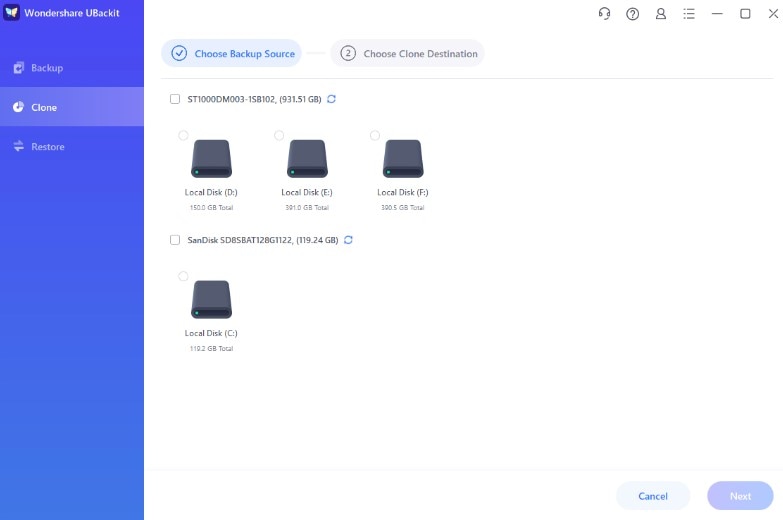
Step 2 Click the Chosen Source and Target Destination.
Select a source disk to clone, and select Next.
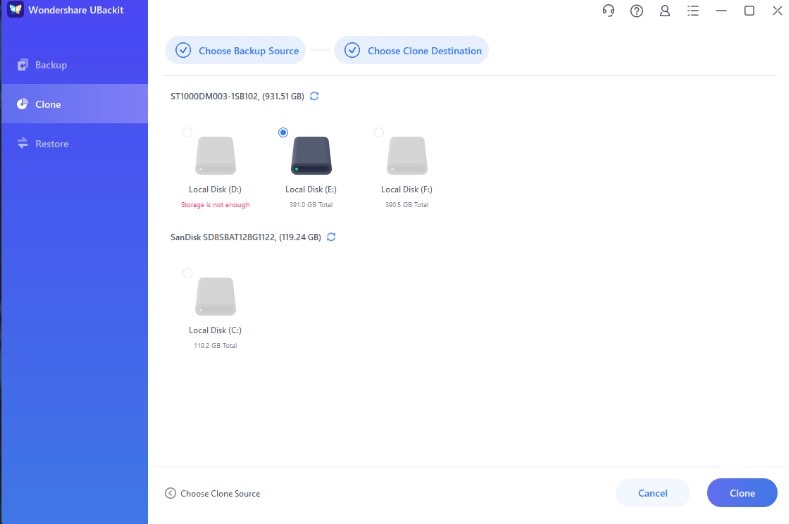
After selecting a source drive, specify its destination. Then, tap Clone to begin the process.
Step 3Start the Cloning Process
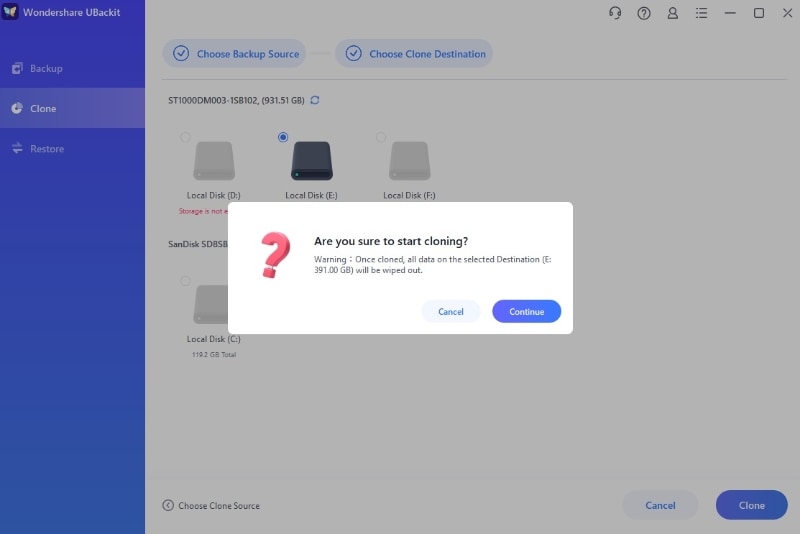
Confirm the cloning process by clicking Continue. Note that this procedure will remove all data on the drive.
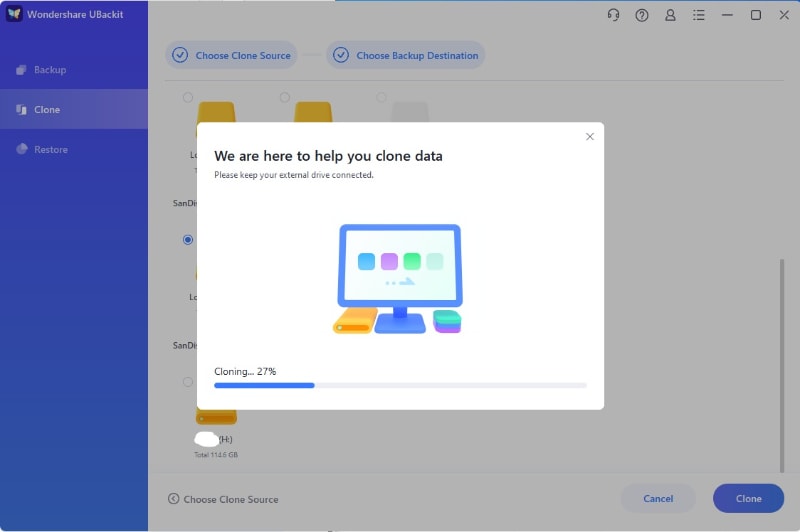
The HDD cloning process will take time based on the data you are copying.
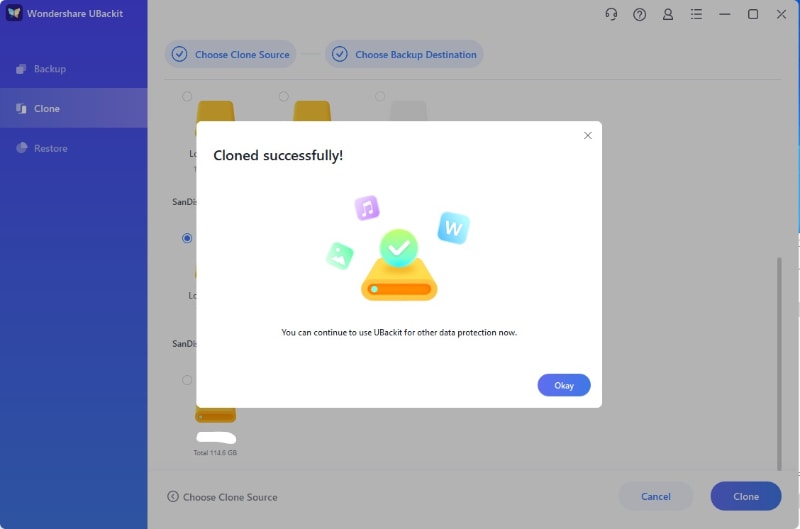
Your screen will alert you when the HDD cloning process is complete.
Conclusion
This guide teaches you how to use Acronis True Image to clone SSD to HDD. However, Wondershare UBackit may be the best option if you require a more dependable and flexible technique to clone your hard disk. It includes simple operation stages and a wide range of functions. Try it now.

 ChatGPT
 Perplexity
 Google AI Mode
 Grok
Grok


