
 TL;DR:
You can back up Windows Live Mail data by manually exporting emails to a local or external drive, or by using automated third-party software like Wondershare UBackit.
● The manual export method saves messages as individual EML files, which prevents you from exporting specific single emails and cannot be directly read by Microsoft Outlook.
● Using Wondershare UBackit enables scheduled and incremental backups, but requires a strict prerequisite that your Windows Live Mail account must first be added and logged into Microsoft Outlook for the tool to function.
● To restore or migrate your email data to a different computer, you must copy the generated backup files to the new device and utilize the native Import option directly within the Windows Live Mail client.
Ask AI for a summary
 ChatGPT
 Perplexity
 Gemini
 Claude
 Grok
Grok
Windows Live Mail is an easy-to-use email application that allows you to send and receive emails from multiple accounts in one place. However, just like any other software, it is important to back up your Windows Live Mail data to prevent data loss. This tutorial will assist you by listing the steps to back up Windows Live Mail data quickly and easily, whether you are a novice or an advanced user. So, without further ado, let's get started!
In this article
About Windows Live Mail Backup
Windows Live Mail is a freeware and widely used email client application from Microsoft. It was first released in 2007 as a part of the Windows Live suite of applications, which included other programs like Windows Live Messenger, Live Writer, OneDrive, MovieMaker, and Photo Gallery. It lets you download and store emails like Outlook Express on Windows XP and Windows Mail on Vista.
This software offers several useful features to help users manage their email accounts efficiently. Here are some of the main features of Windows Live Mail:
- Export and import functionality: Windows Live Mail allows users to export and import email data, including messages, contacts, and calendars, to and from different formats and applications. It makes creating and transferring email data backups between different email clients easy.
- Easy backup location: This software stores email data in a single location on the user's computer, making it easy to locate and back up.
- Customizable backup settings: Users can customize the backup settings in Windows Live Mail to include specific folders or data types, such as email messages, contacts, or calendars.
- Backup file compression: Windows Live Mail offers the option to compress backup files, reducing their size and making them easier to store and transfer.
Top 2 Methods to Backup Windows Live Mail
All email clients have a maximum capacity for storing emails, exceeding which requires users to transfer emails from the email platform to their system. It's a well-known fact that the data on your system is always at risk of being lost or damaged.
In some cases, data loss may be irreversible. However, creating a backup can give you peace of mind and ensure your data is secure. Let's see the top two methods to back up Windows Live Mail.
Method 1: Backup Windows Live Mail to External Hard Drive Manually
One of the simplest ways to back up your Windows Live Mail is by exporting your emails to an external hard drive. This method involves selecting the specific emails or folders you want to save, using the "Export" function in Windows Live Mail, and choosing the external drive as the destination for the backup files.
Following the steps below, you can easily backup Windows Live Mail emails on your system or an external drive:
- Step 1. Make an empty folder wherever you intend to save the backup. Then, launch Windows Live Mail and sign in to your account. When the program launches, click the Windows Live Mail icon and select Export email > Email messages.

- Step 2. Click Browse and navigate to the backup folder you created. To proceed, click the Next button.

- Step 3. Select the folders to export or select All folders and then click Next.

- Step 4. Wait for the process to complete.

- Step 5. When the process has been completed, click the Finish button.

After completing the preceding steps, the selected data will be exported to the new folder you created on your external hard drive. The emails will all be saved in EML format.
Exporting to an external drive ensures that your backup files are stored separately from your computer, reducing the risk of losing your data in case of a hardware failure or other issues. Moreover, the exported files can be easily transferred to another computer, making this method useful for frequently switching between devices. Additionally, you can access your backup files from any computer with the external drive, which is safely stored and accessible when needed.
Method 2: Backup Windows Live Mail Using a Backup Software
After discussing the manual method of backing up Windows Live Mail data to an external hard drive, it is important to note that this approach has its limitations and drawbacks, including the following:
- Each email will receive a separate EML file due to the process. As a result, managing this email becomes a very difficult task.
- Microsoft Outlook does not support EML files. As a result, if you wanted to read Windows Mail emails in Outlook, you couldn't.
- This procedure does not allow you to export specific emails from WLM.
Fortunately, there is a more convenient solution to back up Windows Live Mail using third-party software. Using specialized email backup software can automate the process of creating backups, and you can have more control over which data is backed up and where it is stored. It also saves time and effort while ensuring your important information is always safe and accessible.
The best recommended third-party software for backing up Windows Live Mail is Wondershare UBackit. This software is easy to use and offers a range of features that make it an ideal choice for creating reliable email data backups.

Wondershare UBackit - Your Reliable Email Backup Tool
Back up emails to local hard drives or external storage devices effectively, safely, and completely.
Provide automatic backup to back up your email files daily, weekly, monthly, or non-stop.
Set a password to protect your backups, keeping your data confidential should it be stolen, lost, or compromised.
Support incremental backup, which saves only the changes made to your files since the last backup, reducing backup time and saving storage space.
To back up your Windows Live Mail emails using UBackit, execute the instructions below.
UBackit requires the email account to be logged into Outlook. So, firstly add your Windows Live Mail account to the Outlook.
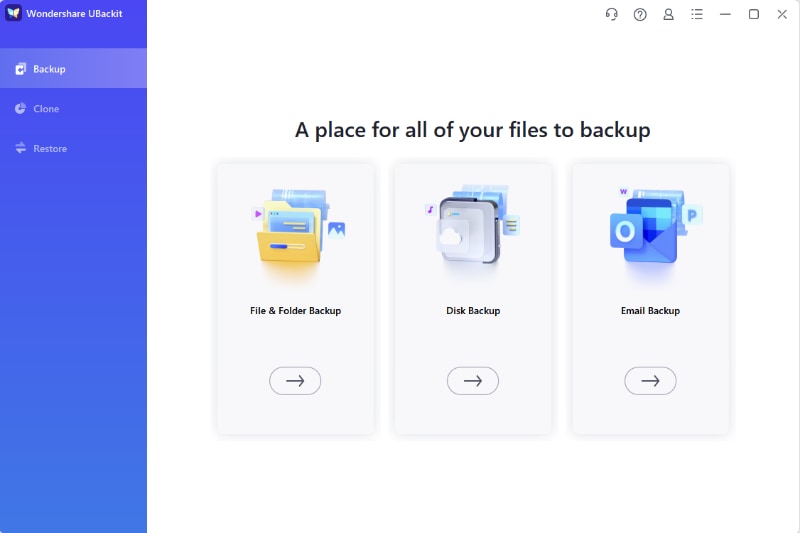
Step1 Choose the Backup Option
Launch Wondershare UBackit on your computer. Then select the Backup option from the drop-down menu. Three options are available: File and Folder Backup, Disk Backup, and Email Backup. To back up our emails, choose the Email Backup button.
Step2 Select a Backup Source and Destination
UBackit will then search and display the email files. Select the Windows Live Mail emails you want to backup.
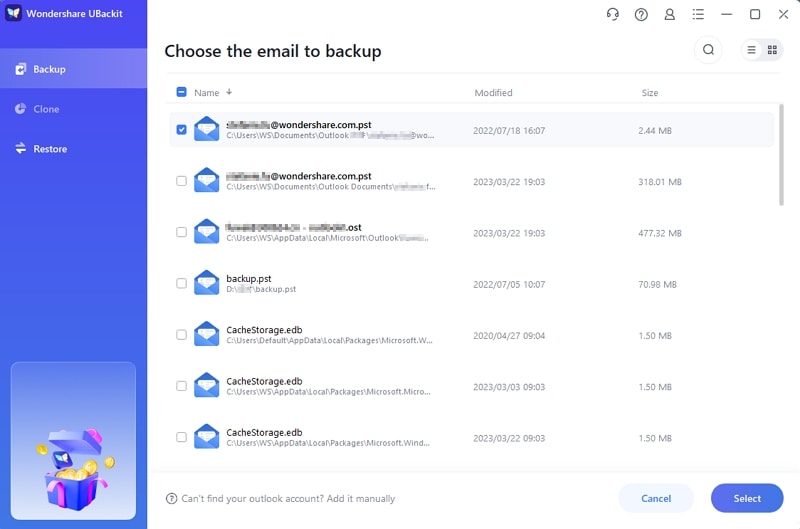
You can specify where the backup should be saved after selecting the files to backup. It could be on a local disk, an external hard drive, a USB flash drive, etc.
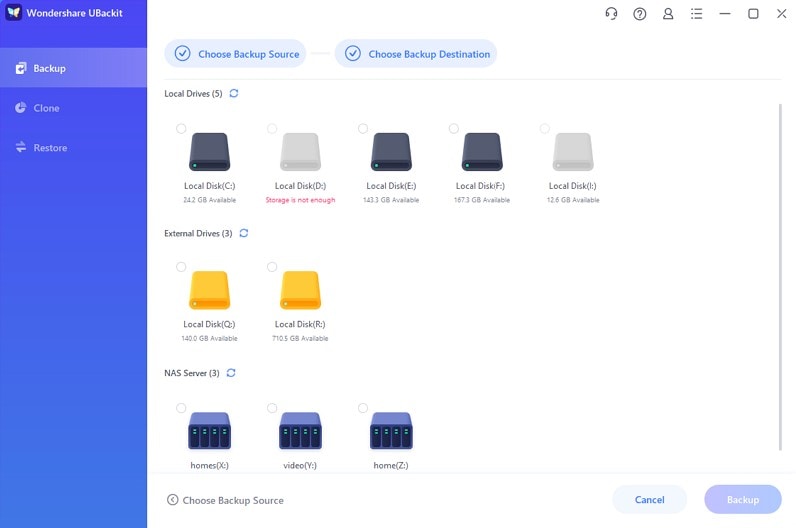
Step3 Start the Backup Process
Click the Backup button to start the file backup process and wait for it to finish.
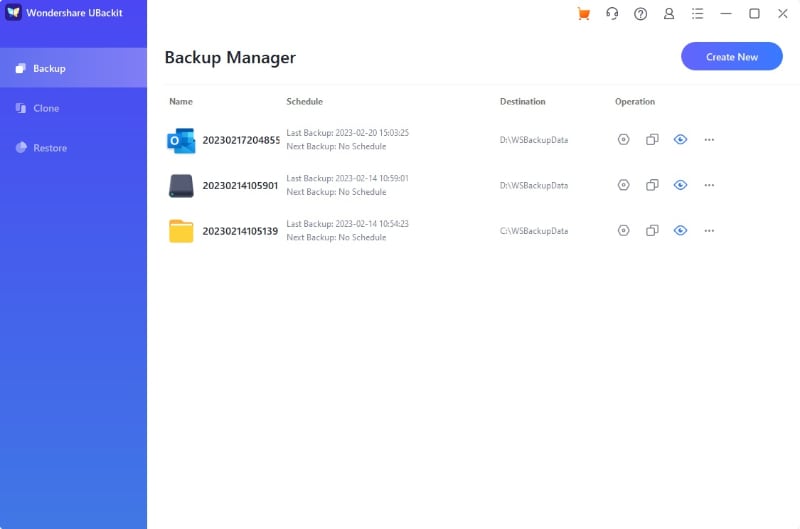
When the backup process is complete, UBackit will notify you, allowing you to easily manage your data.
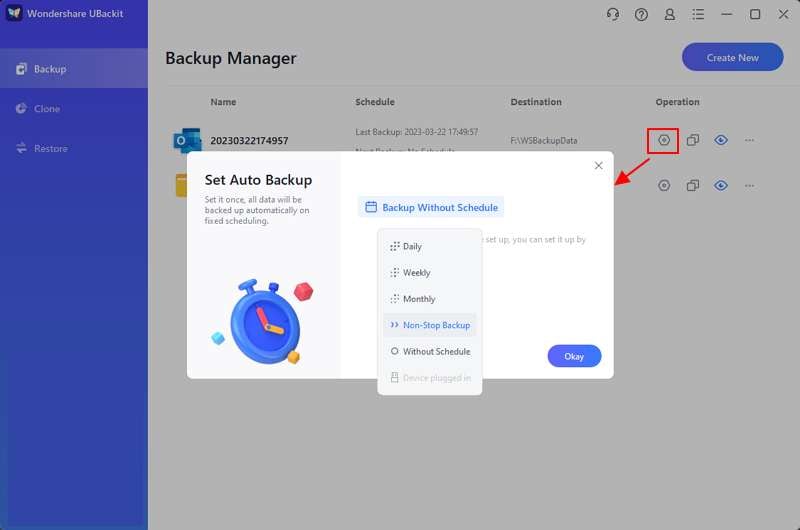
Additionally, with UBackit, you can develop a schedule to automatically back up data daily, weekly, monthly, or even regularly. This convenient option removes the trouble of forgetting to back up. UBackit also has a backup encryption feature that password-protects your backups, which keeps your data private if it is stolen, lost, or compromised.
FAQs
Why Is It Important To Back Up Windows Live Mail?
It is important to back up Windows Live Mail to ensure that your important email data, such as messages, contacts, and calendars, are safe and secure in case of unexpected events like computer crashes or system failures. Backing up your email data can also help you transfer it to a new computer or email program more easily.
How Often Should I Back Up My Windows Live Mail?
The frequency of backing up Windows Live Mail depends on how often you use it and how important the data is to you. Generally, it is recommended to back up your email data regularly, such as weekly or monthly, to ensure that it is always up-to-date and protected in case of unexpected events.
How To Restore Windows Live Mail From The Backup File?
To restore Windows Live Mail from a backup file, you need to locate the backup file and import it into Windows Live Mail. This can be done by selecting the "Import" option in Windows Live Mail and then choosing the backup file location. You can also use reliable third-party software.
What Should I Consider Before Choosing A Backup Method For Windows Live Mail?
When choosing a backup method for Windows Live Mail, consider the amount of data you need to back up, how often you want to back up your data, where you want to store your backups, and the level of automation and customization you require in your backup process. It is also important to ensure the backup method is compatible with your email client and operating system.
Can I Transfer My Windows Live Mail Backup To A Different Computer?
Yes, you can transfer your Windows Live Mail backup to a different computer by copying the backup file to the new computer and importing it into Windows Live Mail.
Summing Up
Backing up your Windows Live Mail data is essential to protect your important email data in case of unexpected events. Multiple backup methods are available, including manually exporting to an external drive and using third-party software. If you want to back up emails on your Windows Live Mail more effectively and conveniently, download the Wondershare UBackit software now!


