
 TL;DR:
Upgrading a legacy IDE hard drive to a faster SATA HDD or SSD without reinstalling your operating system requires verifying hardware compatibility, adjusting specific BIOS settings, and using a disk cloning tool like Wondershare UBackit.
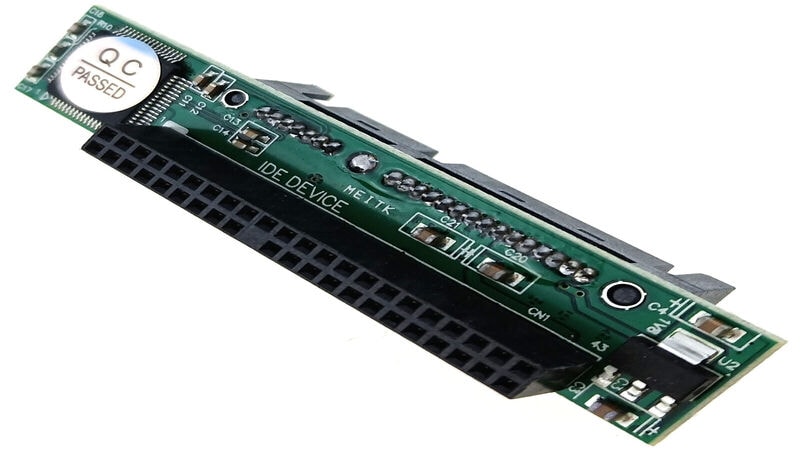
● If your motherboard lacks native SATA support, a SATA to IDE converter is mandatory to connect the devices, and any new target drive larger than 2TB must be initialized as GPT in Disk Management prior to the migration.
● To prevent system boot failures, you must change the SATA Configuration from AHCI/RAID to IDE mode in the BIOS before starting the transfer, which will permanently erase all prior data on the destination SATA disk.
● Once the software successfully migrates your operating system and files, you must return to the BIOS Boot menu and manually assign the newly cloned SATA drive as the primary boot device.
Ask AI for a summary
 ChatGPT
 Perplexity
 Gemini
 Claude
 Grok
Grok
Upgrading your storage system from an IDE hard disk to a SATA HDD or SSD can significantly enhance your computer's performance. However, cloning your IDE drive to a SATA drive might seem challenging if you're new to hardware and data migration. This guide will tackle the step-by-step process of cloning your IDE drive to a SATA HDD or SSD. By following these instructions, you can seamlessly transfer your data while maximizing the benefits of modern storage technology. Let’s get started!
Why Clone IDE Hard Drive to SATA?
IDE and SATA are two interfaces used to connect storage devices to a computer's system bus. If you're wondering whether you should convert your old IDE hard drive to a SATA HDD/SSD, you should first understand the differences.
IDE is an interface technology that was developed in 1986. Generally, an IDE hard disk has a low transfer rate (up to 133 MB/s). It does not allow for hot plugging. Additionally, it does not support Windows 10/8. While installing, jumper settings are required. If you set it incorrectly, the computer will unrecognize your IDE hard disk.
Compared to IDE hard drives, SATA hard drives, released in 2003, have a fast data transfer rate (up to 6 GB/s). SATA hard drives are allowed for hot plugging and have a huge capacity. It lowers electricity usage as it can be directly connected to the computer.
By upgrading your IDE hard drive to SATA, you can experience an increased data transfer speed and performance. The compatibility and connection with the operating system will also improve.
Furthermore, copying an IDE hard disk to SATA lets you update your hard drive without reinstalling Windows. The operating system, software, and user files on the source IDE disk will all be moved to the destination SATA disk. Compared to a fresh setup, doing a disk clone saves you significant time and effort.
If you need to do sophisticated tests, store more data on your hard drive, or discover that your computer is running poorly with an IDE hard drive, don't wait any longer. Let's look at how to upgrade your IDE hard drive to SATA HDD/SSD.
4 Steps to Clone IDE to SATA
Here are the main steps to clone IDE to SATA HDD/SSD.
Note: Ensure your motherboard supports the SATA interface before linking an IDE hard disk to a SATA hard drive. If it supports SATA, you can connect your SATA hard drive to the computer using a SATA connection and a power cable. If it does not support SATA, you must purchase a SATA to IDE converter to connect the SATA drive to your PC.
Step 1. Initialize the New SATA Hard Drive
If your SATA HDD/SDD is brand new, you must initialize it. If it has been used, you can disregard this move and proceed to the next.
Here's how to set up the hard drive.
- Connect your SATA hard drive to your computer using the SATA cable and power cable or a SATA to IDE converter.
- Press Win + R to open the Run dialog box. Then type diskmgmt.msc into the box and press OK to launch Disk Management.
- Right-click your SATA hard drive in Disk Management and select Initialize Disk.
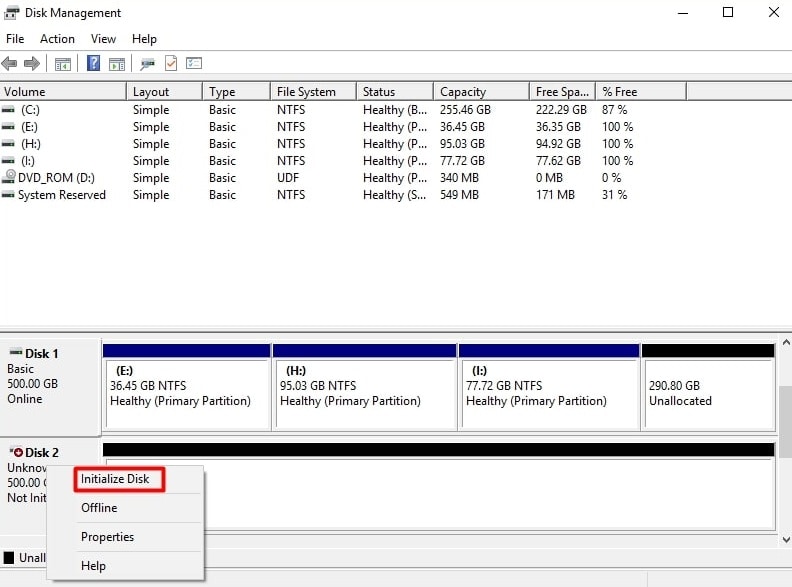
- Specify whether you want to initialize the hard drive as MBR (Master Boot Record) or GPT (GUID Partition Table). Then, to complete the process, click OK and follow the onscreen instructions.
Note: If you have a hard disk over 2TB, you should format it as GPT to get the most out of it. MBR and GPT are acceptable if the SATA hard drive is less than 2TB.
Step 2. Set the SATA Hard Drive to IDE Mode in BIOS
You must adjust several BIOS settings before cloning an IDE to SATA hard disk to avoid booting problems. Simply follow the steps outlined below.
- Connect the SATA hard disk to your computer.
- Restart your computer and when the manufacturer's logo appears, click F12 or Delete to enter BIOS.
Note: The key you need to press to enter BIOS may differ, so focus on the screen and follow the directions to figure out which key you need to press.
- Click the Main menu and pick IDE mode for Configure SATA.
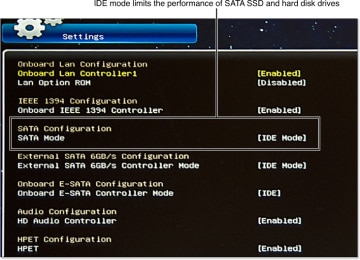
Note: SATA mode menu on your machine may differ. It could be found in the Advanced or Integrated Peripherals menus. You must seek "SATA Configuration" or "SATA Mode" and change the option from AHCI/RAID to IDE.
- Save your modifications and leave BIOS. You can reboot your computer and proceed to the next step of cloning.
Step 3. Copy All the Data in IDE to SATA Hard Drive Using a Reliable Software
After successfully initializing your new SATA hard drive and changing BIOS settings, you can begin cloning IDE to SATA hard drive. If you're looking for a dependable IDE cloner, download and install Wondershare UBackit.
With Wondershare UBackit's Disk Clone feature, you can easily clone your IDE hard disk drive to a SATA HDD/SSD. This ensures a hassle-free and efficient data transfer from your old IDE drive to the faster and more modern SATA technology.

Wondershare UBackit - Your Reliable Disk Cloning Software
Disk Clone: You can clone hard drive to SSD or another HDD easily. It supports a wide range of disk types, such as HDDs from all brands, SATA/M.2 SSDs, NVMe SSDs, USB drives, NAS drives, and SD cards.
Partition Clone: Instead of cloning the entire disk, you have the option to clone a particular partition.
Sector-by-Sector Clone: You are allowed to replicate a hard drive or partition bit by bit.
Supported OS: It is compatible with Windows 11/10/8.1/8/7, 32 bit and 64 bit.
Note: The following method will wipe all data on the target disk. Before operating, you should back up any vital data on your SATA hard disk.
Follow the steps below to clone IDE To SATA HDD/SSD using Ubackit IDE cloner:
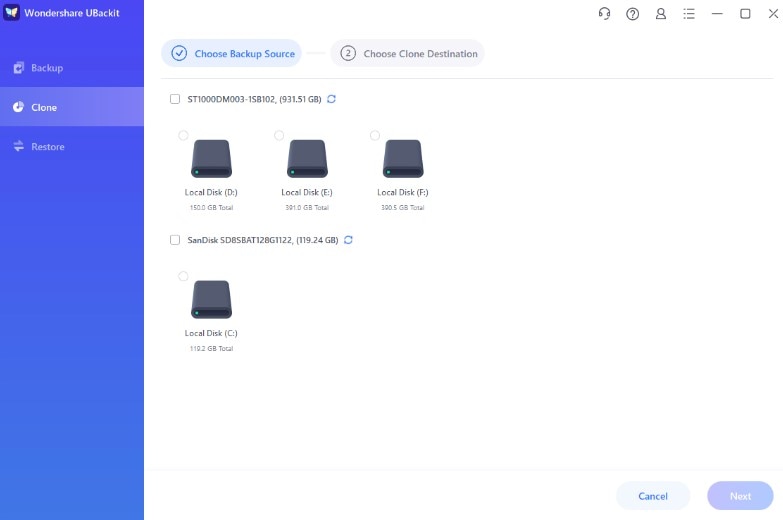
- Open Wondershare UBackit on your device and select the Clone tab to click Start Clone.
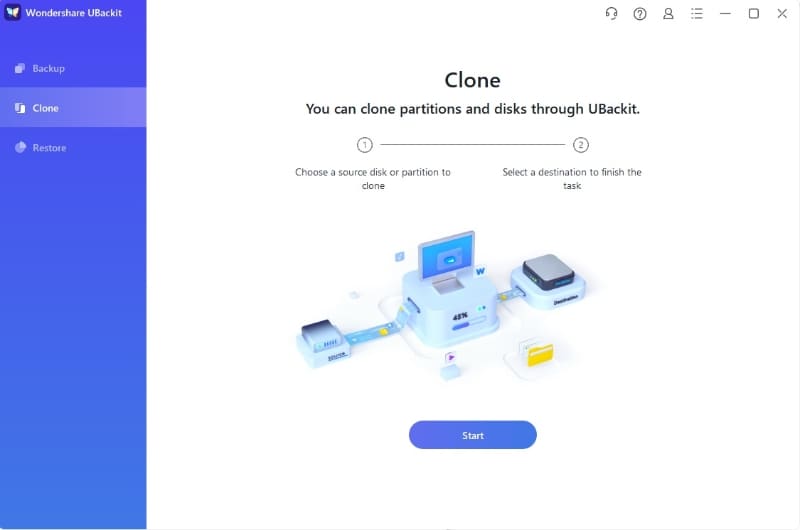
- Choose IDE as a clone source and select Next.
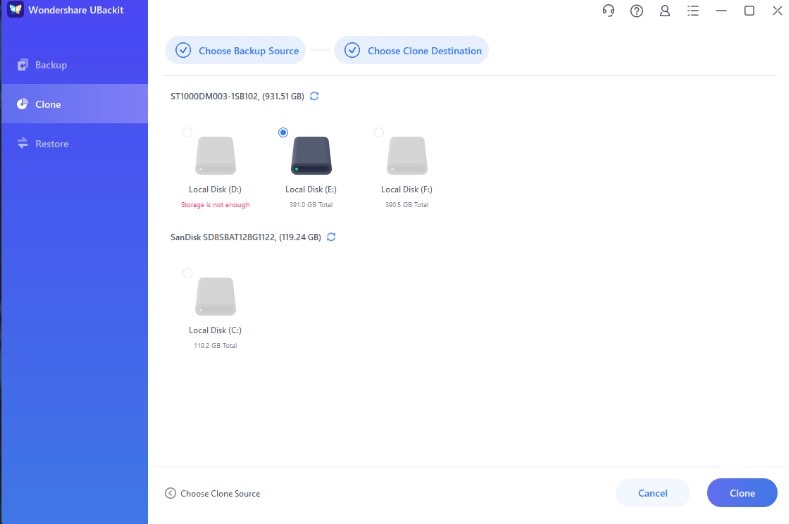
- After selecting a source drive, choose SATA HDD/SSD as the clone destination. Then, tap Clone to begin the cloning process.
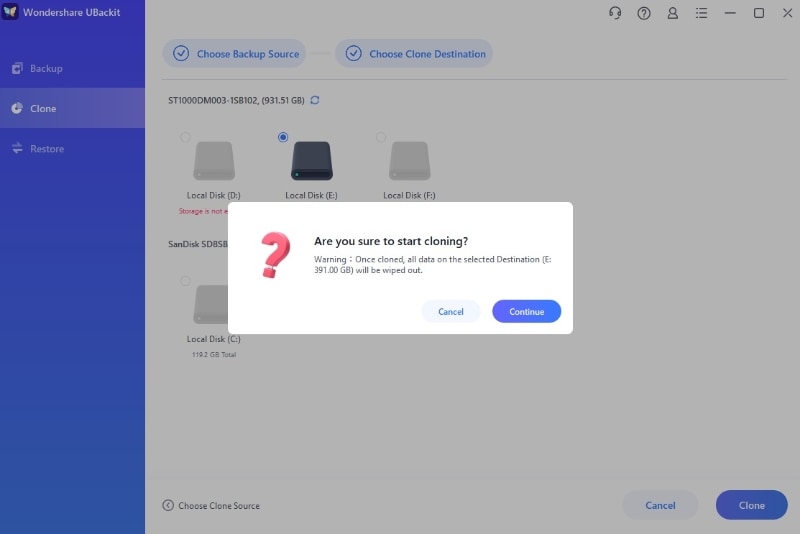
- Confirm the IDE to SATA clone by pressing Continue.
- The clone will take time based on the data and files you are processing.
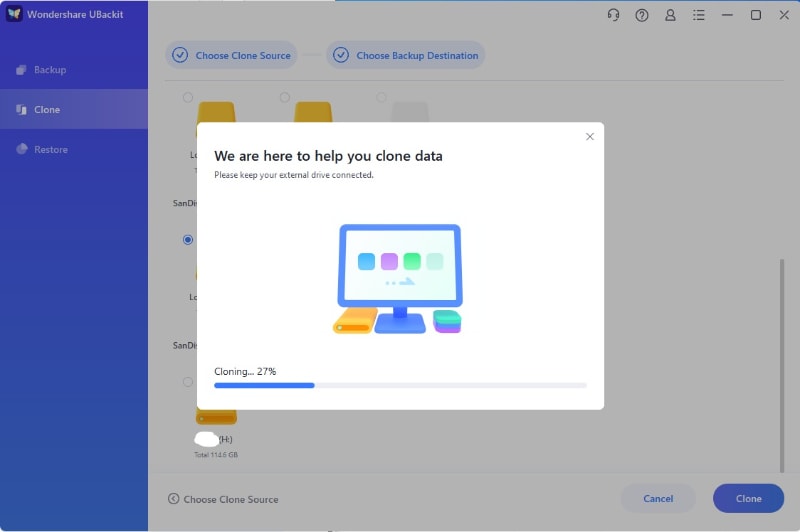
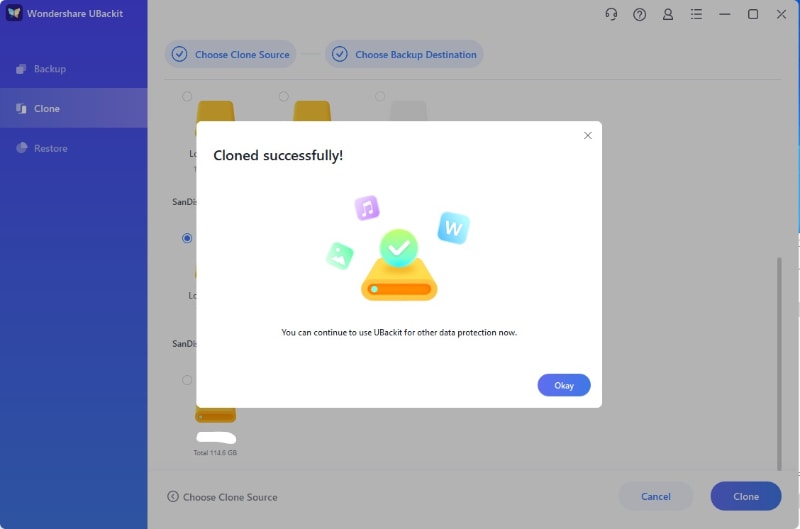
- Your screen will notify you when the cloning process is finished.
Step 4. Boot from the SATA Hard Drive
You must update the boot settings in BIOS if you wish to use the cloned SATA hard disk as the system drive and boot your computer from it.
- Enter BIOS and go to the Boot menu.
- Choose your SATA hard disk as the first boot drive. Save and exit the BIOS. Start your computer, and Windows will boot from your SATA hard drive.
Conclusion
This post fully describes how to upgrade your IDE hard disk to a SATA hard drive. It's a little complicated, but you can do it individually following the four moves above. Wondershare UBackit makes the cloning process simple. If you use this to clone IDE hard drives, you won't have to worry about hard drive sizes or boot failures. UBackit is professional backup and sync software that can assist you with data backup, file transfer, and clone capability. Get this tool and learn more!


