Have you ever lost a very important email on your Mac device? You’re not alone. It’s high time you started backing up your email to iCloud.
If you’re not convinced you need this, the guide below will explain why you need an iCloud email backup and how to do it. There are four main methods to perform an iCloud mail backup, and it’s up to you to choose whether you want to do it manually, with Advik, Macminster, or Email Backup Pro.
Method 1. Export Mac Mail to iCloud Manually
You can export Mac Mail to iCloud manually without the help of other utilities, though it will take more time. However, if you want to do it manually, you’ll need to export Apple mailboxes in MBOX format to be able to move them to iCloud. Follow the next steps:
- Step 1: Open Apple Mail.
- Step 2: Select the mailbox you want to be backed up.
- Step 3: Then, click on Mailbox>Export Mailbox.

- Step 4: Create a folder for the exported Apple mailbox and click Choose. This will create a folder for .mbox format.
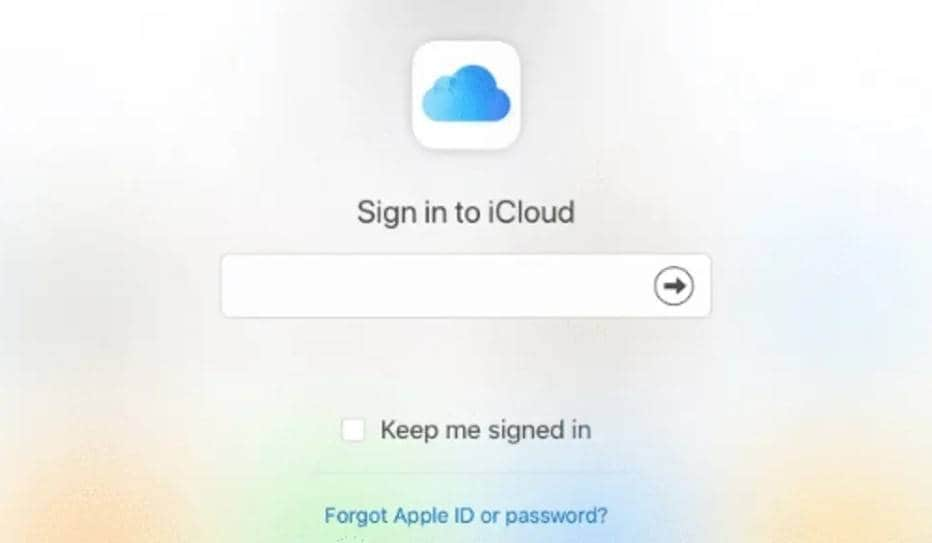
- Step 5: Now that you’ve exported your Apple Mail, open iCloud and log in.
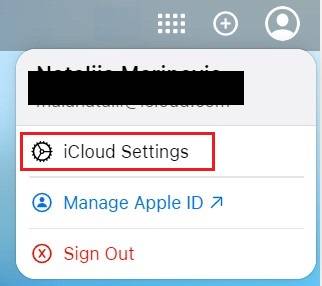
- Step 6: Go to iCloud Settings.
- Step 7: Scroll to the Custom Email Domain>Manage.
- Step 8: Select the .mbox folder you’ve created, then click Import Mail.
- Step 9: Follow the instructions to import your Mac emails to iCloud.
Method 2. Backup Emails to iCloud Using Advik iCloud Email Backup
Since doing the iCloud email backup manually takes a lot of time and effort, you can also try using specialized software, like the Advik iCloud mail backup. Just like when doing it manually, you need to export the mailbox you want to back up. Apple Mail will automatically export it as an MBOX file.
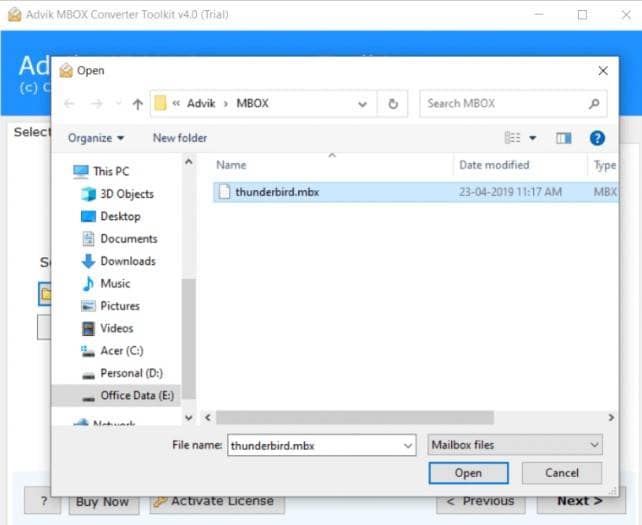
- Step 1: Open Advik MBOX Converter Toolkit and click Select Files.
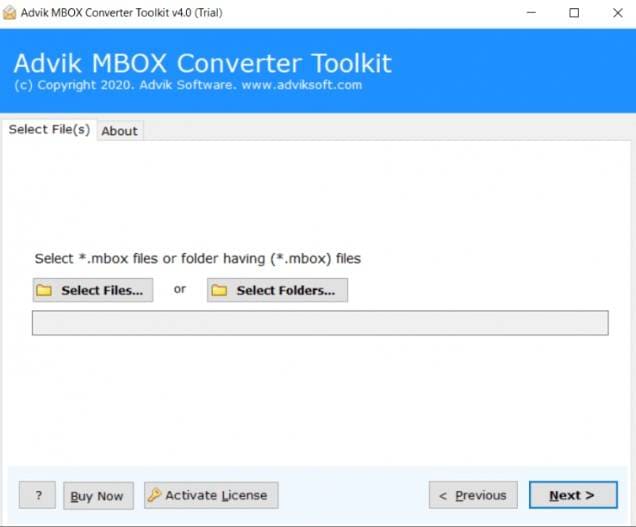
- Step 2: Add the .mbox files into the software.
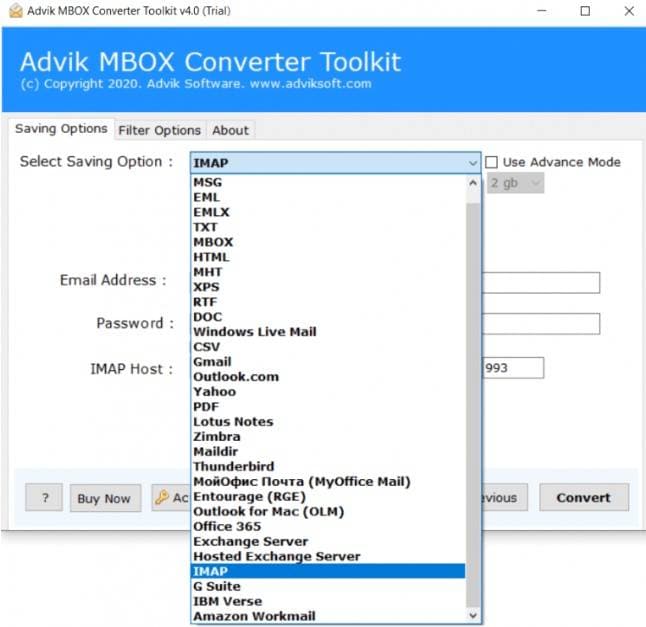
- Step 3: Go to Select Saving Option>IMAP.
- Step 4: Put in your iCloud email address and password.
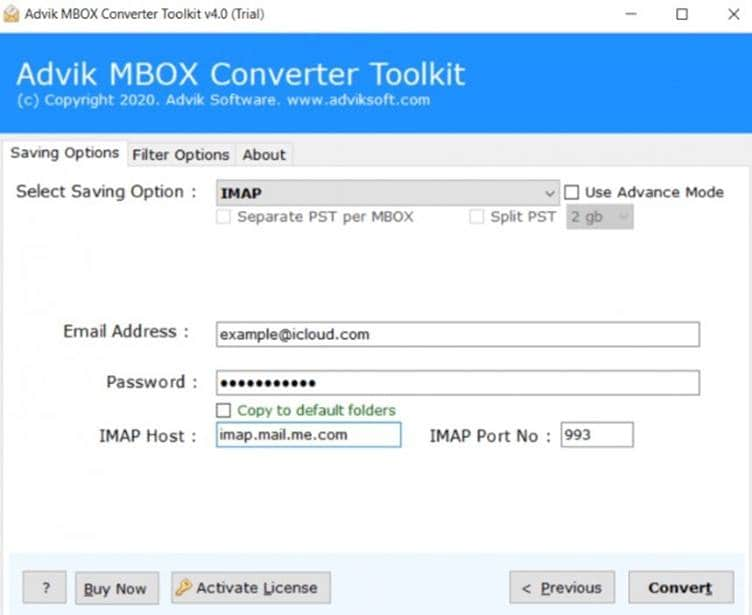
- Step 5: Click Convert to start the import of Apple Mail to iCloud.
Method 3. Backup Emails to iCloud With Macmister Email Backup for Mac
Another great choice for an automated iCloud mail backup is MacMister. This software allows you to directly back up Apple Mail to iCloud, greatly reducing the time and effort it would otherwise take to do so.
The steps are as easy as with Advik:
- Step 1: Open MacMister Apple Mail Converter.
- Step 2: Choose an automatic or manual option for selecting the Apple Mail mailboxes for backup.
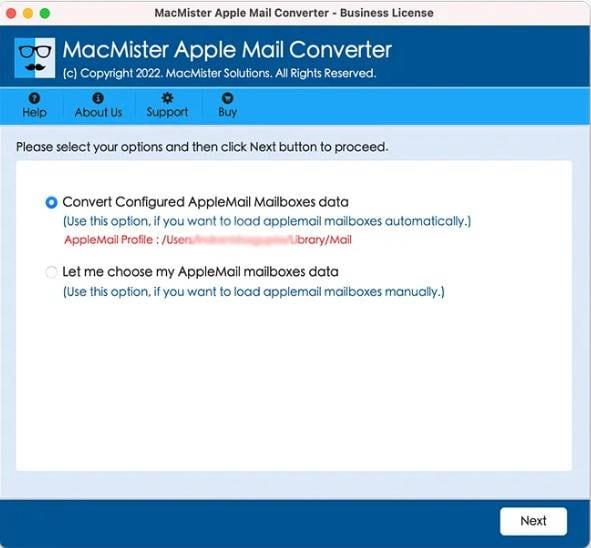
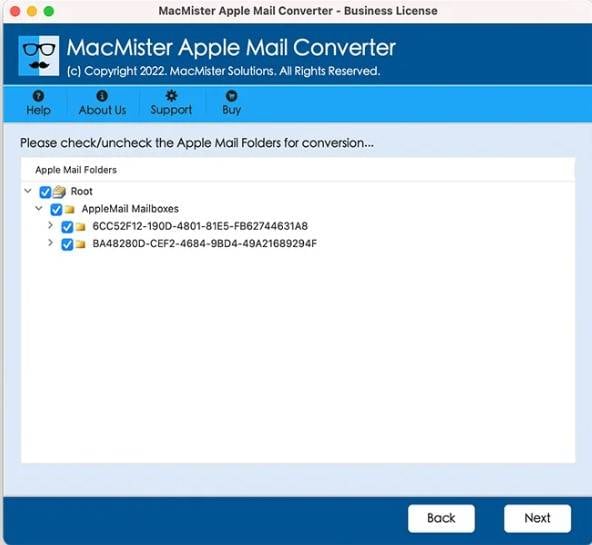
- Step 3: Check the checkboxes next to the Apple Mail folders you want to back up and click Next.
- Step 4: Click on Select Saving Option>IMAP.
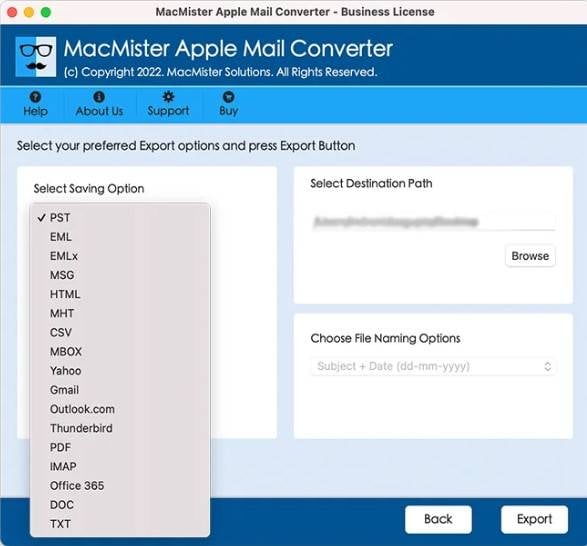
- Step 5: Enter iCloud login credentials and iCloud IMAP host and port number. Press Export.
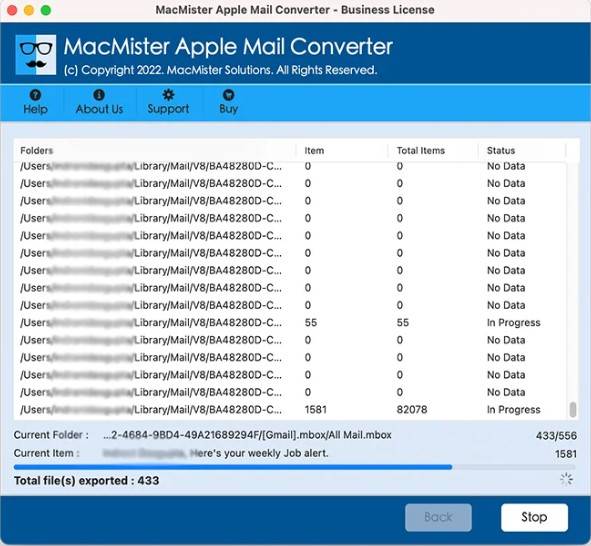
- Step 6: Now, you can overlook the backup process on the screen. When it’s done, you’ll see Conversion Completed text. Click OK to complete the backup.
Method 4. iCloud Mail Backup With Email Backup Pro
Email Backup Pro is a quick and simple solution for backing up Apple Mail to iCloud. This software is very straightforward and user-friendly, and the steps are extremely easy to follow:
- Step 1: Open Email Backup Pro.
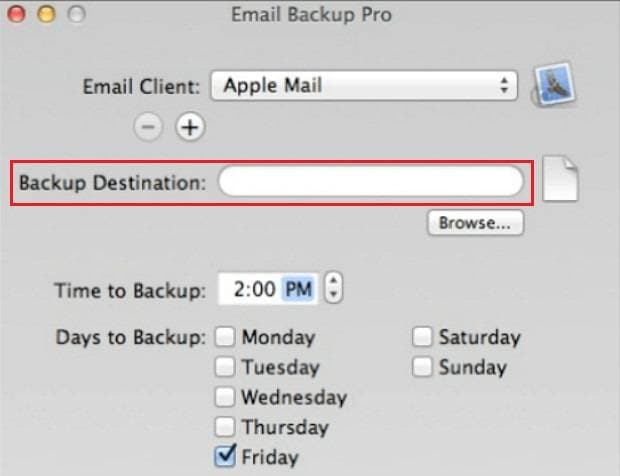
- Step 2: Under Email Client, put Apple Mail.
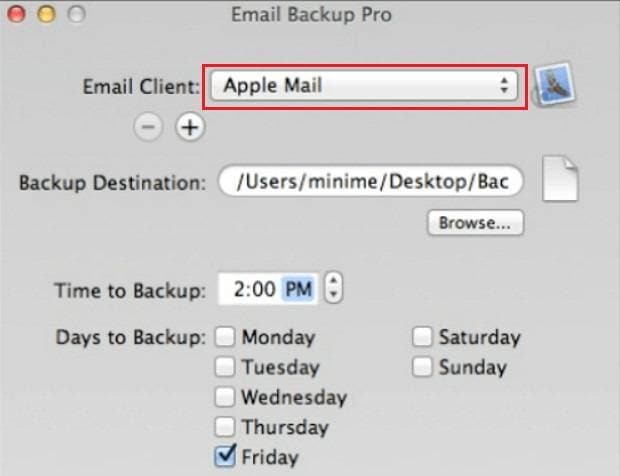
- Step 3: As Backup Destination, select iCloud.
- Step 4: Configure the scheduled backup settings to your needs.
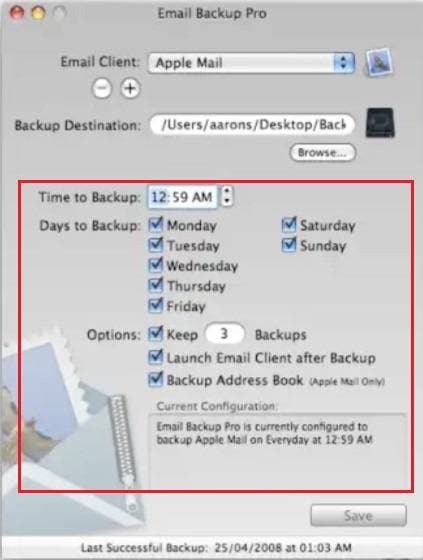
- Step 5: Click Save.
Summing Up
Apple Mail is extremely useful as an email client. However, whichever email client you prefer, backing up your emails is essential for data preservation in case of accidental deletion or virus attacks. It’s best to back up your Apple Mail to iCloud as soon as possible, either manually or by using email backup software.
This process should be a breeze with these step-by-step instructions on how to do it manually and with the help of Advik, MacMister, and Email Backup Pro. It’s up to you to decide which method works best for you and back up your Mac Mail to iCloud with ease.

 ChatGPT
 Perplexity
 Google AI Mode
 Grok
Grok


