
 TL;DR:
Securing your QNAP NAS data to the cloud requires selecting a third-party backup tool like AOMEI Backupper, Duplicacy, MSP360 Backup, or Backblaze based on your operating system requirements and target cloud storage providers.
● Backblaze is the only tool listed that integrates directly with the NAS hardware via the free QNAP Hybrid Backup Sync app, requiring QTS 4.3.3 or later and starting at $7.
● AOMEI Backupper restricts users exclusively to Windows operating systems and supports consumer cloud targets like Google Drive, OneDrive, and Dropbox with a starting price of $39.95.
● Duplicacy and MSP360 Backup support both Windows and macOS, but MSP360 adds Linux compatibility alongside a central web console, while Duplicacy focuses on block-level deduplication for enterprise storage targets like Amazon S3 and Microsoft Azure.
Ask AI for a summary
 ChatGPT
 Perplexity
 Gemini
 Claude
 Grok
Grok

As businesses and people increasingly rely on QNAP NAS devices to store and manage their important data, ensuring proper file protection becomes necessary. One of the most effective methods for securing your NAS data is by creating a QNAP Cloud backup. This guide will provide you with the step-by-step process to do so. Let's dive in and learn how to back up QNAP NAS to the Cloud efficiently!
Benefits of Backing Up QNAP NAS to the Cloud
Having a QNAP Cloud backup offers several compelling benefits, including:
- Offsite Data Protection: Cloud backup provides an offsite storage location for your QNAP NAS data, protecting it from various data loss scenarios.
- Remote Accessibility: Cloud backup enables remote access to your QNAP NAS data anywhere and anytime using any internet-connected device.
- Scalable Storage: Cloud backup offers scalable storage options, allowing you to adapt your backup strategy to your QNAP NAS data storage requirements.
- Cost-effective Backup Solution: Cloud backup can be a cost-effective backup solution compared to traditional methods, eliminating the need for additional hardware investment and maintenance.
- Automated and Efficient Backups: Cloud backup can be set up for automated and efficient backups, reducing the risk of human error and ensuring consistent backups.
- Enhanced Data Security: Cloud backup providers implement robust security measures, ensuring the security and integrity of your QNAP NAS data in the cloud.
When backing up your QNAP NAS to the Cloud, several excellent tools are available that can simplify the process and ensure your data is securely protected.
You may also be interested in: Backup Synology NAS to Cloud
Way 1. Perform QNAP Cloud Backup With AOMEI Backupper
AOMEI Backupper is a powerful and comprehensive backup software compatible with QNAP NAS devices, making it an excellent choice for QNAP NAS cloud backup. It offers a range of features designed to protect valuable data stored on your QNAP NAS, allowing you to create reliable and efficient backups for NAS disaster recovery.
Key Features
- AOMEI Backupper has many backup options, including system backup, file backup and sync, and disk and partition backup. You can choose from multiple backup storage options, such as external drives, flash drives, NAS, network shares, and cloud storage.
- This tool supports popular cloud storage services such as Dropbox, Google Drive, Microsoft OneDrive, etc., allowing you to securely store your QNAP NAS backups offsite for enhanced data protection.
- The software allows you to create full, incremental, and differential backups of your QNAP NAS data, giving you flexibility in managing your backup strategy and optimizing storage space.
- You can schedule automated backups at specific times or intervals, ensuring your QNAP NAS data is regularly backed up without manual intervention.
- It has a user-friendly and intuitive interface, making it easy for users of all levels of expertise to create, manage, and restore backups.
Supported Systems
Designed specifically for Windows operating system.
Pricing
- AOMEI Backupper has a Standard version with a 15-day free trial of Cloud backup.
- The pricing plans start at $39.95.
How To Backup QNAP NAS to Cloud With AOMEI Backupper
- Step 1: Get the software and install it on your device.
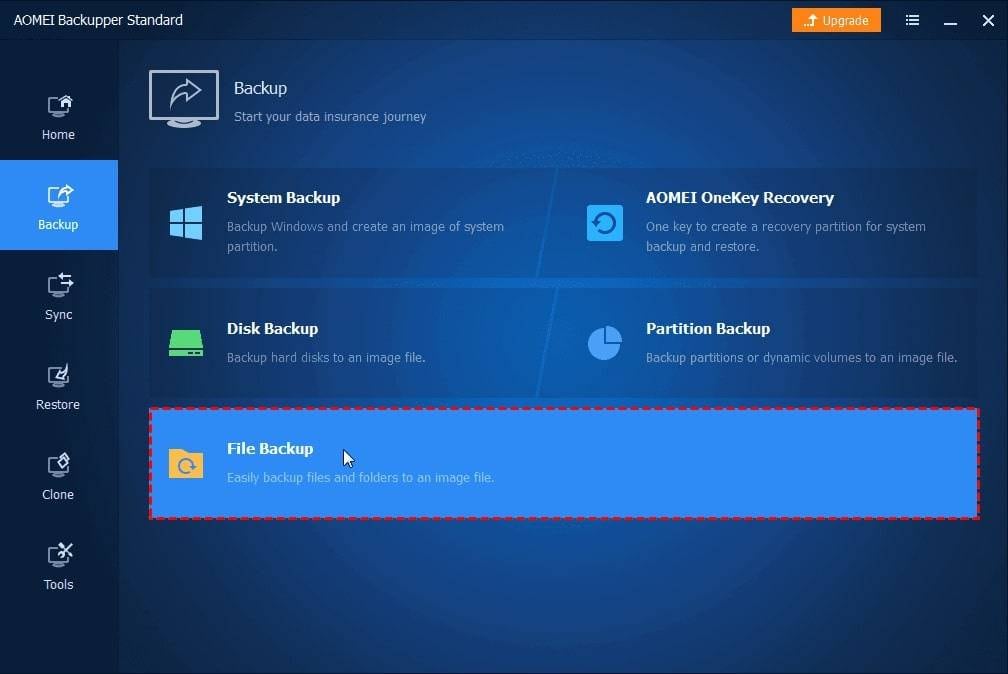
- Step 2: After installing the software, launch it and, in the main interface, select Backup, followed by File Backup.
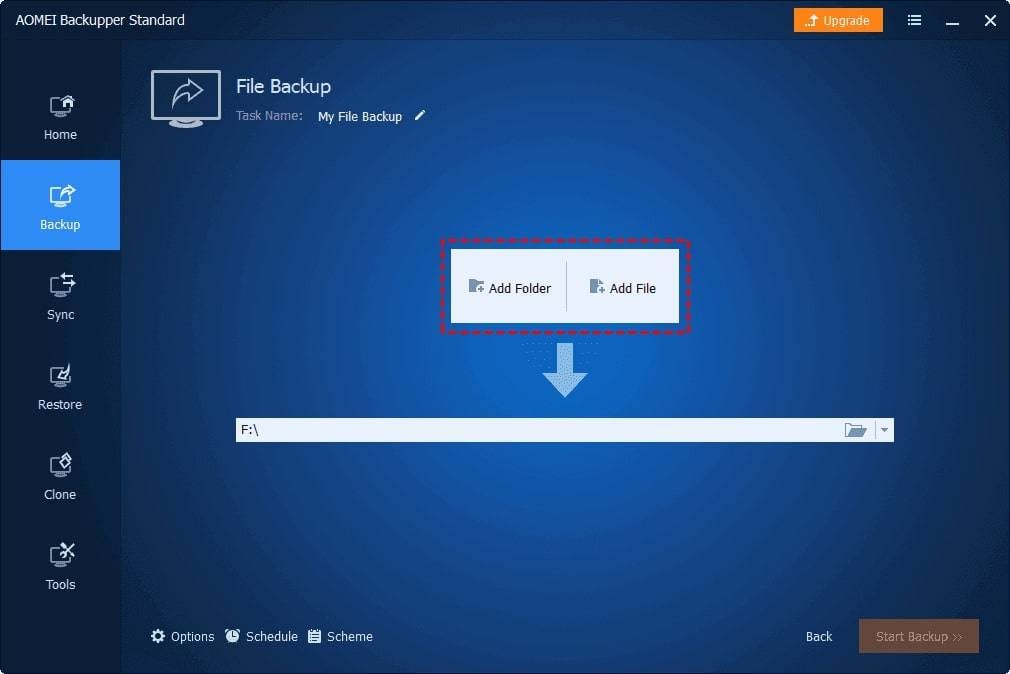
- Step 3: Then, add the files that will be backed up and specify where the backup will be saved. To select the file:
- Click Add file and then choose Browse.
- Select Share/NAS in the next drop-down menu, then Add Share or NAS devices.
- If necessary, enter your username and password.
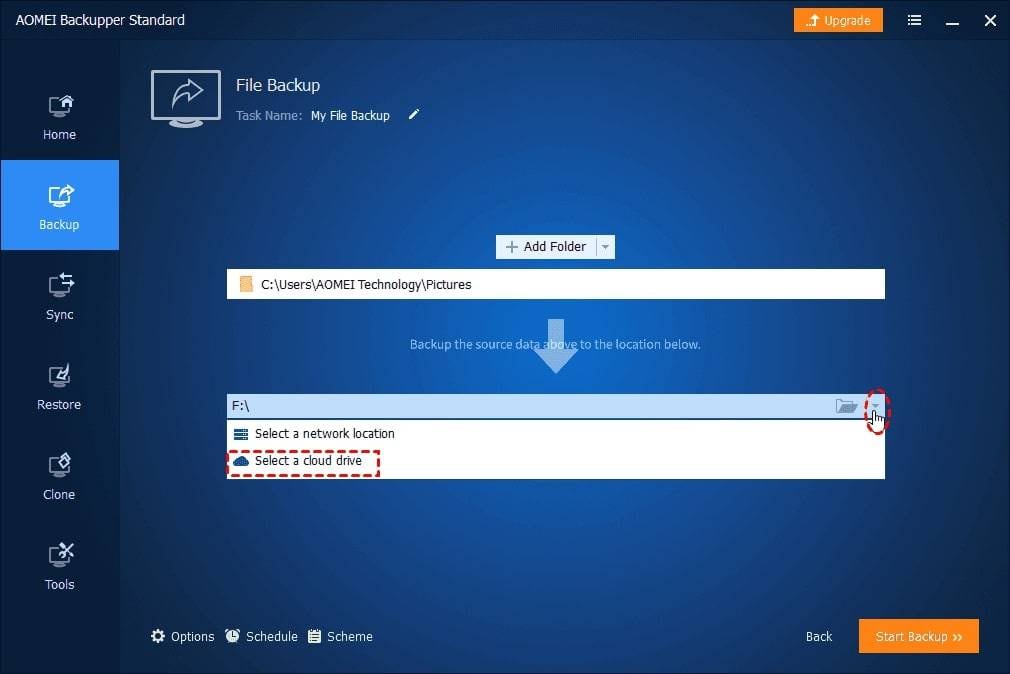
- Step 4: Now, click Select a cloud drive as the destination drive.
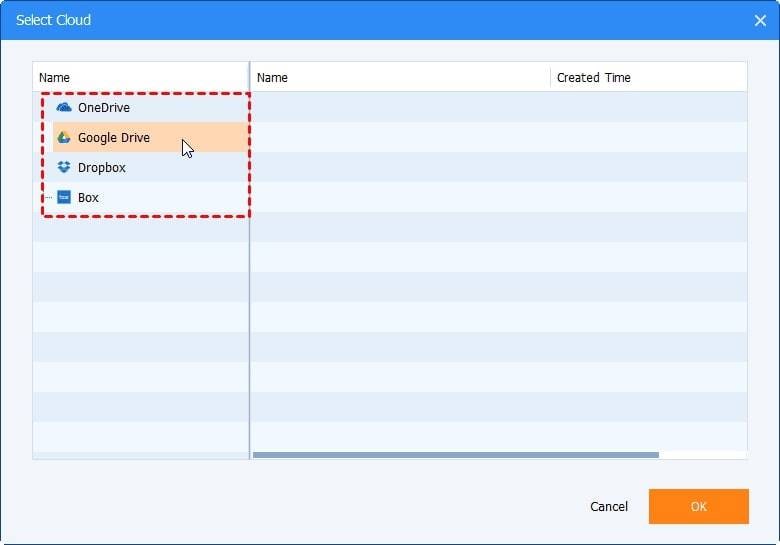
- Step 5: You can choose any cloud storage provider, but we’ll select Google Drive in this example. To proceed, press the OK
- Step 6: In the final window, click Start Backup to continue the process.
Way 2. Perform QNAP Cloud Backup With Duplicacy
Duplicacy is a cutting-edge cloud backup tool that supports major cloud-storage providers like Amazon S3, Google Cloud Storage, Microsoft Azure, Dropbox, and Backblaze, as well as local disks and SFTP servers such as Mac/Linux computers or NAS boxes.
Key Features
- Duplicacy stands out from other backup tools by offering 7 essential features that include incremental backup, full snapshot functionality for easy restore and deletion, deduplication at both file-level and block-level, robust encryption of file contents, file paths, sizes, times, etc., independent deletion of backups, concurrent access for multiple clients, and snapshot migration between storages.
- It also boasts an intuitive GUI with a one-page configuration setup, making setting backup schedules and retention policies easy. Advanced options such as email notifications, automatic start on login, and exclude/include patterns can also be easily configured.
Supported Systems
Windows and macOS
Pricing
- Free: 30-day trial
- Personal License: $20 first computer
- Commercial License: $50/computer
- CLI License: $50/computer
How To Backup QNAP NAS to Cloud With Duplicacy
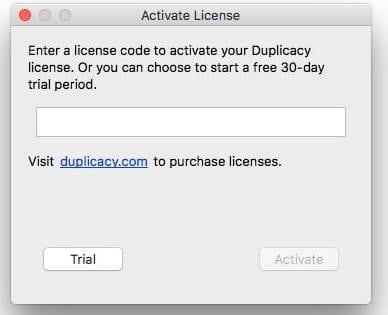
- Step 1. Launching Duplicacy for the first time will prompt you to activate the license or begin a fully functional 30-day trial period.
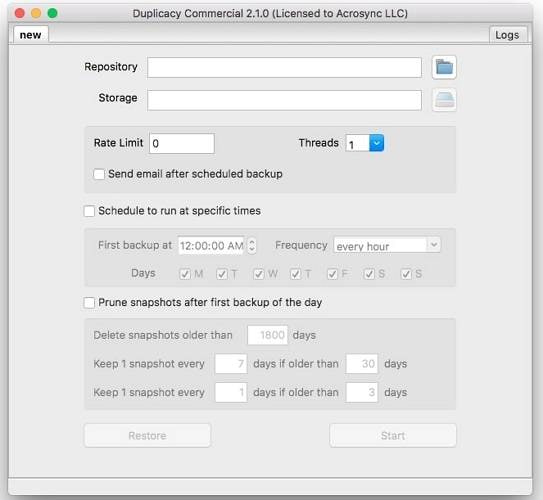
- Step 2. After selecting the appropriate license, Duplicacy will display the main window with an empty backup job.
- Step 3. The first step in configuring a backup job is to select the local directory to be backed up. This directory is referred to as a repository. After you click the button next to the text input used to display the repository, the repository setup dialog will appear.
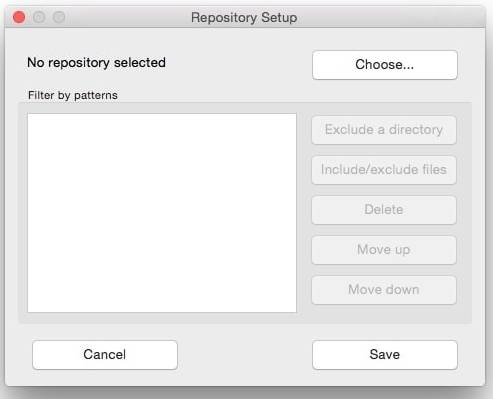
You can use this dialog by clicking the Choose... button. To select the repository, click the button. If you intend to back up everything in the repository, click Save and proceed to the next section on storage configuration. Otherwise, you can use exclude/include patterns to back up only specific files or directories.
- Step 4. Following selecting the repository to be backed up, you must decide where the backup should be stored. Duplicacy supports many major cloud storage providers but can also use local disks or SFTP servers.
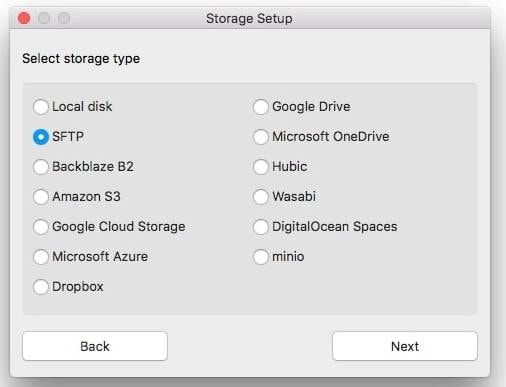
- Step 5. There are many Cloud storage providers that Duplicacy supports. Here, we have used Google Cloud Storage as an example.
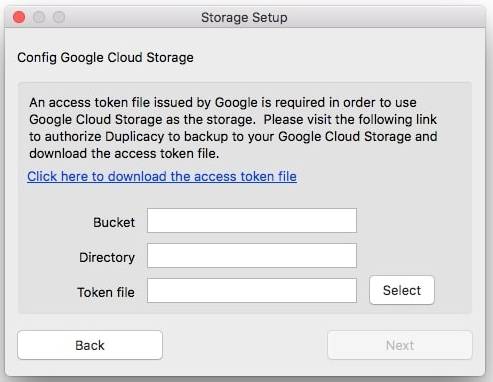
- Step 6. If you want to encrypt the storage, choose a password and enter it twice on this page. If you leave the password field blank, the storage will not be encrypted, and anyone with access to the storage can also access your backups.
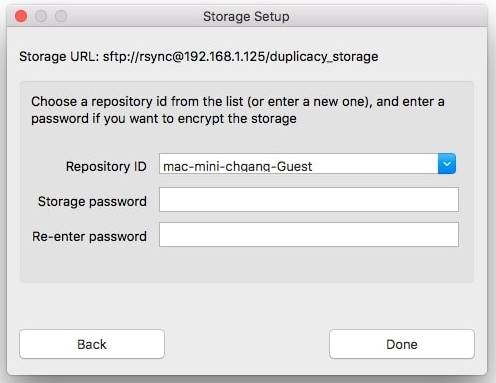
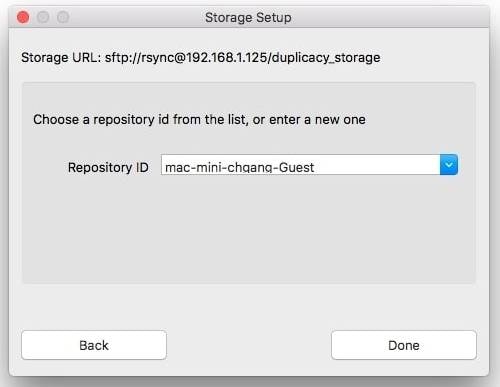
You can also select the repository id used to identify the repository in this dialog. Duplicacy will generate one based on the computer's hostname, username, and repository directory base. You can also enter a different one in the input box or choose another one from the storage.
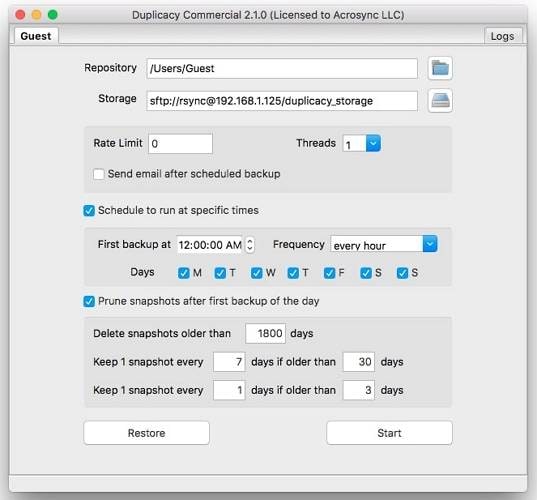
- Step 7. After configuring the storage, you'll be returned to the main window with the two text fields, Repository and Storage. You can then decide whether or not to restrict the upload speed.
- Step 8. Manually start the backup operation by clicking the Start
Way 3. Perform QNAP Cloud Backup With MSP360 Backup
MSP360 Backup, formerly CloudBerry Backup, is a powerful and flexible cloud backup solution. It is compatible with QNAP NAS devices, offering reliable and efficient data protection.
Key Features
- You can track and manage all backup and restore jobs, users, endpoints, and storage from a single web console.
- Immutability, encryption, and 2FA protect your backups from ransomware and unauthorized access.
- Licensing on a pay-as-you-go basis with a steep cumulative discount curve. Choose a monthly or annual subscription with no up-front costs.
- You can schedule automated backups at specific times or intervals and set retention policies to manage how long backups are kept, ensuring that your QNAP NAS data is backed up and retained according to your desired settings.
- MSP360 Backup supports hybrid backup, allowing you to create local backups in addition to cloud backups, providing an extra layer of data protection.
Supported Systems
Windows, Linux, and macOS
Pricing
- The software comes with a 15-day free trial
- Buy online with costs starting from $19.99
How To Backup QNAP NAS to Cloud With MSP360
- Step 1. Download MSP360 Backup and follow the on-screen instructions.
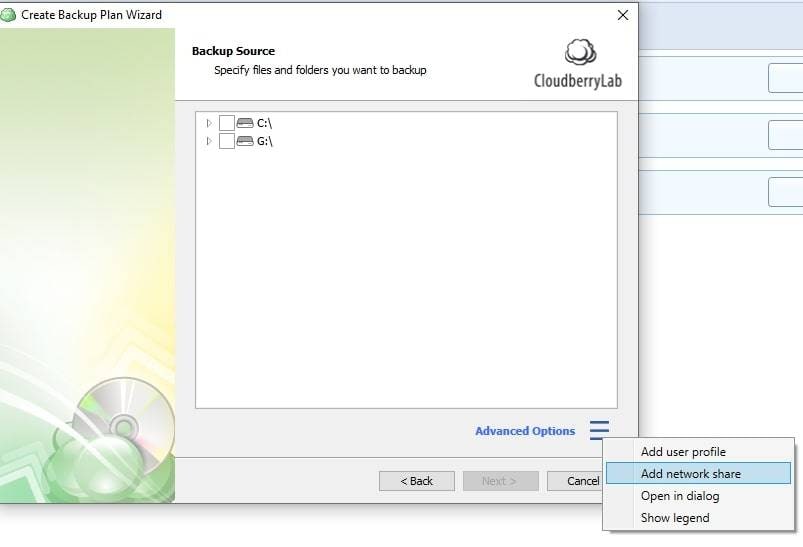
- Step 2. Launch the Backup Plan Wizard. Continue with the necessary storage provider and settings.
- Step 3. Select the Advanced Option on the Backup Source and click Add network share.
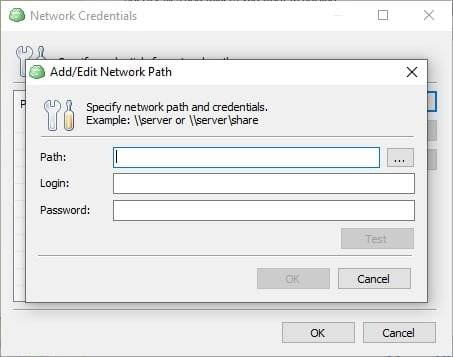
- Step 4. In the resulting window, click Manage network credentials and enter the coordinates, login, and password you'll need to connect to your NAS device over the network. Then, you can follow the on-screen directions to create your backup job to the Cloud.
Way 4. Perform QNAP Cloud Backup With Backblaze
Backblaze is a cloud-based backup and storage service that provides a secure and reliable way to back up your data from your QNAP NAS (Network-Attached Storage) device to the cloud. Backblaze offers a cost-effective solution to protect your valuable data by creating offsite copies in the cloud, ensuring your files are safe from local hardware failures, natural disasters, and other unforeseen events.
Key Features
- Backblaze automatically and continuously backs up your QNAP NAS data to the cloud, ensuring your files are securely protected in real time without manual intervention.
- This tool provides reliable security features, including encryption in transit and at rest, ensuring your QNAP NAS data is protected from unauthorized access.
- Backblaze allows you to customize various backup settings, such as backup frequency, bandwidth usage, and file exclusions, providing flexibility in managing your QNAP NAS backups.
- It offers data center locations in multiple regions, allowing you to choose the location that best suits your needs for data locality and compliance requirements.
Supported Systems
Windows, macOS, Linux, and NAS devices running Synology DSM 5.2 or QNAP QTS 4.3.3 or later, or Western Digital My Cloud OS 3.
Pricing
- Backblaze offers a 15-day free trial period.
- The pricing plans start at $7
How To Backup QNAP NAS to Cloud With Backblaze
You can set up backup jobs in Backblaze B2 and Hybrid Backup Sync to run data backups to secure it offsite. The following guide will walk you through configuring Hybrid Backup Sync on your QNAP device to back it up on the Cloud using Backblaze.
Note: If you don't already have Hybrid Backup Sync installed, you can get it for free from the QNAP App Center.
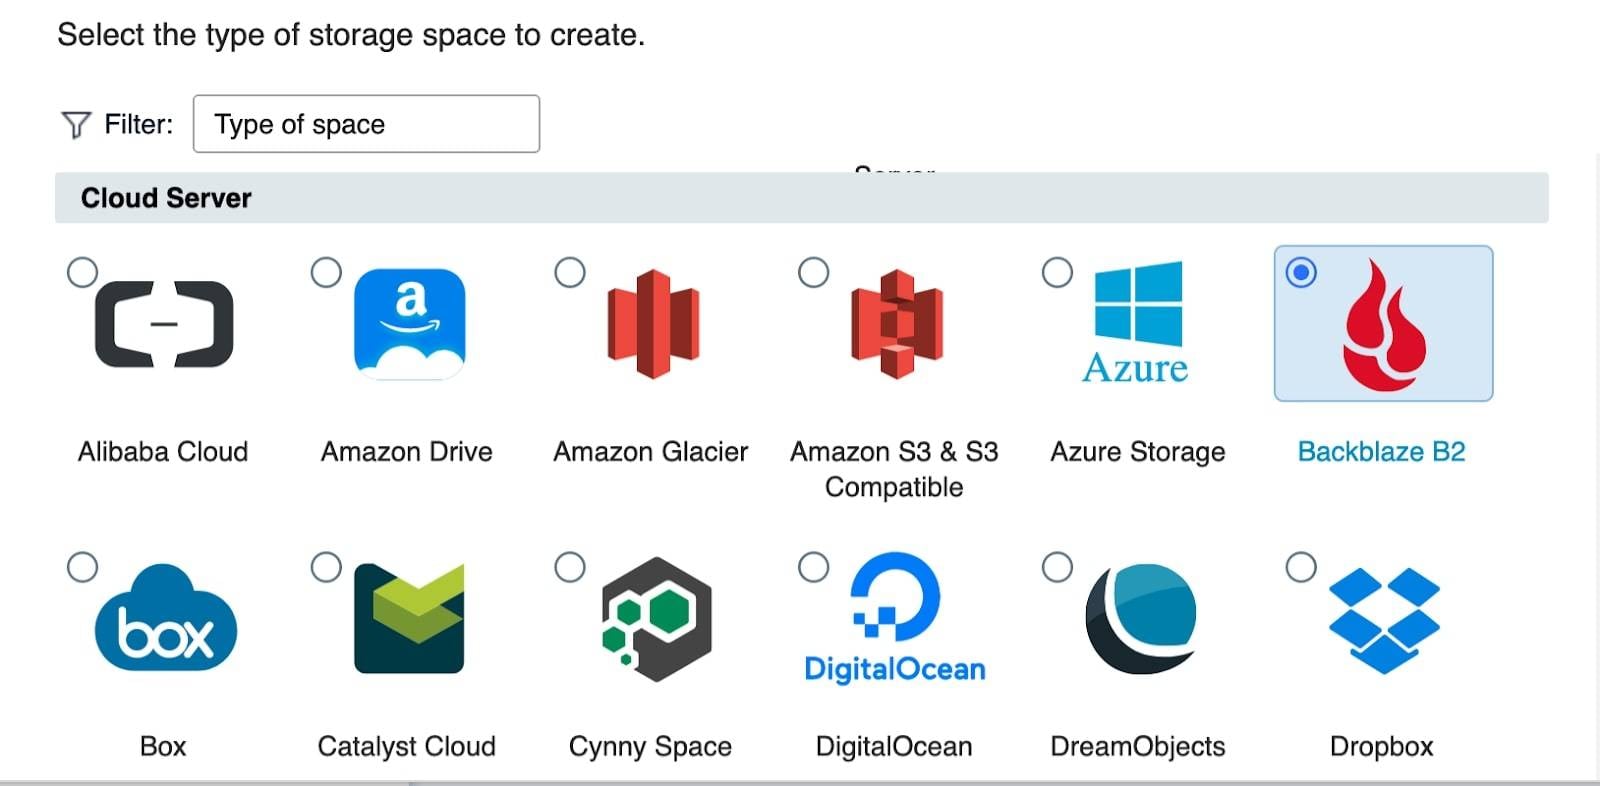
- Step 1. Go to Storage Spaces in Hybrid Backup Sync, then click Create.

- Step 2. Use the Backblaze B2 as the CloudServer type.
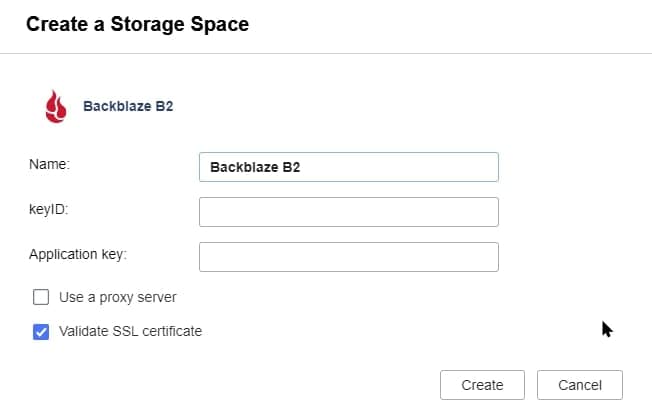
- Step 3. Name it. Then, enter your KeyID and Application Key and click Create. Now that we've configured our Storage Space, we can use it with a Backup or Sync job in Hybrid Backup and Sync (HBS).
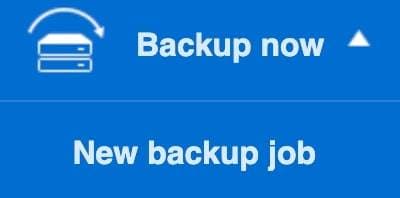
- Step 4. To create a Backup Job, go to the Hybrid Backup menu and select the Backup and Restore Then select Backup Now > Create New Backup Job.
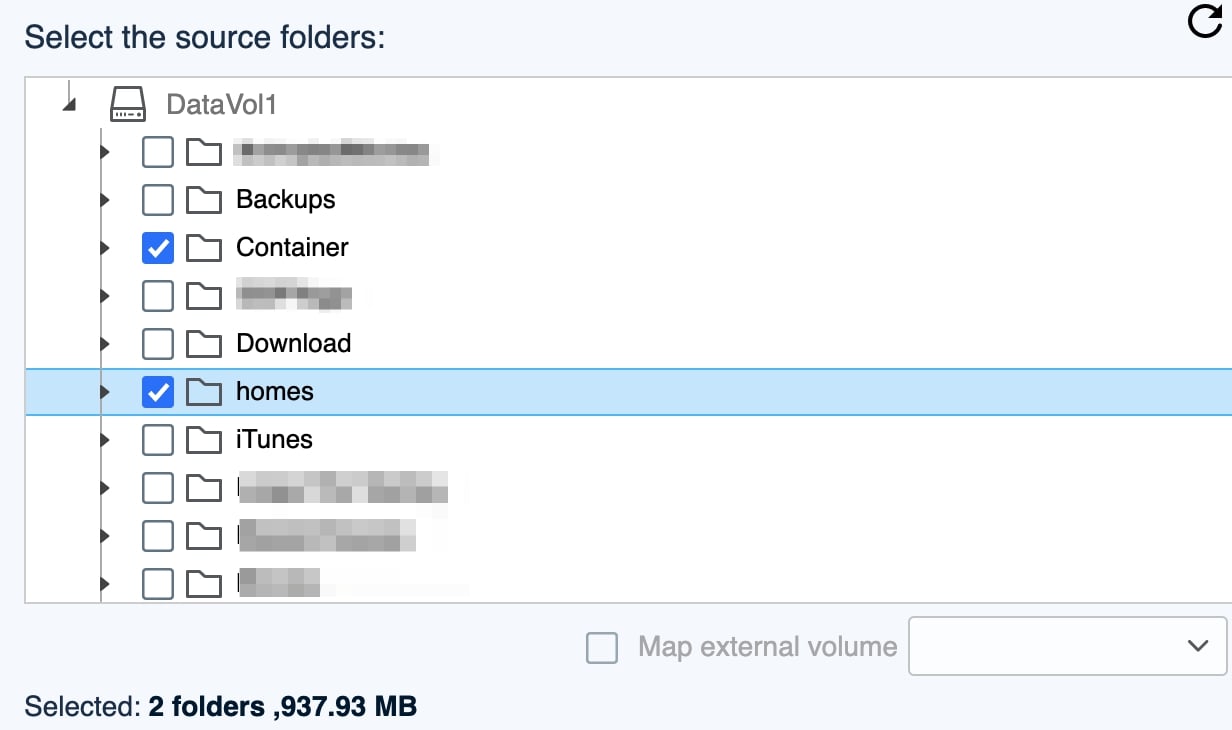
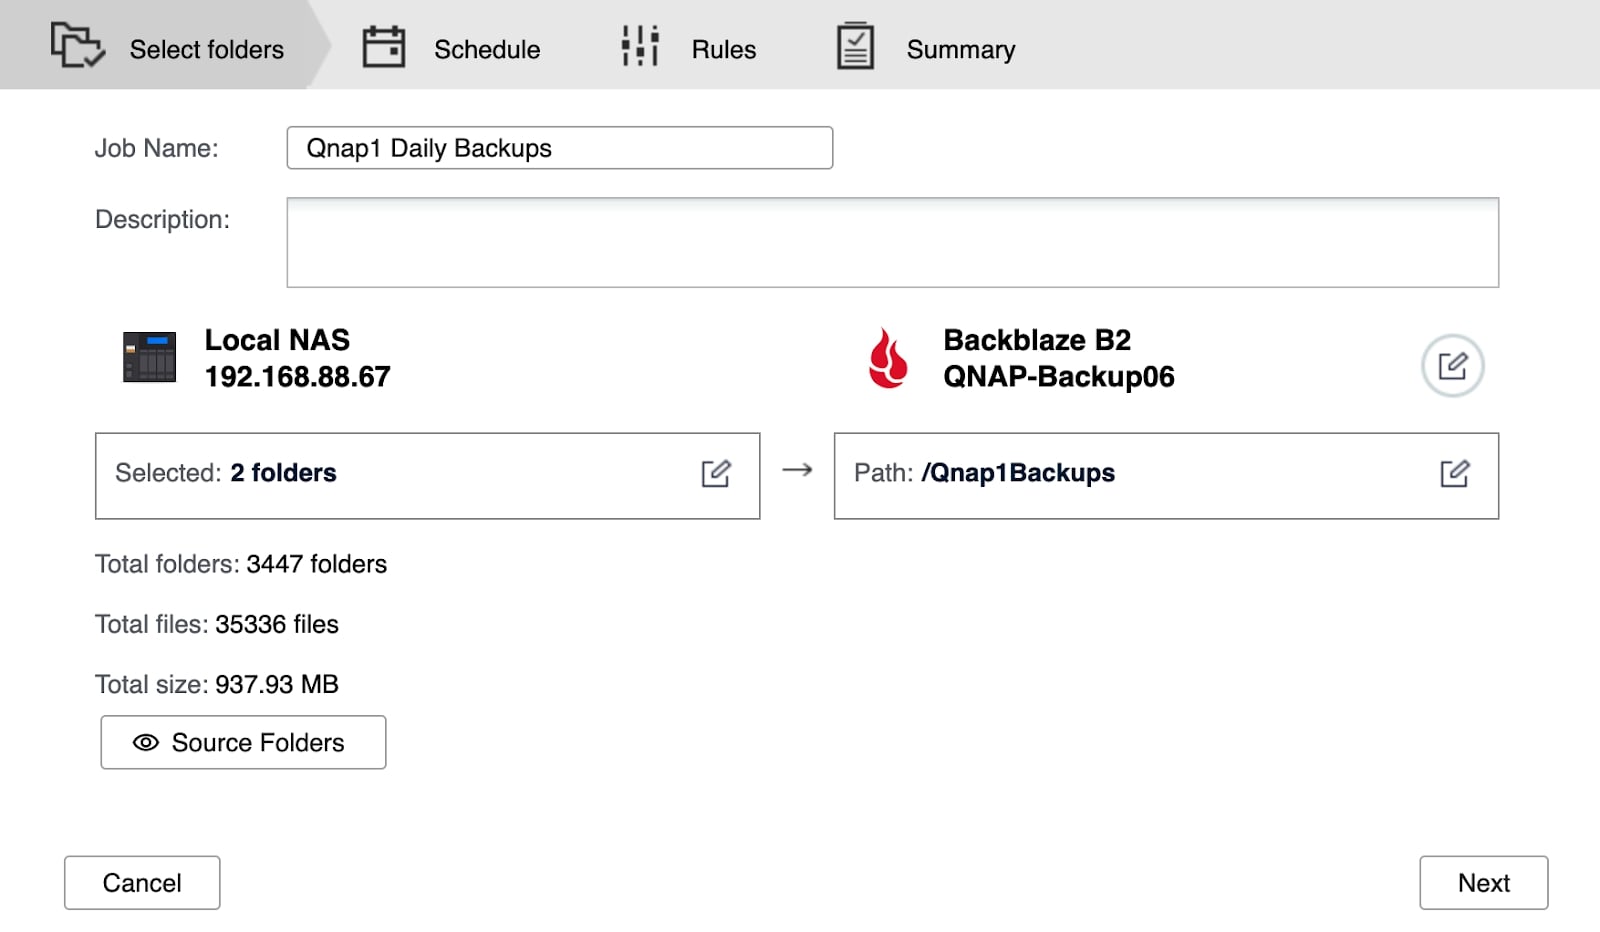
- Step 5. Add the source folders that you want to back up now.
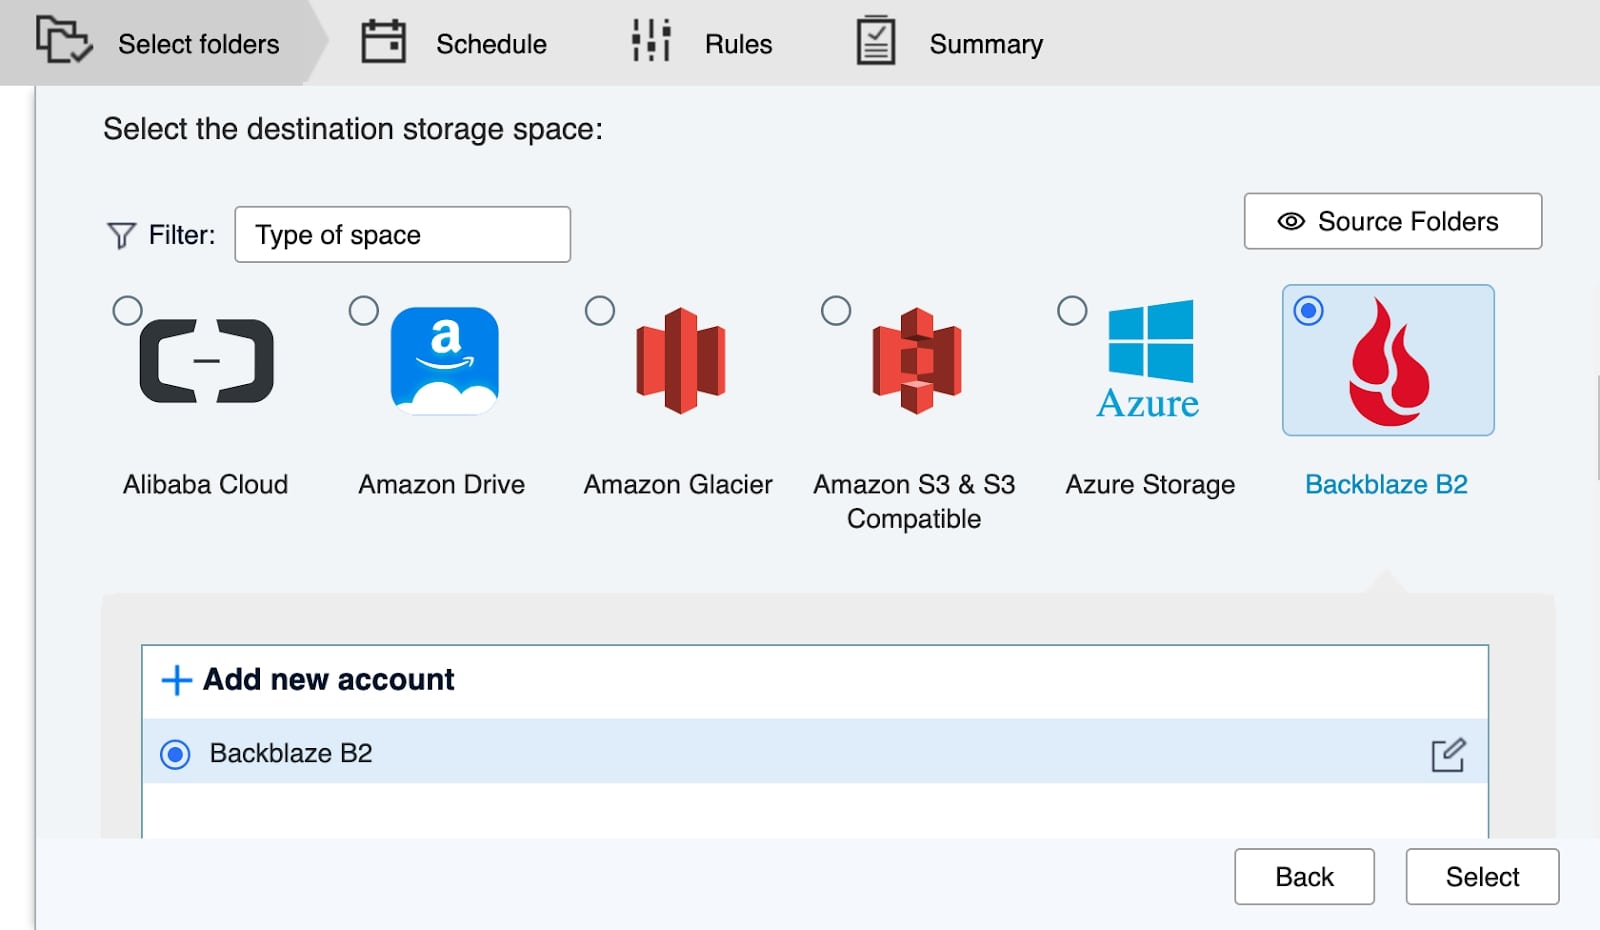
- Step 6. Select Backblaze B2 storage space; by default, the account you configured is highlighted. Click the Select
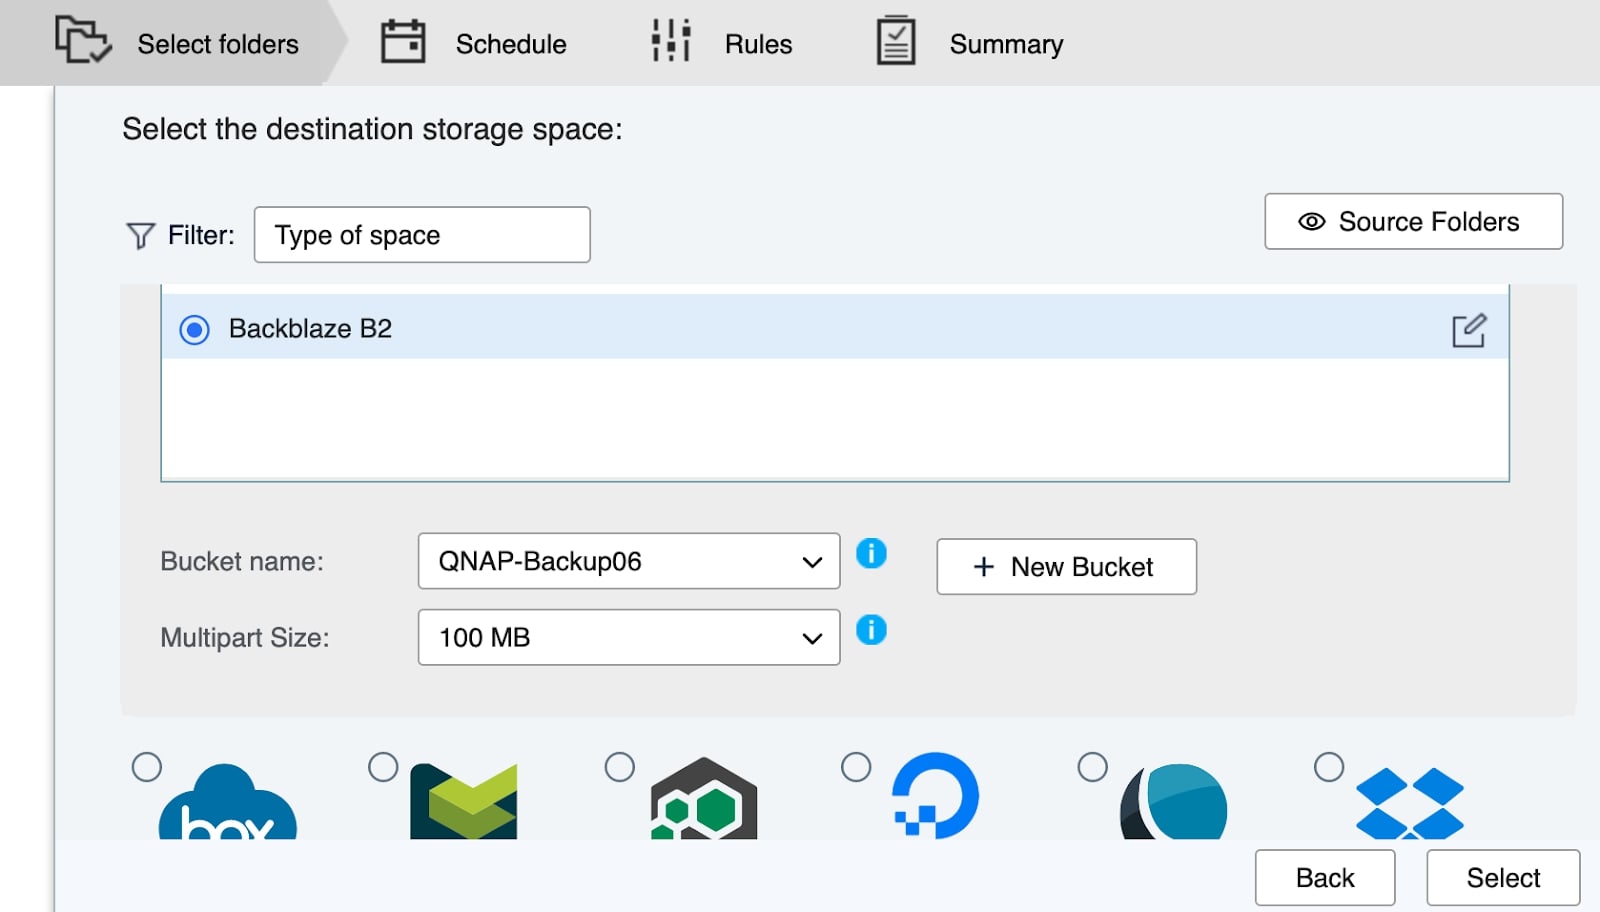
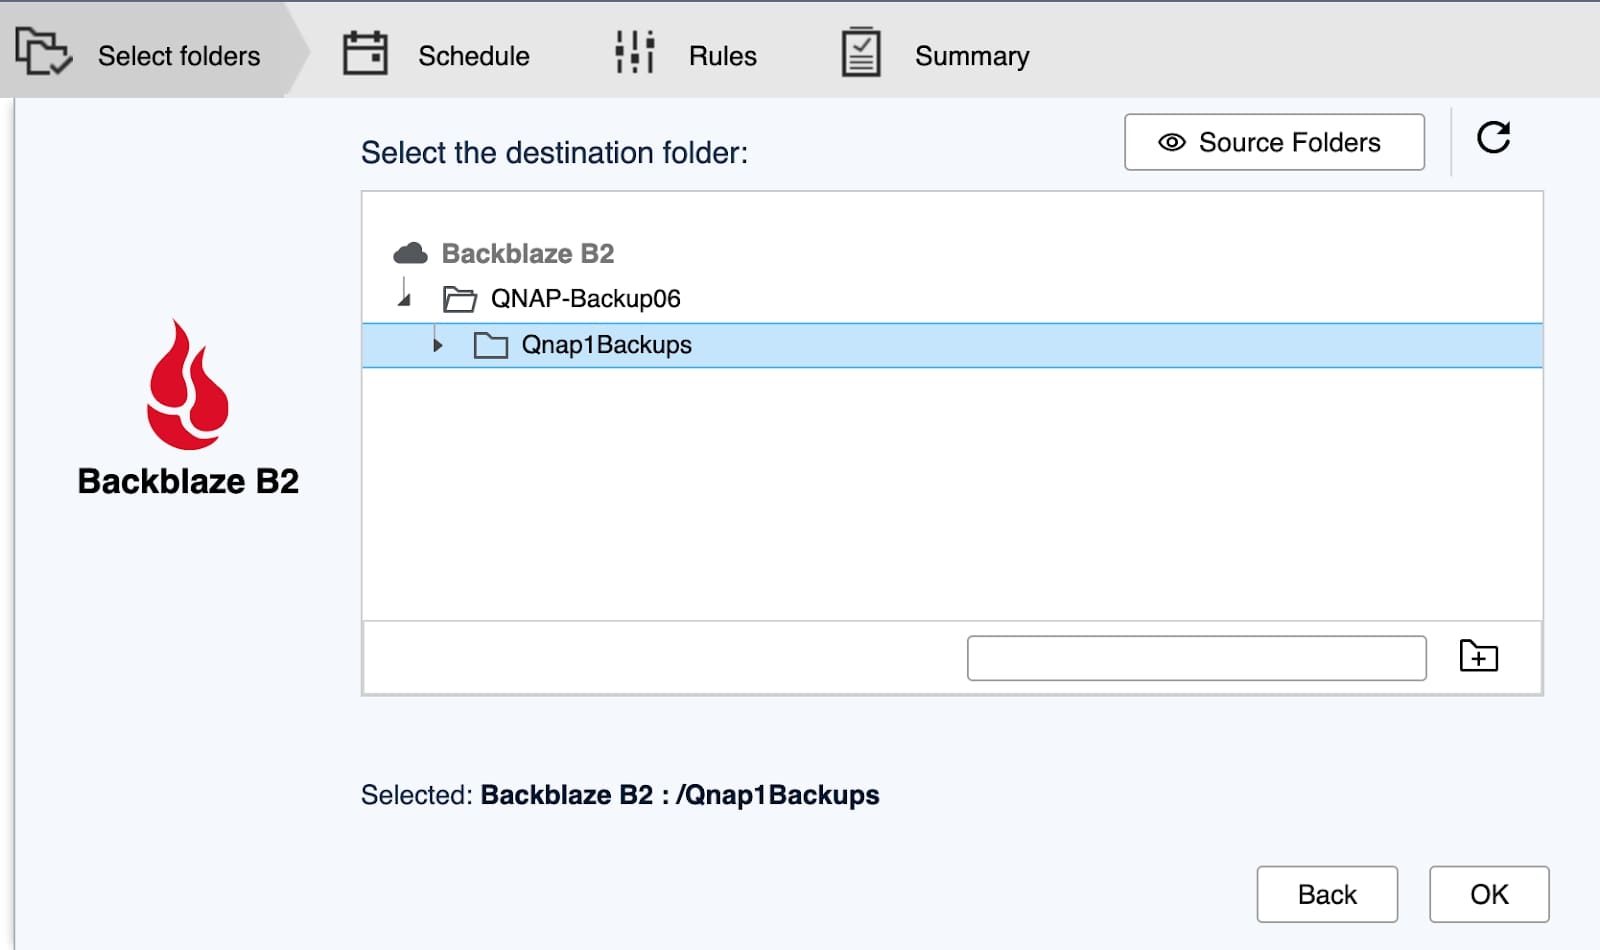
- Step 7. Select an existing B2 folder from the drop-down menu, or click to create a new one. Then click the Select
- Step 8. Select a folder to store the backup in, or create a new folder in the lower right corner of the menu, and click the plus Then press the OK button.
- Step 9. Enter a Job name and then click Next.
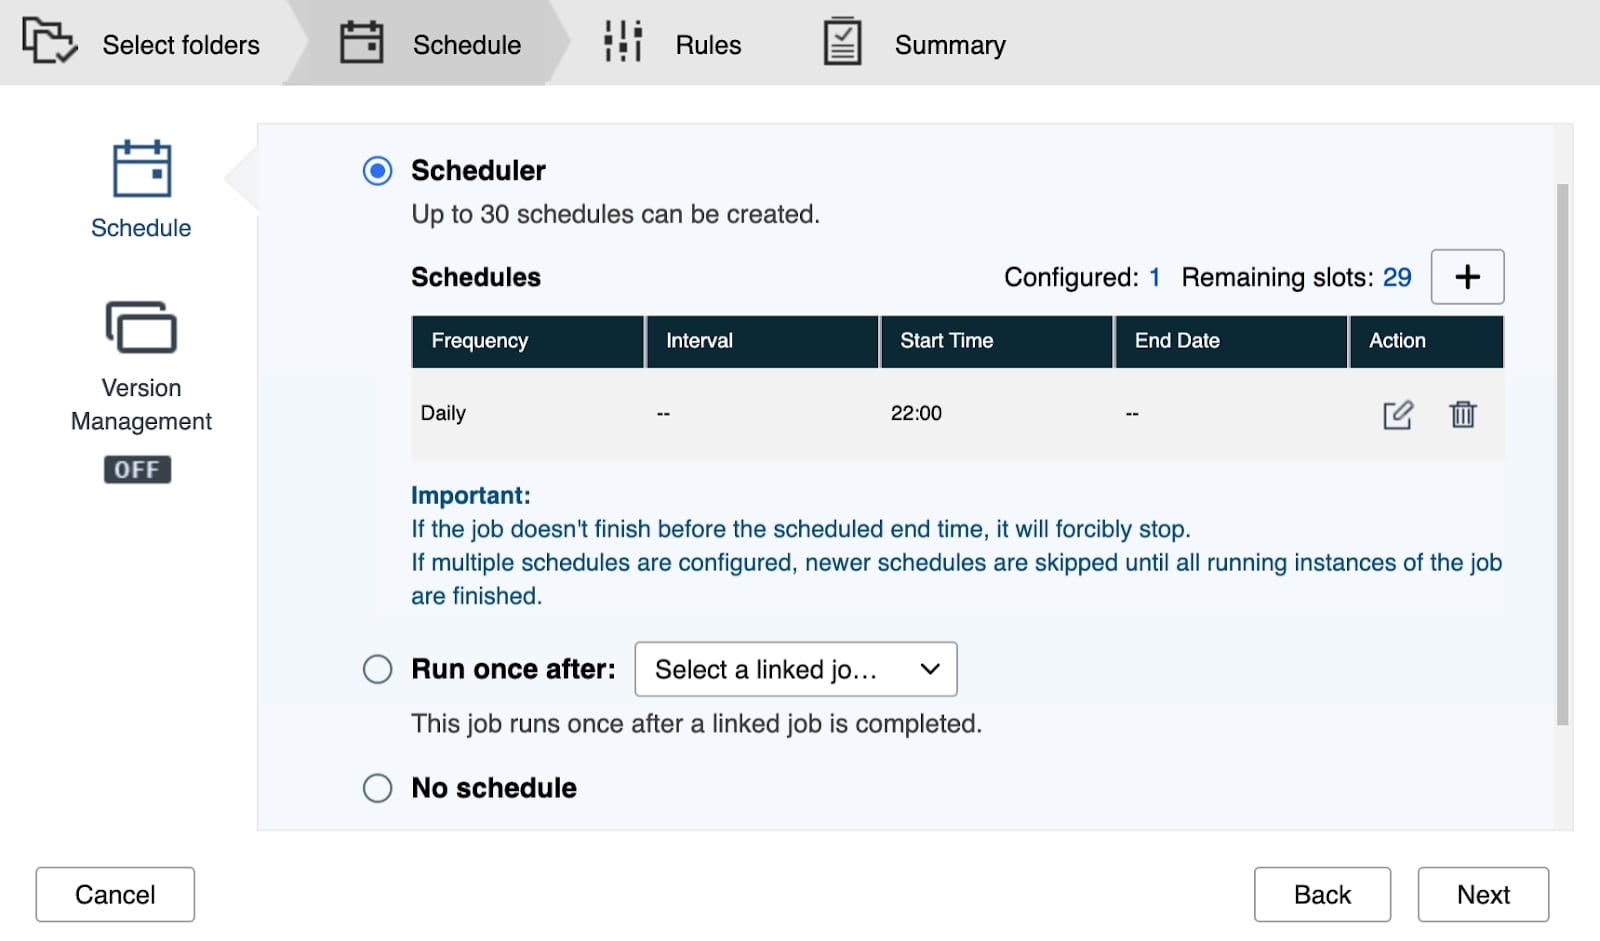
- Step 10. Create a backup schedule that meets your needs, or use the Backup Now option at the bottom of the menu to run it once or immediately. Then press the Next
- Step 11. Add any filters you want to exclude specific types of files or folders within your chosen directories. You can also enable or disable data compression. Click Next > Create.
Related article: Backup Synology NAS to Backblaze
Summing Up
Performing a QNAP NAS Cloud backup is important in securing your data from loss or damage. With the right cloud backup tools and a step-by-step guide, you can easily protect your valuable files and have peace of mind knowing your data is secure in the Cloud. Don't wait; implement a robust Cloud backup strategy for your QNAP NAS today!


