
 TL;DR:
You can back up a Windows PC to a QNAP NAS using QNAP NetBak Replicator for real-time file synchronization and compression, or use Wondershare UBackit if you need to back up entire disks, partitions, or Outlook data.
● QNAP NetBak Replicator requires at least a 1 GHz CPU, 1 GB RAM for 32-bit or 2 GB RAM for 64-bit systems, and Windows XP through 11 or Windows Server 2008/2012, though you must verify compatibility because older software releases may not support newer QNAP NAS hardware.
● To configure continuous auto-backups or scheduled intervals in NetBak Replicator, you must switch from the default Simple Mode to Advanced Mode, select a target network NAS shared folder, and save your NAS credentials.
● Wondershare UBackit serves as an alternative for users needing broader capabilities, adding encrypted backup options and the ability to use a NAS device mapped to your computer as both a backup source and destination.
Ask AI for a summary
 ChatGPT
 Perplexity
 Gemini
 Claude
 Grok
Grok
Whether you’re a home user or running a business, the safety of your data is crucial, and the best way to ensure it is to back up your files regularly. That’s why we’ll discuss one of the best backup methods: backing up your Windows files to NAS devices. How do you go about it?
You can use QNAP NetBak Replicator to create various backups, as it helps users back up Windows PCs to QNAP NAS devices. If you’re unfamiliar with NetBak Replicator for Windows, we’ll discuss a powerful alternative to keeping all your data safe.
What Is QNAP NetBak Replicator?
QNAP NetBak Replicator is QNAP’s powerful solution for creating regular backups. The backup software has an easy-to-use interface and powerful features for backing up essential data. With QNAP NetBak Replicator, you can do instant or scheduled backups or use its auto-backup function.
It functions by backing up files, folders, and applications, and it does so effortlessly. There’s also real-time synchronization, which means that each time you change something on your Windows PC, the changes also become active on the NAS device.
QNAP NetBak Replicator has an incremental backup feature, too. You can use NetBac Replicator’s incremental backup to secure files to shared folders and FTP and WebDav folders.
Regarding its advanced functions, it’s worth noting that it includes file filtering and compression. With NetBak’s compression, your backups will be smaller, and you’ll be able to back up more files. That’s why NetBak Replicator for Windows is a powerful software many users love.
General Requirements and Specifications for QNAP NetBak Replicator
There are specific requirements you must meet to use QNAP NetBak Replicator. Of course, you need a supported QNAP NAS device and a Windows machine with the following minimum requirements:
- Windows XP, Vista, 7, 8, 8.1, 10, or 11; Windows Server 2008 & 2012
- A 1 GHz or faster CPU
- 1 GB RAM (32-bit) or 2 GB RAM (64-bit)
Older NetBak Replicator versions may not support newer QNAP models, so check the compatibility list before downloading or installing anything. If you have an older QNAP NAS, find the latest NetBak Replicator for Windows to support it.
How To Install QNAP NetBak Replicator
To create various backups with QNAP NetBak Replicator, you must first install and configure it. It’s a straightforward process that will only take a few minutes of your time. Nevertheless, if you need help, below is a short guide to doing just that. Here’s what you need to do:
- Visit QNAP’s website and download the NetBak Replicator app.
- Launch the installation file and follow the instructions to finish installing it.

- Launch the NetBak Replicator app when it finishes installing.
- Select your region and click Apply.

- Click the Start button next to the green folder icon to configure your NetBak Replicator. It’ll find all QNAP NAS devices connected to your network.

- Select the NAS to which you want to back up your Windows machine and click Next.

- Select the shared folder on your NAS device and click Next.

- Enter your QNAP NAS username and password to connect to your NAS. You can also save your username and password by ticking the corresponding checkbox, so you don’t have to enter these again. Press OK.

- Click Finish after successfully configuring your NetBak Replicator and see the “Congratulations!” message.
That’s it. You’ve installed and configured QNAP NetBak Replicator on your Windows machine. You can now move on to using it for Windows backups.
How To Use QNAP NetBak Replicator for Windows Backups
As you now know, QNAP NetBak Replicator has a straightforward and easy-to-use interface. Nevertheless, if you need help using its features, below are several guides to using NetBak Replicator for Windows, including setting up a backup destination, using NetBak Replicator’s auto-backup, using the incremental backup option, etc.
How To Set Up a Backup Destination
To set up NetBak Replicator’s backup destination, follow these steps:
- Launch the NetBak Replicator application on your Windows machine.
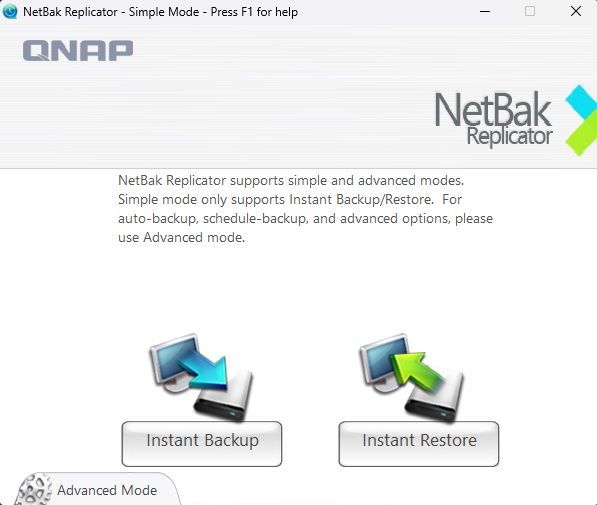
- When NetBak Replicator’s Simple Mode appears, click the Advanced Mode button in the bottom left corner.

- Select the Auto Backup tab.

- On the right side of the screen, you’ll see the part where it says, “Please select the destination.”

- Select where you want to back up from the dropdown menu.
QNAP NetBak Replicator remembers recent backup destinations, so you can use it whenever you create instant or scheduled backups. Moreover, you can back up to local drives, network locations, and other locations.
How To Use the Instant Backup
To use QNAP NetBak Replicator’s instant backup option, you can follow these steps:
- Launch the QNAP NetBak Replicator application on your Windows machine.
- When NetBak Replicator’s Simple Mode appears, click the Instant Backup button.

- Select all the files and folders you want to back up on the following screen and click Next.

- Select the NAS device to which you want to back up.

- Press OK, and when the process completes, click Finish.
That’s it when creating instant backups with QNAP NetBak Replicators. It’s fast and easy, and anyone can do it.
How To Use Instant Restore
You can do the following if you want to restore your backups using QNAP NetBak Replicator:
- Launch the NetBak Replicator application on your Windows machine.
- When NetBak Replicator’s Simple Mode appears, click the Instant Restore button.

- On the following screen, select the source of the backup in the first box and the user and the computer in the second box. Then, select which files and folders you want to restore and click Next.

- Select the location to restore to and choose whether to recover all files or skip the files with the same name and different content. Click Start.

- After the restoration completes, click OK. Finally, click Finish.
Restoring backups with QNAP NetBak Replicator is similar to creating an Instant Backup. It takes a few short steps and a few minutes of your time.
How To Use QNAP NetBak Replicator’s Auto-Backup
NetBak Replicator offers an automatic backup option. To use it, follow these steps:
- Launch the NetBak Replicator application on your Windows machine.
- When NetBak Replicator’s Simple Mode appears, click the Advanced Mode button in the bottom left corner.

- You should already be on the Auto Backup tab. If you’re not, select it in the top left corner.
- On the left side, you can select which files and folders you want to back up, while on the right, you can select the destination. It’s where you should pick your NAS device.

- After you’ve selected the source and the destination, click the Start Auto-Backup button in the bottom right corner.

Setting auto backups on QNAP NetBak Replicator is a feature you can set up once and forget about it. You won’t have to worry about backups anymore.
How To Set Up Scheduled Backups
Finally, you can set up scheduled backups inside the NetBak Replicator app. To do that, follow the guide below:
- Launch the NetBak Replicator application on your Windows PC.
- When NetBak Replicator’s Simple Mode appears, click the Advanced Mode button in the bottom left corner.

- Select the Schedule Backup tab in the top left corner.

- Select the backup source. It includes all the files and folders you want to back up.

- Select the destination for your backup on the right side of the menu. You can choose your NAS device here.

- Select the shared folder of your NAS device and click Next.

- You can change your scheduled backup frequency by clicking the Frequency Settings underneath the destination.

- Tick the box to “Repeat on selected day” and choose an option that suits you.

- Select when you want the backup to happen by changing the time. Click Add.

- (OPTIONAL) You can right-click the created backup schedule in the table and click the Start Schedule button to make an immediate backup.
These are all the options you have with QNAP NetBak Replicator. Following these steps, you should have your backups up and running quickly.
Wondershare UBackit: A Simpler Alternative to QNAP NetBak Replicator
If QNAP NetBak Replicator seems too complicated, alternative solutions exist to back Windows files to NAS devices. One such option is Wondershare UBackit, a powerful backup utility with even more features than NetBak Replicator.
Moreover, UBackit offers incremental, real-time, scheduled, and encrypted backup options. With UBackit, you can back up files, folders, partitions, and even entire disks. There are also options for Outlook backups. You can also use a NAS device mapped to your computer as a backup source and destination.
Backing up and restoring is incredibly straightforward and takes only a few steps. If you want to try Wondershare UBackit, there’s also a guide to creating Windows PC to QNAP NAS backups below.
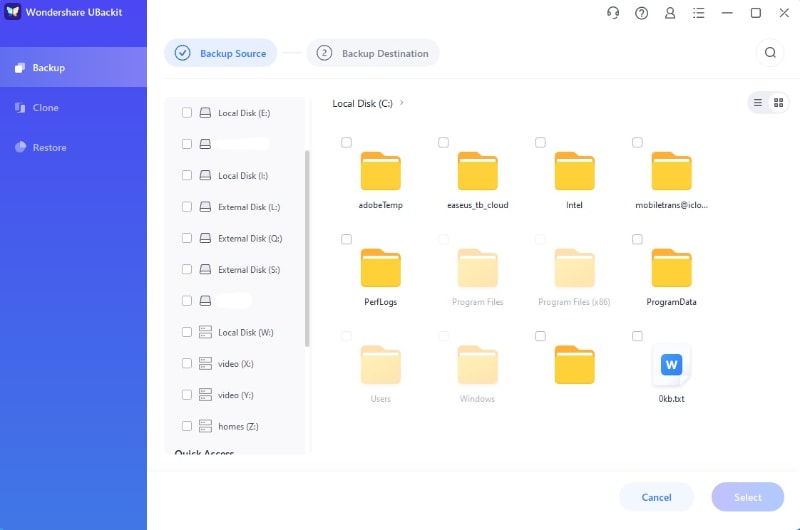
- Launch Ubackit after downloading and installing it on your PC. Choose the Backup option in the left navigation pane and select either File & Folder Backup or Disk Backup, depending on which backup type you need.

- Select the backup source. That requires selecting all your Windows PC files, folders, or disks you want to back up to a NAS. When you’re done selecting, click the Select button.
- Select a NAS device as the backup destination and click Backup.

- Your backup will now start, and you can see the progress in the Backup Manager.
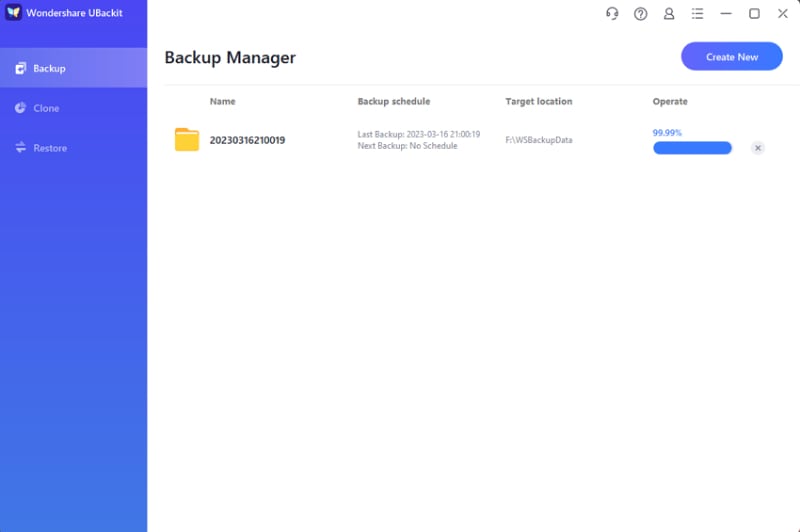
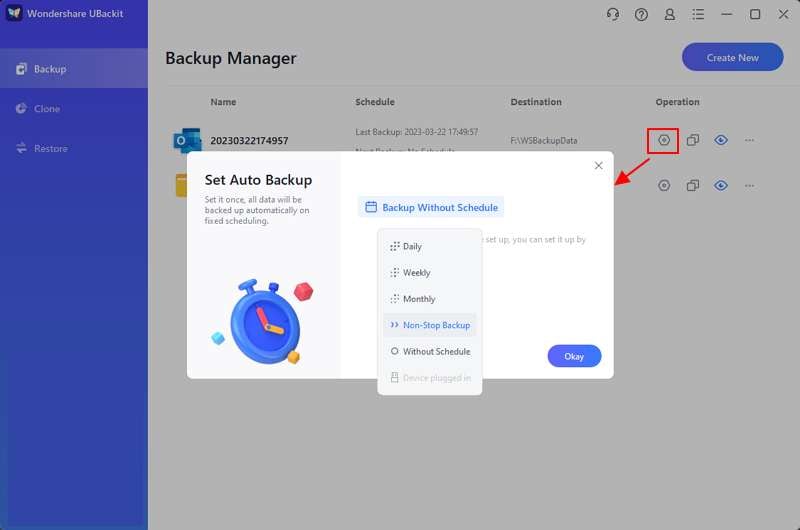
- When the backup is complete, you’ll see it in the Backup Manager, along with information about its name, backup schedule, and location.
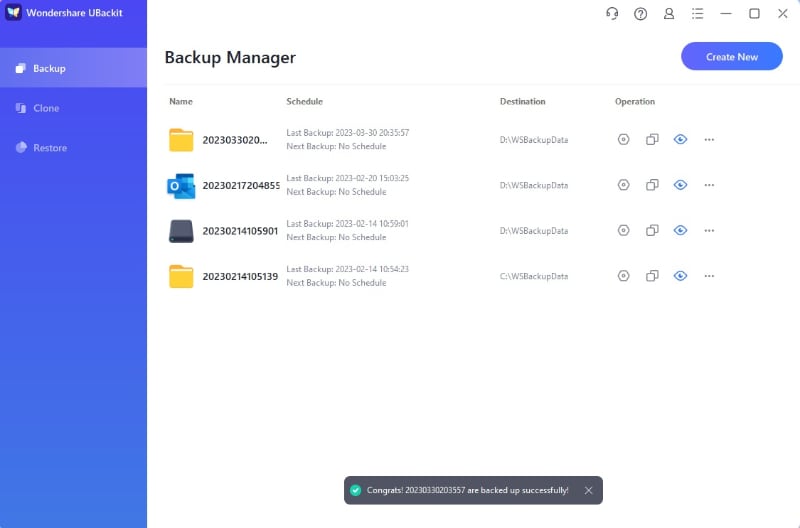
Now you can set automatic backup by clicking the Schedule icon next to the backup file.
Congratulations! You’ve successfully backed up a Windows PC to a NAS device with this QNAP Netback Replicator alternative. It’s that easy.
Conclusion
Backing up your crucial files is essential to keeping them safe, and the best way to back up your Windows machine is to create backups on storage servers such as NAS devices. You can do that by creating backups of Windows machines with QNAP NetBak Replicator, which can automatically back up to a NAS device.
Alternatively, if you don’t like the complexity of the QNAP NetBak Replicator, you can use Wondershare UBackit. It’s a powerful backup tool that works similarly to QNAP NetBak Replicator but is much simpler and has even more valuable features.


