
 TL;DR:
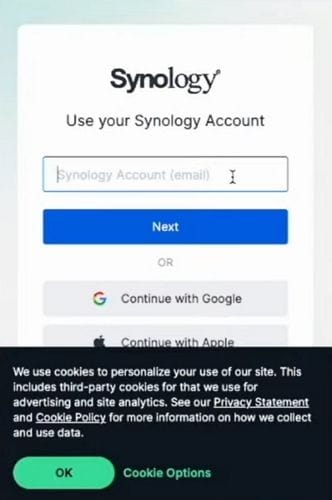
Synology Active Backup for Business provides centralized data protection for Mac users running macOS 10.15.7 or later, requiring an x64-based Synology NAS with Btrfs support and at least 4 GB of RAM.
● Backup destinations must be configured as unencrypted shared folders utilizing Btrfs volumes to successfully receive data.
● Installing the software agent on a Mac typically requires booting into the Recovery environment to apply a Reduced Security policy and allow kernel extensions.
● Running Active Backup version 2.1.0 or higher requires the NAS to use DSM 6.2 or newer, while versions 2.0.4 and earlier depend on DSM 6.1.7.
Ask AI for a summary
 ChatGPT
 Perplexity
 Gemini
 Claude
 Grok
Grok
Backing up your data is highly important. You never know when your sensitive files might get corrupted, accidentally deleted, or lost in a safety hazard. All Mac users must consider using a backup tool for essential data.
Today we’ll introduce one of those tools you can use for securing your data on Mac - Synology Active Backup for Business, and give you detailed instructions on creating backups and restoring them effectively.
Table of Content
What Is Synology Active Backup for Business?
Active Backup for Business is a Synology backup tool designed to make all business processes revolving around saving data easier. It lets you achieve comprehensive data protection with a wide range of backup, recovery, compatibility, and restoration capabilities.
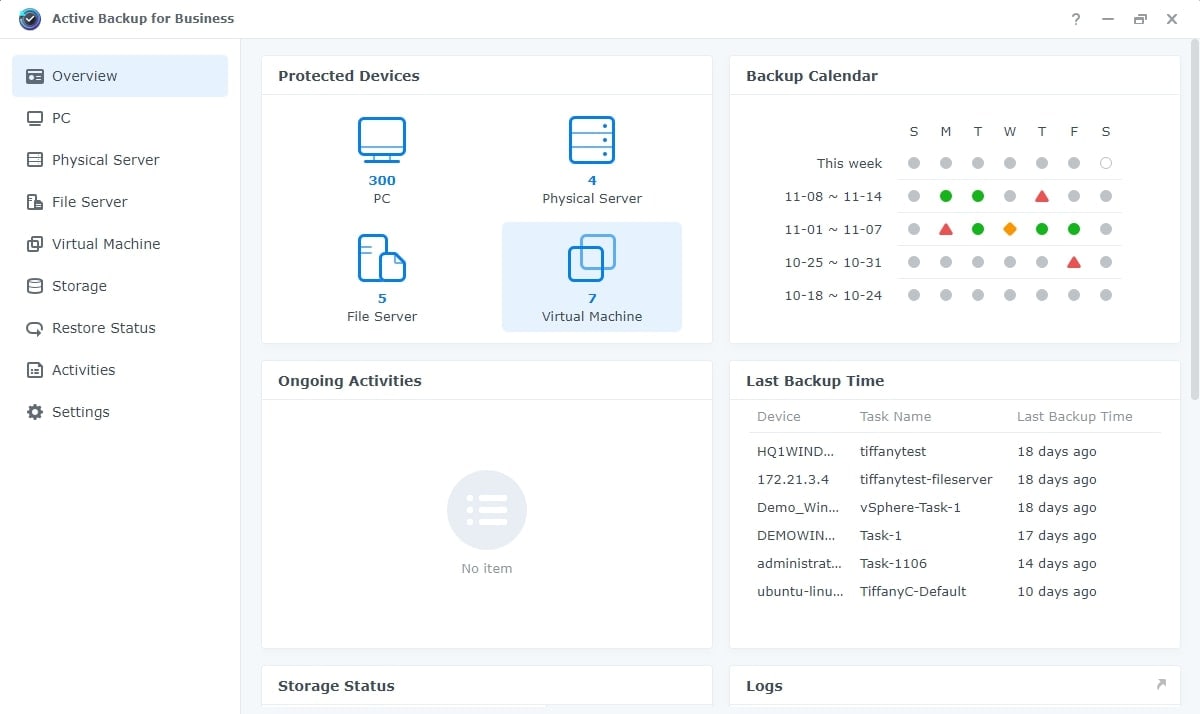
This all-in-one data solution lets you centralize the protection of your multifaceted IT infrastructure, including file servers, physical servers, virtual devices, and computers. All the actions can be performed through the centralized console. Even though you can use Time Machine to back up your data on Mac, Active Backup for Business is a more advanced tool.
Active Backup for Business packs a unified dashboard with quick deployment, backup templates, and a robust reporting system. Active Backup for Business allows Mac users to add different computers to the program, create backup tasks, restore the previously backed data, and manage all devices in a single place.
Undoubtedly, Synology NAS offers a secure method for data storage. However, no approach is entirely foolproof. Various factors, such as power outages, hard drive failure, or accidental deletion, can lead to data loss on your Synology NAS. Fortunately, Wondershare Ubackit is available to assist you in recovering your data effortlessly. Check the video tutorial below to learn how to get data back from Synology NAS on Mac.
For Windows 7 or later
For macOS 10.10 or later
Things To Do Before Installing Synology Active Backup on Mac
Active Backup for Business isn’t compatible with all NAS drives and all operating systems. If you want to use Active Backup 2.1.0 and higher versions, you will need a NAS drive using DSM 6.2 or higher. If you want to use the 2.0.4 and earlier versions, you will need a Synology NAS with the DSM 6.1.7 version.
Active Backup for Business can’t work on NAS servers that aren’t x64 and don’t support Btrfs files. Your Synology NAS should have at least 4 GB of RAM for optimal performance. You need to set up all the backup destinations as shared folders using Btrfs volumes
All backup destinations on virtual machines, physical servers, and computers can’t be encrypted shared folders. Your Mac needs to be connected with the Synology NAS before you can start doing backups. Also, check if your macOS is 10.15.7 or newer before installing Active Backup for Business.
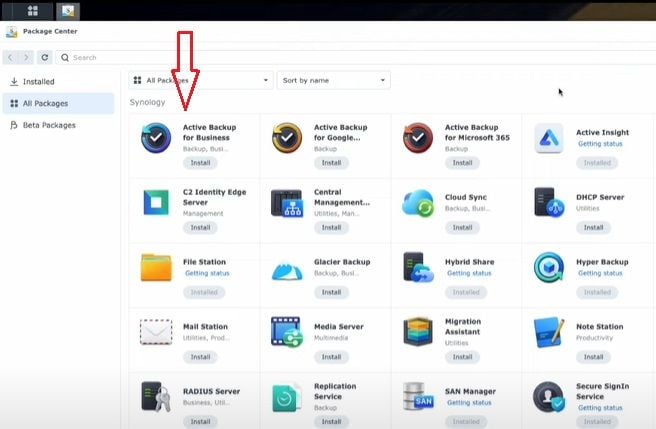
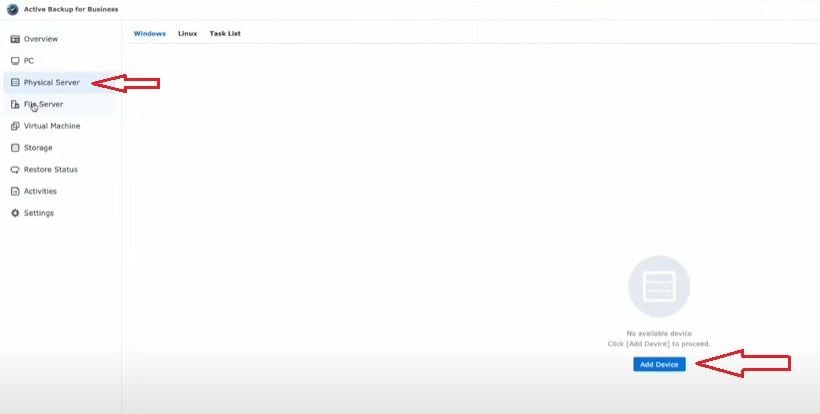
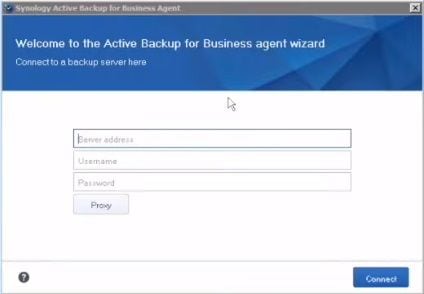
How To Install and Setup the Active Backup for Business on Mac
- Step 1: Download the Active Backup for Business Agent installer on your Mac and run it.
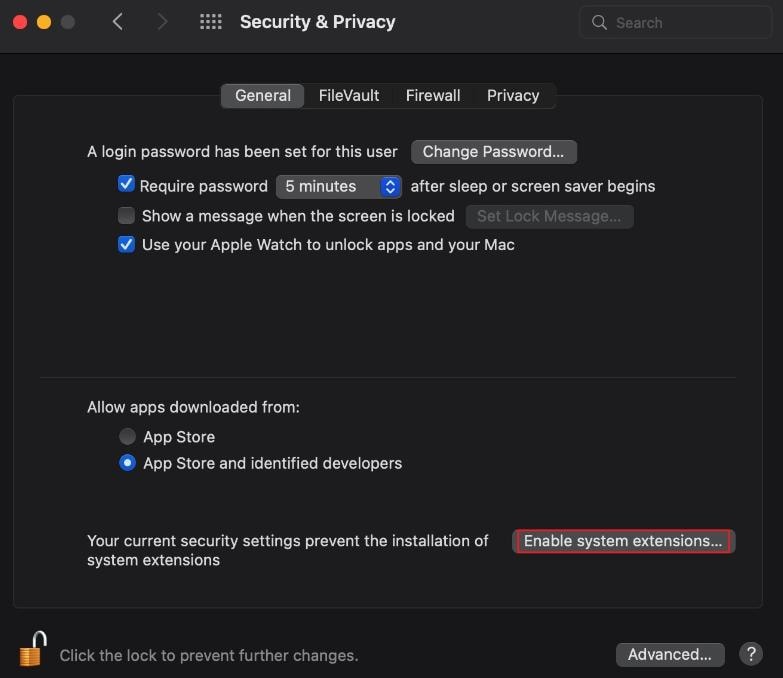
- Step 2: If you get the “System Extension Blocked” message, click Open Security Preferences.
- Step 3: When the Security & Privacy window opens, click Enable system extensions, restart your Mac, and start the installation again.
- Step 4: If you get the “To enable system extensions, you need to modify your security settings in the Recovery environment,” you must make different security changes.
- Step 5: Shut down your device, press the power option to open the startup options, and click Options.
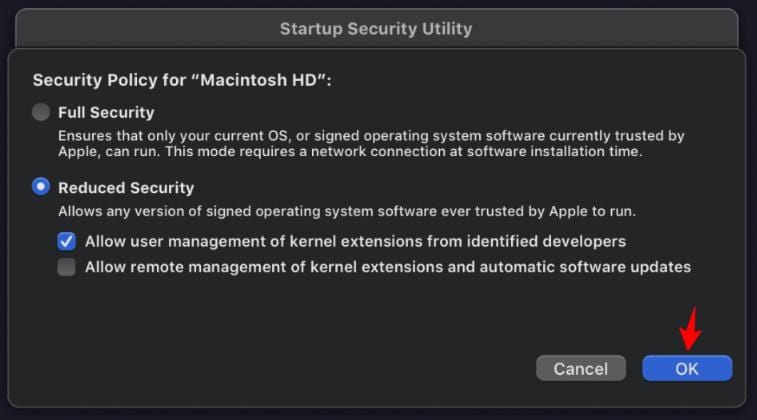
- Step 6: Click Utilities and then Startup Security Utility.

- Step 7: Select your startup disk (Macintosh HD is the default name) and click Security Policy in the bottom right corner.
- Step 8: Click Reduced Security and enable Allow user management of kernel extensions from identified developers.
- Step 9: Restart the device and continue the installation.
How To Create & Schedule a Backup Task in Active Backup for Business on Mac
- Step 1: Run the backup creating wizard, select the drive you want to back up, and click Create.
- Step 2: In the next window, create a task name, select the source type of the backup, and configure data transfer settings.

- Step 3: Select the Synology NAS shared folder as your backup destination.
- Step 4: When you get to this window, select the Scheduled Backup option
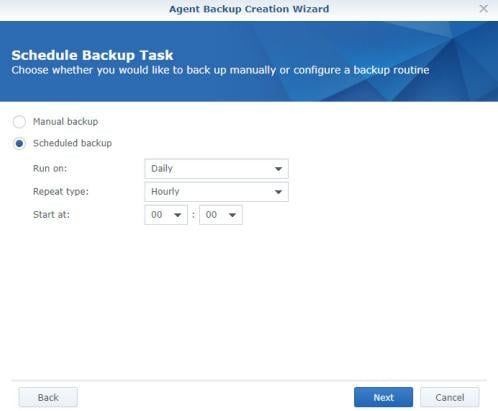
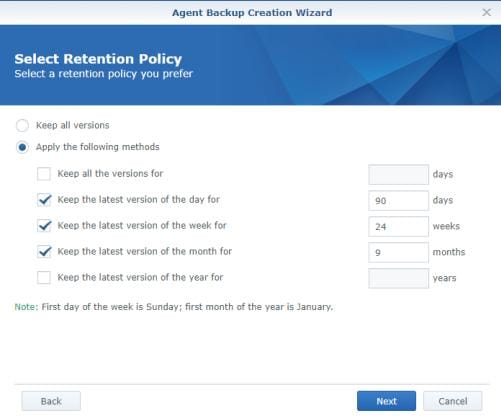
- Step 5: On the next page, configure the retention policy and click Next. On the next page, confirm the backup and wait for the process to be completed.
How To Restore Backed-up Data in Active Backup for Business on Mac
- Step 1: Start the Active Backup for Business Recovery Wizard on your Mac device.
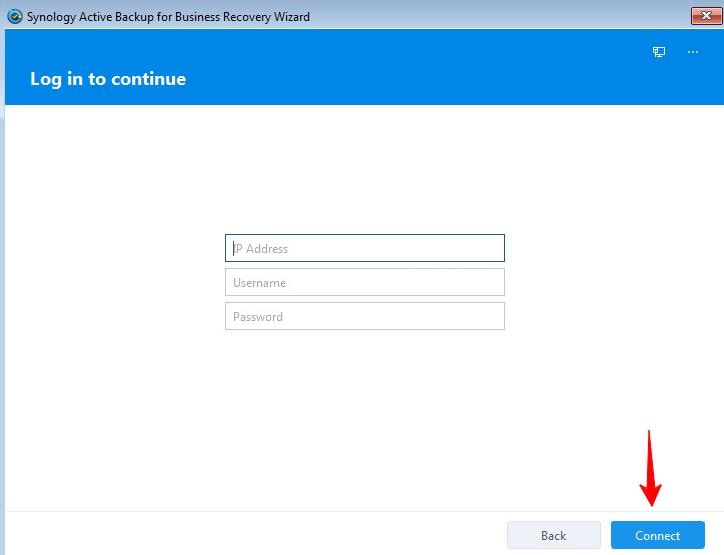
- Step 2: Provide the AP, Username, and Password to access your Synology NAS containing backed-up files.

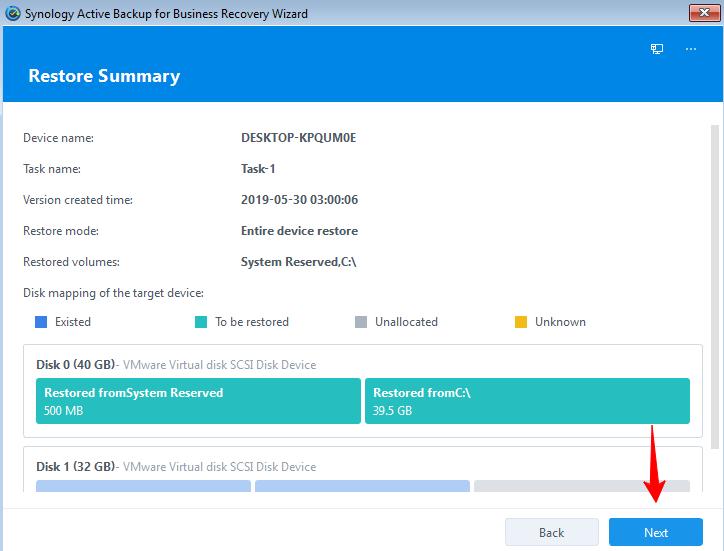
- Step 3: Select the desired task and device (select restore mode). Select the desired option (Entire device restore/System volume restore/Manually restore specified volumes).
- Step 4: Select the version of the backup you want to restore and click Next.
- Step 5: Check the whole summary of your recovery and click Next when you’re ready.
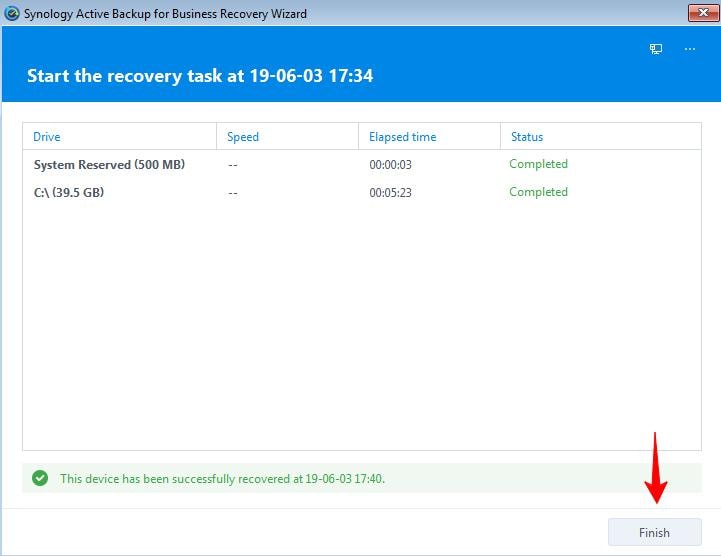
- Step 6: Wait until the process is complete and click Finish.
Conclusion
These are just some of the things Active Backup for Business can do on macOS devices. It’s a compelling platform that enables you to secure, store, and manage files effectively.


