
 TL;DR:
While the free, open-source Clonezilla provides advanced deployment tools like MBR/GPT support and multicast for expert users, Wondershare UBackit is the recommended software for beginners to clone Windows 11/10 directly through a graphical desktop interface.
● Utilizing Clonezilla bypasses the standard desktop environment, requiring users to manually configure a bootable USB or DVD and execute the cloning process entirely through a text-based pre-boot menu.
● Wondershare UBackit enforces a strict hardware prerequisite mandating that the destination target drive must possess a storage capacity equal to or greater than the original source drive.
● Manually canceling the transfer or shutting down the computer during a prolonged cloning operation introduces a direct risk of permanently corrupting the target Windows installation and user data.
Ask AI for a summary
 ChatGPT
 Perplexity
 Gemini
 Claude
 Grok
Grok
Suppose you’ve recently bought a new HDD or SSD and don’t want to reinstall your Windows 10/11 on it from scratch. In that case, you can use Windows cloning software to quickly transfer all your files from one drive to another. That’s where Clonezilla comes in.
It’s a perfect disk cloning tool that supports backups and restores and is filled with various advanced cloning options.
However, using Clonezilla to clone Windows 10 or 11 isn’t effortless, as the software is designed for advanced users. That’s why we’ll show you how to use it and offer a much easier-to-use alternative solution.
Join us to celebrate World Backup Day, and make data backups a regular part of your day. As you try to use Clonezilla disk cloning tool , you must realize the importance of data backup.
Table of Content
What Is Clonezilla?

Clonezilla is an open-source software developed by NCHC Free Software Labs, and since it’s open-source, it also means it’s free to use. Moreover, support for various operating systems and file types, such as NTFS in Windows, ext2, 3, and 4 in Linux, and HFS in MacOS, make Clonezilla an excellent tool for disk cloning, system imaging, backups, and restores.
Key Advantages of Using Clonezilla
What makes Clonezilla stand out from the competition, such as Norton Ghost or True Image, are its many advanced features. Those features include:
- Support for both MBR and GPT partition schemes;
- Ability to reinstall various corrupted bootloaders, such as GRUB;
- Restoring one image to multiple devices;
- An enterprise-grade cryptographic encryption mode for system images;
- AES-256 encryption for securing data;
- Extremely minimal system requirements because of a very basic GUI;
- Support for various file systems and ability to work with Windows, MacOS, and Linux operating systems;
- Multicast options for massive cloning tasks;
- Unattended mode, where you can customize your disk cloning needs with boot parameters.
With so many features, tools, and options, it’s understandable why many experts and advanced users love Clonezilla. However, that’s also where the problem lies with using Clonezilla.
Things You Need Before Cloning Windows 10 With Clonezilla
A few things are worth mentioning before you choose Clonezilla as your Windows 10 cloning tool. Namely, Clonezilla requires some advanced knowledge and isn’t exactly what you’d call a beginner-friendly tool.
Even the download section at Clonezilla’s website requires you to know your CPU architecture, select what file type to save the app’s installation file, and select a repository. Although these settings are likely set to default values for most users and shouldn’t be changed before downloading the app, they’re still quite confusing, but using Clonezilla is even more challenging.
That’s because Clonezilla isn’t precisely an application. Instead, what you download from their website must be accessed like you would access Windows. You’ll need to put the installation file on a bootable USB or CD/DVD, restart your PC, and boot from the USB or DVD.
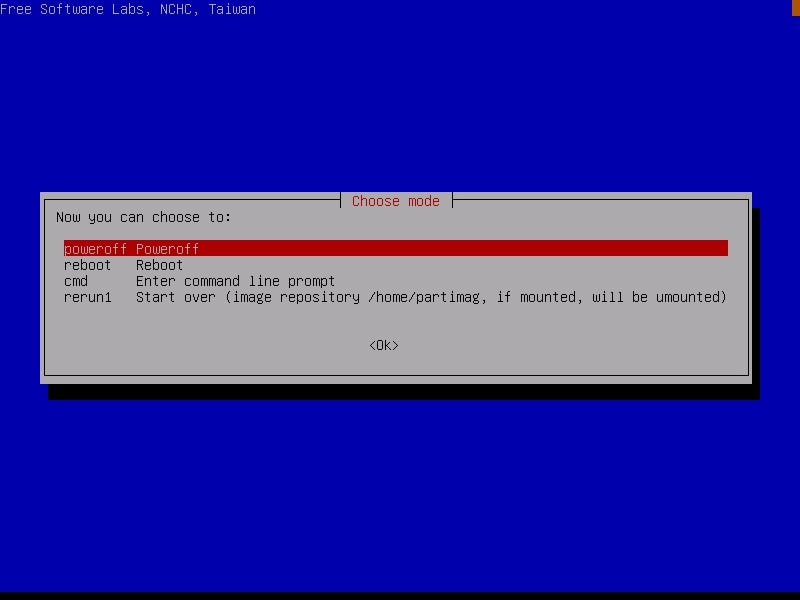
The app’s user interface is similar to Windows from 30 years ago. Sure, you could call it a graphical user interface (GUI), but it’s more of a text-based interface that resembles MS-DOS. Beginners shouldn’t even consider using it, as even advanced users can find it challenging.
How To Clone Windows 11/10 With Clonezilla
As mentioned above, using Clonezilla can be pretty challenging. However, if you still want to try Clonezilla, we’ve written a detailed step-by-step guide to clone Windows 10 or 11. You can find these steps below – as long as you follow them, you should be good.
Here’s what you’ll need to clone Windows 11 or 10 with Clonezilla:
- Step 1: Download the software from Clonezilla’s website. The mentioned CPU Architecture should be left to amd64 for most modern computers, and the file type can be either one of the two.
- Step 2: Create a bootable USB or DVD with your downloaded ISO file. This guide won’t cover this part – various guides on creating bootable USBs exist online.
- Step 3: Once you have a bootable USB with Clonezilla’s ISO, restart your PC and boot from the USB to enter Clonezilla’s LiveBoot. (Booting from the USB will require you to press a specific key on your keyboard and choose the USB with Clonezilla on it. The key you need to press depends on your motherboard manufacturer. You’ll need to find out which key it is before using Clonezilla. For example, that’s often the F12 key for many motherboards, such as Gigabyte.)
- Step 4: Select the Clonezilla version to boot to. For this guide, we’ll select “Other modes…”.

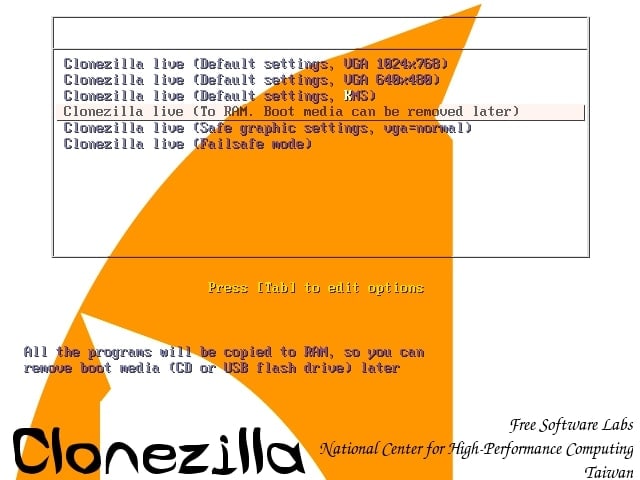
- Step 5: Select “Clonezilla live (To RAM…)” on the following screen.
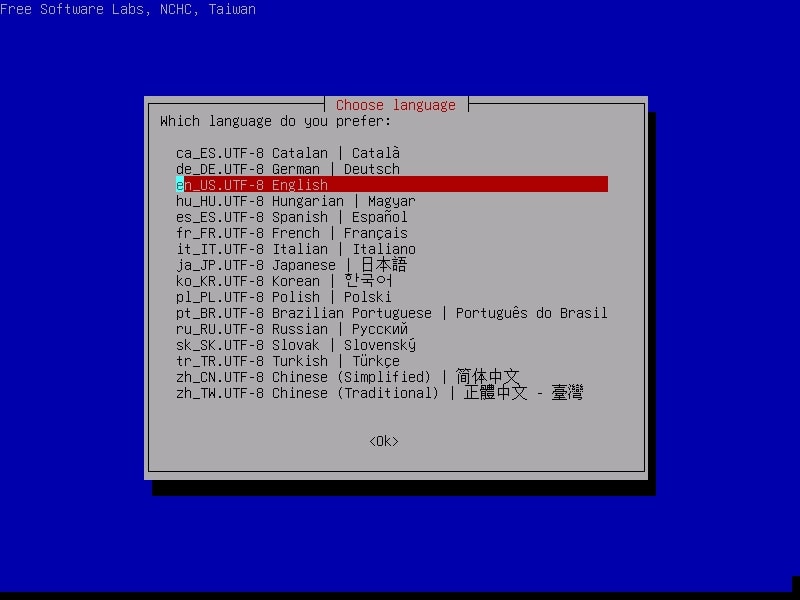
- Step 6: Choose your language and select the keyboard layout on the subsequent two screens.
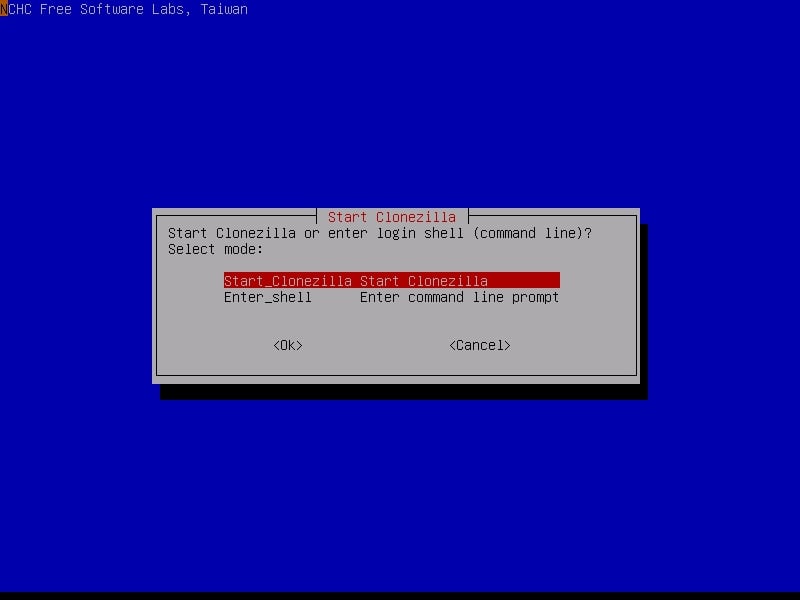
- Step 7: Start Clonezilla by selecting the first option.
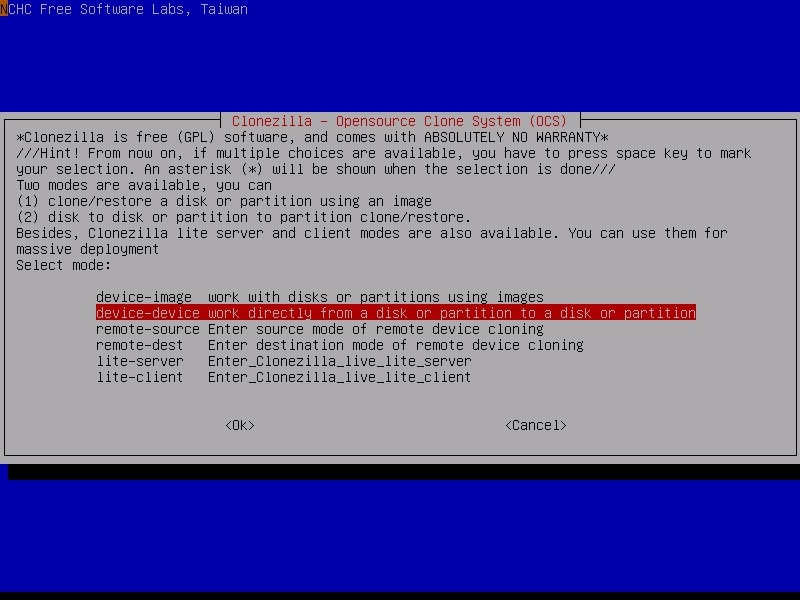
- Step 8: Select the device-device option on the following screen.
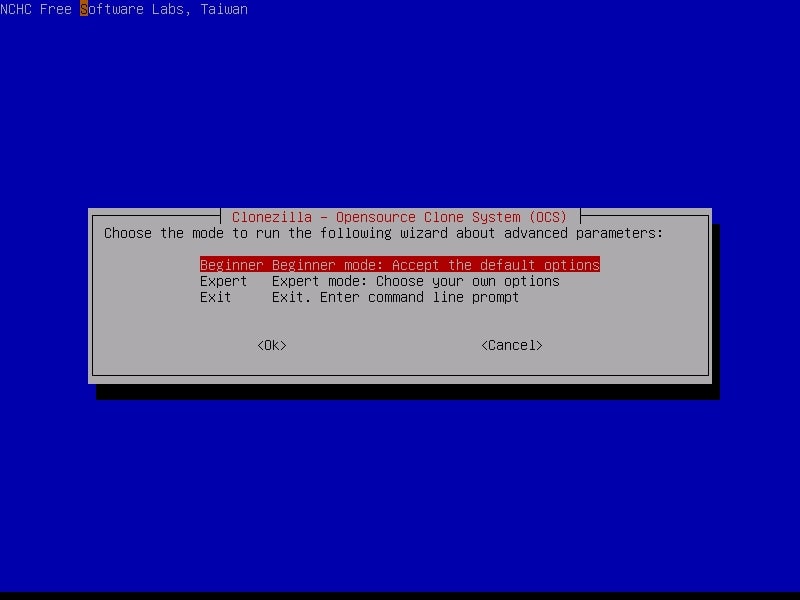
- Step 9: Select the Beginner mode next.
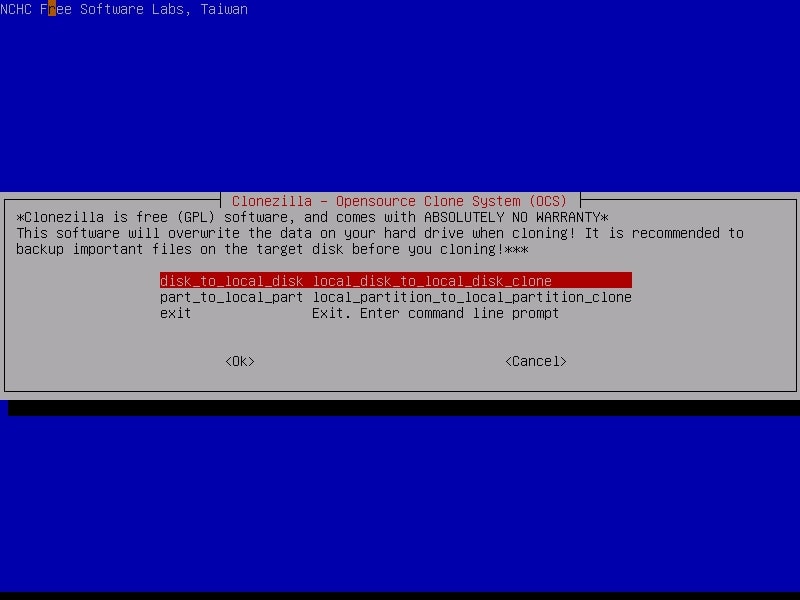
- Step 10: Select the disk_to_local_disk option.
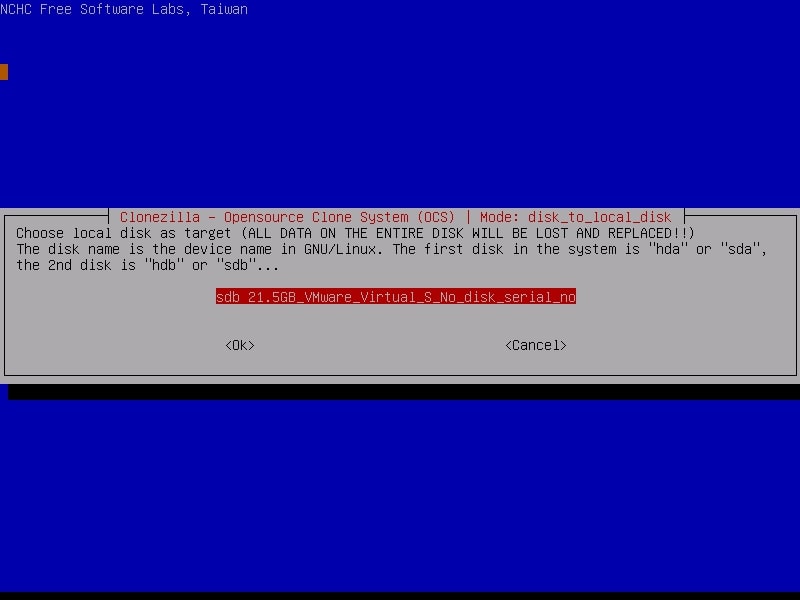
- Step 11: Choose the source disk you want to clone on the following screen.

- Step 12: Then select the target disk to clone to.
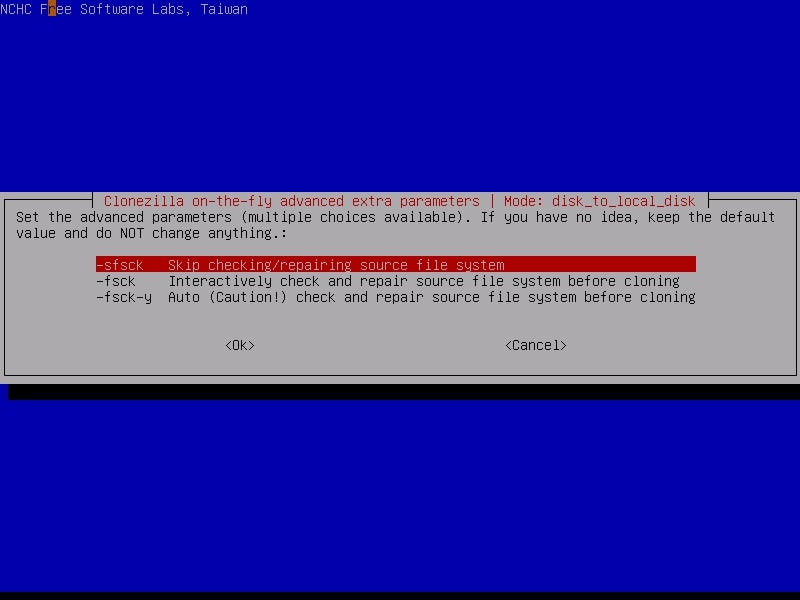
- Step 13: Choose whether you want to check the source disk first. We’ll skip it.
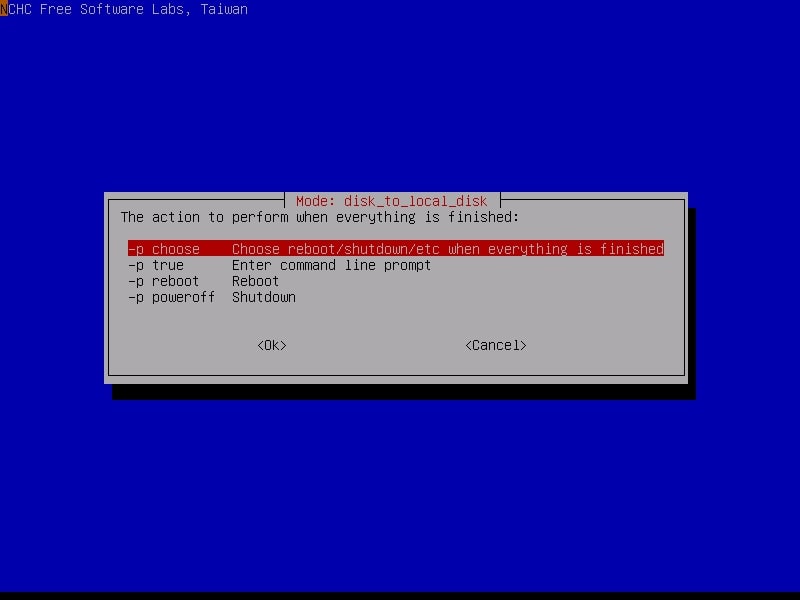
- Step 14: Choose whether to reboot or shut down or leave it to default to choose later. We’ll go with the default option.
- Step 15: Hit Enter to start the cloning operation.
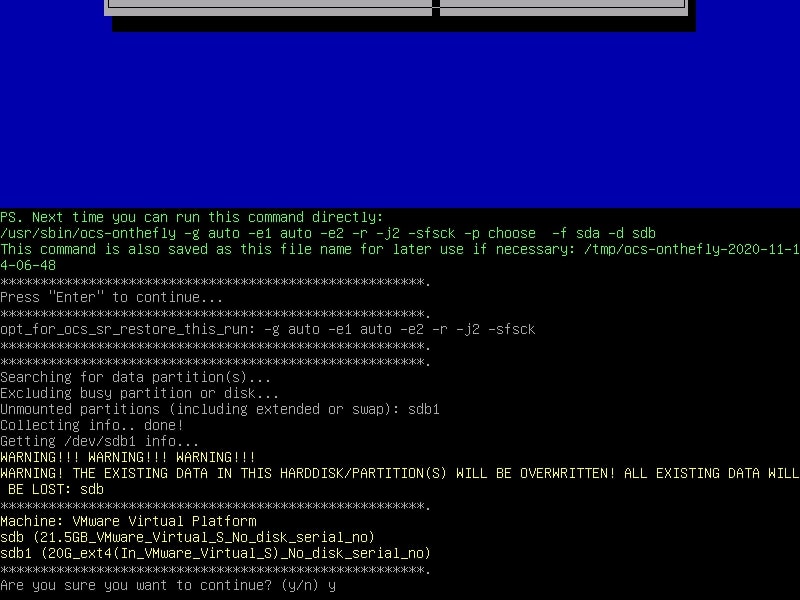
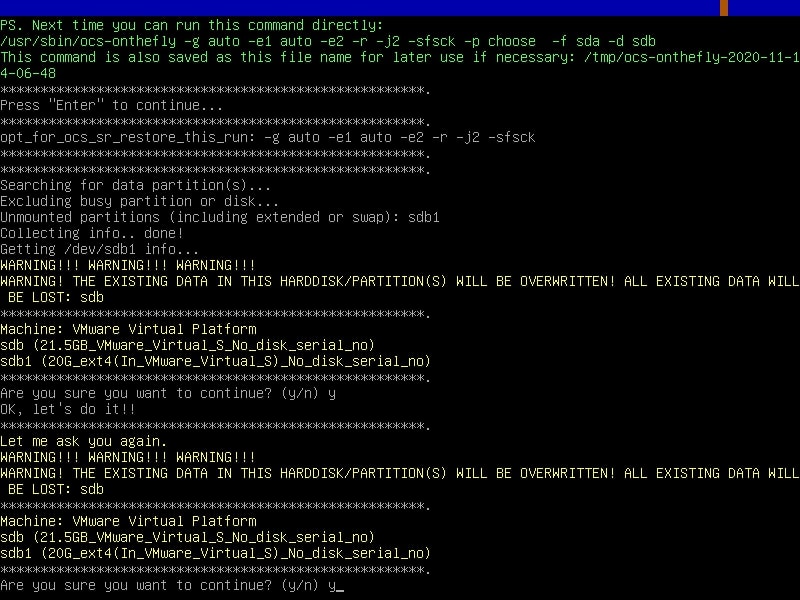
- Step 16: You’ll be asked several times to continue the process. Press Y and then Enter on the keyboard.
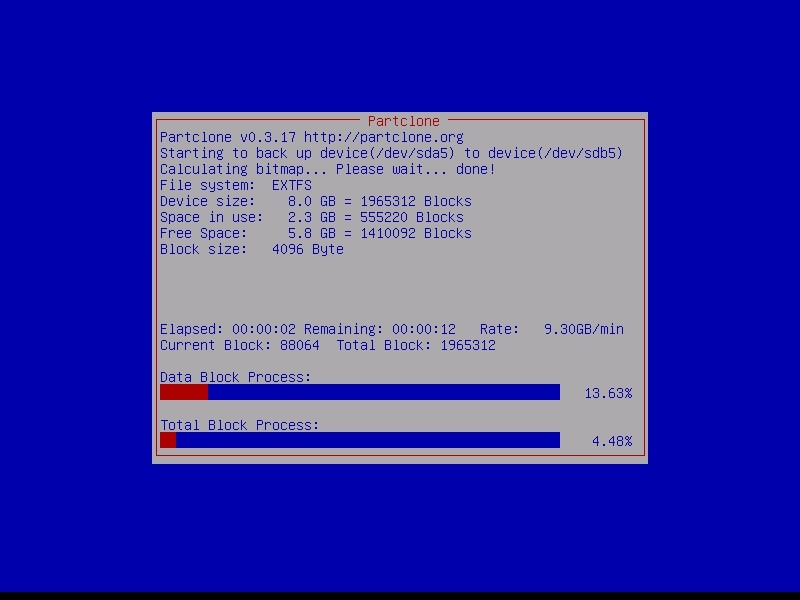
- Step 17: Let Clonezilla do the cloning operation and watch the progress.
- Step 18: Choose whether to shut down the PC or reboot, and that’s it.
As you can see from the steps above, using Clonezilla isn’t beginner-friendly or straightforward. It requires advanced knowledge, a lot of preparation, and a completely different process of creating a bootable USB and navigating an interface that can barely be considered a GUI.
However, Clonezilla isn’t the only way of cloning Windows 10 or 11 installations. Plenty of other apps are available online, one of which is covered below. Read ahead to learn more about this alternative solution to cloning Windows 10 or 11.
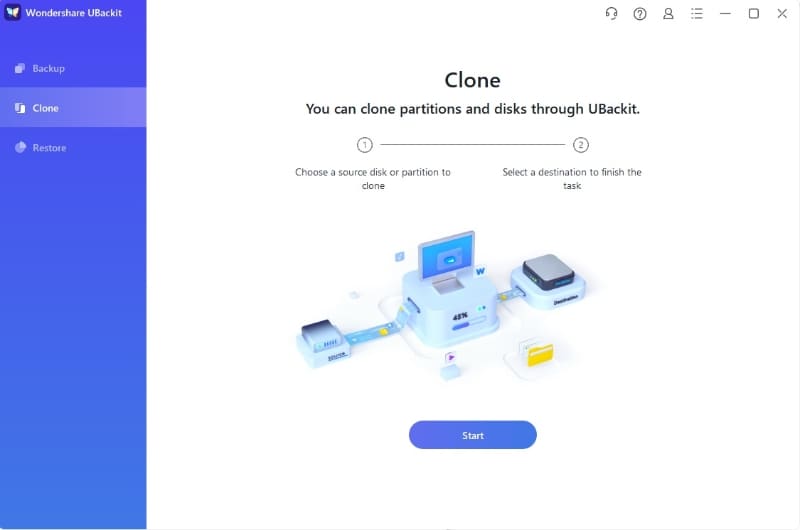
A Better Alternative – Wondershare UBackit – Disk Clone
If Clonezilla seems too complicated or you don’t want to use it, there’s an alternative solution that’s incredibly easy to use, and that’s Wondershare UBackit. Even if it’s primarily a backup solution, it also has powerful restore and clone features.
Moreover, its integrated and powerful Disk Clone tool can quickly create Windows 10 or 11 installation clones. Namely, the clone feature can clone both system and data disk, something various other cloning apps can’t. It supports both MBR and GPT partition schemes, and as long as you have a disk equal to or larger than your source drive, your target drive can be any data disk.
Wondershare UBackit - Your Reliable Outlook Backup Tool
Disk Clone: You can clone hard drive to SSD or another HDD easily. It supports a wide range of disk types, such as HDDs from all brands, SATA/M.2 SSDs, NVMe SSDs, USB drives, NAS drives, and SD cards.
Partition Clone: Instead of cloning the entire disk, you have the option to clone a particular partition.
Sector-by-Sector Clone: You are allowed to replicate a hard drive or partition bit by bit.
Supported OS: It is compatible with Windows 11/10/8.1/8/7, 32 bit and 64 bit.
Compared to Clonezilla, Wondershare UBackit is much simpler to use as it has a straightforward and clean user interface that’s easy to use and navigate. All you need is a few clicks here and there, and you’ll have a Windows installation clone in no time. We’ve also written instructions on using it, which you can find below.
How To Clone Windows 11/10 With the Clonezilla Alternative
Below, you’ll find instructions on cloning a Windows 10 or 11 installations with Wondershare UBackit’s Disk Clone. Here’s everything you’ll need to do:
- Step 1: Launch Wondershare UBackit on your PC and select Clone on the app’s left side.
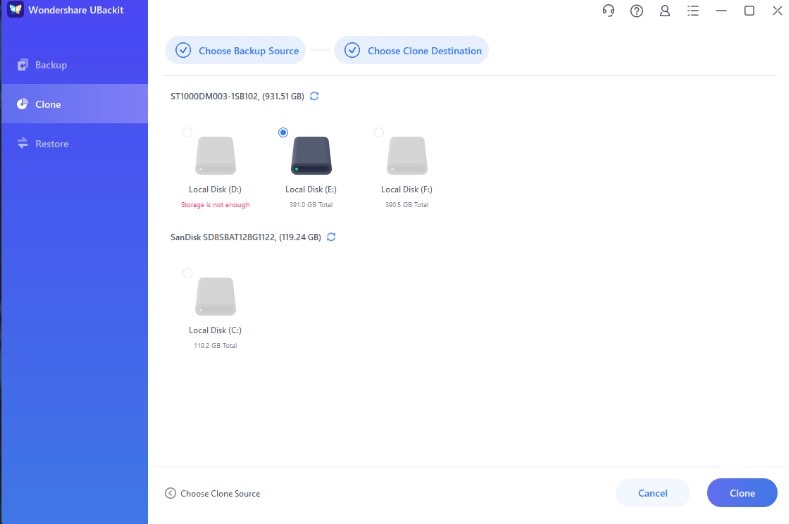
- Step 2: Select the source drive or partition where your Windows 10/11 is > Next.
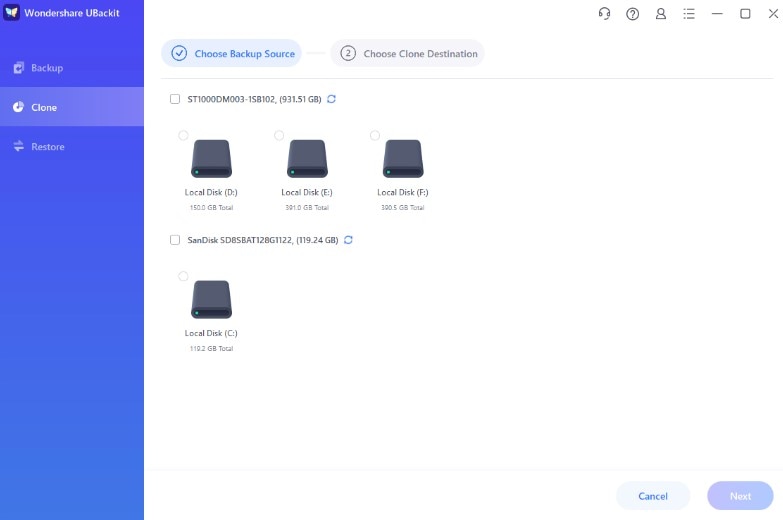
- Step 3: Select the destination drive to clone your Windows installation to > Clone.
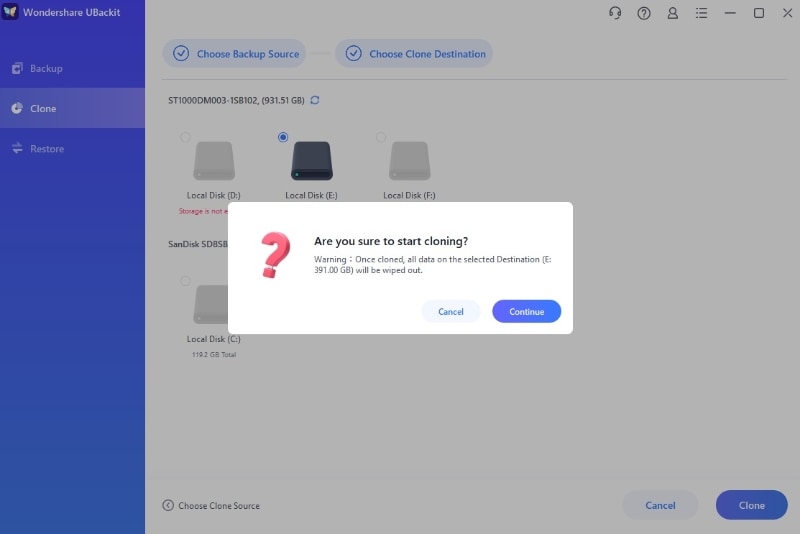
- Step 4: Hit Continue to confirm the Windows cloning task.
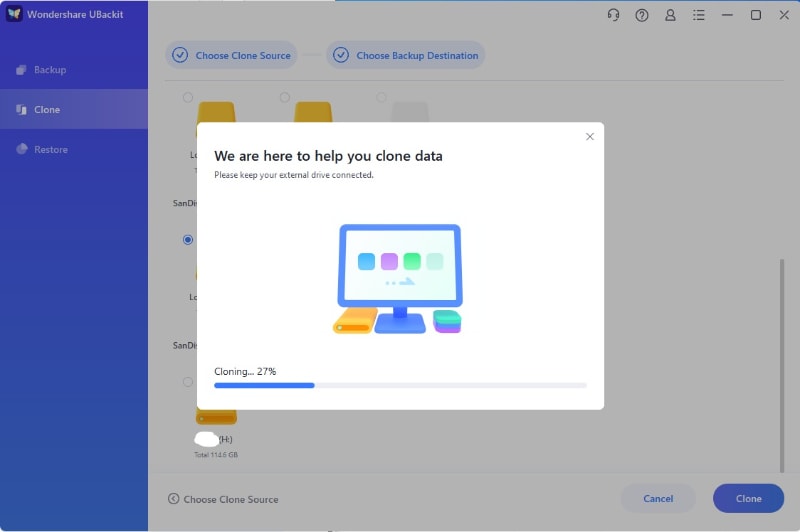
- Step 5: Watch the progress and give UBackit’s disk cloning tool a few minutes to finish Windows cloning.
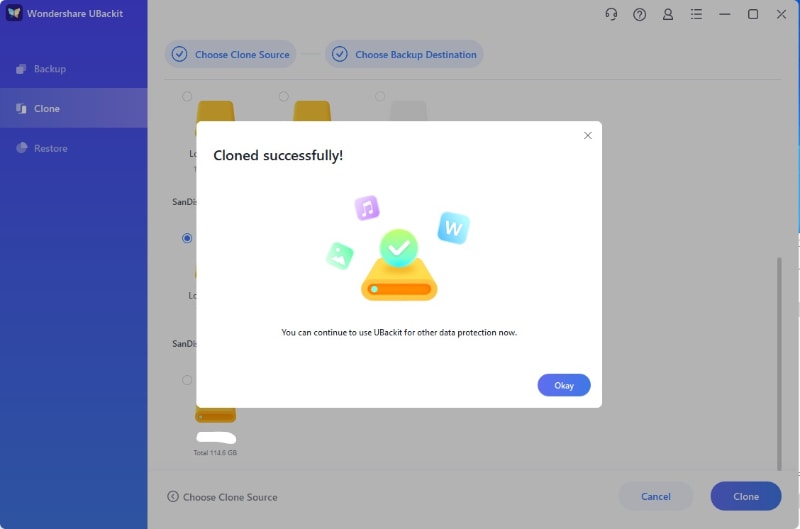
- Step 6: Press Okay when you see the “Cloned successfully!” message to confirm the Windows cloning operation is complete.
It’s worth noting that larger disks or Windows installations will require more time to clone. Namely, a smaller Windows install with a few apps can be finished in a few minutes. But if you have various apps, games, music files, videos, and photos alongside your Windows installation, you can expect the cloning operation to last up to a few hours.
Don’t cancel the operation or shut down your computer. Otherwise, you might end up corrupting your Windows installation or data. Instead, let Wondershare UBackit finish the Windows cloning operation by giving it time.
Conclusion
Clonezilla can be an excellent choice if you want to clone your Windows installation because you just upgraded your HDD or SSD and don’t want to start from scratch. It’s also a fantastic option if you’re looking to back up your essential data to another drive.
However, Clonezilla requires a lot of advanced knowledge. It won’t be the right tool for you if you’re unfamiliar with USB-booting, Linux Debian-like interface, command line tools, and boot parameters.
Fortunately, there’s a great alternative that’s incredibly easy to use, which we’ve also covered, and that’s Wondershare UBackit, which makes cloning a Windows installation a piece of cake.


