Have you filled your old hard drive’s storage capacity and want to switch to a new one? To avoid transferring all your data manually, you should try cloning a disk. If Macrium Reflect is your choice for cloning software, there’s no need to worry.
We’ve prepared a detailed guide on Macrium Reflect for you. You can learn about its main features and what to do before cloning a disk with Macrium Reflect. After that, you’ll see how to clone a hard drive with Macrium Reflect.
Macrium Reflect Clone Disk Features
Macrium Reflect is a Windows backup software that creates backups for disks and files, compatible with Windows 11/10/8.1/8/7/XP. It uses advanced disk imaging technology to save and protect your whole disk, including the operating system, documents, and other data.
It offers various options, such as imaging single and multiple partitions, disk cloning, and file backups. Macrium Reflect is a valuable clone disk tool that offers numerous features for cloning a disk. These features include deleting, shrinking, and extending partitions. If you’re unsatisfied with the result, the software allows you to adjust the partitions’ size manually.
Moreover, it includes scheduled disk cloning as an option for users to set a disk cloning task according to their needs. All in all, Macrium Reflect is a precious and reliable backup software for Windows users.
Things You Need Before Cloning a Disk With Macrium Reflect
Here’s what you should know if you’re ready to clone a disk with Macrium Reflect.
- Macrium Reflect is only available for Windows users, meaning you won’t be able to enjoy it if you’re a macOS or Linux user.
- When switching to a new HDD or SSD, always ensure that it has a bigger storage capacity than your old hard drive and can support all the data from it. If not, your disk cloning won’t be successful, and you might lose your data.
- you’ll need to connect your new hard drive internally, as Windows doesn’t allow disk cloning via a USB cable. Keep this limitation of Windows in mind, as you can lose data if you attempt to do it via a USB.
How To Clone a Disk With Macrium Reflect
Some users find that Macrium Reflect has a more complex interface, so we’ll simply present the steps so anyone can follow them. Connect your new hard drive to the computer’s motherboard before starting the cloning process, and follow these steps:
- Step 1: Download and install Macrium Reflect on your computer.
- Step 2: Open Macrium Reflect and go to Create Backups.

- Step 3: Select the disk you want to clone from the list of local disks and click Clone this disk.

- Step 4: In the newly opened Clone window, click Select a disk to clone to… to choose a clone destination.
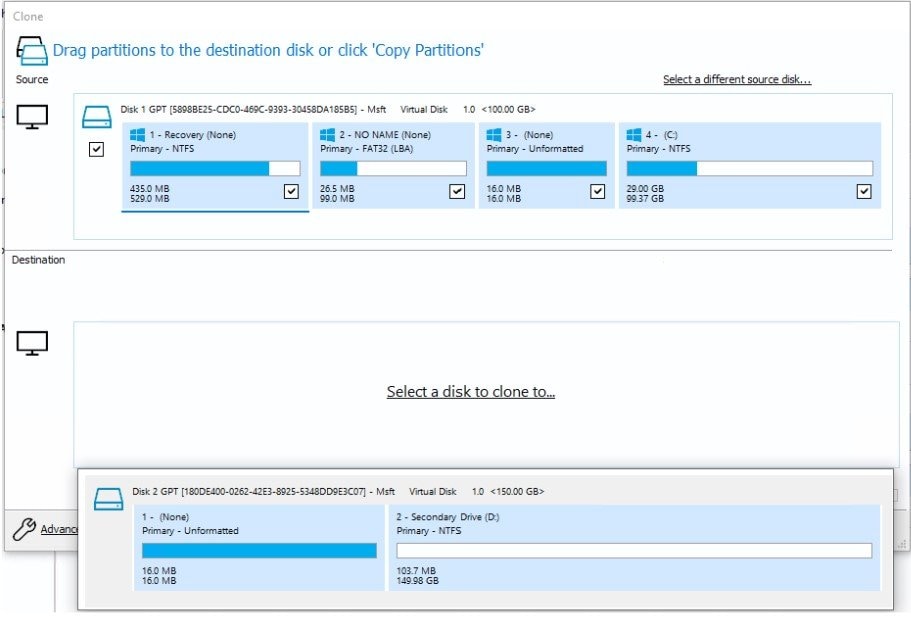
- Step 5: Click Copy Partitions before clicking Exact partition offset and length. This option will copy the disk partitions precisely as they are and show how much storage space you have left on the destination disk.
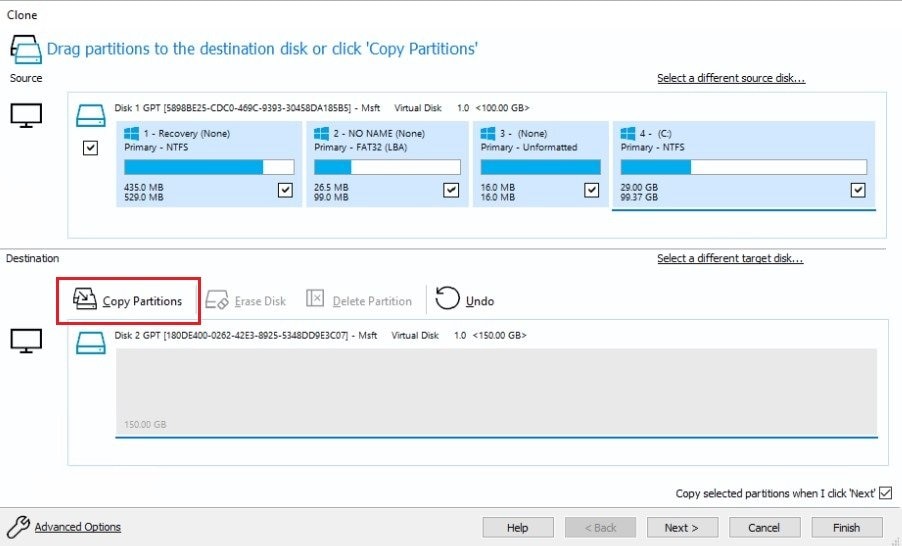
- Step 6: You can also choose Shrink or extend to fill the target disk, which will automatically resize the partitions you want to clone to fill the destination disk.
- Step 7: Once you’ve adjusted the partitions as you want, click Next.
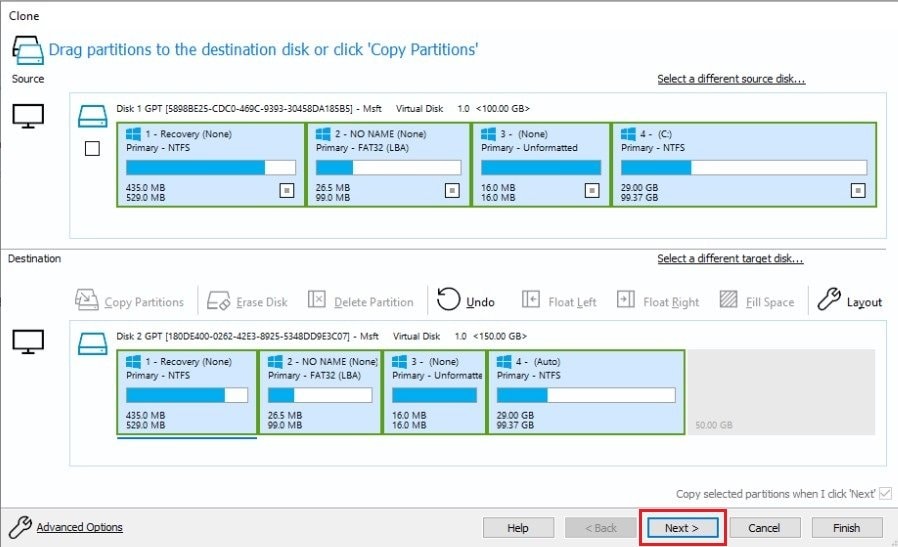
- Step 8: Schedule the disk cloning to happen automatically. Click Next.
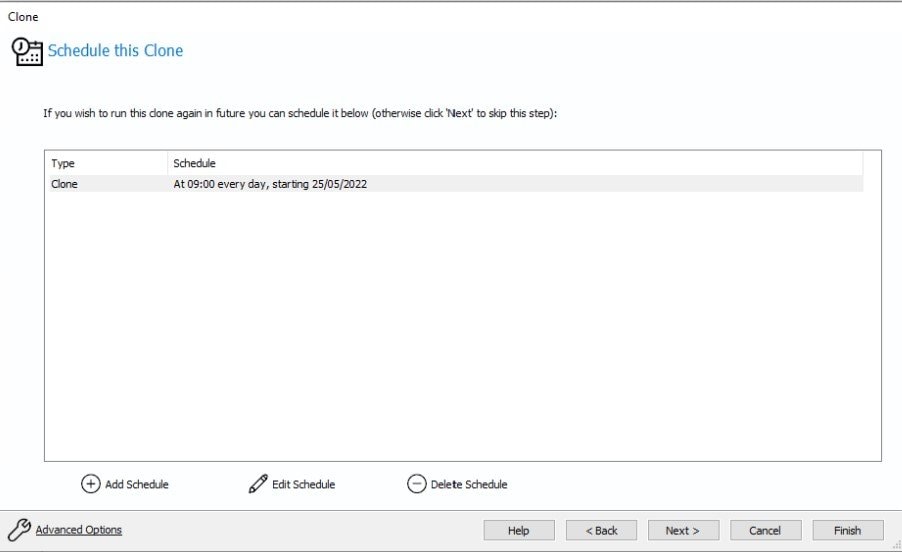
- Step 9: Preview the specifications you’ve set for the cloning task. If you’re satisfied, click Finish.

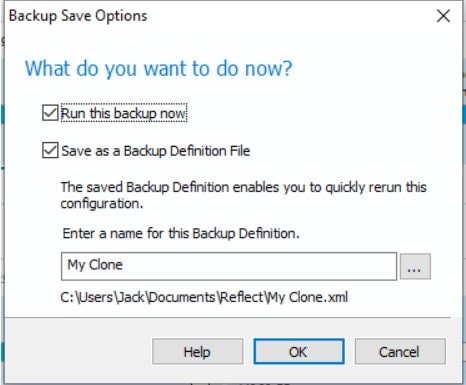
- Step 10: A dialog box will open, asking you if you want to run this backup now and if you’ll save it as a backup definition file, meaning to keep it as a pattern for future disk cloning. Tick both options and click OK.
A Better Clone Disk Alternative to Macrium Reflect — Wondershare UBackit
If you find Macrium Reflect a bit complicated to use, don’t worry. There’s a more straightforward solution for disk cloning. Even though Macrium Reflect is very useful for backups and disk cloning, its complex interface and the required knowledge for managing it might deter some users.
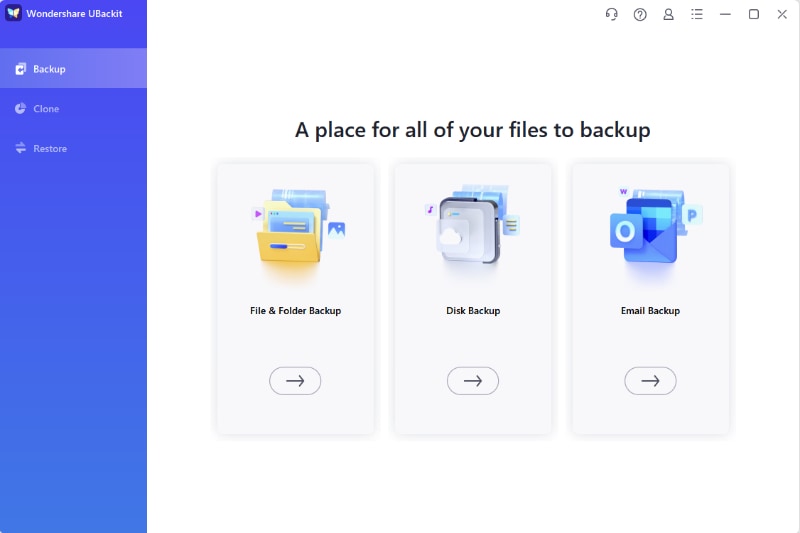
Therefore, you can try a simpler Macrium Reflect alternative — Wondershare UBackit. Wondershare UBackit is a backup manager that allows users to back up partitions, disks, files, Outlook, and clone disks. UBackit offers outstanding cloning features for disks and partitions in cases of disk upgrades and disk crashes.

Wondershare UBackit - Your Reliable Outlook Backup Tool
Disk Clone: You can clone hard drive to SSD or another HDD easily. It supports a wide range of disk types, such as HDDs from all brands, SATA/M.2 SSDs, NVMe SSDs, USB drives, NAS drives, and SD cards.
Partition Clone: Instead of cloning the entire disk, you have the option to clone a particular partition.
Sector-by-Sector Clone: You are allowed to replicate a hard drive or partition bit by bit.
Supported OS: It is compatible with Windows 11/10/8.1/8/7, 32 bit and 64 bit.
Among its many benefits, the most significant advantage of Wondershare UBackit is its user-friendly interface. This cloning software doesn’t require having technical skills beforehand, and the cloning process completes in just a few steps. With its intuitive interface and straightforward disk cloning steps, Wondershare UBackit is a perfect alternative for Macrium Reflect.
How To Clone a Hard Drive With the Macrium Reflect Alternative
Now that you know more about Wondershare UBackit, it’s time to see how to clone a disk on a Windows 10/11 using it.
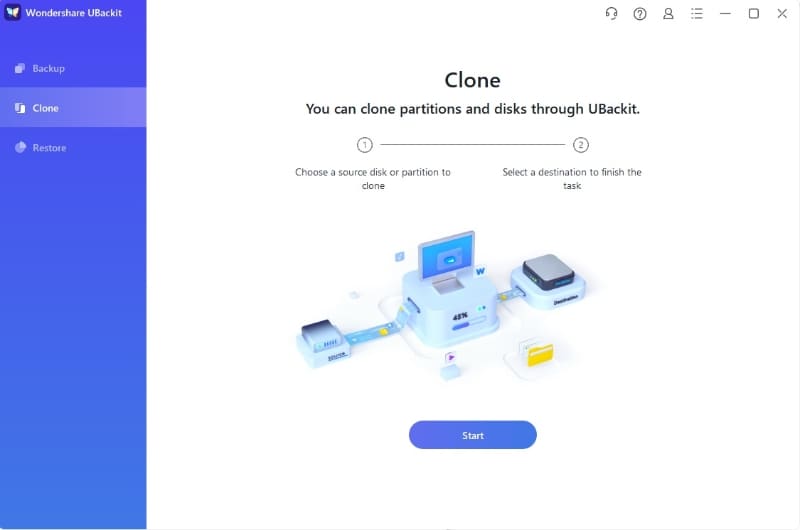
- Step 1: Install Wondershare UBackit and open it. Go to the Clone section and click Start.
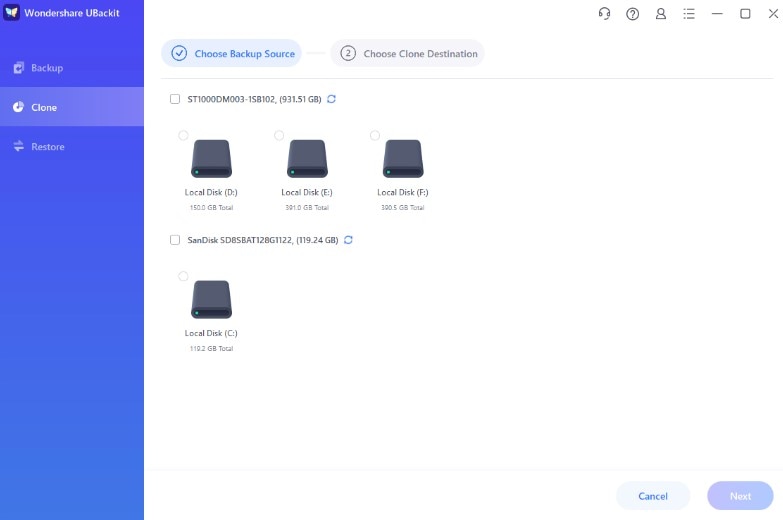
- Step 2: Choose a source disk for your clone to protect your data.
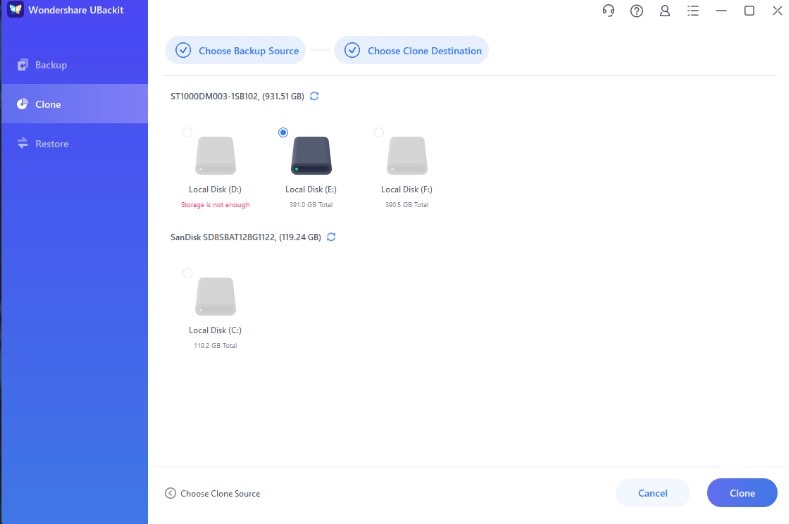
- Step 3: Select a destination disk for the disk clone.
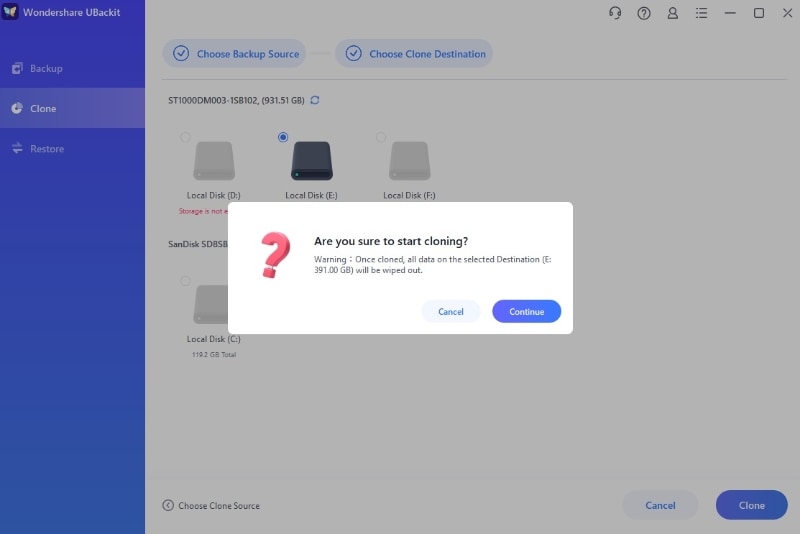
- Step 4: Confirm the task by clicking Continue.
- Step 5: The cloning process will start. Please wait until it finishes.
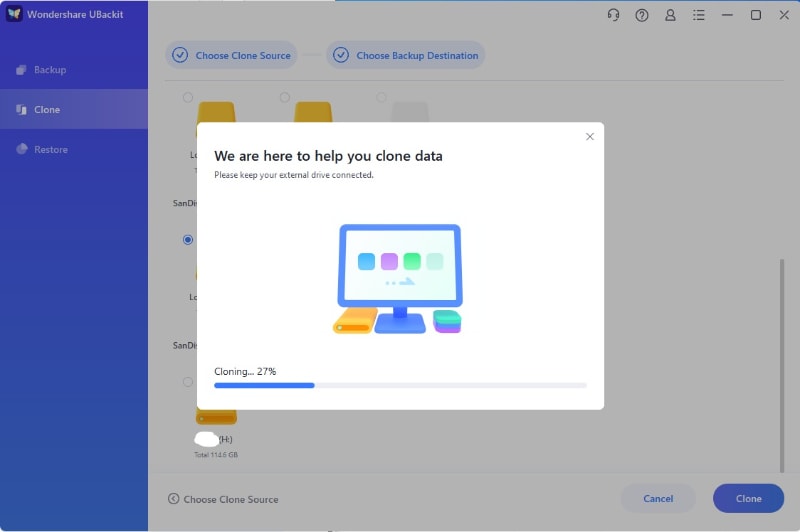
- Step 6: Once the disk cloning completes, click Okay.
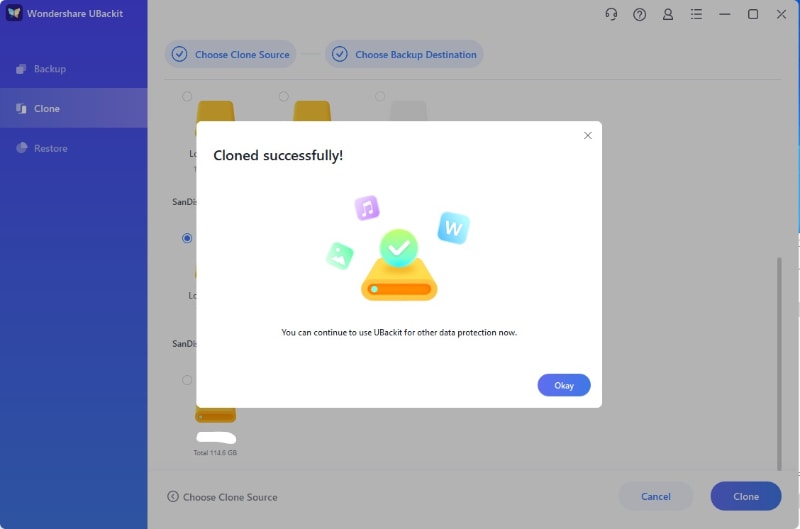
You have successfully cloned a disk with Wondershare UBackit in just a few steps. If you find this process more straightforward than the one in Macrium Reflect, Wondershare UBackit is a perfect solution for your needs.
Conclusion
If you’ve come to the point where you need to upgrade to a new hard drive, don’t worry. With disk cloning in Macrium Reflect, you won’t lose any data and will clone your disk efficiently. However, remember that Macrium Reflect is only available to Windows users.
Since Windows doesn’t allow booting a hard disk via a USB cable, connect your new hard drive to your computer’s motherboard before starting the disk cloning process. Moreover, always ensure your new hard disk is larger than the old one to support all the data you’re trying to clone.
Since Macrium Reflect can be a bit complex to manage, a simpler alternative for disk cloning is Wondershare UBackit. With its user-friendly interface and a simple process with few steps, Wondershare UBackit is a perfect tool for disk cloning.

 ChatGPT
 Perplexity
 Google AI Mode
 Grok
Grok


