
 TL;DR:
You can change the default local storage path of an MS Outlook OST file by configuring a new Mail profile via the Control Panel, temporarily disabling Cached Exchange Mode, or creating a ForceOSTPath string value in the Windows Registry.
● Moving OST data to an entirely different computer is not natively supported and requires a third-party tool to first convert the OST file into a PST file format.
● Relocating the file is heavily driven by storage constraints, as OST files can grow up to 80% larger than the original Exchange mailbox and hit a hard 50GB maximum limit.
● Mac environments do not use OST files; Outlook for Mac generates OLM files instead, which are stored within a hidden Library directory under Office 2011 Identities or Outlook 15 Profiles.
Ask AI for a summary
 ChatGPT
 Perplexity
 Gemini
 Claude
 Grok
Grok

Did you know that around 400 million people use MS Outlook daily? So no, you’re not alone in your struggles. You’re probably not doing it for the same reason as some other people, but sooner or later, everyone tries to change the Outlook OST file location.
Stay with us as we dig deeper into the purpose behind Outlook OST files and different reasons for changing their default location. Let’s learn how to find your OST file and move it.
What Is an OST File in Outlook?
There are many robust email management systems in today’s market, some better than Outlook. One thing that makes Microsoft’s top seller such a popular choice 26 years on is the ability to use MS Outlook without an internet connection. (You may also wondering How to Export Outlook to PST )
After all, why shouldn’t you be able to read old messages or write a new email in an offline mode? You don’t really need to be connected to the internet until you’re ready to press Send, but you often need to return to your Inbox whether or not you’re online.
Granted, we’re hardly ever offline these days, but still.
Being allowed to choose between the two modes is always a plus.
But what does all that have to do with Outlook OST files?
When you’re using Outlook in the Exchange environment – we’re referring to the Microsoft Exchange Server – every offline action is performed in a cached mode that creates a type of file specific to this context – the so-called Offline Storage File (OST).
The purpose of the OST file is to keep the contents of MS Outlook’s mailbox accessible in offline mode. That includes email messages, contacts, calendar events, tasks, and other data types. Every OST file created is saved automatically at a default location.
Why move it from there? There are a few good reasons.
Why Move OST Files To a Different Location?
The main reason so many Outlook users decide to move their OST files to other devices is storage space. Although convenient, Outlook’s offline storage solution is not the most space-efficient, so it might overflow your storage quickly.
To be precise, Outlook’s OST file can be up to 80% larger than the original Exchange mailbox. In addition to that, it has a maximum storage limit of 50GB.
The size issue is the top cited reason, but it’s not the only one. You might want to move and backup your OST files to a different location in any of the following scenarios:
- To prevent data loss. Microsoft’s Exchange Servers are good, but they are not flawless. They often crash, exposing your Outlook data to corruption and loss.
- To boost accessibility. Being able to access your mailbox in an offline mode is great, but what if you don’t have access to Outlook? Moving your OST file to a different location allows you to access your email data outside of Outlook, both offline and online.
- To migrate your data. You might want to move OST files if you’re moving to a different position or job or migrating your data from Windows to Mac.
Some other reasons for changing the default location of an OST file include renaming your mailbox and deleting an Outlook account – accidentally or on purpose.
Default Storage Locations of OST Files
You probably have a really good reason to change an OST file’s location, but there’s one more thing you need to know before we get right down to the specifics. After all, you do need to find your OST file first.
The OST file is created locally for every Outlook account you set up.
Outlook always stores OST files at a default location, but they differ depending on the version. The Outlook 2016 OST file location is not the same as Outlook 365 OST file location, and so on. Here’s how to look for your Outlook OST file on both Windows and Mac:
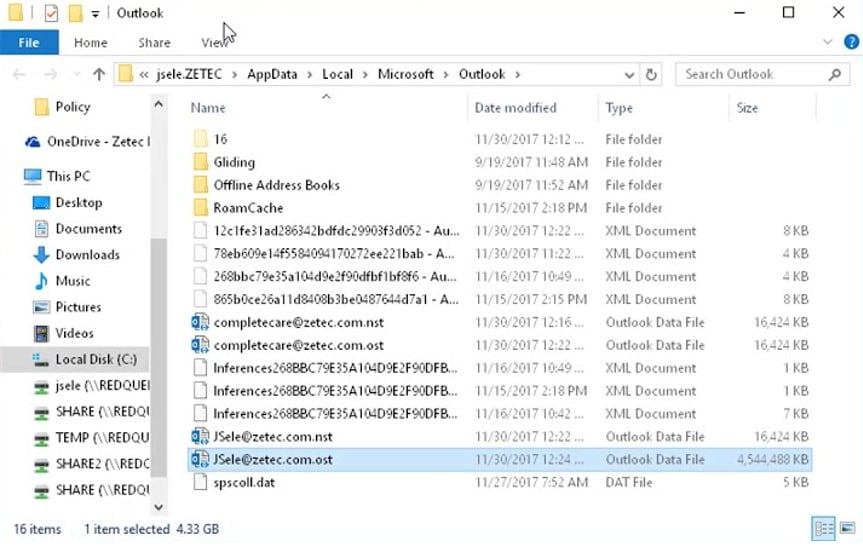
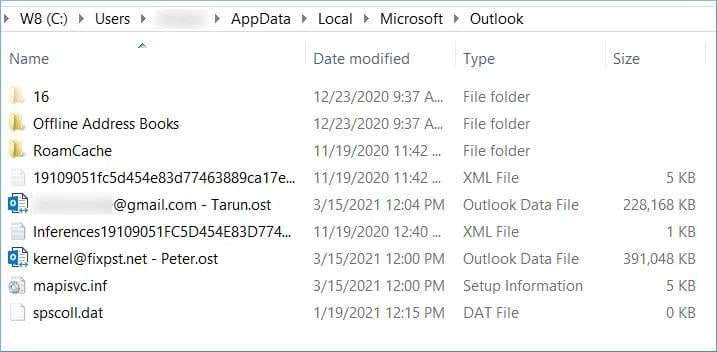
Windows Outlook OST File Location
MS Outlook Version |
Windows OS Version |
Default OST File Path |
| Outlook 2000 Outlook 2003 Outlook 2007 |
Windows XP | C:\Documents and Settings\User\Name\Local Settings\Application Data\Microsoft Outlook |
| Outlook 2007 | Windows Vista Windows 7 Windows 8 Windows 10 |
C:\Users\User Name\AppData\Local\Microsoft\Outlook |
| Outlook 2010 | Windows XP | My Documents\Outlook Files |
| Outlook 2010 | Windows Vista Windows 7 Windows 8 Windows 10 |
Documents\ Outlook File\ |
| Outlook 2013 Outlook 2016 Outlook 2019 |
Windows Vista Windows 7 Windows 8 Windows 10 |
C:\Users\admin\AppData\Local\Microsoft\Outlook |
Mac Outlook OST File Location
MS Outlook wasn’t intended for Mac, so their alignment might seem confusing at first. For starters, the OST file in the Outlook version for Mac isn’t called the OST file at all, but OLM – Outlook For Mack. Like OST, it has a default location that varies depending on the version:
MS Outlook Version |
Mac OS Version |
Default OST File Path |
| Outlook 2011 for Mac | Mac OS X 10.5 or later | /Users/‹username›/Documents/Microsoft User Data/Office 2011 Identities/Main Identity |
| Outlook 2016 for Mac | Mac OS X 10.5 or later | Users/‹username›/Library/Group Containers/UBF8T346G9.Office/Outlook/Outlook 15 Profiles/Main Profile |
| Outlook 2019 for Mac | Mac OS X 10.5 or later | Users/‹username›/Library/Group Containers/UBF8T346G9.Office/Outlook/Outlook 15 Profiles/Main Profile |
If you can’t find the Outlook 15 Profiles folder on your Mac, that’s because it is hidden by default. To make it visible, you must go to the File Menu, select the Go Option, and hold down the Option key. That will reveal the Library folder. Just follow the path above from there.
How To Change the Location of the OST File
Ready to move your OST file to a different location? Good.
Now that you know where to look for your OST file on both Windows and Mac, changing the default location shouldn’t be so hard. There are three simple ways to do this. If the first one works, great – no need to try the others. If not, one of these methods should help you out.
Method 1: Create a New Profile in Outlook
You should be able to quickly move your OST file to a different location by creating a new Outlook profile and setting a new default location. Here’s how you can do this:
- Step 1. Find the Outlook OST file you want to move and copy-paste it to a desired location.
- Step 2. Open the Control Panel on your PC. Search for Mail and click to open.

- Step 3. Click on Show Profiles in the Mail Setup dialog box. Then, click the Add button.

- Step 4. After naming your new Outlook profile, click OK. A new window will open up. Set up the necessary credentials for your new profile and then click Next.

- Step 5. While waiting for Outlook to configure your new profile, navigate to the checkbox at the lower right part of the window that says Change account settings. Check it and click Next.

- Step 6. In the Server Settings window, which will open at this point, click on More Settings.
- Step 7. Open the Advanced tab and click Outlook Data File Settings.

- Step 8. Browse the location where you’ve moved the OST file, select it, and then click Open.

- Step 9. After completing all these steps and pressing the Finish button, go back to the Mail option in the Control Panel.
- Step 10. Click on Always use this profile and select your new Outlook Then, click Apply.

Method 2: Turn Off Cached Exchange
Your Exchange Server caches data so that you can access it offline. As we’ve explained earlier, this cached data is stored in an OST file. To move the OST file to another drive, you should turn off the cached Exchange mode. Follow this step-by-step guide:
- Step 1. Open your Outlook and navigate to the File From there, go to the Info section and the Account Settings button. Click to see the drop-down menu and then pick the Account Settings option.

- Step 2. Click the Data Files tab and select the Outlook account for the OST file that you want to move. Next, navigate to the Advanced section. Under Cached Exchange Mode Settings, you’ll see a checkbox saying Use Cached Exchange Mode. Uncheck it and click Apply.

- Step 3. Below the Use Cached Exchange Mode checkbox, you’ll find the Outlook Data File Settings… Click to open and click the Disable Offline Use button.

- Step 4. Move your OST file to a desired location and return to Outlook Data File Settings You’ll have the option to Browse now – click on it and find the new location of your OST file. Select it and click OK.

- Step 5. Go back to the Advanced section following the same path as before. This time, enable the Use Cached Exchange Mode option under Cached Exchange Mode Settings and click Apply.
Method 3: Add a New ForcePSTpath Registry Entry
If the first two methods don’t work, Windows Registry should be able to compensate for their lack of success. To move the OST file around, you’ll use a special ForcePSTPath key in the Windows Registry. You’ve never done anything like this before? Don’t worry.
Just go one step at a time, as shown in the screenshots below:
- Step 1. Launch the Windows Run Program (you can use the shortcut keys Windows + R). Type regedit and click OK. This will initiate the Windows Registry.

- Step 2. Type in the appropriate key for your version of Outlook:
Outlook Version |
Key |
| Outlook 2007 | Computer\HKEY_CURRENT_USER\Software\Microsoft\Office\12.0\Outlook |
| Outlook 2010 | Computer\HKEY_CURRENT_USER\Software\Microsoft\Office\14.0\Outlook |
| Outlook 2013 | Computer\HKEY_CURRENT_USER\Software\Microsoft\Office\15.0\Outlook |
| Outlook 2016 | Computer\ HKEY_CURRENT_USER\Software\Microsoft\Office\16.0\Outlook |
- Step 3. After the Windows Registry editor opens up the location, find empty space and right-click open a New Expandable String Value.

- Step 4. Name the New Expandable String Value ForceOSTPath. To complete locating the OST file, restart your Outlook.

How To Move OST File to Another Computer
As you can see, changing the location of an OST file is a simple process with only a few steps. But what if you want to move your OST file to a different computer?
Well, that’s tough luck. The only way to migrate OST files from one computer to another is with a third-party tool. That’s necessary because you must convert an OST file into a PST file before you can access it from another computer.
Conclusion
If you’re using Outlook, accessing it offline is probably a huge reason you’re staying loyal to Microsoft’s email client. None of that would be possible without the OST file. You can change its location if you need to – just try not to lose it.


